一、准备工作
安装和启动 zookeeper
$ brew install zookeeper...$ zkServer startZooKeeper JMX enabled by defaultUsing config: /usr/local/etc/zookeeper/zoo.cfgStarting zookeeper ... STARTED
下载 java 服务端工程
$ git clone git@github.com:gxcsoccer/sofa-rpc-java-demo.git$ cd dubbo-demo && mvn clean install
二、创建 sofa-node 工程
克隆 demo 仓库
git clone git@github.com:gxcsoccer/sofa-rpc-demo.git
执行 npm i 安装依赖
$ npm i
三、配置调用的接口
将 java 工程编译好的接口 jar 包放置到 sofa-node 工程根目录下的 assembly 子目录下(脚手架已经将该示例的 jar 包放到指定位置)
配置 $app_root/config/proxy.js 文件
'use strict';module.exports = {group: 'SOFA',version: '1.0',services: [{appName: 'sofarpc',api: {HelloService: {interfaceName: 'com.alipay.sofa.rpc.hessian.HelloService',},},dependency: [{groupId: 'com.alipay.sofa',artifactId: 'sofa-rpc-java-demo',version: '1.0-SNAPSHOT',}],}],};
配置详细信息:
errorAsNull (可选): 是否将后台服务错误以 null 返回, 默认为 false, 不处理, 直接抛异常。
tpl (可选): 指定 proxy 的模板,如不指定则使用默认模板
services (必须): RPC 服务详细配置
appName (必须): 提供此 RPC 服务的应用名。
api (必须): jar 包里提供了很多服务(服务通常是类级别的), 用于指明为哪些服务生成 proxy 文件, 其中的 key 生成 proxy 文件的名字. value 是服务接口名。如果需要进行更加细粒度的配置, value 也支持以下对象格式:
interfaceName (可选): 服务接口.
version (可选): 服务的版本号,如:1.0.0; 1.0.0.daily。默认是 1.0。
group (可选): 服务组别,默认是 SOFA。
dependency (必须): 对应 Maven pom 中配置的 dependency。
tpl (可选): 指定当前 proxy 的模板,覆盖全局模板配置。
四、配置 RPC 参数
通过 $app_root/config/config.${env}.js 文件可以配置 rpc 的一些信息,比如这里我们配置 registry 的地址为 127.0.0.1:2181 zk 的地址
'use strict';exports.rpc = {registry: {address: '127.0.0.1:2181',},};
五、生成 Proxy
运行 npm run rpc 命令来生成调用代理。运行完毕以后,会生成两个文件夹
$app_root/app/proxy:存放调用代理的目录,下面会有一个 userService.js 文件$app_root/app/proxy_class:从 jar 包导出的接口元数据会存放在这里
userService.js 长下面这个样子,它会自动帮你导出接口暴露的方法,并且帮你处理好 js 到 java 之间的类型映射问题。另外,proxy 文件还会将 java 接口定义的注释也导出,尽量做到和 java 调用 java 的体验一致
// Don't modified this file, it's auto created by jar2proxy'use strict';const path = require('path');/* eslint-disable *//* istanbul ignore next */module.exports = function (app) {const appName = 'sofarpc';let version = '1.0';if (app.config.proxy && app.config.proxy.envVersion) {version = app.config.proxy.envVersion[appName] || version;}const rpcClient = app.rpcClient;if (!rpcClient) return;const consumer = rpcClient.createConsumer({interfaceName: 'com.alipay.sofa.rpc.hessian.HelloService',version,targetAppName: appName,group: 'SOFA',proxyName: 'helloService',responseTimeout: 3000,});class HelloService extends app.Proxy {constructor(ctx) {super(ctx, consumer);}// java source code: String sayHello(String name);// returnType: java.lang.Stringasync sayHello(name) {const args = [{$class: 'java.lang.String',$: name,}];return await consumer.invoke('sayHello', args, {ctx: this.ctx,});}// java source code: User echoUser(User user);// returnType: com.alipay.sofa.rpc.hessian.Userasync echoUser(user) {const args = [{$class: 'com.alipay.sofa.rpc.hessian.User',$: user,}];return await consumer.invoke('echoUser', args, {ctx: this.ctx,});}}return HelloService;};/* eslint-enable */
$app_root/app/proxy_class 目录下导出了接口依赖的类型、枚举等元数据,比如 userService 接口依赖一个 User 类会被导出成下面形式,包含其属性和类型、缺省值等信息
// Don't modified this file, it's auto created by jar2proxy'use strict';/* eslint-disable *//* jshint ignore:start */module.exports = {'com.alipay.sofa.rpc.hessian.User': {'id': {'type': 'int','defaultValue': 0,},'name': {'type': 'java.lang.String',},'address': {'type': 'java.lang.String',},'salary': {'type': 'int','defaultValue': 0,},'birthday': {'type': 'java.util.Date',},},};/* jshint ignore:end *//* eslint-enable */
六、调用 Proxy
生成的 proxy 在运行时会被挂载在 ctx.proxy 对象上,你可以通过下面方式调用接口提供的方法,一般情况下你只需要传递 JSON 对象就好,就像调用本地函数一样
const result = await ctx.proxy.helloService.echoUser({id: 123456,name: '宗羽',address: '蚂蚁 C 空间',salary: 100000000,birthday: new Date(),});
七、运行 & 调试
执行 npm run dev 启动应用
$ npm run dev
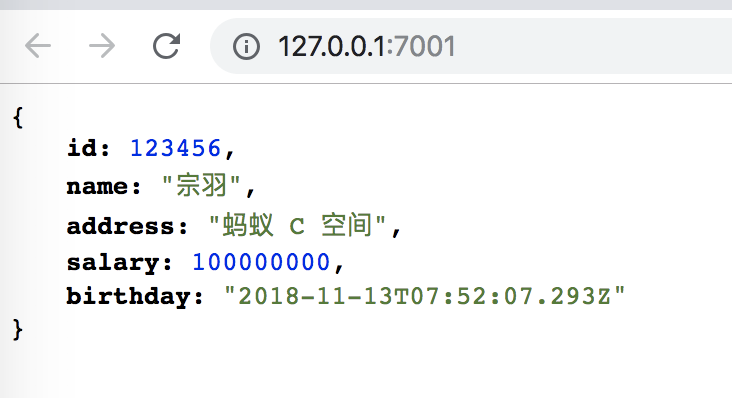
然后在浏览器里访问 http://127.0.0.1:7001 ,可以看到下面效果,说明调用已经成功了

若有收获,就点个赞吧
0 人点赞
