Feign 提供了很多的扩展机制,让用户可以更加灵活的使用,这节我们来学习 Feign 的一些自定义配置。
日志配置
有时候我们遇到 Bug,比如接口调用失败、参数没收到等问题,或者想看看调用性能,就需要配置 Feign 的日志了,以此让 Feign 把请求信息输出来。
首先定义一个配置类,代码如下所示。
@Configurationpublic class FeignConfiguration {/*** 日志级别** @return*/@BeanLogger.Level feignLoggerLevel() {return Logger.Level.FULL;}}
通过源码可以看到日志等级有 4 种,分别是:
- NONE:不输出日志。
- BASIC:只输出请求方法的 URL 和响应的状态码以及接口执行的时间。
- HEADERS:将 BASIC 信息和请求头信息输出。
- FULL:输出完整的请求信息。
Feign 日志等级源码如下图所示:
public enum Level {NONE,BASIC,HEADERS,FULL}
配置类建好后,我们需要在 Feign Client 中的 @FeignClient 注解中指定使用的配置类,代码如下所示。
@FeignClient(value = "eureka-client-user-service", configuration = FeignConfiguration. class)public interface UserRemoteClient {// ...}
在配置文件中执行 Client 的日志级别才能正常输出日志,格式是“logging.level.client 类地址=级别”。
logging.level.net.biancheng.feign_demo.remote.UserRemoteClient=DEBUG
最后通过 Feign 调用我们的 /user/hello 接口,就可以看到控制台输出的调用信息了,如图 1 所示。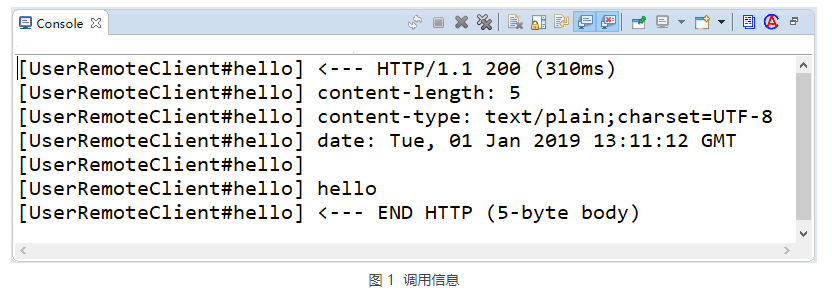
契约配置
Spring Cloud 在 Feign 的基础上做了扩展,可以让 Feign 支持 Spring MVC 的注解来调用。原生的 Feign 是不支持 Spring MVC 注解的,原生的使用方法我们在后面会讲解。
如果你想在 Spring Cloud 中使用原生的注解方式来定义客户端也是可以的,通过配置契约来改变这个配置,Spring Cloud 中默认的是 SpringMvcContract,代码如下所示。
@Configurationpublic class FeignConfiguration {@Beanpublic Contract feignContract() {return new feign.Contract.Default();}}
当你配置使用默认的契约后,之前定义的 Client 就用不了,之前上面的注解是 Spring MVC 的注解。
Basic 认证配置
通常我们调用的接口都是有权限控制的,很多时候可能认证的值是通过参数去传递的,还有就是通过请求头去传递认证信息,比如 Basic 认证方式。在 Feign 中我们可以直接配置 Basic 认证,代码如下所示。
@Configurationpublic class FeignConfiguration {@Beanpublic BasicAuthRequestInterceptor basicAuthRequestInterceptor() {return new BasicAuthRequestInterceptor("user", "password");}}
或者你可以自定义属于自己的认证方式,其实就是自定义一个请求拦截器。在请求之前做认证操作,然后往请求头中设置认证之后的信息。通过实现 RequestInterceptor 接口来自定义认证方式,代码如下所示。
public class FeignBasicAuthRequestInterceptor implements RequestInterceptor {public FeignBasicAuthRequestInterceptor() {}@Overridepublic void apply(RequestTemplate template) {// 业务逻辑}}
然后将配置改成我们自定义的就可以了,这样当 Feign 去请求接口的时候,每次请求之前都会进入 FeignBasicAuthRequestInterceptor 的 apply 方法中,在里面就可以做属于你的逻辑了,代码如下所示。
@Configurationpublic class FeignConfiguration {@Beanpublic FeignBasicAuthRequestInterceptor basicAuthRequestInterceptor() {return new FeignBasicAuthRequestInterceptor();}}
超时时间配置
通过 Options 可以配置连接超时时间和读取超时时间(代码如下所示),Options 的第一个参数是连接超时时间(ms),默认值是 10×1000;第二个是取超时时间(ms),默认值是 60×1000。
@Configurationpublic class FeignConfiguration {@Beanpublic Request.Options options() {return new Request.Options(5000, 10000);}}
客户端组件配置
Feign 中默认使用 JDK 原生的 URLConnection 发送 HTTP 请求,我们可以集成别的组件来替换掉 URLConnection,比如 Apache HttpClient,OkHttp。
配置 OkHttp 只需要加入 OkHttp 的依赖,代码如下所示。
<dependency><groupId>io.github.openfeign</groupId><artifactId>feign-okhttp</artifactId></dependency>
然后修改配置,将 Feign 的 HttpClient 禁用,启用 OkHttp,配置如下:
#feign 使用 okhttp
feign.httpclient.enabled=false
feign.okhttp.enabled=true
关于配置可参考源码 org.springframework.cloud.openfeign.FeignAutoConfiguration。
HttpClient 自动配置源码如下所示:
@Configuration@ConditionalOnClass(ApacheHttpClient.class)@ConditionalOnMissingClass("com.netflix.loadbalancer.ILoadBalancer")@ConditionalOnProperty(value = "feign.httpclient.enabled", matchIfMissing = true)protected static class HttpClientFeignConfiguration {@Autowired(required = false)private HttpClient httpClient;@Bean@ConditionalOnMissingBean(Client.class)public Client feignClient() {if (this.httpClient != null) {return new ApacheHttpClient(this.httpClient);}return new ApacheHttpClient();}}
OkHttp 自动配置源码如下所示:
@Configuration@ConditionalOnClass(OkHttpClient.class)@ConditionalOnMissingClass("com.netflix.loadbalancer.ILoadBalancer")@ConditionalOnProperty(value = "feign.okhttp.enabled", matchIfMissing = true)protected static class OkHttpFeignConfiguration {@Autowired(required = false)private okhttp3.OkHttpClient okHttpClient;@Bean@ConditionalOnMissingBean(Client.class)public Client feignClient() {if (this.okHttpClient != null) {return new OkHttpClient(this.okHttpClient);}return new OkHttpClient();}}
上面所示两段代码分别是配置 HttpClient 和 OkHttp 的方法。其通过 @ConditionalOnProperty 中的值来决定启用哪种客户端(HttpClient 和 OkHttp),@ConditionalOnClass 表示对应的类在 classpath 目录下存在时,才会去解析对应的配置文件。
GZIP 压缩配置
开启压缩可以有效节约网络资源,提升接口性能,我们可以配置 GZIP 来压缩数据:
feign.compression.request.enabled=true
feign.compression.response.enabled=true
还可以配置压缩的类型、最小压缩值的标准:
feign.compression.request.mime-types=text/xml,application/xml,application/json
feign.compression.request.min-request-size=2048
只有当 Feign 的 Http Client 不是 okhttp3 的时候,压缩才会生效,配置源码在 org.spring-framework.cloud.openfeign.encoding.FeignAcceptGzipEncodingAutoConfiguration,代码如下所示。
@Configuration@EnableConfigurationProperties(FeignClientEncodingProperties.class)@ConditionalOnClass(Feign.class)@ConditionalOnBean(Client.class)@ConditionalOnProperty(value = "feign.compression.response.enabled", matchIfMissing = false)@ConditionalOnMissingBean(type = "okhttp3.OkHttpClient")@AutoConfigureAfter(FeignAutoConfiguration.class)public class FeignAcceptGzipEncodingAutoConfiguration {@Beanpublic FeignAcceptGzipEncodingInterceptor feignAcceptGzipEncodingInterceptor(FeignClientEncodingProperties properties) {return new FeignAcceptGzipEncodingInterceptor(properties);}}
核心代码就是 @ConditionalOnMissingBean(type=”okhttp3.OkHttpClient”),表示 Spring BeanFactory 中不包含指定的 bean 时条件匹配,也就是没有启用 okhttp3 时才会进行压缩配置。
编码器解码器配置
Feign 中提供了自定义的编码解码器设置,同时也提供了多种编码器的实现,比如 Gson、Jaxb、Jackson。我们可以用不同的编码解码器来处理数据的传输。如果你想传输 XML 格式的数据,可以自定义 XML 编码解码器来实现获取使用官方提供的 Jaxb。
配置编码解码器只需要在 Feign 的配置类中注册 Decoder 和 Encoder 这两个类即可,代码如下所示。
@Beanpublic Decoder decoder() {return new MyDecoder();}@Beanpublic Encoder encoder() {return new MyEncoder();}
使用配置自定义 Feign 的配置
除了使用代码的方式来对 Feign 进行配置,我们还可以通过配置文件的方式来指定 Feign 的配置。
# 链接超时时间
feign.client.config.feignName.connectTimeout=5000
# 读取超时时间
feign.client.config.feignName.readTimeout=5000
# 日志等级
feign.client.config.feignName.loggerLevel=full
# 重试
feign.client.config.feignName.retryer=com.example.SimpleRetryer
# 拦截器
feign.client.config.feignName.requestInterceptors[0]=com.example.FooRequestInterceptor
feign.client.config.feignName.requestInterceptors[1]=com.example.BarRequestInterceptor
# 编码器
feign.client.config.feignName.encoder=com.example.SimpleEncoder
# 解码器
feign.client.config.feignName.decoder=com.example.SimpleDecoder
# 契约
feign.client.config.feignName.contract=com.example.SimpleContract
继承特性
Feign 的继承特性可以让服务的接口定义单独抽出来,作为公共的依赖,以方便使用。
创建一个 Maven 项目 feign-inherit-api,用于存放 API 接口的定义,增加 Feign 的依赖,代码如下所示。
<dependency><groupId>org.springframework.cloud</groupId><artifactId>spring-cloud-starter-openfeign</artifactId></dependency>
定义接口,指定服务名称,代码如下所示。
@FeignClient("feign-inherit-provide")public interface UserRemoteClient {@GetMapping("/user/name")String getName();}
创建一个服务提供者 feign-inherit-provide,引入 feign-inherit-api,代码如下所示。
<dependency><groupId>net.biancheng</groupId><artifactId>feign-inherit-api</artifactId><version>0.0.1-SNAPSHOT</version></dependency>
实现 UserRemoteClient 接口,代码如下所示。
@RestControllerpublic class DemoController implements UserRemoteClient {@Overridepublic String getName() {return "zhangsan";}}
创建一个服务消费者 feign-inherit-consume,同样需要引入 feign-inherit-api 用于调用 feign-inherit-provide 提供的 /user/name 接口,代码如下所示。
@RestControllerpublic class DemoController {@Autowiredprivate UserRemoteClient userRemoteClient;@GetMapping("/call")public String callHello() {String result = userRemoteClient.getName();System.out.println("getName调用结果:" + result);}}
通过将接口的定义单独抽出来,服务提供方去实现接口,服务消费方直接就可以引入定义好的接口进行调用,非常方便。
多参数请求构造
多参数请求构造分为 GET 请求和 POST 请求两种方式,首先来看 GET 请求的多参数请求构造方式,代码如下所示。
@GetMapping("/user/info")String getUserInfo(@RequestParam("name")String name,@RequestParam("age")int age);
另一种是通过 Map 来传递多个参数,参数数量可以动态改变,笔者在这里还是推荐大家用固定的参数方式,不要用 Map 来传递参数,Map 传递参数最大的问题是可以随意传参。代码如下所示。
@GetMapping("/user/detail")String getUserDetail(@RequestParam Map<String, Object> param);
POST 请求多参数就定义一个参数类,通过 @RequestBody 注解的方式来实现,代码如下所示。
@PostMapping("/user/add")String addUser(@RequestBody User user);
实现类中也需要加上 @RequestBody 注解,代码如下所示。
@RestControllerpublic class DemoController implements UserRemoteClient {@Overridepublic String addUser(@RequestBody User user) {return user.getName();}}
注意:使用继承特性的时候实现类也需要加上 @RequestBody 注解。

若有收获,就点个赞吧
0 人点赞
