一、布局
1.1 div、span
布局基本都用DIV、span,scss样式的语法基本都用 className={style.···}
1.2 psd
外层的包裹元素尽可能的减少和有效利用,Photoshop的psd原图以50%与开发后进行对比,尽量提高还原度。
1.3 rem、px
布局使用rem();字体大小为px;它们之间的比例为2:1。
二、图片(img/svg)
2.1 img
两者均保存在src/app/config文件夹中,通过对应引入路径,抛出路径,再经过一系列的引入方可使用:
在index.ts中: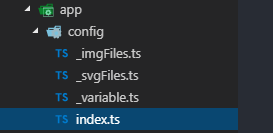
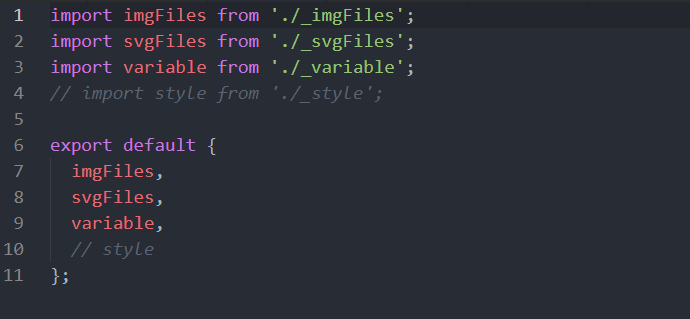
variable.ts则是配置相关信息,其中在开发过程引入图片路径则需添加相关路径信息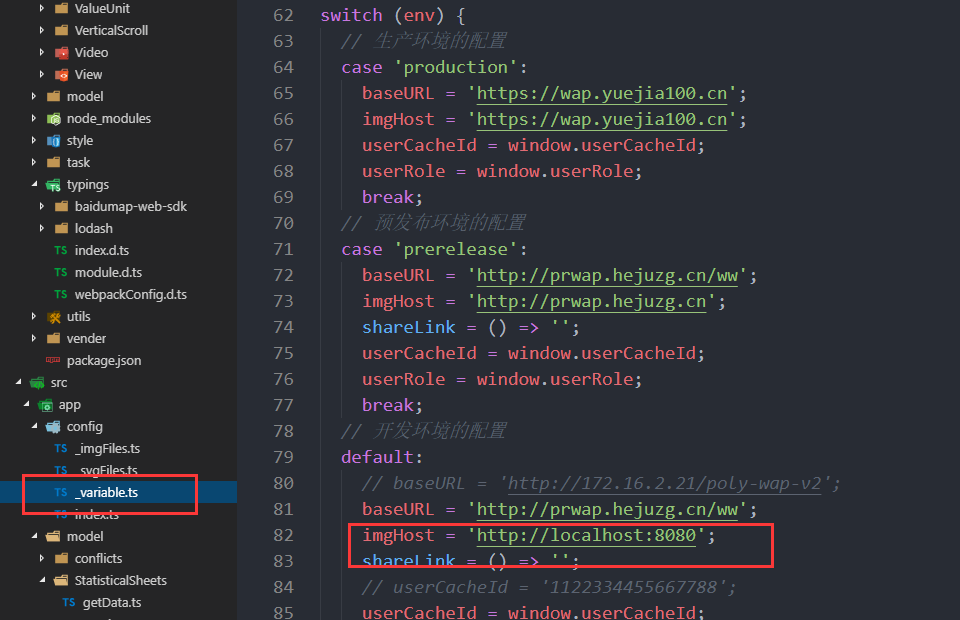
引入使用(包含路由功能):
import ImgView from 'yuejia/component/ImgView';
import Link from 'yuejia/component/Link'; //引入路由组件
<ImgViewclassName={style.rankBgChoose}completeView={config.variable.app.imgHost + config.imgFiles.rankChoose}onClick={() => {Link.go('/rankingFilter'); //路由model.customer.channelListRequest.filter.TypeFitter.clear();model.customer.channelListRequest.filter.ProjectService.clear();}}/>
2.2 svg
svg图片的使用:
import Icon from 'yuejia/component/Icon';
classnames组件的引入与使用
import * as classnames from 'classnames';
通过classnames,改变icon的样式效果
<divonClick={() => this.isIconActive(txt)}className={style.rankListTitleBox}key={txt}><span className={txt === '报备经纪人数' ? style.rankListTitleBoxSpan : ''}>{txt}</span><IconclassName={classnames(style.iconUp, type2 === txt && typeS2 ? style.iconUpActive : '')}src={config.svgFiles.rankUp}/><IconclassName={classnames(style.iconDown, type2 === txt && !typeS2 ? style.iconDownActive : '')}src={config.svgFiles.rankDown}/></div>
.iconUp {position: absolute;top: rem(22);right: rem(15);fill: rgba(255, 255, 255, 0.5);width: rem(22);height: rem(22);}.iconUpActive {position: absolute;fill: #fff;top: rem(22);right: rem(15);width: rem(22);height: rem(22);}.iconDown {position: absolute;top: rem(22);right: rem(0);fill: rgba(255, 255, 255, 0.5);width: rem(22);height: rem(22);}.iconDownActive {position: absolute;top: rem(22);right: rem(0);fill: #fff;width: rem(22);height: rem(22);}
2.3 背景图片的引入
<div className={style.rankBg} style={{backgroundImage: `url(${config.variable.app.imgHost + config.imgFiles.rankbg})`}}>
三、切换、交互、逻辑
3.1 status的使用流程
- 通过在interface State中申明类型;
2 .constructor中, this.state中初始化 status: 0,;
3. 通过handleChecked触发,在 public handleChecked 中写判断,通过0和1实现状态的改变
this.setState({
status,
})
4. render()中解构,const { status} = this.state;
5. 使用status,className里面可根据status === 0/1 显示不同样式;同时通过 handleChecked(0/1) 的点击显示不同的页面: { status ? () :() }
interface State {/** 经纪人和置业顾问的切换 */status: number;/** 经纪人维度排序类型 */type1: string;/** 经纪人维度排序方式 */typeS1: boolean;/** 置业顾问维度排序类型 */type2: string;/** 置业顾问维度排序方式 */typeS2: boolean;/** 判断箭头的显示与隐藏 */iconActive: boolean;/** 时间的筛选 */isDate: boolean;/** 判断角色渲染对应数据 */roleData: any;/** 表头列表 */tabs: string[];}
constructor(props: PageProps<Match>, state: State) {super(props, state);this.init();const role = config.variable.account.userRole;let temptab = tabList[0];let tempType1 = '报备量';if (role === '销售经理') {temptab = tabList[1];tempType1 = '分配量';}this.state = {status: 0, //经纪人和置业顾问的切换type1: tempType1,typeS1: true,type2: '分配量',typeS2: true,iconActive: true,isDate: false,roleData: [],tabs: temptab,};this.handleChecked = this.handleChecked.bind(this);this.isIconActive = this.isIconActive.bind(this);}
/** 经纪人维度和置业顾问维度的切换 */public handleChecked = (index: number) => {const status = (index === 0) ? 0 : 1;this.setState({status,});}
const { status, type1, typeS1, type2, typeS2, tabs } = this.state;
<div className={style.rankBgMenuBox1}><divclassName={status === 0 ? style.pactive : ''}onClick={() => this.handleChecked(0)}>经纪人维度</div></div><div className={style.rankBgMenuBox1}><divclassName={status === 1 ? style.pactive : ''}onClick={() => this.handleChecked(1)}>置业顾问维度</div></div>
{status ? (<div className={style.rankListTitle}>{tabList[2].map((txt: string) => (<divonClick={() => this.isIconActive(txt)}className={style.rankListTitleBox}key={txt}><span className={txt === '报备经纪人数' ? style.rankListTitleBoxSpan : ''}>{txt}</span><IconclassName={classnames(style.iconUp, type2 === txt && typeS2 ? style.iconUpActive : '')}src={config.svgFiles.rankUp}/><IconclassName={classnames(style.iconDown, type2 === txt && !typeS2 ? style.iconDownActive : '')}src={config.svgFiles.rankDown}/></div>))}</div>) : (<div className={style.rankListTitle}>{tabs.map((txt: string) => (<divonClick={() => this.isIconActive(txt)}className={style.rankListTitleBox}key={txt}><span>{txt}</span><IconclassName={classnames(style.iconUp, type1 === txt && typeS1 ? style.iconUpActive : '')}src={config.svgFiles.rankUp}/><IconclassName={classnames(style.iconDown, type1 === txt && !typeS1 ? style.iconDownActive : '')}src={config.svgFiles.rankDown}/></div>))}</div>)}
3.2 其他功能的实现
3.2.1 tab根据获取的用户角色(userRole),显示不同的列表,通过 tabList[2].map((txt: string) => ()遍历渲染,其他的tabs(temptab)等,解构后遍历渲染。
const tabList = [['报备量', '分配量', '到访量', '认购量', '签约量'],['分配量', '到访量', '认购量', '签约量'],['分配量', '到访量', '认购量', '签约量', '报备经纪人数'],];
constructor(props: PageProps<Match>, state: State) {super(props, state);this.init();const role = config.variable.account.userRole;let temptab = tabList[0];let tempType1 = '报备量';if (role === '销售经理') {temptab = tabList[1];tempType1 = '分配量';}
{status ? (<div className={style.rankListTitle}>{tabList[2].map((txt: string) => (<divonClick={() => this.isIconActive(txt)}className={style.rankListTitleBox}key={txt}><span className={txt === '报备经纪人数' ? style.rankListTitleBoxSpan : ''}>{txt}</span><IconclassName={classnames(style.iconUp, type2 === txt && typeS2 ? style.iconUpActive : '')}src={config.svgFiles.rankUp}/><IconclassName={classnames(style.iconDown, type2 === txt && !typeS2 ? style.iconDownActive : '')}src={config.svgFiles.rankDown}/></div>))}</div>) : (
3.2.2 type1, typeS1, type2, typeS2 的对应切换
  /** 经纪人维度排序类型 */
  type1: string;
  /** 经纪人维度排序方式 */
  typeS1: boolean;
  /** 置业顾问维度排序类型 */
  type2: string;
  /** 置业顾问维度排序方式 */
  typeS2: boolean;
  /** 判断箭头的显示与隐藏 */
/** 箭头上下的切换 */
  public isIconActive = (type: string) => {
    const { status, type1, typeS1, type2, typeS2 } = this.state;
    if (status) {
      this.setState({
        type2: type,
        typeS2: type2 === type ? !typeS2 : true,
      });
    } else {
      this.setState({
        type1: type,
        typeS1: type1 === type ? !typeS1 : true,
      });
    }
  }
3.2.3 public pageActive(): void { }:
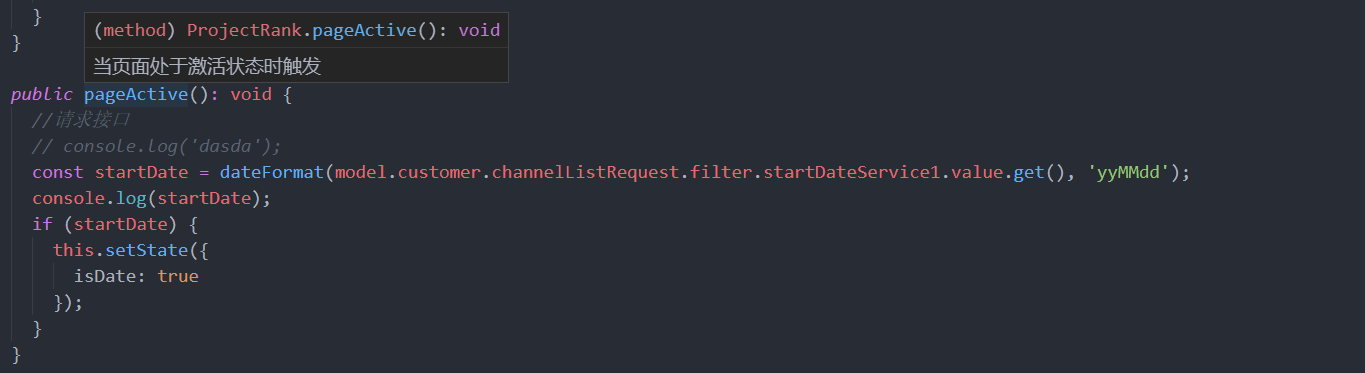
比如里面的 isDate 就是通过在此进行判断和生效的
public pageActive(): void {
    //请求接口
    // console.log('dasda');
    const startDate = dateFormat(model.customer.channelListRequest.filter.startDateService1.value.get(), 'yyMMdd');
    console.log(startDate);
    if (startDate) {
      this.setState({
        isDate: true
      });
    }
  }
3.2.4 筛选条件:
通过筛选页面给出的接口,
private sendParams = (): FilterParams => {
    const { status, type1, type2, typeS1, typeS2 } = this.state;
    const filter = model.customer.channelListRequest.filter;
    const startDate = dateFormat(filter.startDateService1.value.get(), 'yyMMdd');
    const endDate = dateFormat(filter.endDateService2.value.get(), 'yyMMdd');
    // 这个是项目筛选的
    const ProjectService = filter.ProjectService.value;
    const projectServiceV = ProjectService.get()[0] && ProjectService.get()[0].value;
    // 这个是类型筛选的
    const typeFitter = filter.TypeFitter.value;
    const typeFitterV = typeFitter.get()[0] && typeFitter.get()[0].value;
    return {
         //startDate,
         //endDate,
      //reportType: status === 0 ? 1 : 2,
      //categoryCode: Number(typeFitterV) ? Number(typeFitterV) : undefined,
      //projectInfoId: Number(projectServiceV) ? Number(projectServiceV) : undefined,
      //orderType: status === 0 ? Number(!typeS1) : Number(!typeS2),
      //sortType: status === 0 ? type1 : type2,
    };
  }
例:3.2.3里面的 isDate,写在div中的判断:显示与否。
{this.state.isDate ? (<div>{`${startDate}至${endDate}`}</div>) : (<></>)}
四、数据接口、渲染
4.1 model组件
4.1.1 MVC模式,模型(model)-视图(view)-控制器(controller)
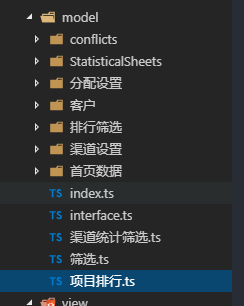
4.1.2 项目排行.ts
引入组件 ,其中 SendParams 是数据接口组件
import Request, { Event } from 'yuejia/app/request';
import Toast from 'yuejia/component/Toast';
import ObArray from 'yuejia/app/datatype/obArray';
import { SendParams } from 'yuejia/component/ListView';
import Filter from './筛选';
import { Value } from 'yuejia/_base/action/Choice';
定义筛选数据的类型:
export interface FilterParams {
  /** 开始日期 */
  startDate?: string;
  /** 结束日期 */
  endDate?: string;
  /** 渠道类型 */
  categoryCode: number | undefined;
  /** 报表类型 */
  reportType: number;
  /** 项目id */
  projectInfoId: number | undefined;
  /** 排序字段 */
  sortType: string;
  /** 升降序 */
  orderType: number;
}
列表:
// 如果是获取数据类型的请求就需要data,并且正确设置类型和初始化;如果是请求类的一般就不需要data
  public data: ObArray<Data> = new ObArray({ request: this });
  public startDate: string | undefined = undefined;
  public endDate: string | undefined = undefined;
  /** 筛选 */
  public filter: Filter = new Filter();
  public total: number = 0;

  private getTypeNum(type: string): number {
    switch (type) {
      case '报备量':
        return 1;
      case '分配量':
        return 2;
      case '到访量':
        return 3;
      case '认购量':
        return 4;
      case '签约量':
        return 5;
      case '报备经纪人数':
        return 6;
      default:
        return 0;
    }
  }
发送数据(重要):
/** 发送请求 */
  public async send(params: Params): Promise<void> {
    this.action({
      config: {
        url: '/channel/ranking/reportdata',
        method: 'post',
        data: {
          categoryCode: params.categoryCode,
          reportType: params.reportType,
          projectInfoId: params.projectInfoId,
          page: params.listviewParams.start,
          rows: params.listviewParams.size,
          startDate: params.startDate ? params.startDate : undefined,
          endDate: params.endDate ? params.endDate : undefined,
          sortType: this.getTypeNum(params.sortType),
          orderType: params.orderType,
        }
      }
    }).then((response) => {
      if (response.retCode === '0000') {
        const state = params.listviewParams.state;

        if (state === 'init') {
          this.data.set(response.result);
        } else {
          const oldData = this.data.get();
          const newData = oldData.concat(response.result);
          this.data.set(newData);
        }
      } else {
        this.state.set('fail');
        Toast.show(response.retMsg);
      }
    }).catch((err) => {
      Toast.show('网络繁忙');
      throw err;
    });
  }
4.2 index.tsx
4.2.1 ListView组件里
在ListView组件外层,包裹一层div,有利于样式的调整;
通过params接收数据,传递数据,渲染数据;
params={
this.sendParams()
}
···
3 在此之后,通过遍历数据等进行数据渲染。 const item: any = data[params.index];
···
4 其中,可使用 <> </> 组合键将 div 包含在一个标签里。
<div className={style.body}>
  <ListView
    request={getReport}
    limit={this.limit} //限制分页里面的条数
    rowHeight={94}    //可自动获取、可手动固定值
    dataLength={data.length}
    params={
      this.sendParams()  //传值
  }
  emptyRender={(
               <StateView state={'empty'} className={style.emptyView} />
      )}
   failRender={(
               <FailView />
     )}
    loadingRender={(
               <StateView state={'loading'} />
      )}
    >
             {(params: any, i) => {
        const item: any = data[params.index];
        return (
          <div className={style.rankItemCon}>
          <div className={style.rankListNum} key={`${item.brokerName}_${i}`}>
            <div className={style.rankListNumP}>{item.brokerName}</div>
              <div className={style.rankListNumSpan}>
                {userRole === '现管' ? status === 0 ? (
                  <>
                    <span>
                        <div className={style.itemFirNum}>
                        {item.recordTotal}
                        </div>
                    </span>
                    <span>{item.distributionTotal}</span>
                    <span>{item.visitTotal}</span>
                    <span>{item.subscriptionTotal}</span>
                    <span>{item.tradeTotal}</span>
                  </>
                ) : (
                ) : status === 0 ? ()
            }}
        </ListView>
</div>

若有收获,就点个赞吧
0 人点赞
