1、全局变量
- 在函数外面声明的变量,是一个全局变量
全局变量是window的一个属性
<script>/* 在函数外面声明的变量,是一个全局变量全局变量是window的一个属性*/var a = 10;console.log(window.a)</script>
2、局部变量
作用域:就是一个变量能够生效的范围
<script>/* 作用域:就是一个变量能够生效的范围 */var a = 10;function go(){var b =20;console.log(b);}console.log(a);</script>
3、声明提前
JS在执行代码的时候,会将所有使用var声明的代码,放在作用域的顶层集中创建,赋值留在原地
function函数声明也会提前
<script>/*JS在执行代码的时候,会将所有使用var声明的代码,放在作用域的顶层集中创建,赋值留在原地*///var a,b;console.log(a);var a=10;var b=20;console.log(b);</script>
4、window的方法
window方法的特点:window.是可以省略的

4-1.window提示框
<script>/* window方法的特点:window.是可以省略的 */alert("hello world")/*1、window是访问窗口的一个接口2、是一个全局对象*/</script>

4-2.window定义变量
<script>window.b = 20; //var b = 20;var a = 30;console.log(a+b);</script>
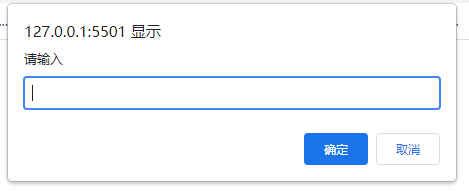
4-3.window输入框
- 有值则true
无值则false
<script>var b = prompt("请输入");console.log(b);if(b){alert("输入成功")}else{alert("不能没有输入")}</script>
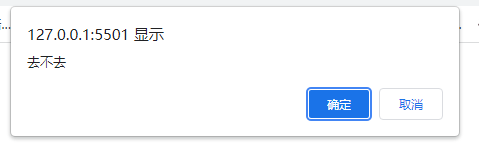
4-4.window选择框
确定则true
取消则false
<script>var a = window.confirm("去不去");console.log(a);</script>
4-5.点击确认删除事件
点击删除后,confirm选择值返回为true确认删除
<body><ul><li>html<button>删除</button></li><li>css<button>删除</button></li><li>javascript<button>删除</button></li></ul><script>var btns = document.getElementsByTagName("button");/* 1、给每个btn绑定点击事件 */for(var i=0;i<btns.length;i++){btns[i].onclick = function(){/* 2、点击对应的元素,将其父元素删除 */var isShow = confirm("是否删除");console.log(isShow);if(isShow){this.parentNode.style.display = "none";}}}</script></body>
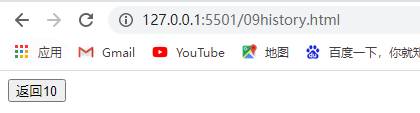
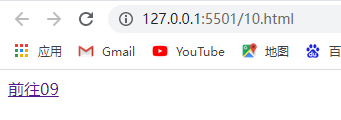
4-6.history历史记录
history.back() 回退到前一个界面
<body><a href="09history.html">前往09</a></body>
<body><button id="btn">返回10</button><script>var btn = document.getElementById("btn")btn.onclick = function(){/* 回退到前一个页面 */history.back()}</script></body>
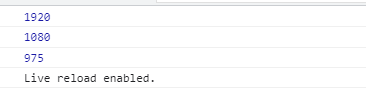
4-7.获取屏幕宽高
screen.availWidth —获取屏幕宽度
- screen.availHeight —获取屏幕高度
- document.documentElement.clientWidth —获取视窗宽度
document.documentElement.clientHeight —获取视窗高度
<body><script>/* 获取屏幕宽高 */var sw = screen.availWidth;console.log(sw);var sh = screen.availHeight;console.log(sh);var vh = document.documentElement.clientHeight;/* 可视区域的视窗高度 */console.log(vh)</script></body>
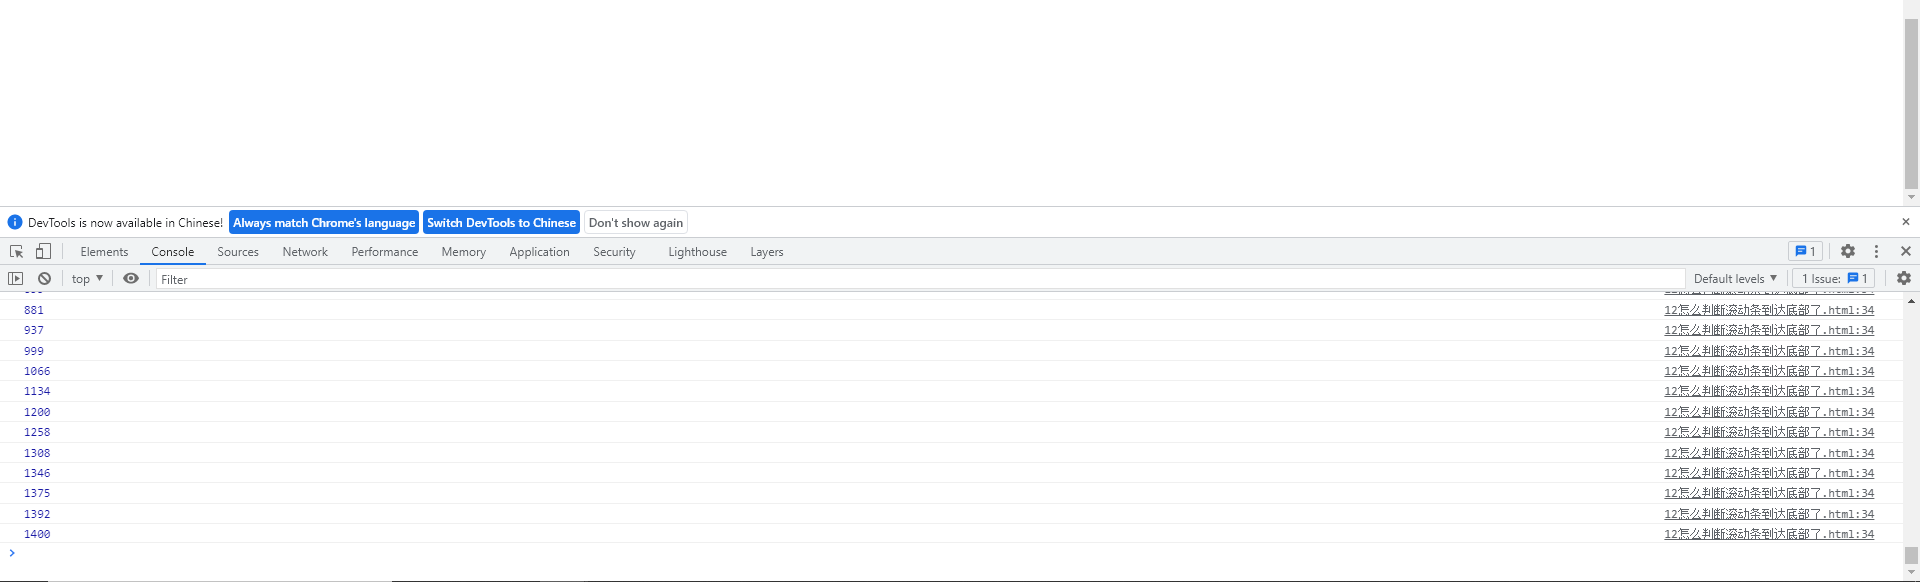
4-8.实现上拉刷新的原理
如何判断滚动条到达底部?
滚动移动的距离+视窗高度vh = body的高度 —代表着滚动条到达最底部
- body高度:var bh = document.body.clientHeight
- 视窗高度:var vh = document.documentElement.clientHeight;
- 滚动条距离顶部距离:window.onscroll = function(){

var scrollTop = window.scrollY;
console.log(scrollTop);
}
<style>*{margin: 0;padding: 0}body{height: 2000px;}div{width: 300px;height: 300px;background: red;}</style></head><body><div></div><script>var bh = document.body.clientHeight;var vh = document.documentElement.clientHeight;console.log(bh);console.log(vh);/* 滚动移动的距离+视窗高度vh = body的高度代表着滚动条到最底部*/window.onscroll = function(){var scrollTop = window.scrollY;console.log(scrollTop);}</script></body>

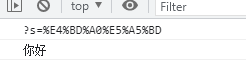
4-9.跳转传值location
1、设置键盘事件点击键盘的enter,获取input的值
2、将这个值传递给另一个页面 location.href = (传递的值为ASCII码)
通过decodeURIComponent(“”)转译
<input type="text" id="app"><script>/* 1、点击键盘的enter,获取input的值 */var app = document.getElementById("app")app.onkeydown = function(event){if(event.keyCode == 13){console.log(this.value)/* 2、将这个值传递给另一个页面 */location.href = "14.html?s="+this.value;}}</script>
<script>console.log(location.search);console.log(decodeURIComponent("%E4%BD%A0%E5%A5%BD"));</script>
5、函数
5-1.创建函数
- 1、以直接量的方式创建(推荐)
tips:在函数前后调用都是可以的
- 2、以变量的方式创建30
tips:只能在函数之后调用
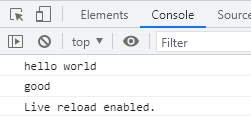
<script>/* 1、以直接量的方式创建(推荐)tips:在函数前后调用都是可以的*/go();function go(){console.log("hello world")}/* 2、以变量的方式创建tips:只能在函数之后调用*/var b = function(){console.log("good")}b();</script>
5-2.return函数
- 函数的返回值
- 函数的执行结果
tips:
- 1、函数调用后,return后面的语句不会执行
- 2、函数遇到return语句会立即返回停止,退出
3、return语句的作用,将函数内部的值返回给外部
<script>/*函数的返回值函数的执行结果tips:1、函数调用后,return后面的语句不会执行2、函数遇到return语句会立即返回停止,退出3、return语句的作用,将函数内部的值返回给外部*/function go(){return 10;console.log("hello world");}var res = go();console.log(res);</script>
5-3.函数的参数
函数的参数是局部变量(未设值的参数为undefined)
tips:JS传不定参
<script>function go(a,b){/* 函数的参数是局部变量 */console.log(a);console.log(b);}/* tips:JS传不定参 */go();go(10);go(10,20);</script>

5-4.重载
- 使用function声明的方法,本质上是window方法
后定义的函数覆盖前定义的函数
<script>/* 使用function声明的方法,本质上是window方法 */function go(a){console.log(a)}function go(a,b){console.log(a);console.log(a+b);}window.go(10);</script>
<script>/* 使用function声明的方法,本质上是window方法 */var go = function(a){console.log(a)}var go = function(a,b){console.log(a);console.log(a+b);}go(10);</script>
5-5.JavaScript实现重载
- 重载:函数名相同,参数不同,根据传入的参数动态的决定调用哪个方法
JS不支持重载
- 要想JS支持 arguments对象
JS传不定参,函数使用arguments对象管理函数内部的参数
<script>/* 重载:函数名相同,参数不同,根据传入的参数动态的决定调用哪个方法JS不支持重载*//* 要想JS支持 arguments对象JS传不定参,函数使用arguments对象管理函数内部的参数*/function go(){console.log(arguments);}go(10,20)</script>

通过if语句判断arguments管理的函数内部的参数个数,决定输出多少值实现动态伪重载
<script>/*一个参数两个参数*/function go(){if(arguments.length == 1){console.log(arguments[0]);}else if(arguments.length == 2){console.log(arguments[0]);console.log(arguments[0]+arguments[1]);}}go(10);go(10,20);</script>
5-6.函数对象
函数对象 —函数作为对象的方法
this关键字指向问题
1、onclick等事件 —谁执行事件,this指向谁
2、谁执行方法,this指向谁(哪个对象执行方法,this指向那个对象)<script>/* 函数对象函数作为对象的方法*/var obj = {name:"html",sayName:function(){console.log(this.name)}}/* 函数使对象的一个方法 */obj.sayName();/*this关键字指向问题1、onclick 谁执行事件,this指向谁2、谁执行方法,this指向谁*/</script>
!5-7.回调函数
回调函数 —就是函数作为参数传递给另一个函数!
使用场景:异步问题<script>/* 回调函数就是函数作为参数传递给另一个函数使用场景:异步问题*/function show(a){console.log(a);}function go(callback){var b = 10;callback(b);}go(show);/*callback = show*/</script>
简写:
执行go()函数:
1.将function(a)作为go函数中的callback参数
2.定义b=20
3.callback(b) = function(b)
4.function(b)为输出b
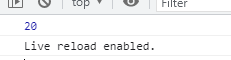
5.go函数执行完毕,输出b=20<script>function go(callback){var b =20;callback(b);}go(function(a){console.log(a);})</script>
5-8.es6写法
es5定义函数
var 函数名 = function(参数){
函数体
}
es6定义函数
var 函数名=(参数)=>{
函数体
}<script>/* es5 */var shou = function(a){console.log(a);}/* es6 箭头特点:省略了function关键字*/var go=(a)=>{console.log(a);}go(30);</script>
简写:tips:如果参数只有一个可以省略小括号,输出语句只有一段可以省略大括号
<script>var go =(a)=>{console.log(a);}/*简写tips:如果参数只有一个可以省略小括号,输出语句只有一段可以省略大括号*/var show = (a)=>console.log(a);go(10);show(10);</script>
如果输出语句只有一段return语句,可以省略return
<script>var go = (a)=>{return a;}/* 如果输出语句只有一段return语句,可以省略return */var show = (a)=>a;console.log(show(10))</script>
6、数组
6-1.定义一个数组
var 数组名 = []; —.length 获取数组长度
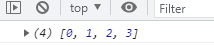
<!-- 数组增,删,改,查,遍历--><script>var arr = [1,2,3];/* length */console.log(arr.length);console.log(arr[0]);</script>
6-2.数组的后增加
push 向数组的后面增加
特点:
1、可以增加多个值
2、增加数组时是原数组变为二维数组
使用场景:加载更多 上拉刷新<script>var arr = [1,2,3];/*push 向数组的后面增加特点:1、可以增加多个值使用场景:加载更多 上拉刷新*/arr.push(4);arr.push(5,6);arr.push([7,8,9])console.log(arr);</script>
6-3.数组的前增加
unshift 从前增加
使用场景:历史搜索 下拉刷新<script>/*从前增加unshift使用场景:历史搜索 下拉刷新*/var arr = [1,2,3]arr.unshift(0);console.log(arr);</script>
6-4.获取数组中值的下标,判断数组中是否重复
.indexOf 可以判断数组中值的下标
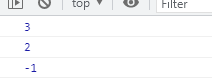
-1 —数组中没有这个值<script>/*indexOf 可以判断数组中值的下标-1 --数组中没有这个值*/var arr = [1,2,3,4];console.log(arr.indexOf(4));console.log(arr.indexOf(3));console.log(arr.indexOf(8));</script>
6-5.concat函数
concat
特点:
1、支持添加多个值
2、支持数组
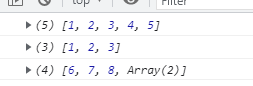
3、不会改变数组原本的结构<script>/*concat特点:1、支持添加多个值2、支持数组3、不会改变数组原本的结构*/var arr=[1,2,3];var b = arr.concat([4,5]);console.log(b);console.log(arr);var test = [6,7,8];test.push([9,10]);console.log(test);</script>
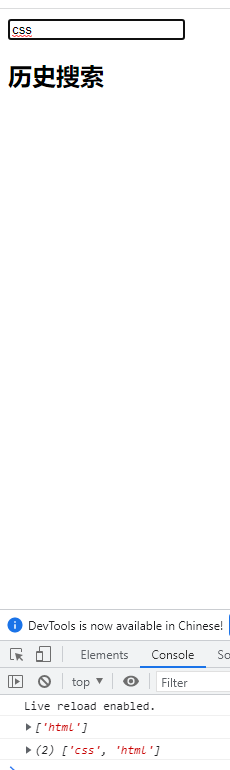
!6-6.设置简单的搜索框历史搜索
1.定义数组historys=[]存储历史搜索
2.if判断键盘事件的值,为13则是enter键
3.在判断输入的值不为空且.indexOf值为-1则表示历史数组中没有重复值
4.将搜索框的值从前增加至历史数组中 输出数组
5.否则则提醒弹窗 “输入的字段不能是是空字符或相同字段”<input type="text" id="input"><h2>历史搜索</h2><div id="app"></div><script>var input = document.getElementById("input");var historys = []input.onkeydown = function(event){if(event.keyCode == 13){// console.log(this.value);if(this.value!="" && historys.indexOf(this.value) == -1){historys.unshift(this.value);console.log(historys);}else{alert("输入的字段不能是是空字符或相同字段")}}}</script>
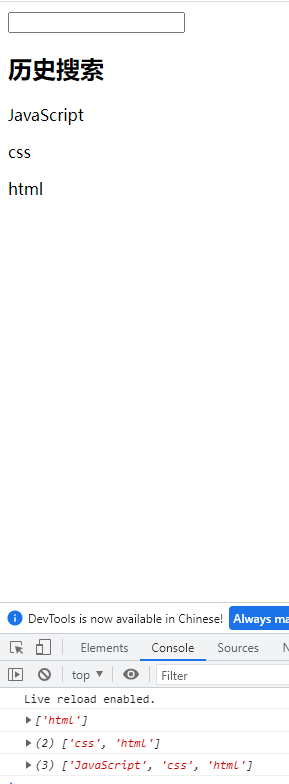
优化:
1、获取输入框的值
2、只要数组中没有的值同时字符不能空,才向数组添加再定义创建P对象,将搜索框的值付给P对象
- 利用.prepeng从前添加P元素
每次将搜索框中的值赋给history数组时,清空搜索框
<input type="text" id="input"><h2>历史搜索</h2><div id="app"></div><script>var input = document.getElementById("input");var app = document.getElementById("app");var historys = []/* 1、获取输入框的值 */input.onkeydown = function(event){if(event.keyCode == 13){// console.log(this.value);/* 2、只要数组中没有的值同时字符不能空,才向数组添加 */if(this.value!="" && historys.indexOf(this.value) == -1){var p =document.createElement("p");p.innerHTML = this.value;app.prepend(p);historys.unshift(this.value);this.value = "";console.log(historys);}else{alert("输入的字段不能是是空字符或相同字段")}}}</script>


若有收获,就点个赞吧
0 人点赞
