项目地址:
https://github.com/bubbletg/vite-vue3-ts
安装项目
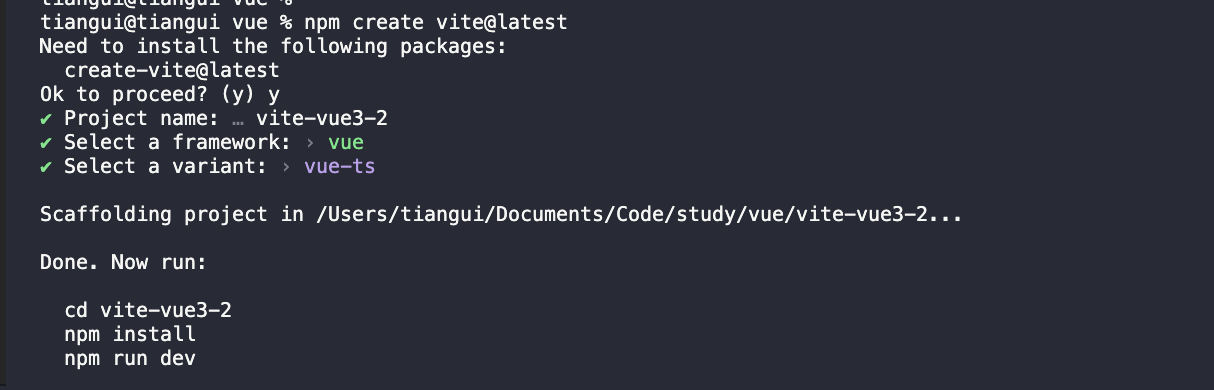
通过 vite 初始化项目
https://cn.vitejs.dev/guide/#scaffolding-your-first-vite-project
安装
yarn create vite or npm create vite@latest
git init
使用 git init 对项目初始化。
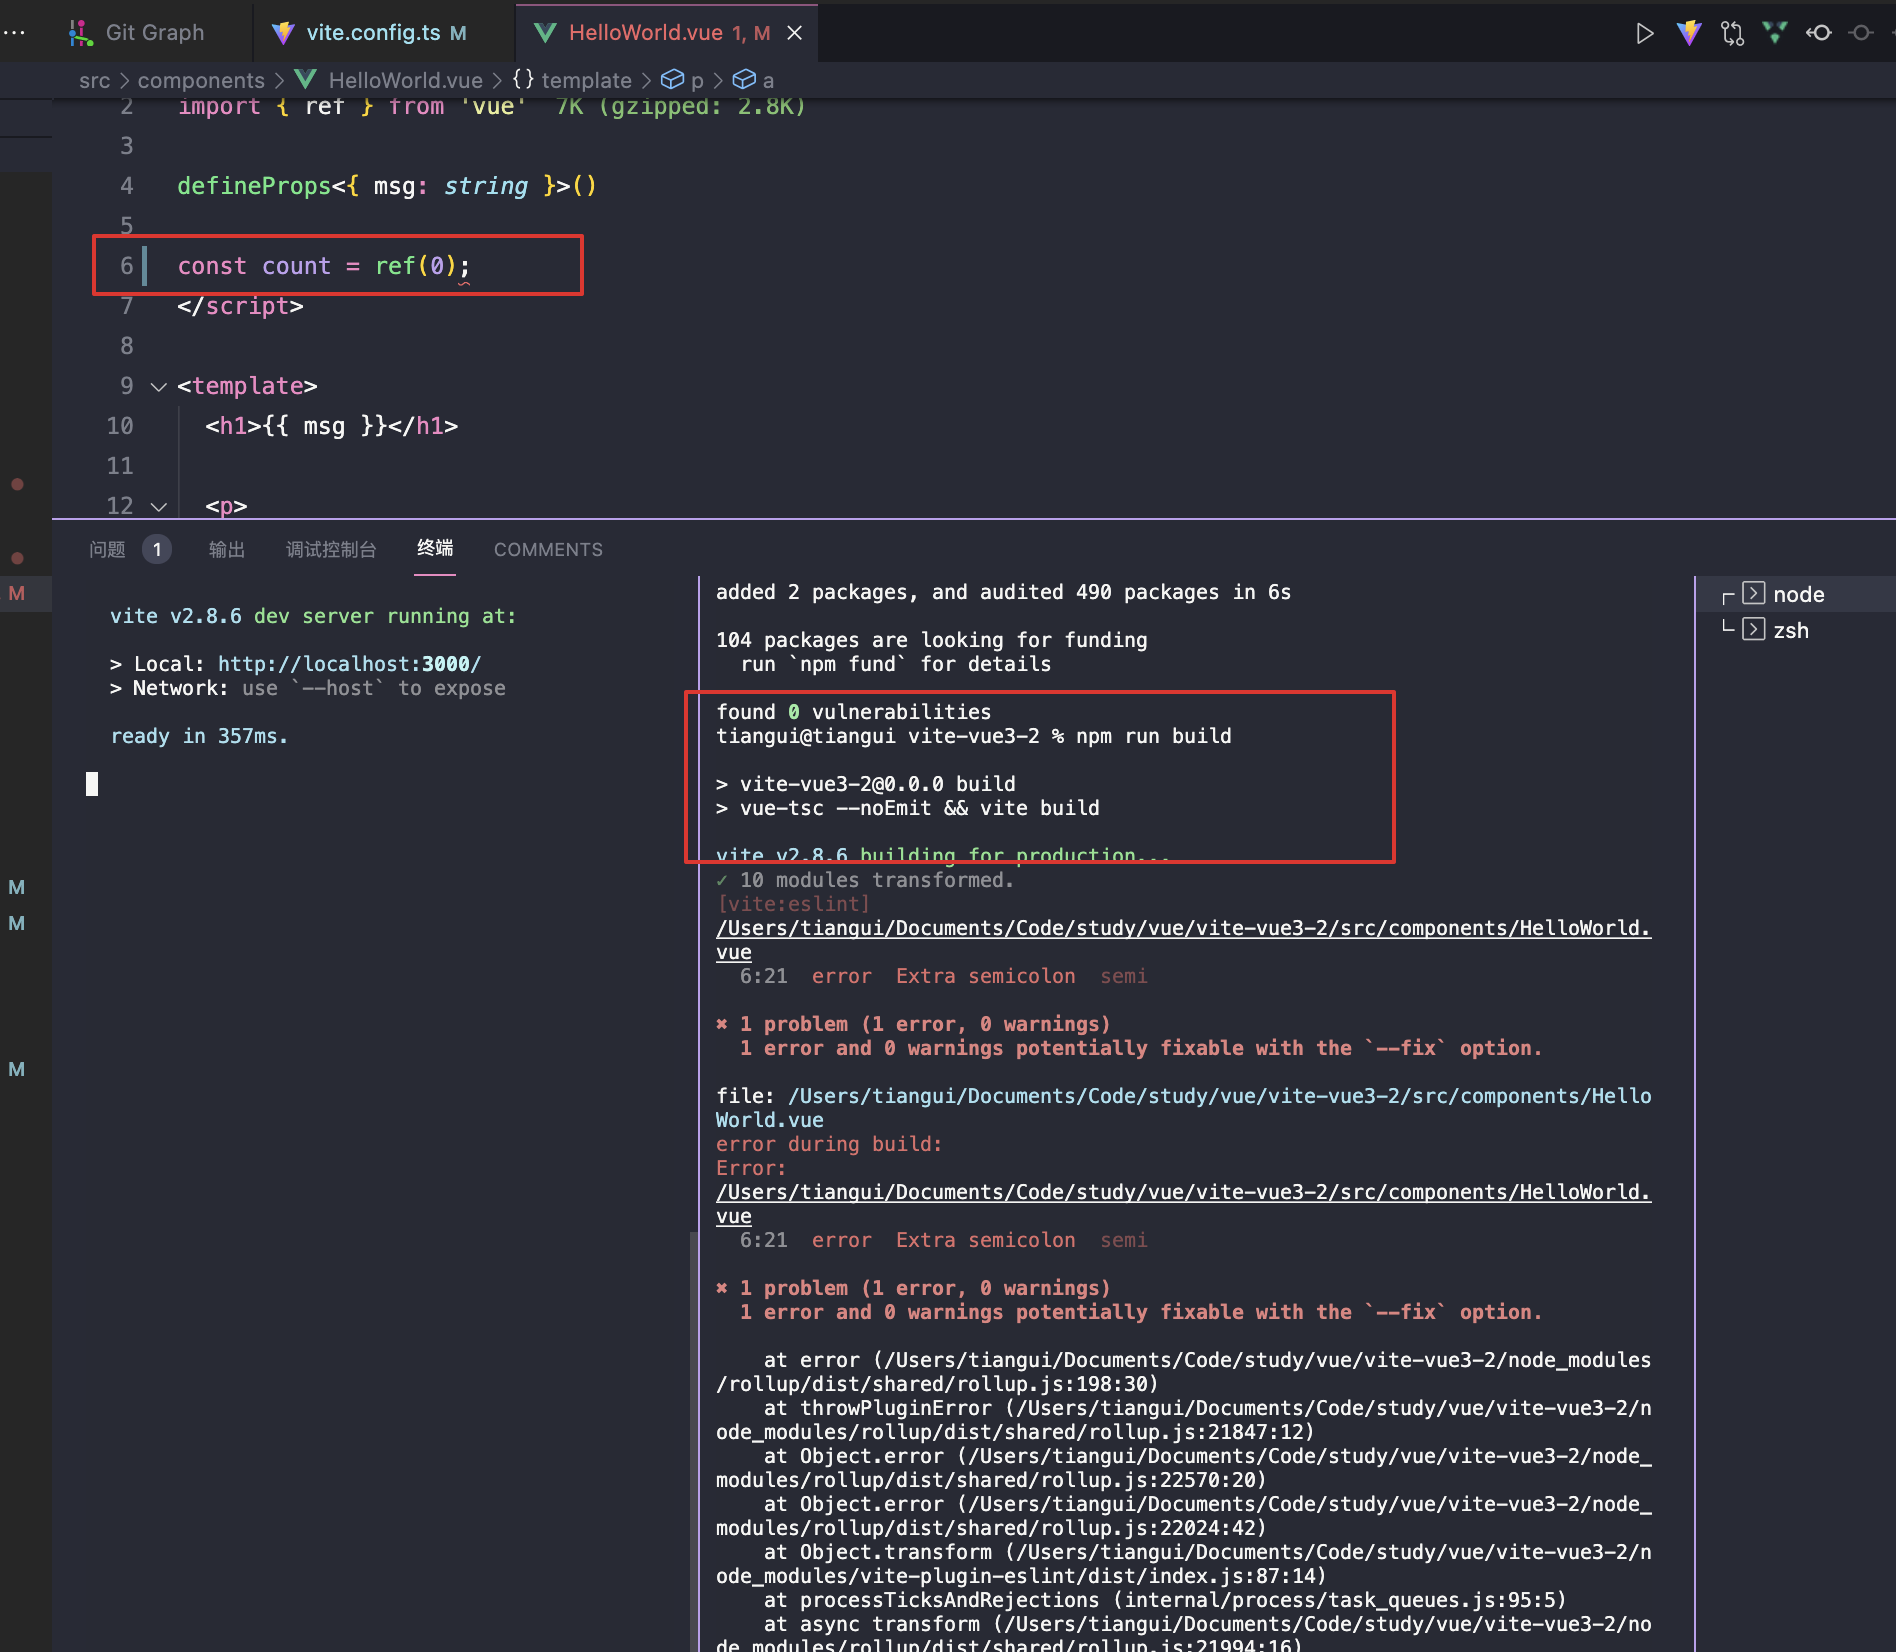
使用ESlint代码规范
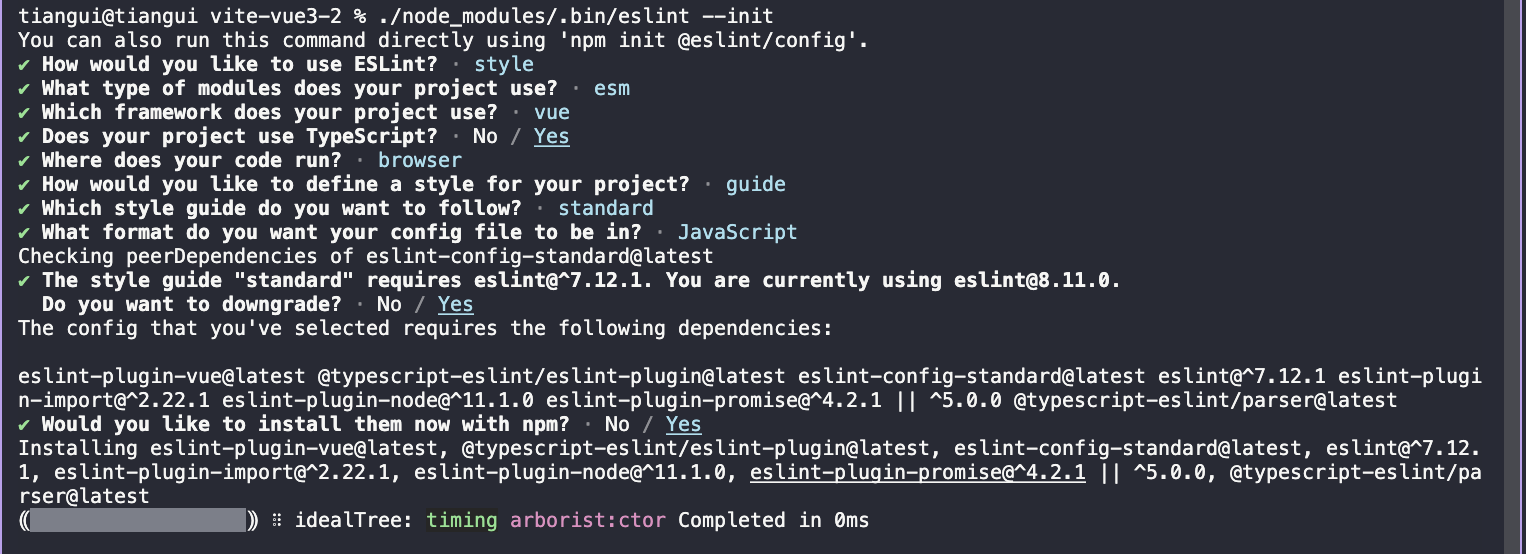
安装 ESlint
https://cn.eslint.org/docs/user-guide/getting-started
你可以使用 npm 安装 ESLint:
npm install eslint —save-dev
紧接着你应该设置一个配置文件:
./node_modules/.bin/eslint —init
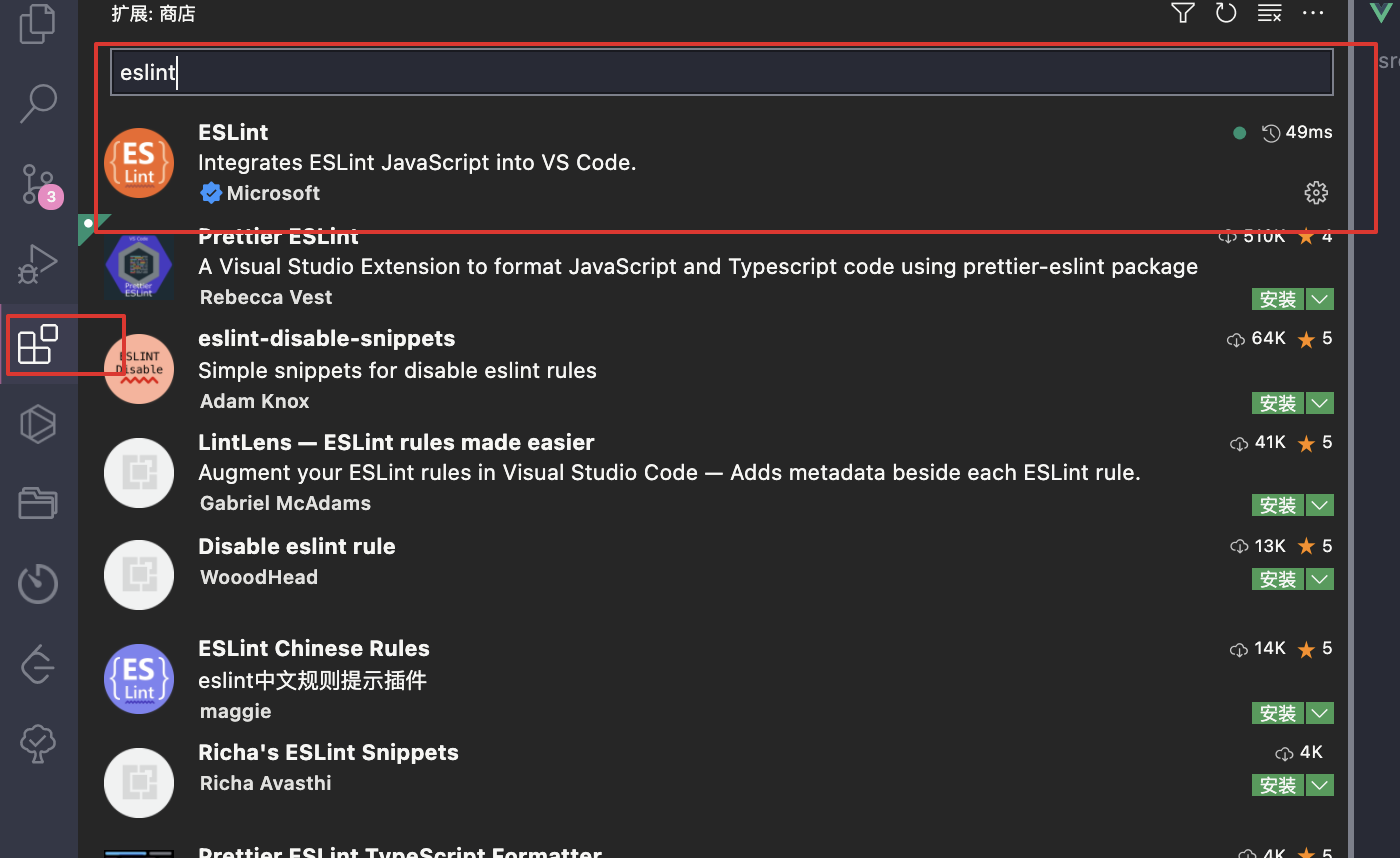
vscode 安装 ESLinit
ESLint 对vue3 的验证插件支持
- 找到 eslint-plugin-vue 插件下的 configs 查看插件有哪些
详情查看:https://eslint.vuejs.org/user-guide/#usage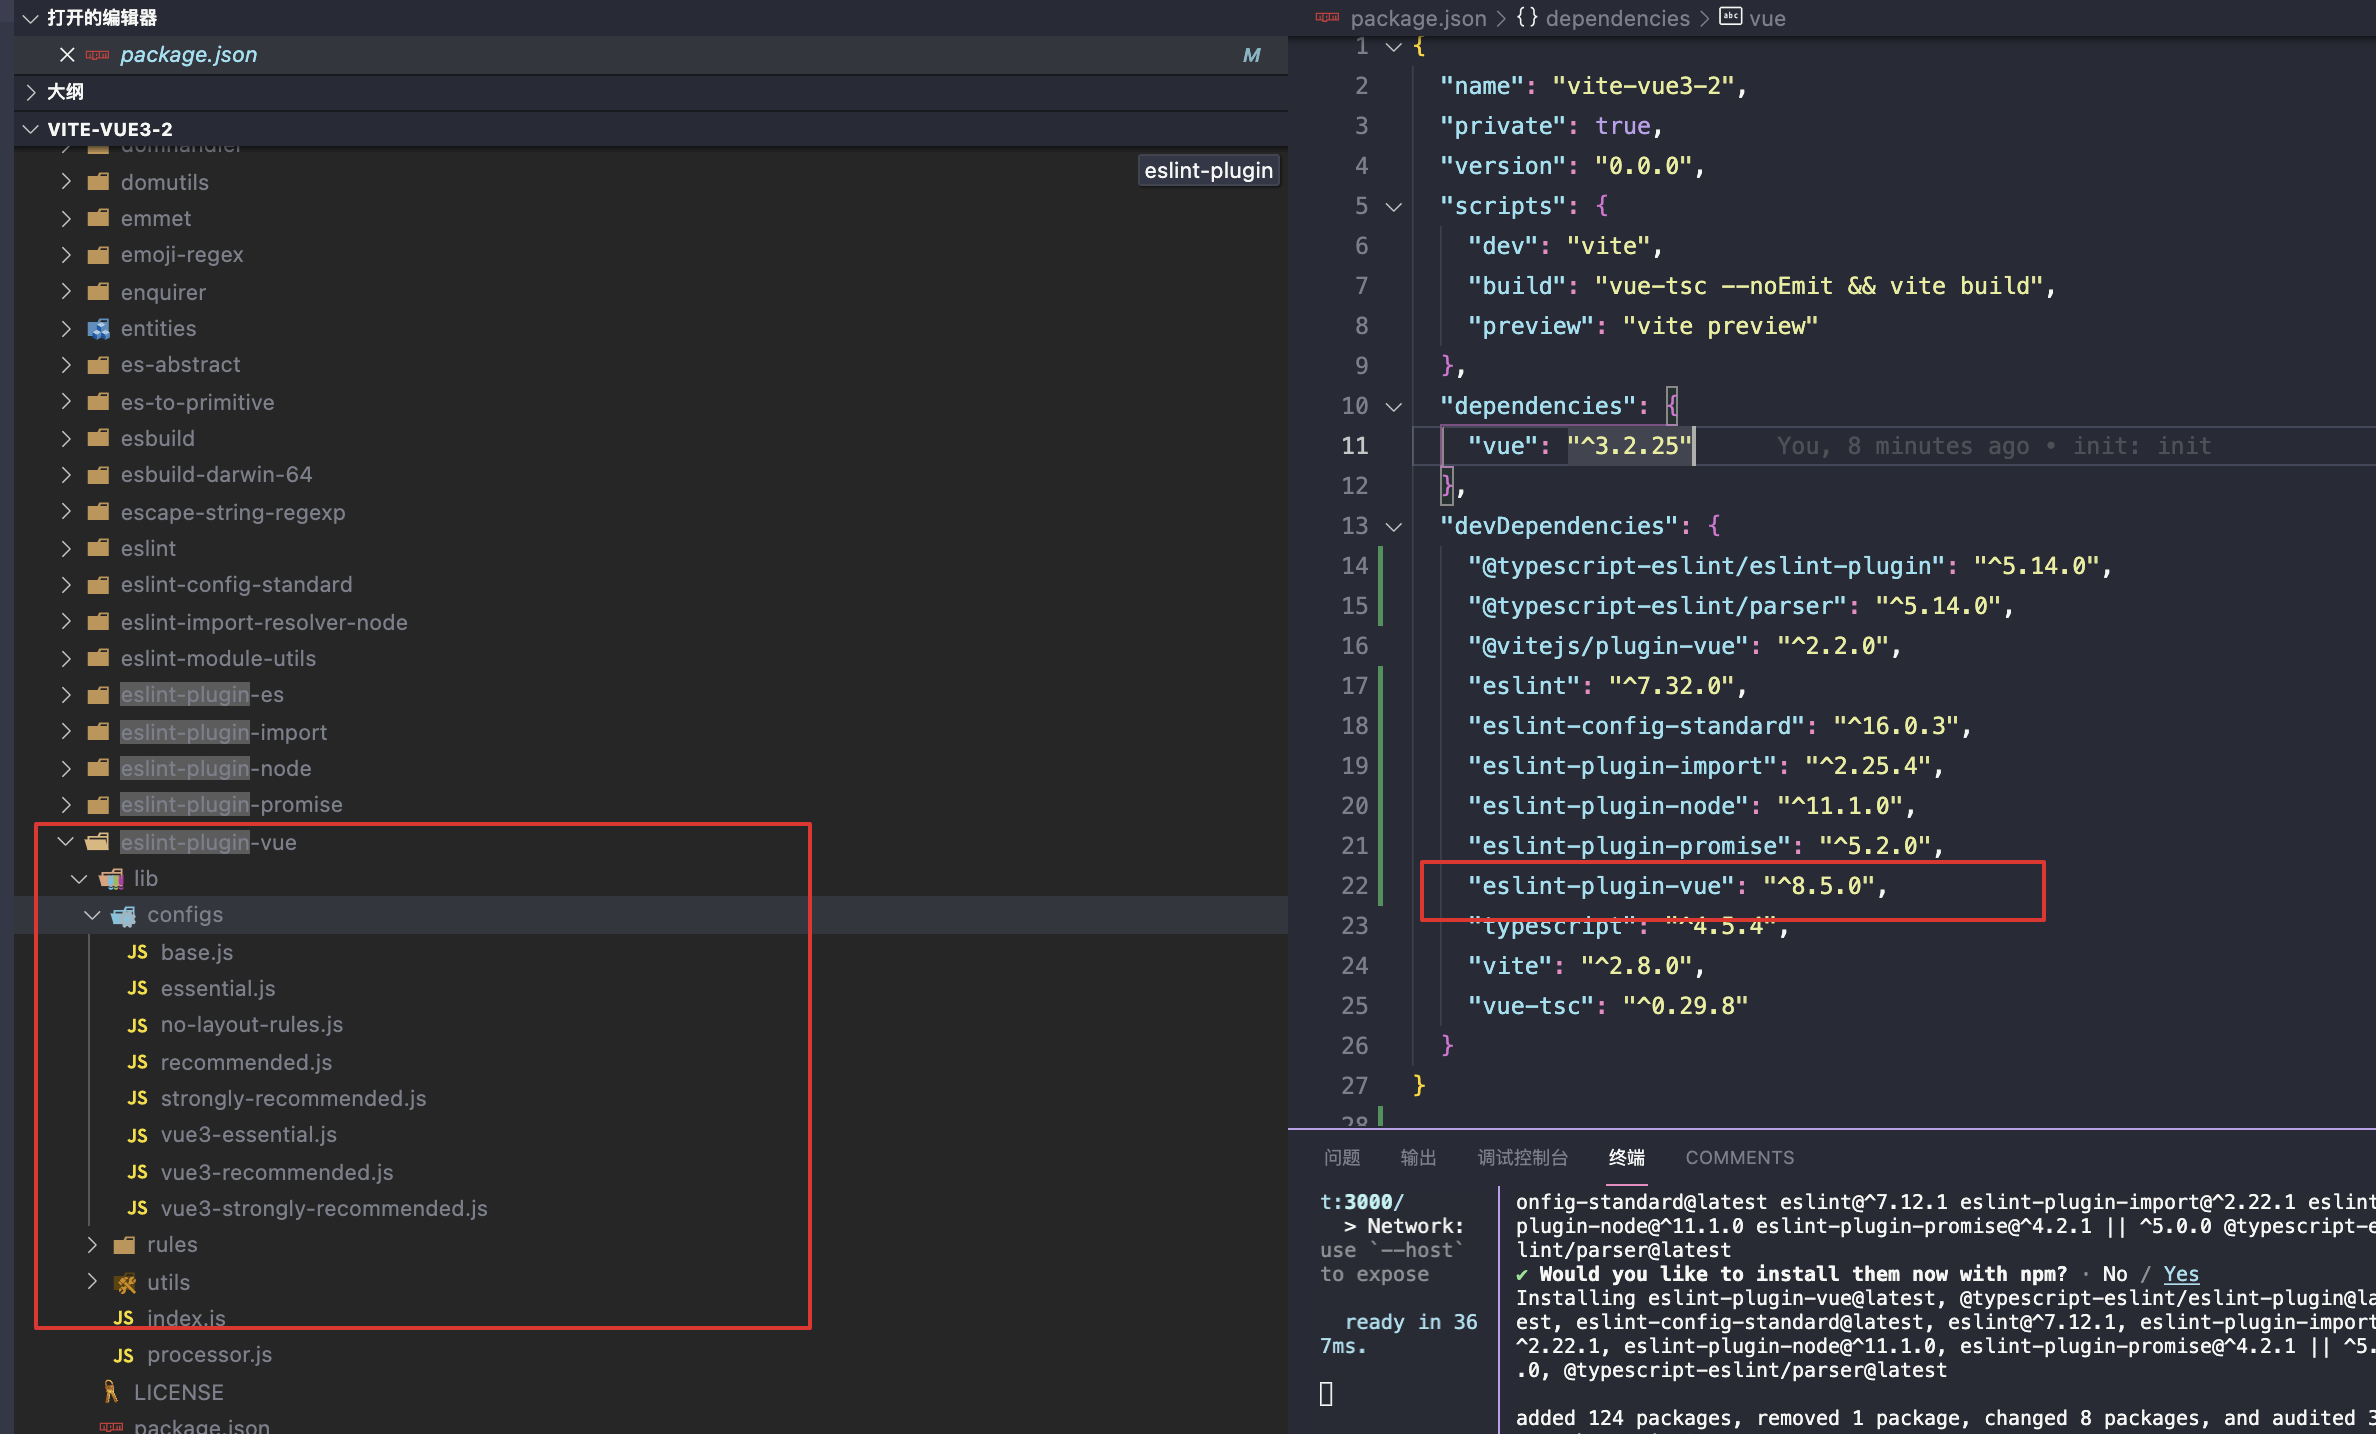
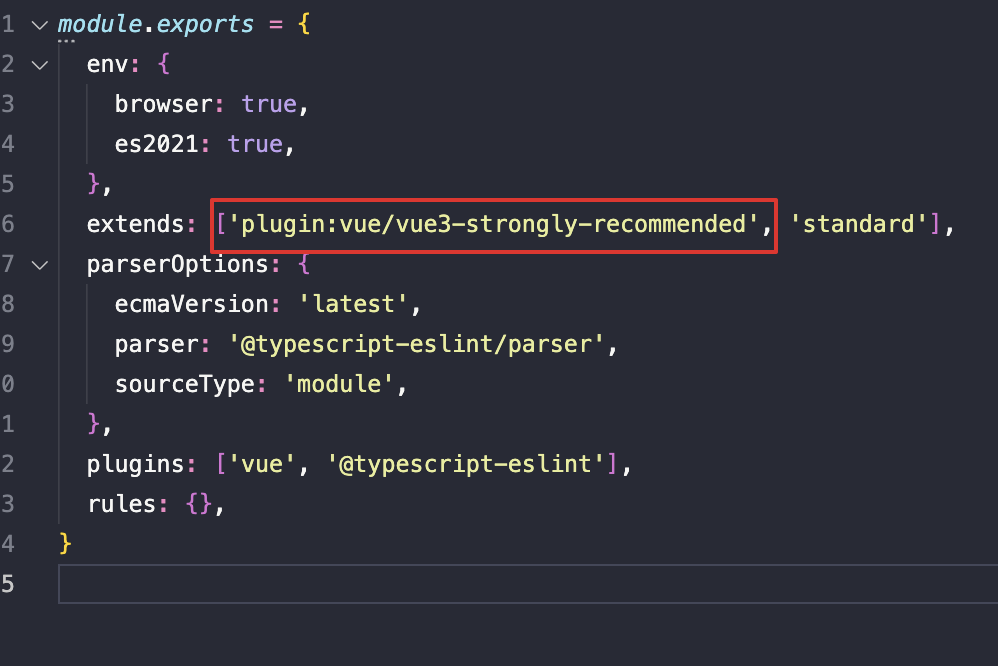
- 修改 .eslintrc.js
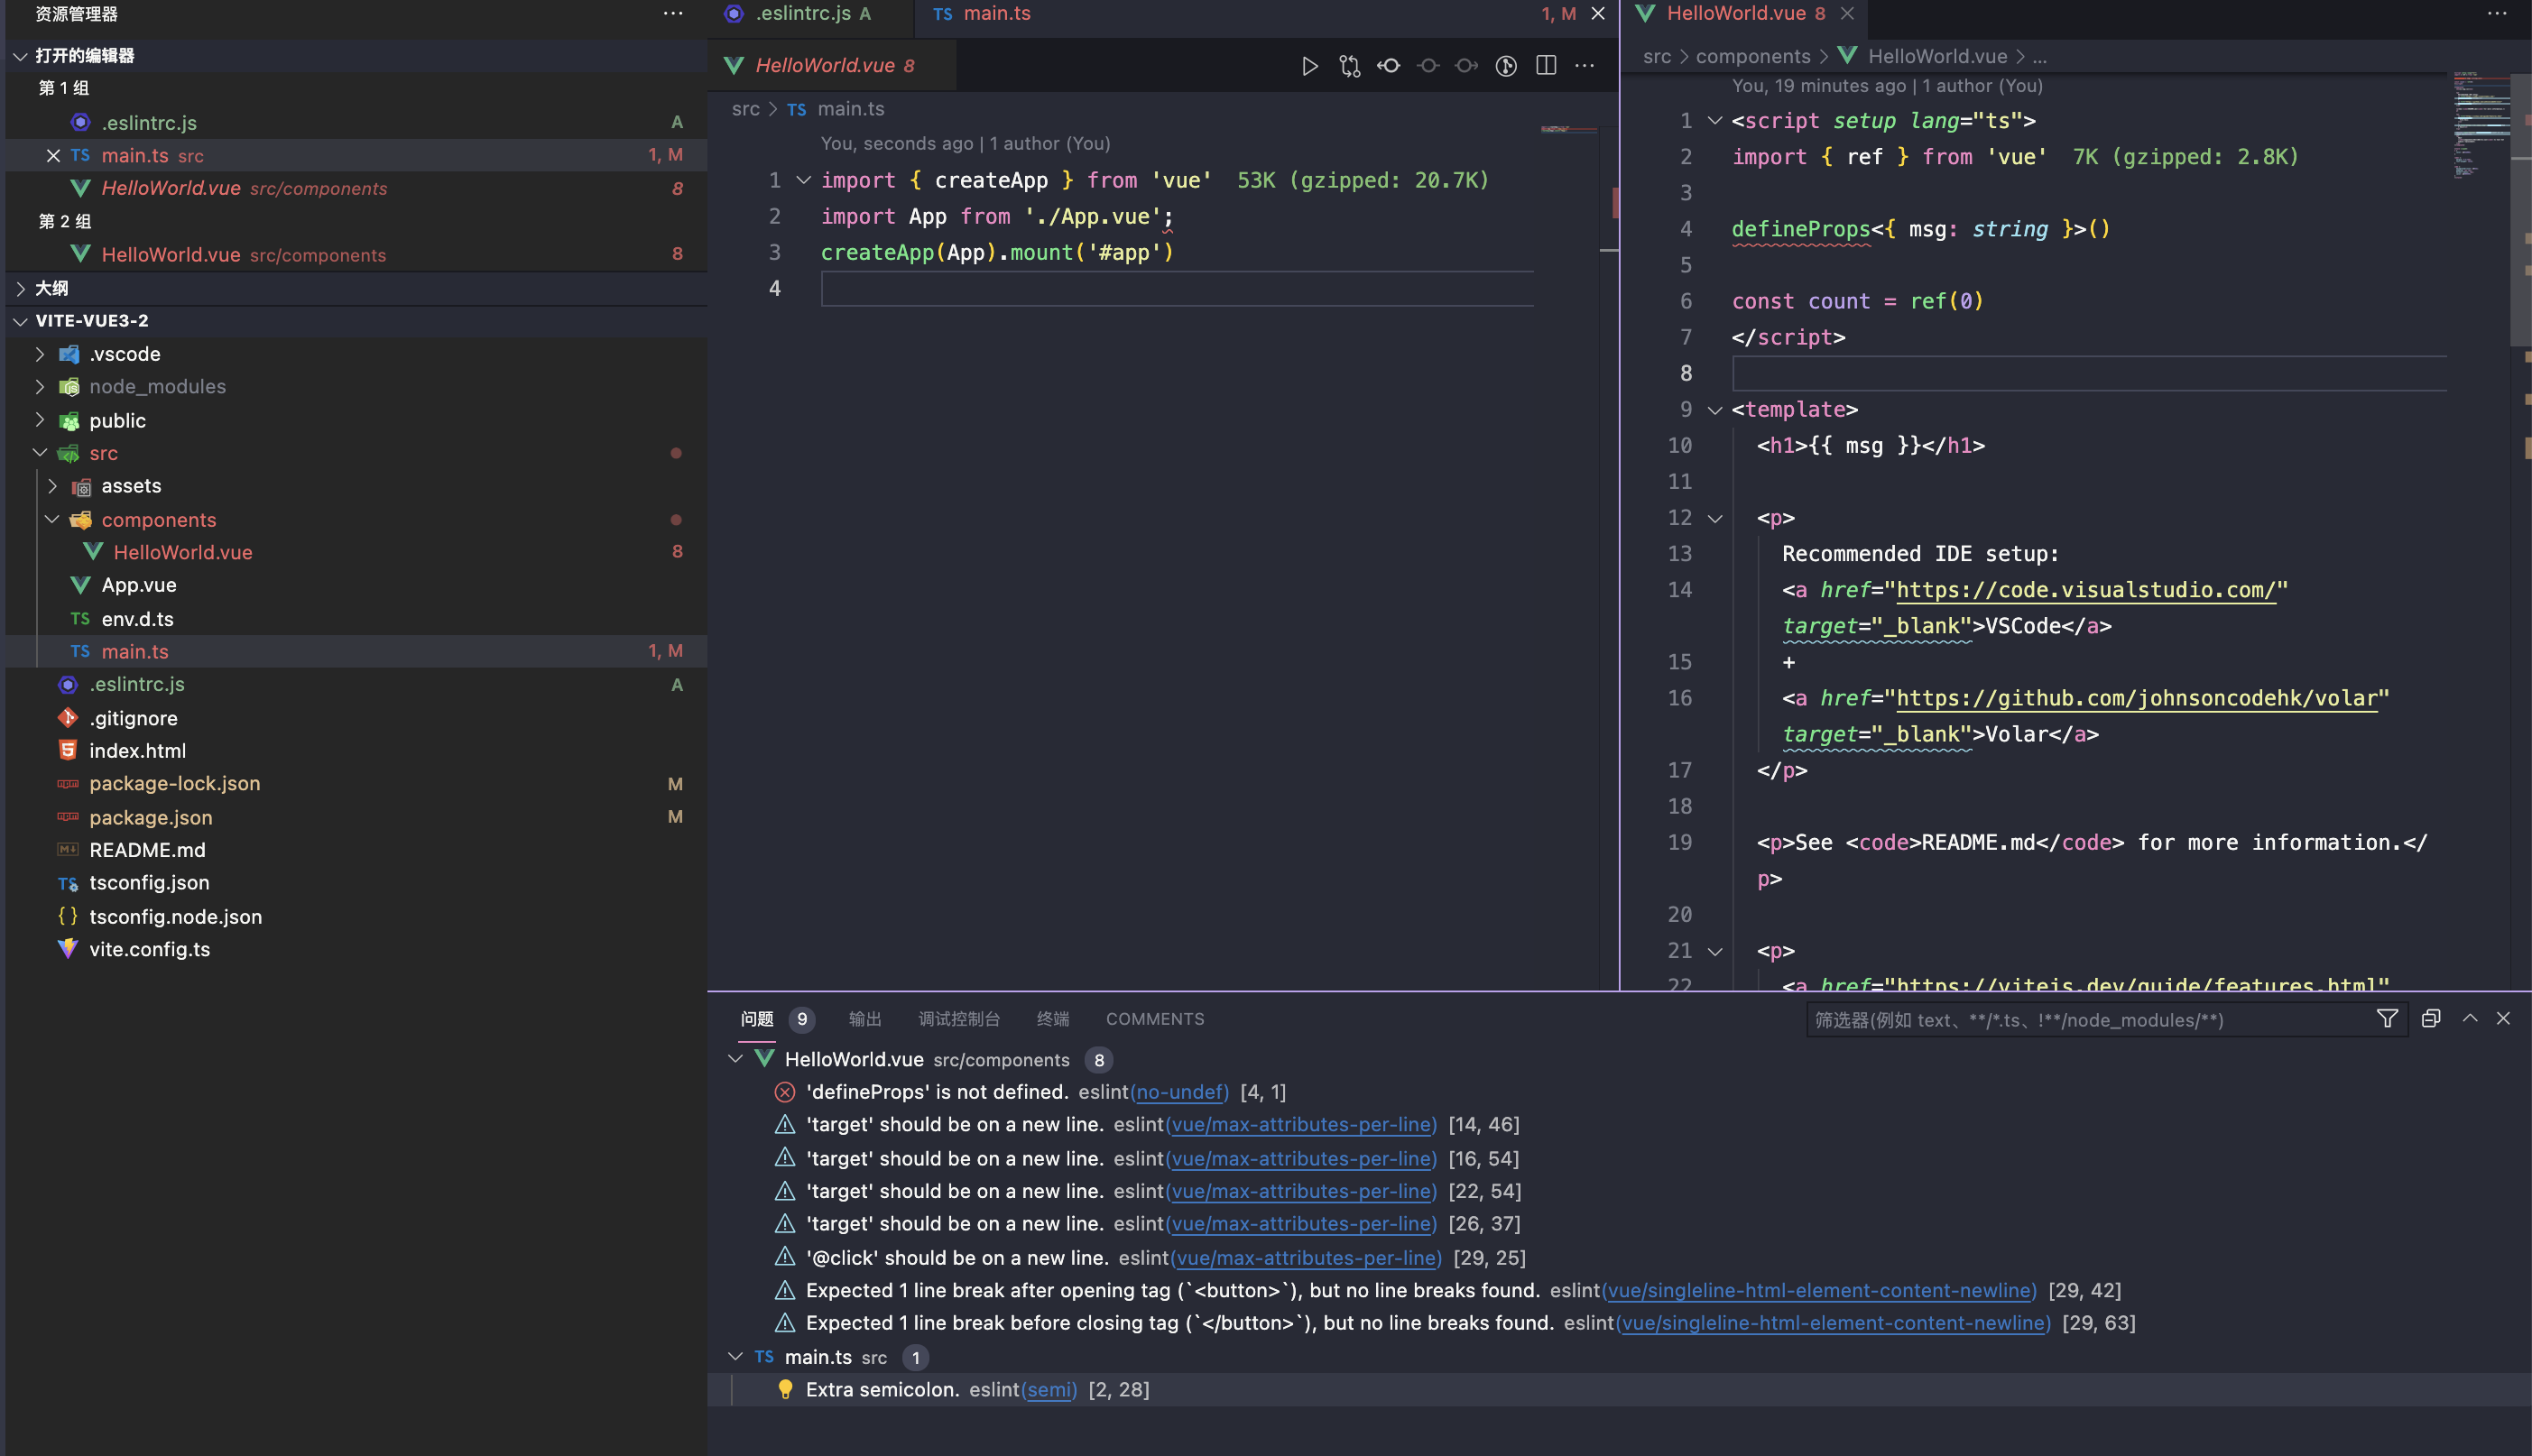
解决ESLint 带来的错误提示(代码规范)
1. 针对vue 文件
在 .eslintrc.js 中添加
‘vue/setup-compiler-macros’:true
module.exports = {env: {browser: true,es2021: true,'vue/setup-compiler-macros': true},extends: ['plugin:vue/vue3-strongly-recommended', 'standard'],parserOptions: {ecmaVersion: 'latest',parser: '@typescript-eslint/parser',sourceType: 'module'},plugins: ['vue', '@typescript-eslint'],rules: {}}
2.针对 ts,js,vue,jsx 等文件
在 package.json 中添加
“lint”:”eslint —ext js,jsx,ts,tsx,vue src/ —fix”,
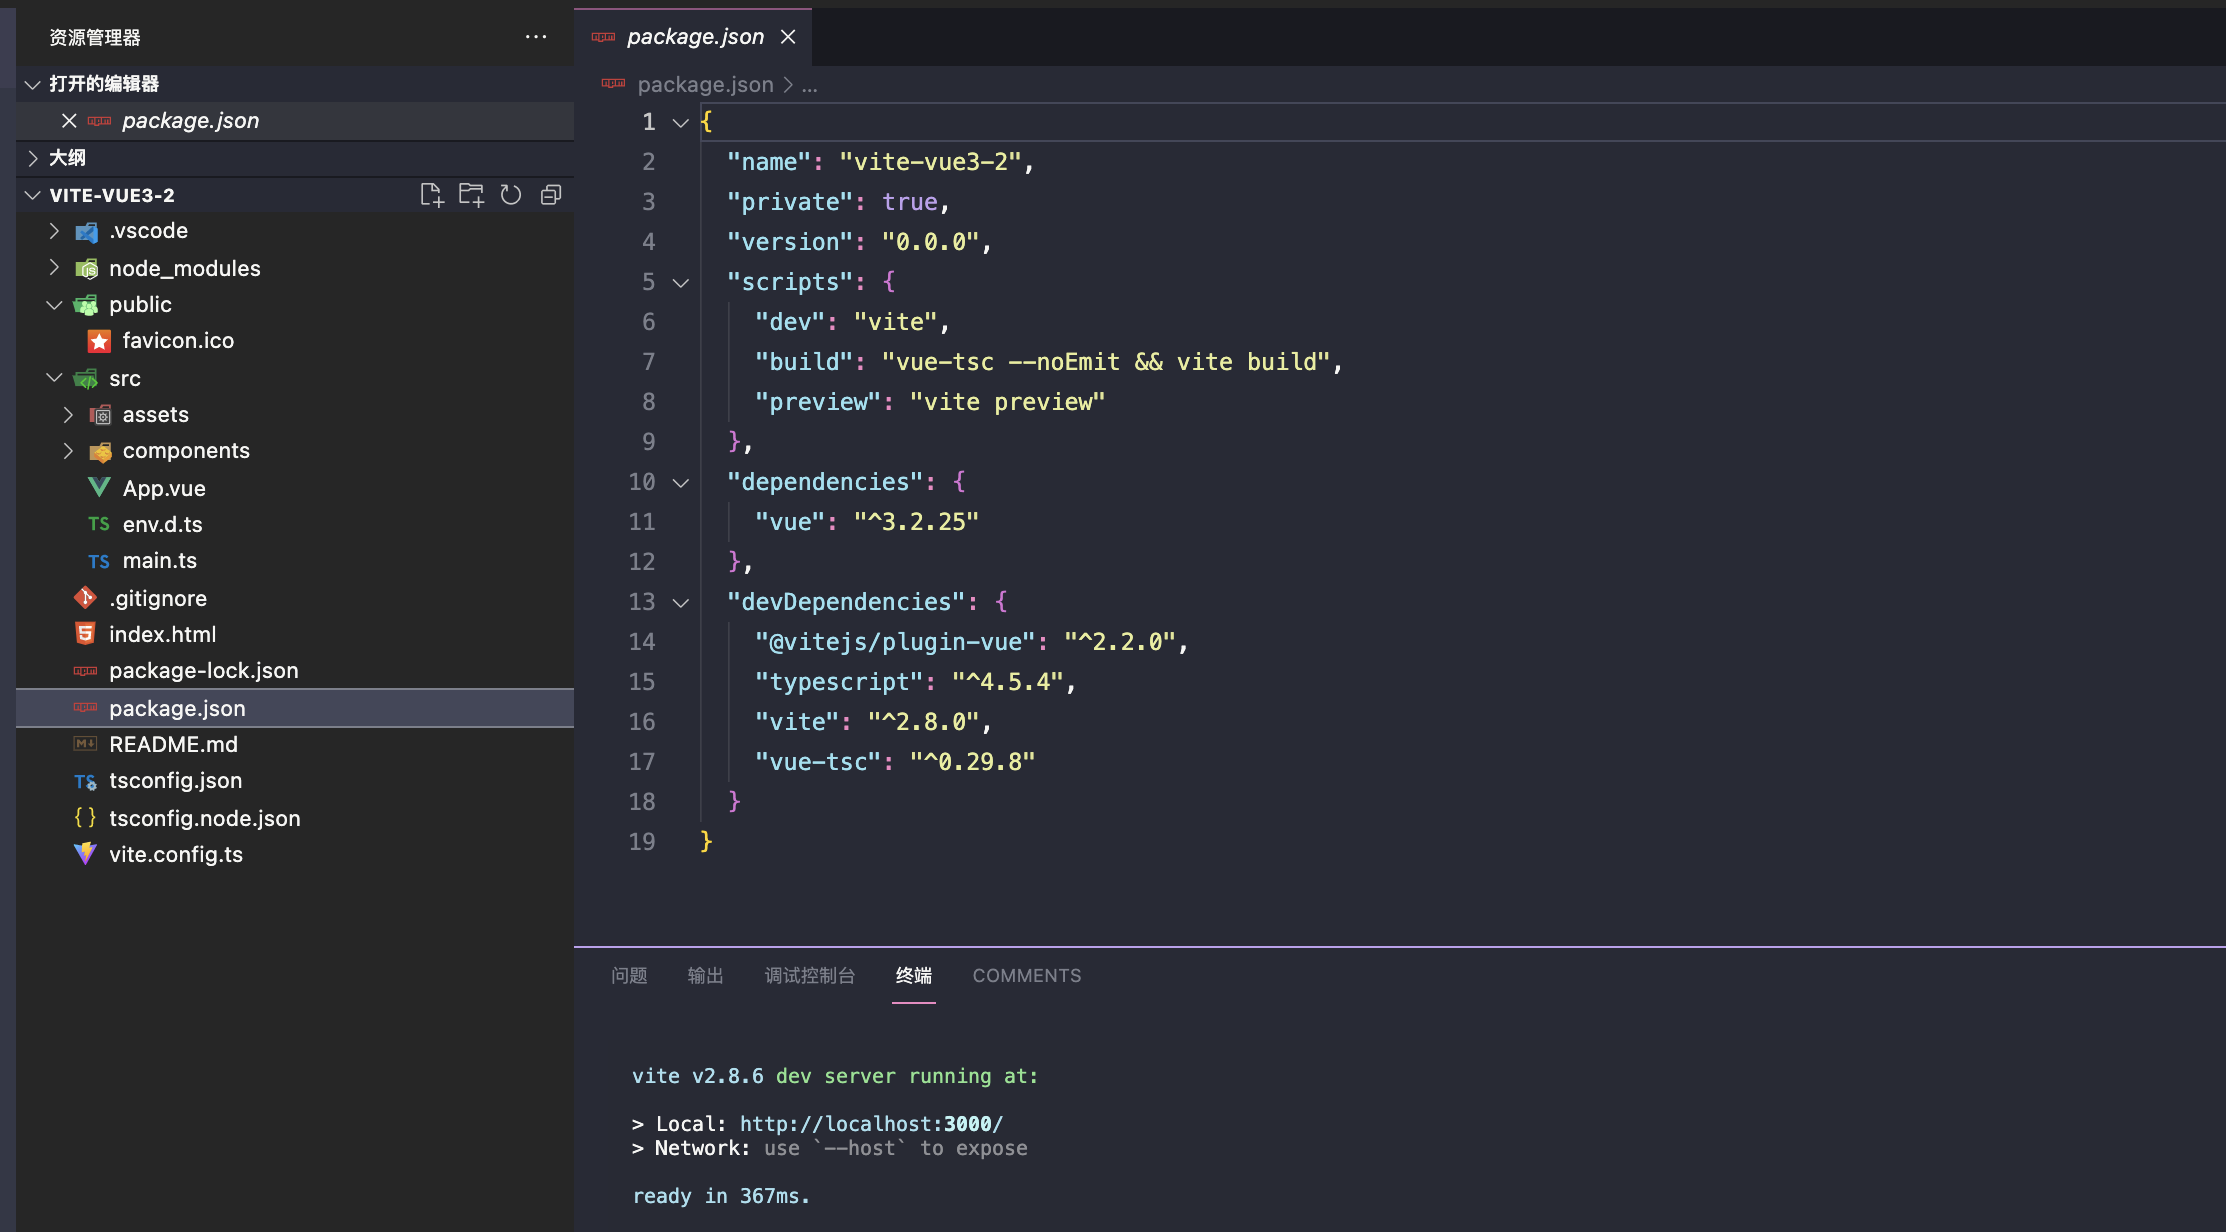
"scripts": {"dev": "vite","build": "vue-tsc --noEmit && vite build","preview": "vite preview","lint": "eslint --ext js,jsx,ts,tsx,vue src/ --fix"},"lint-staged": {"*.{js,jsx,ts,tsx,vue}": ["yarn lint","git add"]}
这样我们就可以通过 npm run lint 来进行修复。
我们也可以使用vscode 设置默认的格式化工具为 ESLint 来进行格式化,并处理一些代码规范报错。
代码提交执行 npm run lint 来对代码进行校验
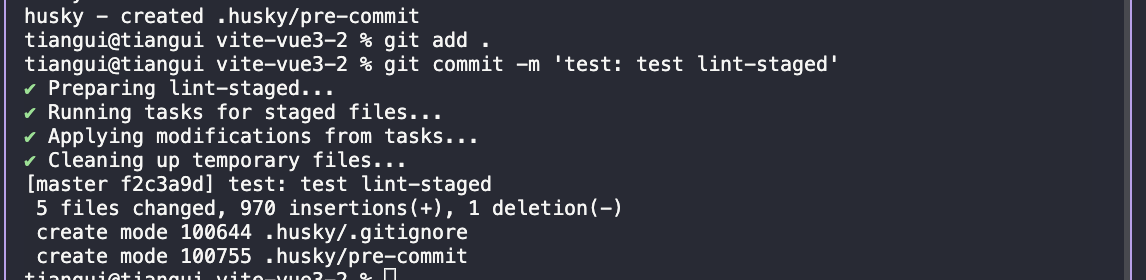
使用 lint-staged 来解决这个问题。
安装:
npx mrm@2 lint-staged
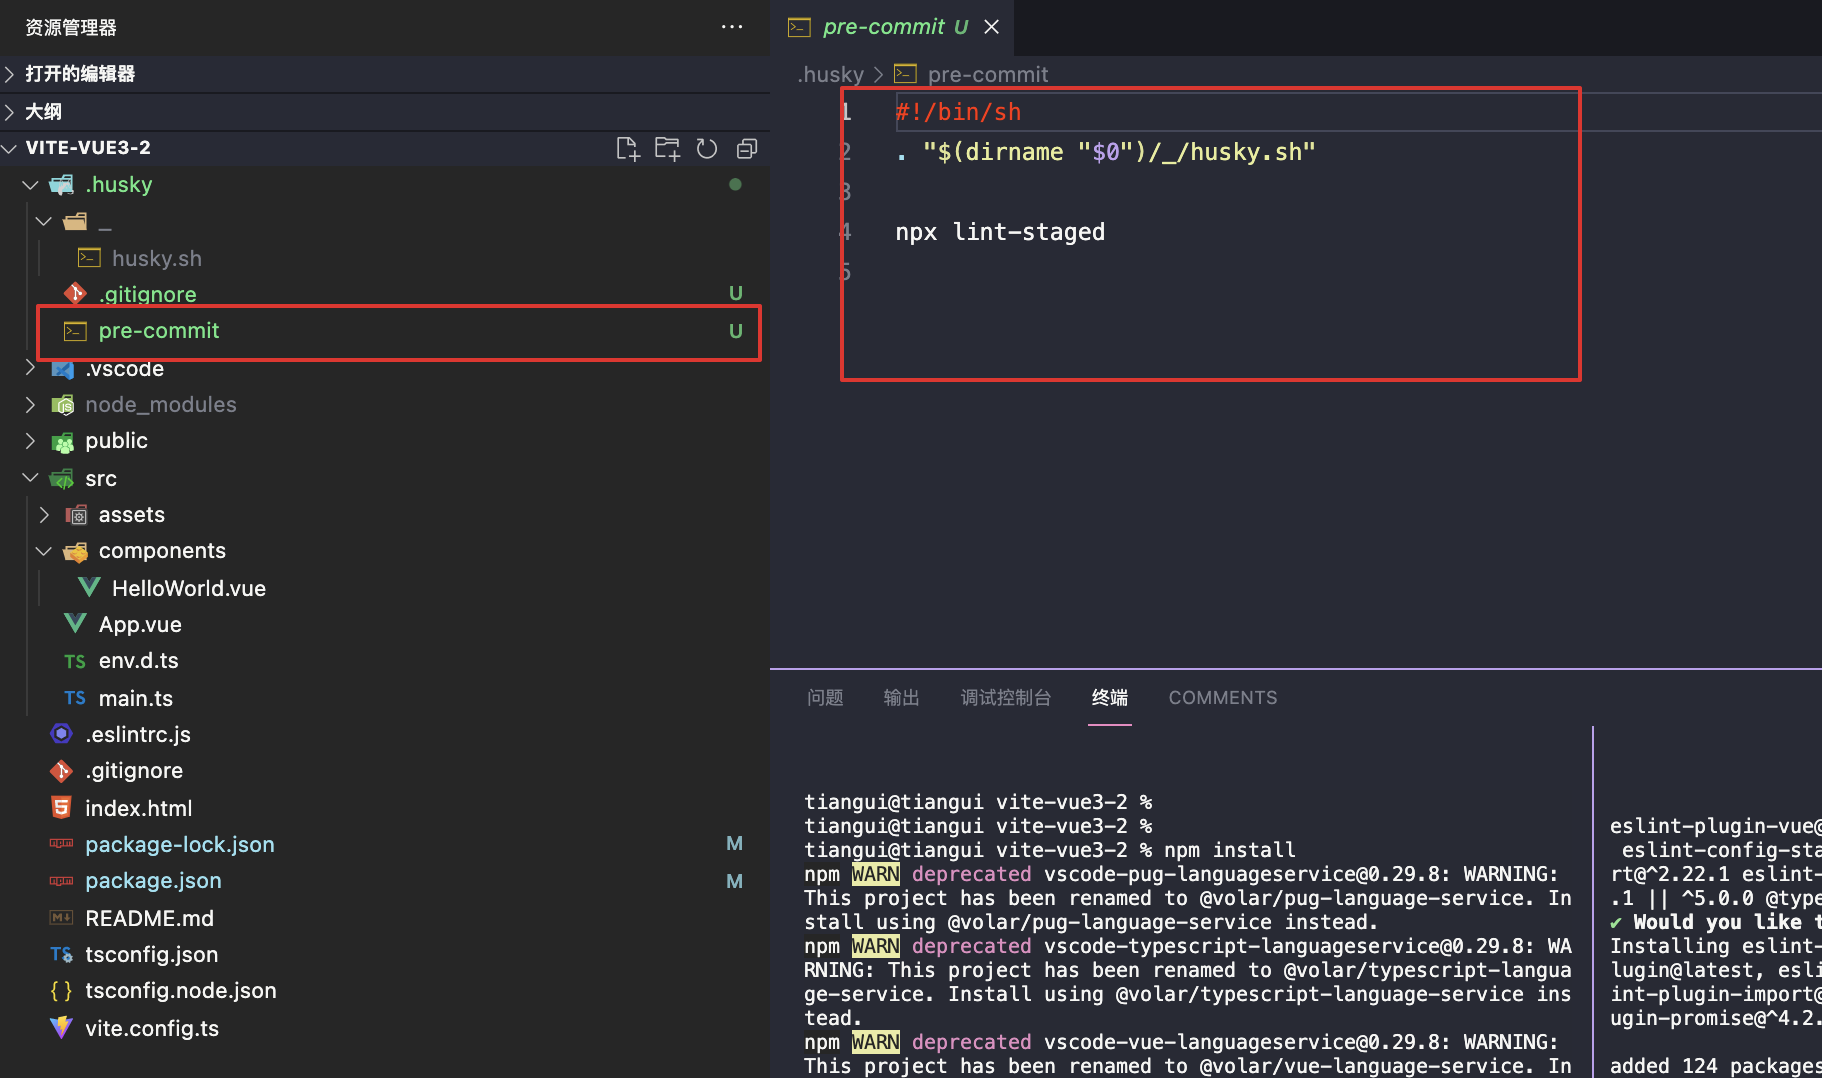
让 vite 打包时候对代码格式进行校验
使用 vite-plugin-eslint 插件来完成,该插件是一个 vite 插件。
安装:
npm install vite-plugin-eslint —save-dev
配置:vite.config.ts
import { defineConfig } from 'vite'import vue from '@vitejs/plugin-vue'import eslintPlugin from 'vite-plugin-eslint'// https://vitejs.dev/config/export default defineConfig({plugins: [vue(), eslintPlugin({})]})
git commit 规范
关于 git commit 规范 查看 Git Guide Angular提交信息规范
使用插件来校验 git commit 规范
conventional-changelog/commitlint
安装
macOS
npm install —save-dev @commitlint/{config-conventional,cli}
win
npm install —save-dev @commitlint/config-conventional @commitlint/cli
安装完成后,执行命令:
echo “module.exports = {extends: [‘@commitlint/config-conventional’]}” > commitlint.config.js yarn husky add .husky/commit-msg ‘yarn commitlint —edit $1’
如下图表示成功。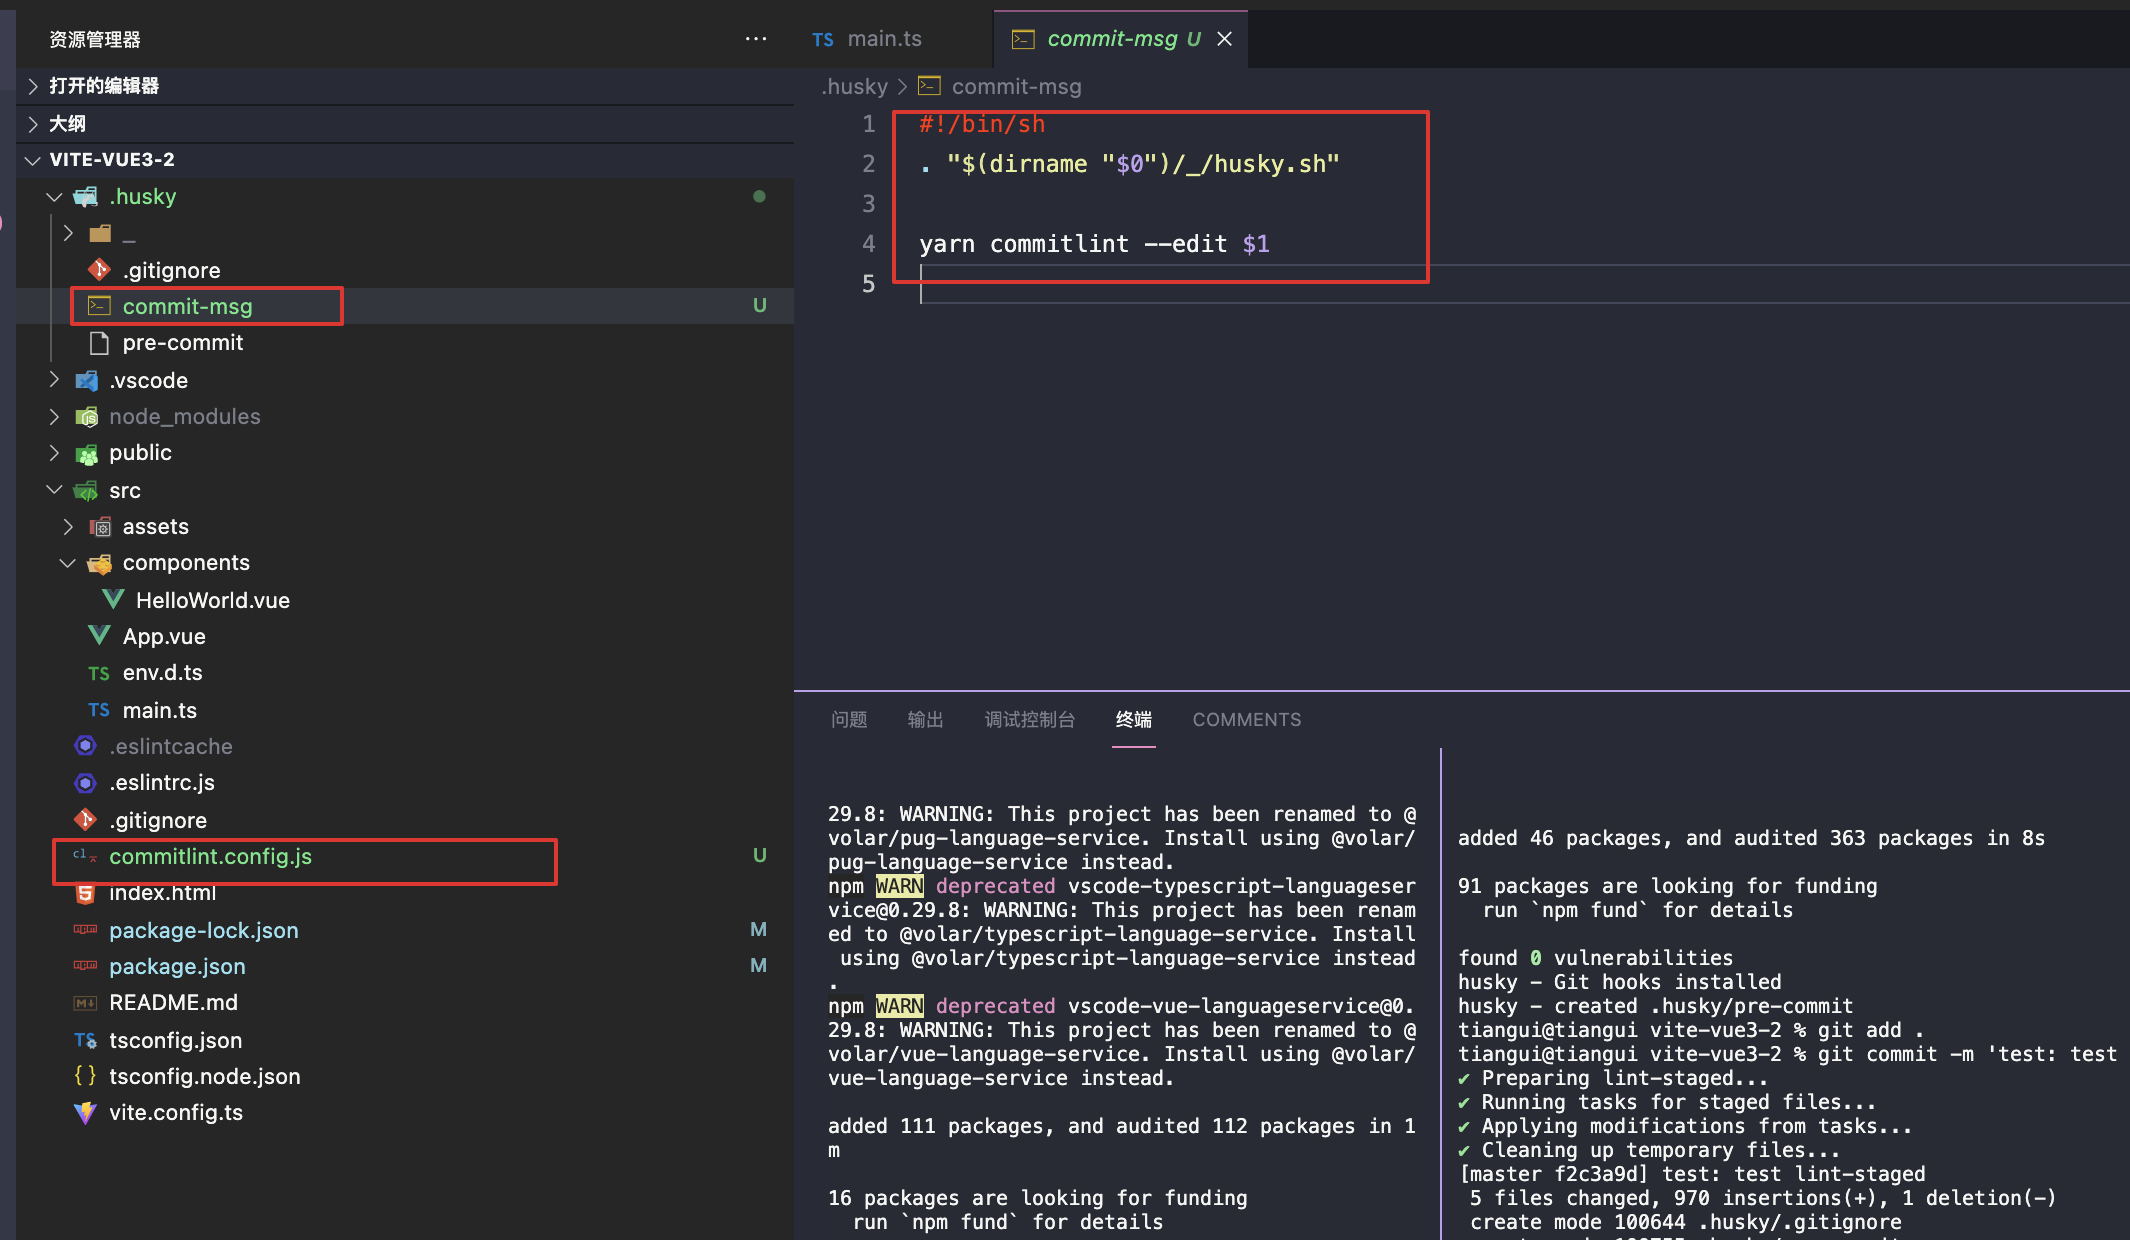
测试:
不按照规范提交会出现如下错误: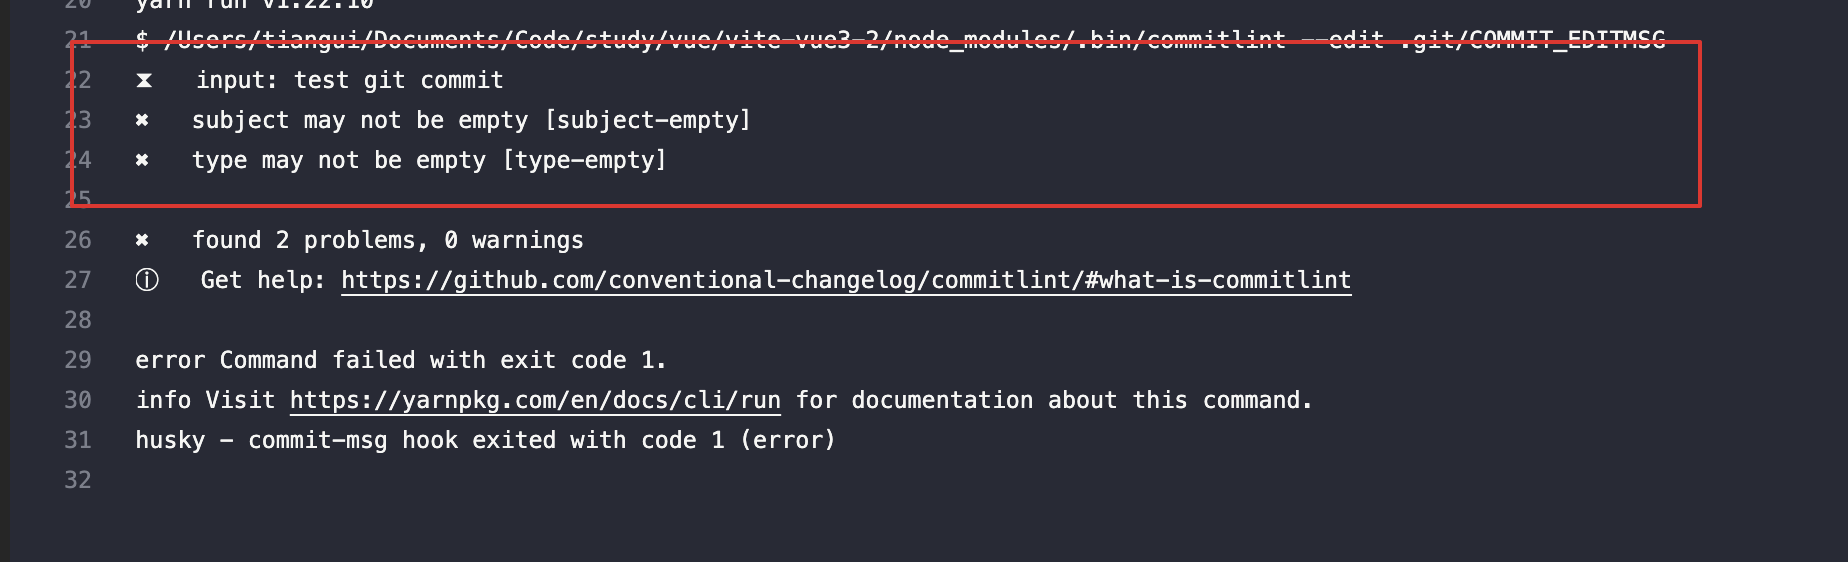
ts 类型检查
vite 只会对 .ts 文件进行转译工作,不过执行类型检查。
支持router, vuex,txs
支持router
import { createRouter, createWebHashHistory, RouteRecordRaw } from 'vue-router'const routes: RouteRecordRaw[] = [{path: '/',name: 'Home',component: () => import('../views/home/HomeIndex.vue')},{path: '/login',name: 'Login',component: () => import('../views/login/LoginIndex.vue')}]const router = createRouter({history: createWebHashHistory(),routes})export default router
支持 vuex
import { InjectionKey } from 'vue'import { createStore, useStore as baseUseStore, Store } from 'vuex'// 声明自己的 store stateexport interface State {count: number,testkey: string}// 定义 injection keyexport const key: InjectionKey<Store<State>> = Symbol('store')export const store = createStore<State>({state () {return {count: 0,testkey: 'key'}},mutations: {increment (state) {state.count++}}})// 定义自己的 `useStore` 组合式函数export function useStore () {return baseUseStore(key)}
/* eslint-disable no-unused-vars */import { ComponentCustomProperties } from 'vue'import { Store } from 'vuex'import { State } from './store'declare module '@vue/runtime-core' {// 为 `this.$store` 提供类型声明interface ComponentCustomProperties {$store: Store<State>}}
支持 tsx
https://cn.vitejs.dev/guide/features.html#jsx
https://github.com/vitejs/vite/tree/main/packages/plugin-vue-jsx
安装:
npm i -D @vitejs/plugin-vue-jsx
配置:
// vite.config.jsimport vueJsx from '@vitejs/plugin-vue-jsx'export default {plugins: [vueJsx({// options are passed on to @vue/babel-plugin-jsx})]}
项目路径支持别名
在 vue2 中,我们可以使用 @ 来作为别名,在 vue3 默认不支持,需要我们自己配置。
vite.config.ts
import { defineConfig } from 'vite'import vue from '@vitejs/plugin-vue'import eslintPlugin from 'vite-plugin-eslint'import vueJsx from '@vitejs/plugin-vue-jsx'import path from 'path'// https://vitejs.dev/config/export default defineConfig({plugins: [vue(), vueJsx(), eslintPlugin({cache: false})],resolve: {alias: {'@': path.join(__dirname, 'src')}}})
因为使用的是 ts ,引入 path 是node 的,会报错,需要安装 @types/node
npm i -D @types/node
配置完后,还需在 tsconfig.json 中配置 paths
{"compilerOptions": {"target": "esnext","useDefineForClassFields": true,"module": "esnext","moduleResolution": "node","strict": true,"jsx": "preserve","sourceMap": true,"resolveJsonModule": true,"esModuleInterop": true,"lib": ["esnext", "dom"],"isolatedModules": true,"types": ["vite/client"],"paths": {"@/*": ["./src/*"]}},"include": ["src/**/*.ts", "src/**/*.d.ts", "src/**/*.tsx", "src/**/*.vue"]}
支持样式
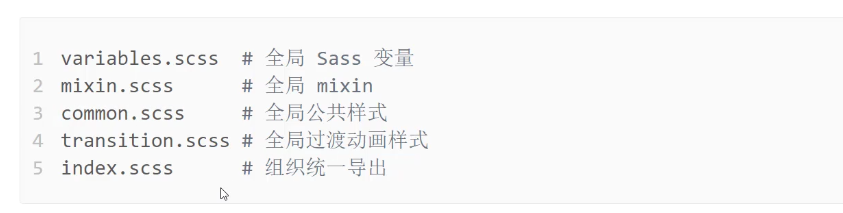
配置 vite.config.ts
通过 配置 vite.config.ts 的 css.preprocessorOptions.scss.additionalData ,这样就可以不用在每个vue 文件的style 中书写 @import “@/styles/variables.scss”; 了。
import { defineConfig } from 'vite'import vue from '@vitejs/plugin-vue'import eslintPlugin from 'vite-plugin-eslint'import vueJsx from '@vitejs/plugin-vue-jsx'import path from 'path'export default defineConfig({plugins: [vue(), vueJsx(), eslintPlugin({cache: false})],resolve: {alias: {'@': path.join(__dirname, 'src')}},css: {preprocessorOptions: {scss: {additionalData: '@import "@/styles/variables.scss";'}}}})
axios 封装支持
安装
npm i axios
基本封装
src\utils\request.ts
import axios, { AxiosRequestConfig } from 'axios'const request = axios.create({baseURL: 'https://shop.fe.lagou.com/api/admin'})request.interceptors.request.use(function (config) {return config}, function (err) {return Promise.reject(err)})request.interceptors.response.use(function (response) {return response}, function (err) {return Promise.reject(err)})export default <T=any>(config:AxiosRequestConfig) => {return request(config).then(res => {return res.data.data as T})}
使用
src\api\admin.ts
import request from '@/utils/request'import { ILoginInfo } from './types/admin'/*** 得到登录信息* @returns*/export const getLoginInfo = () => {return request<ILoginInfo>({method: 'get',url: '/login/info'})}
src\api\types\admin.ts
/*** 登录信息*/export interface ILoginInfo {logo_square: stringlogo_rectangle: stringlogin_logo: stringslide: string[]}
src\views\login\LoginIndex.vue
<template><h1>login</h1><h2>{{ $store.state.count }}</h2></template><script setup lang="ts">import { getLoginInfo } from '@/api'import type { ILoginInfo } from '@/api/types'import { useStore } from '@/store'import { ref } from '@vue/runtime-core'const store = useStore()const list = ref<ILoginInfo['slide']>([])console.log('🚀 ~ file: LoginIndex.vue ~ line 14 ~ list', list)console.log(store.state.testkey)getLoginInfo().then(res => {console.log('🚀 ~ file: LoginIndex.vue ~ line 13 ~ getLoginInfo ~ res', res.login_logo)})</script>
配置eslint
.eslintrc.js
module.exports = {env: {browser: true,es2021: true,'vue/setup-compiler-macros': true},extends: ['plugin:vue/vue3-strongly-recommended', 'standard'],parserOptions: {ecmaVersion: 'latest',parser: '@typescript-eslint/parser',sourceType: 'module'},plugins: ['vue', '@typescript-eslint'],rules: {},overrides: [{// 对单个文件不使用驼峰命名法校验files: ['src/api/**/*.ts'],rules: {camelcase: 'off'}}],globals: {defineProps: 'readonly',defineEmits: 'readonly',defineExpose: 'readonly',withDefaults: 'readonly'}}
环境变量的配置
https://cn.vitejs.dev/guide/env-and-mode.html#production-replacement
配置代理处理跨越

若有收获,就点个赞吧
0 人点赞
