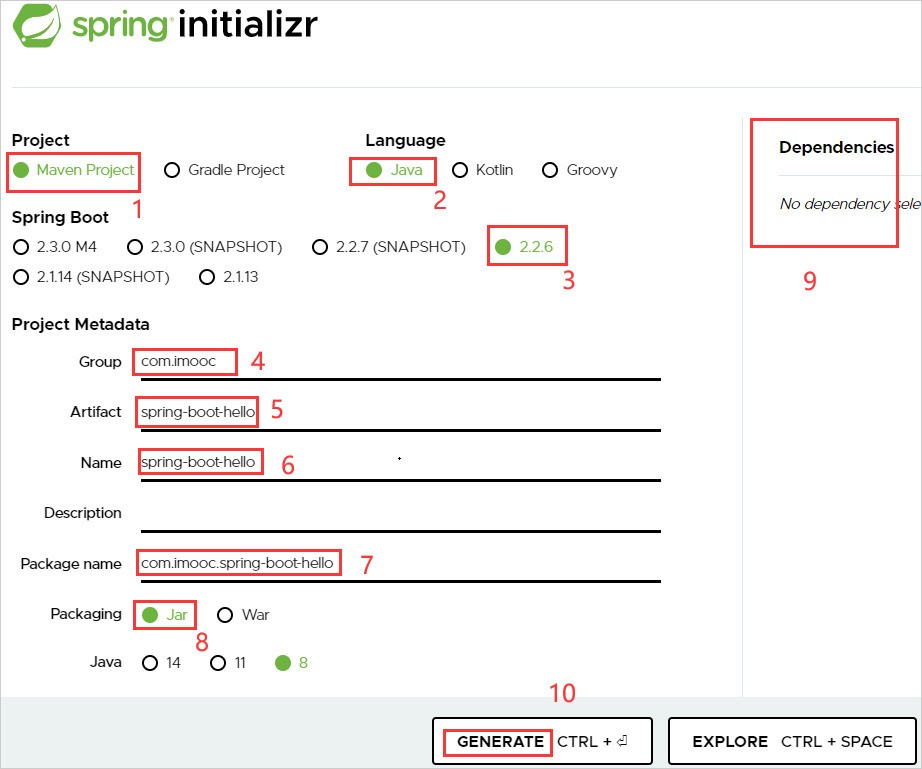
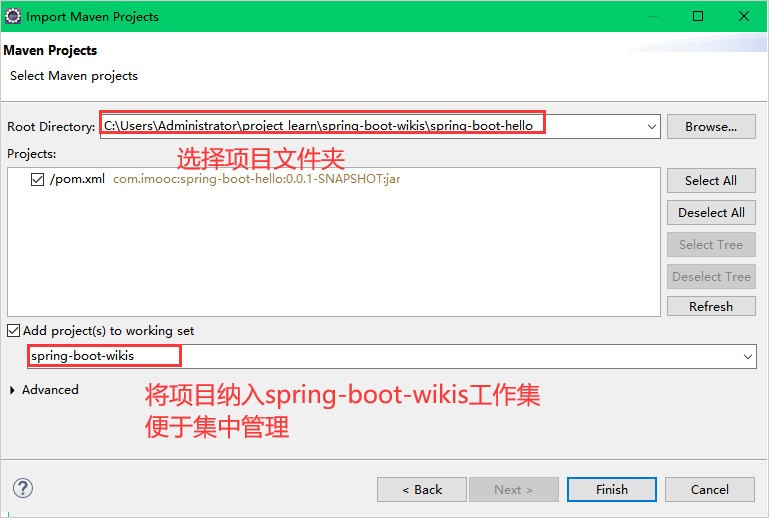
构建项目
启动项目
@RestController@SpringBootApplicationpublic class DesignPatternApplication {@RequestMapping("/")@ResponseBodypublic String index() {return "Hello SpringBoot!!!";}public static void main(String[] args) {SpringApplication.run(DesignPatternApplication.class, args);}}
@Target(ElementType.TYPE)@Retention(RetentionPolicy.RUNTIME)@Documented@Inherited@SpringBootConfiguration@EnableAutoConfiguration@ComponentScan(excludeFilters = { @Filter(type = FilterType.CUSTOM, classes = TypeExcludeFilter.class),@Filter(type = FilterType.CUSTOM, classes = AutoConfigurationExcludeFilter.class) })public @interface SpringBootApplication {}
@SpringBootConfiguration注解,它继承自@Configuration注解,功能也跟@Configuration一样。它会将当前类标注为配置类了,我们在启动类中配置 Bean 就可以生效了。@ComponentScan注解,用来指定我们要扫描的包,以便发现 Bean 。注意在默认情况下, SpringBoot 扫描该注解标注类所在包及其子包。当我们的控制器、服务类等 Bean 放到不同的包中时,就需要通过@ComponentScan注解指定这些包,以便发现 Bean 。@EnableAutoConfiguration注解,用来启动自动配置。开启自动配置后, Spring Boot 会扫描项目中所有的配置类,然后根据配置信息启动 Spring 容器。
定制Banner
在src/main/resources目录下新建banner.txt文件,然后将自己的图案黏贴进去即可
ASCII图案可通过网站http://www.network-science.de/ascii/一键生成
//关闭bannerpublic static void main(String[] args) {SpringApplication app = new SpringApplication(DemoApplication.class);app.setBannerMode(Mode.OFF);app.run(args);}
全局配置文件
在src/main/resources目录下,Spring Boot提供了一个名为application.properties的全局配置文件,可对一些默认配置的配置值进行修改。
自定义配置
my.cat.name=mimimy.cat.age=3
@Component@Datapublic class MyCat {@Value("${my.cat.name}")private String name;@Value("${my.cat.age}")private int age;}
@Controllerpublic class TestController {@Autowiredprivate MyCat myCat;@RequestMapping(value = "/cat", produces = MediaType.APPLICATION_JSON_VALUE)@ResponseBodypublic MyCat getCat() {return myCat;}}
多个配置文件处理
属性非常多的情况下,也可以定义一个和配置文件对应的Bean:通过注解 @ConfigurationProperties(prefix = “my.cat”) 指明了属性的通用前缀,通用前缀加属性名和配置文件的属性名一一对应。
@Data@ConfigurationProperties(prefix = "my.cat")public class ConfigBean {private String name;private int age;}
还需在Spring Boot入口类加上注解@EnableConfigurationProperties({ConfigBean.class})来启用该配置:
@SpringBootApplication@EnableConfigurationProperties({ ConfigBean.class })public class DesignPatternApplication {public static void main(String[] args) {SpringApplication.run(DesignPatternApplication.class, args);}}
@Autowiredprivate ConfigBean configBean;@RequestMapping("/config")@ResponseBodypublic String index() {return configBean.getName()+"——"+configBean.getAge();}
属性之间可以相互引用
my.cat.name=mimimy.cat.age=3my.cat.des=${my.cat.name} -- ${my.cat.age}
自定义配置文件
除了可以在application.properties里配置属性,我们还可以自定义一个配置文件。在src/main/resources目录下新建一个test.properties:
test.name=KangKang
test.age=25
@Configuration
@ConfigurationProperties(prefix="test")
@PropertySource("classpath:test.properties")
@Component
public class TestConfigBean {
    private String name;
    private int age;
    // get,set略
}
注解@PropertySource("classpath:test.properties")指明了使用哪个配置文件。要使用该配置Bean,同样也需要在入口类里使用注解@EnableConfigurationProperties({TestConfigBean.class})来启用该配置。
使用xml配置
虽然Spring Boot并不推荐我们继续使用xml配置,但如果出现不得不使用xml配置的情况,Spring Boot允许我们在入口类里通过注解@ImportResource({"classpath:some-application.xml"})来引入xml配置文件。
Profile配置
配置-springBoot
多环境配置文件必须以application-{profile}.properties的格式命,
application-dev.properties:
server.port=8080
application-pro.properties:
server.port=8081
需要在application.properties文件中通过spring.profiles.active属性来设置,其值对应{profile}值。也可以在运行jar文件的时候使用命令java -jar xxx.jar --spring.profiles.active={profile}切换不同的环境配置。
spring.profiles.active=dev
配置-maven
集成模板引擎
theamleaf
引入pmo
<!-- 引入web项目相关依赖 -->
        <dependency>
            <groupId>org.springframework.boot</groupId>
            <artifactId>spring-boot-starter-web</artifactId>
        </dependency>
        <!-- ThymeLeaf依赖 -->
        <dependency>
            <groupId>org.springframework.boot</groupId>
            <artifactId>spring-boot-starter-thymeleaf</artifactId>
        </dependency>
创建控制器方法
@Controller
@Slf4j
@RequestMapping("/user")
public class UserController {

    @Resource
    private UserService userService;
    @RequestMapping("/getAll")
    public String getUsers(Model model) {
        model.addAttribute("users", userService.getAllUser());
        return "user.html";
    }
}
创建html
<!DOCTYPE html>
<html lang="en" xmlns:th="http://www.w3.org/1999/xhtml">
<head>
    <meta charset="UTF-8">
    <title>USERS</title>
</head>
<body>
    <div>用户列表</div>
    <div th:each="item:${users}">
        <span th:text="${item.name}"></span>
        <span th:text="${item.age}"></span>
        <span th:text="${item.address}"></span>
    </div>

</body>
</html>
JSP
需要引入 Web 项目及 JSP 模板相关的依赖项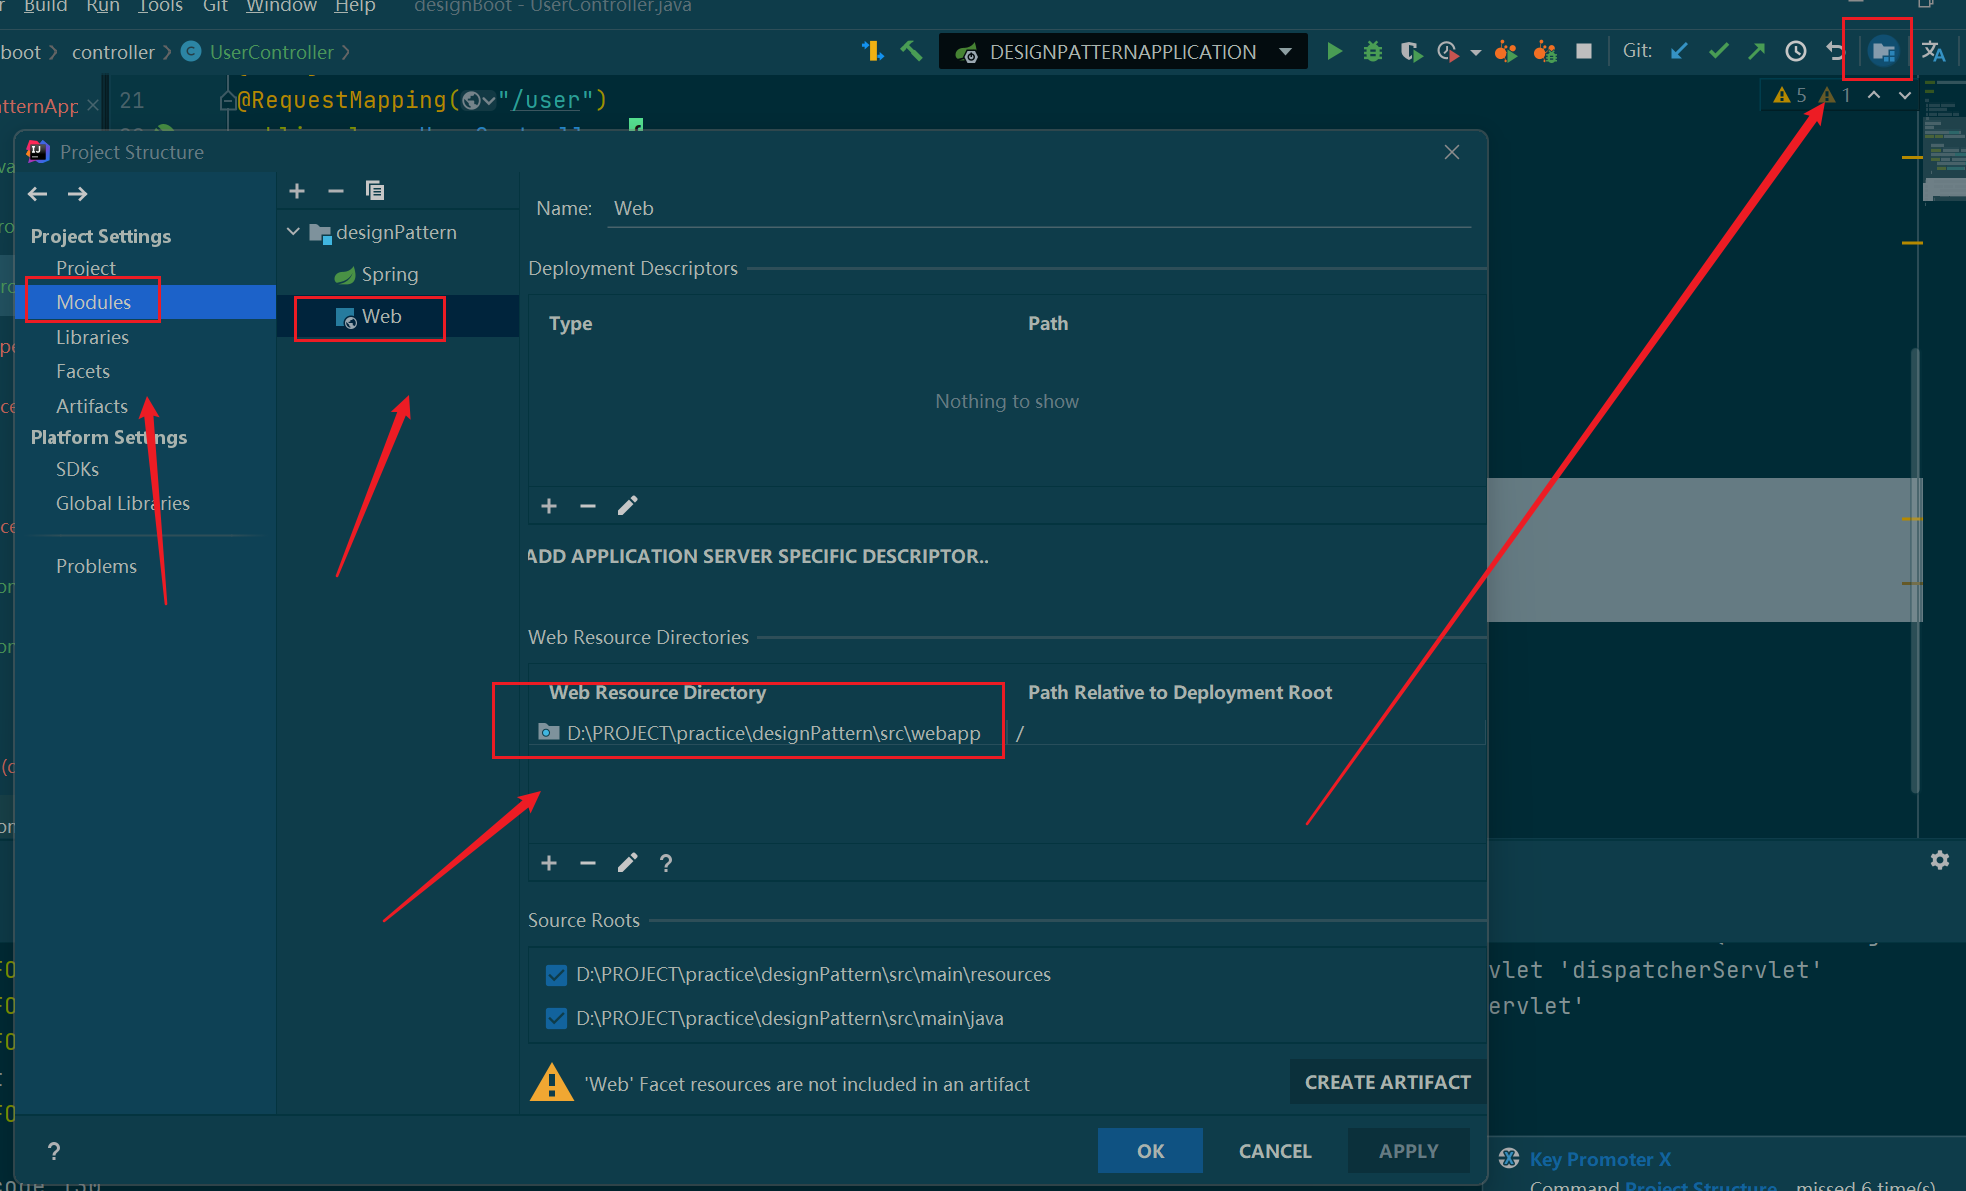
        <!-- 添加web开发功能 -->
        <dependency>
            <groupId>org.springframework.boot</groupId>
            <artifactId>spring-boot-starter-web</artifactId>
        </dependency>
        <!--内嵌的tomcat支持模块 -->
        <dependency>
            <groupId>org.apache.tomcat.embed</groupId>
            <artifactId>tomcat-embed-jasper</artifactId>
            <scope>provided</scope>
        </dependency>
        <!-- 对jstl的支持 -->
        <dependency>
            <groupId>javax.servlet</groupId>
            <artifactId>jstl</artifactId>
        </dependency>
添加视图解析器
@SpringBootApplication
public class SpringBootJspApplication {
    public static void main(String[] args) {
        SpringApplication.run(SpringBootJspApplication.class, args);
    }
    @Bean // 注册视图解析器
    public InternalResourceViewResolver setupViewResolver() {
        InternalResourceViewResolver resolver = new InternalResourceViewResolver();
        resolver.setPrefix("/WEB-INF/jsp/");// 自动添加前缀
        resolver.setSuffix(".jsp");// 自动添加后缀
        return resolver;
    }
}

若有收获,就点个赞吧
0 人点赞
