Spring Profile
为了实现多环境配置,我们可以在本地开发的时候在Resource文件夹下新建不同环境的配置文件: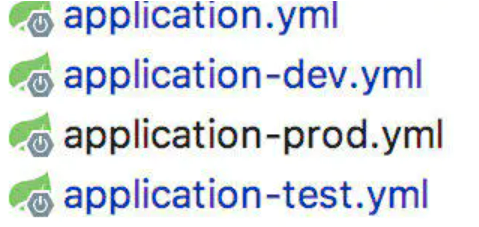
然后只需要在主配置文件application.yml文件使用spring.profiles.active = dev/test/prod来进行不同环境的切换。Spring Profile有一个特性即可以在application.yml配置通用的内容,在application-dev.yml文件中配置不同文件的差异化配置,这样可以精简我们的配置文件。配置如下:
# application.yml 主配置文件主要用来存放公共设置,不受环境配置影响server:port: 8082 # 指定端口号context-path: /server # 指定访问资源的根路径spring:profiles:active: dev
# application-dev.yml主要用来存放不同环境差异化配置,包括ftp地址、数据库连接等spring:datasource:username: xxxpassword: xxxurl: xxxdriver-class-name: oracle.jdbc.driver.OracleDriver
上述解决方案虽然可以解决我们的环境问题,但是不够优雅,还有一些值得优化的地方,比如打包出的配置文件有四个、每次需要手动修改主配置文件的环境信息等。
Maven Profile
Profile配置
Maven 也提供了 Profile 支持,它允许我们在 pom.xml 中定义多个 Profile ,每个 profile 可以指定自己的一些配置、依赖、触发条件等。例如:
<profiles><profile><id>dev</id><activation><activeByDefault>true</activeByDefault></activation><properties><profile.active>dev</profile.active></properties></profile><profile><id>prod</id><properties><profile.active>prod</profile.active></properties></profile></profiles>
资源过滤
在进行打包的时候,我们并不需要把dev或者test等配置文件打包进行,所有我们在打包的时候进行如下配置
<build><resources><resource><directory>src/main/resources</directory><!--先排除所有的配置文件--><excludes><exclude>application*.yml</exclude></excludes></resource><resource><directory>src/main/resources</directory><!--引入所需环境的配置文件--><filtering>true</filtering><includes><include>application.yml</include><include>application-${profile.active}.yml</include></includes></resource></resources><plugins><plugin><groupId>org.springframework.boot</groupId><artifactId>spring-boot-maven-plugin</artifactId><configuration><classifier>exec</classifier></configuration></plugin></plugins></build>
主要是分为两个步骤:
- 先排除所有的配置文件
- 引入我们所需要的配置文件,根据${profile.active}来动态指定
熟悉idea的同学都知道,这里的${profile.active}我们在idea的maven的配置处进行快速的切换
从上面的配置文件可以看出,我们引入了两个配置文件,一个是主配置文件(application.yml),一个是实际环境(application-dev.yml)的配置文件,但是到这里还没有结束。我们知道主配置文件的dev/test/prod在没有使用Maven Profile的时候,我们是需要手动修改的,但是使用Maven Profile之后,我们可以把这个工作交给maven去做。
在application.yml进行下面的修改:
# 主配置文件主要用来存放公共设置,不受环境配置影响server:port: 8082 # 指定端口号context-path: /server # 指定访问资源的根路径spring:profiles:active: @profile.active@ #此处由maven的环境选择决定

若有收获,就点个赞吧
0 人点赞
