1、fixture 的优势
- 命名方式灵活,不局限于 setup 和teardown 这几个命名
- conftest.py 配置里可以实现数据共享,不需要 import 就能自动找到fixture
- scope=”module” 可以实现多个.py 跨文件共享前置
- scope=”session” 以实现多个.py 跨文件使用一个 session 来完成多个用例
2、fixture 参数列表
@pytest.fixture(scope="function", params=None, autouse=False, ids=None, name=None)def test():print("fixture初始化的参数列表")
2.1 参数列表
● scope:可以理解成 fixture 的作用域,默认:function,还有 class、module、package、session 四个【常用】
● autouse:默认:False,需要用例手动调用该 fixture;如果是 True,所有作用域内的测试用例都会自动调用该 fixture
● name:默认:装饰器的名称,同一模块的 fixture 相互调用建议写个不同的 name
2.2 注意
session 的作用域:是整个测试会话,即开始执行 Pytest 到结束测试
3、测试用例如何调用 fixture
三种方式:
①将 fixture 名称作为测试用例函数的输入参数 ②测试用例加上装饰器:@pytest.mark.usefixtures(fixture_name) ③fixture 设置 autouse=True
#!/usr/bin/env python# -*- coding: utf-8 -*-import pytest# 调用方式一@pytest.fixturedef login():print("输入账号,密码先登录")def test_s1(login):print("用例 1:登录之后其它动作 111")def test_s2(): # 不传 loginprint("用例 2:不需要登录,操作 222")# 调用方式二@pytest.fixturedef login2():print("please输入账号,密码先登录")@pytest.mark.usefixtures("login2", "login")def test_s11():print("用例 11:登录之后其它动作 111")# 调用方式三@pytest.fixture(autouse=True)def login3():print("====auto===")# 不是test开头,加了装饰器也不会执行fixture@pytest.mark.usefixtures("login2")def loginss():print(123)
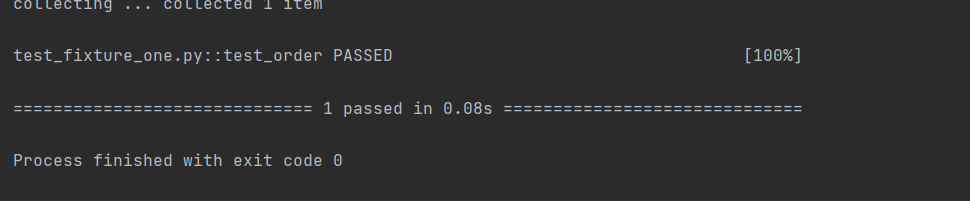
3.1 执行结果

3.2 知识点
● 在类声明上面加@pytest.mark.usefixtures(),代表这个类里面所有测试用例都会调用该 fixture
● 可以叠加多个@pytest.mark.usefixtures(),先执行的放底层,后执行的放上层
● 可以传多个 fixture 参数,先执行的放前面,后执行的放后面
● 如果 fixture 有返回值,用@pytest.mark.usefixtures()是无法获取到返回值的,必须用传参的方式(方式一)
4、fixture 的实例化顺序
● 较高 scope 范围的 fixture(session)在较低 scope 范围的 fixture( function 、 class )之前实例化【session > package > module > class > function】
● 具有相同作用域的 fixture 遵循测试函数中声明的顺序,并遵循 fixture 之间的依赖关系【在 fixture_A 里面依赖的 fixture_B 优先实例化,然后到 fixture_A 实例化】
● 自动使用(autouse=True)的 fixture 将在显式使用(传参或装饰器)的 fixture 之前实例化
#!/usr/bin/env python# -*- coding: utf-8 -*-import pytestorder = []@pytest.fixture(scope="session")def s1():order.append("s1")@pytest.fixture(scope="module")def m1():order.append("m1")@pytest.fixturedef f1(f3, a1):# 先实例化f3, 再实例化a1, 最后实例化f1order.append("f1")assert f3 == 123@pytest.fixturedef f3():order.append("f3")a = 123yield a@pytest.fixturedef a1():order.append("a1")@pytest.fixturedef f2():order.append("f2")def test_order(f1, m1, f2, s1):# m1、s1在f1后,但因为scope范围大,所以会优先实例化assert order == ["s1", "m1", "f3", "a1", "f1", "f2"]
5、关于 fixture 的注意点
添加了 @pytest.fixture ,如果 fixture 还想依赖其他 fixture,需要用函数传参的方式,不能用@pytest.mark.usefixtures()的方式,否则会不生效
@pytest.fixture(scope="session")def open():print("===打开浏览器===")@pytest.fixture# @pytest.mark.usefixtures("open") 不可取!!!不生效!!!def login(open):# 方法级别前置操作setupprint(f"输入账号,密码先登录{open}")
6、fixture 之 yield 实现 teardown
用 fixture 实现 teardown 并不是一个独立的函数,而是用 yield 关键字来开启 teardown 操作
import pytest@pytest.fixture(scope="session")def open():# 会话前置操作setupprint("===打开浏览器===")test = "测试变量是否返回"yield test# 会话后置操作teardownprint("==关闭浏览器==")@pytest.fixturedef login(open):# 方法级别前置操作setupprint(f"输入账号,密码先登录{open}")name = "==我是账号=="pwd = "==我是密码=="age = "==我是年龄=="# 返回变量yield name, pwd, age# 方法级别后置操作teardownprint("登录成功")def test_s1(login):print("==用例1==")# 返回的是一个元组print(login)# 分别赋值给不同变量name, pwd, age = loginprint(name, pwd, age)assert "账号" in nameassert "密码" in pwdassert "年龄" in agedef test_s2(login):print("==用例2==")print(login)
● 如果 yield 前面的代码,即 setup 部分已经抛出异常了,则不会执行 yield 后面的 teardown 内容
● 如果测试用例抛出异常,yield 后面的 teardown 内容还是会正常执行
7、yield + with 的结合
# 官方例子@pytest.fixture(scope="module")def smtp_connection():with smtplib.SMTP("smtp.gmail.com", 587, timeout=5) as smtp_connection:yield smtp_connection # provide the fixture value# 该smtp_connection 连接将测试完成执行后已经关闭,因为 smtp_connection 对象自动关闭时, with 语句结束
8、addfinalizer 终结函数
@pytest.fixture(scope="module")def test_addfinalizer(request):# 前置操作setupprint("==再次打开浏览器==")test = "test_addfinalizer"def fin():# 后置操作teardownprint("==再次关闭浏览器==")request.addfinalizer(fin)# 返回前置操作的变量return testdef test_anthor(test_addfinalizer):print("==最新用例==", test_addfinalizer)
注意事项
● 如果 request.addfinalizer() 前面的代码,即 setup 部分已经抛出异常了,则不会执行 request.addfinalizer() 的 teardown 内容(和 yield 相似,应该是最近新版本改成一致了)
● 可以声明多个终结函数并调用

若有收获,就点个赞吧
0 人点赞
