
Part I Introduction to a problem
Sound is a common means of communication for many animals, including humans. Monkeys cry out a warning when a predator is near, bullfrogs croak to attract female frogs as mates, dolphins, for instance, produce various noises—including whistles, chirps, and clicks—and arrange them in complex patterns and so on. And of course humans can convey their meaning using languages. It is quite obvious that a robot with a sense of sound and ideally ability to understand human speech is much more convenient to interact with. In this lesson we are going to outfit Bittle with sensors that will give it this ability!
Part II Explaining the knowledge
Microphones and sound sensors
Sound is the energy things produce when they vibrate (move back and forth quickly). These vibrations travel through a medium(usually air or water) and make medium molecules move. As the molecules move, they carries energy out from the sound source in all directions. Sound sensors and microphones work pretty much the same way. In a sound sensor, there is a diaphragm (similar to the one you can find in a speaker, but much smaller), that moves back and forth when the sound waves hit it.
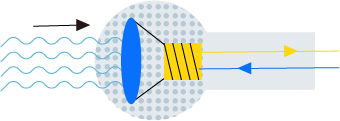
The coil attached to the diaphragm moves with it. As the coil moves back and forth through the magnetic field from a permanent magnet located inside the coil, an electric current flows through it. The current then can be amplified and directly forwarded to speakers (this is how megaphone/electric guitars work for example), or converted into a digital representation. The current from moving coil is an analog signal - louder sounds produce larger voltage and vice-verse. So, by using Analog to Digital Converter we can transform that analog signal from Sound sensor into digital, that the microcontroller in Bittle can “understand”.
Speech recognizer
Another Sound related module in Bittle Sensor pack is Grove - Speech Recognizer.
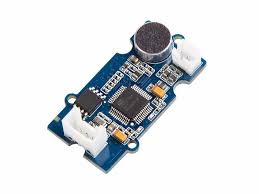
It receives sound waves with omni-directional microphone(means that whether a user speaks into the microphone from the front, back, left or right side, the microphone will record the signals all with equal gain), but then instead of sending analog signal directly to Bittle main board, it processes the sound on on-board microcontroller (ISD9160 based on Cortex™-M0) extracting the data about sound amplitude, frequencies and then performs matching of the processed sound information to templates of per-recorded words. 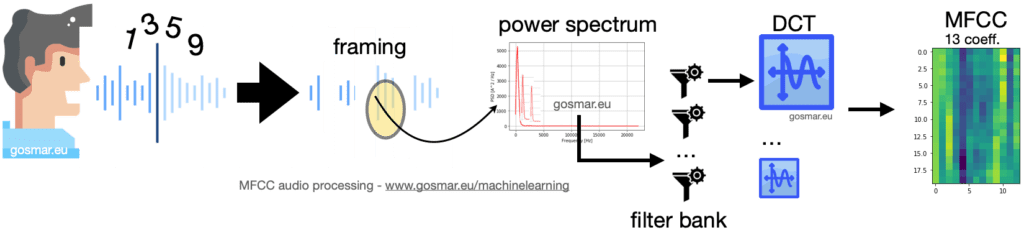
The output of Grove - Speech Recognizer is recognized word index - it can recognize 22 pieces of commands including ‘start’, ‘stop’, ‘Play music’ and so on.
Part III Solving a problem
Task 1: Check Sound sensor raw data
First let’s see raw data values from sound sensor on Serial monitor. To do that connect Grove Sound sensor module to Analog Grove port on Bittle mainboard with Grove cable. 
Then upload the following code to Bittle: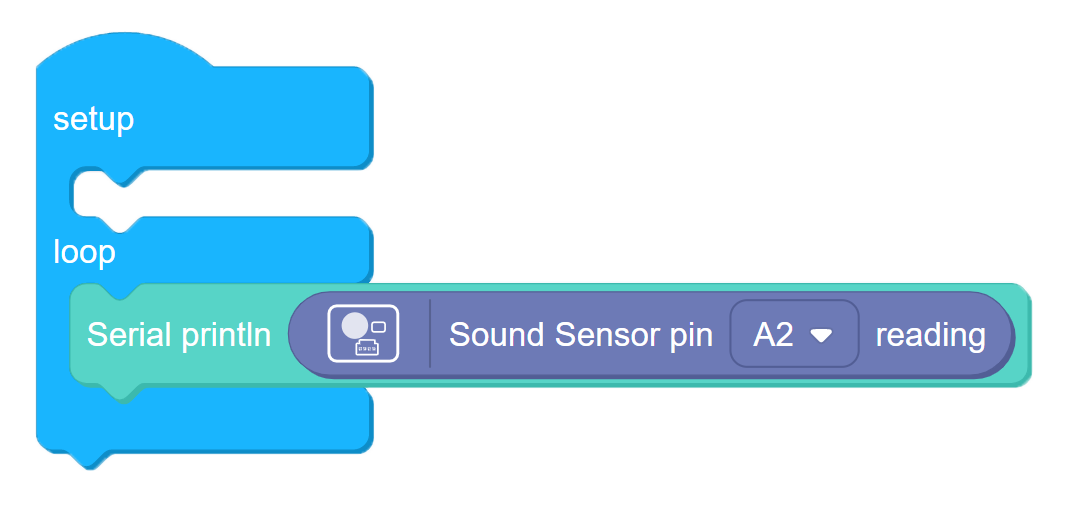
2-1
After code is uploaded, press on Connect button and connect to Bittle. Then press on on Serial monitor button to open Serial monitor where you will be able to see raw data from Sound sensor.
Note Remember to switch baud rate in Serial monitor to 115200 bps, a default baud rate for BIttle. Baud rate is the speed of data transmission between Bittle’s mainboard and your computer, it is measured in bits per second or bps.
Try making some sounds, for example clap your hands or say “Aaah!” to see how the values change.

Activate Bittle with sound
Next we’re going to write code to compare values coming from Sound sensor with a pre-set threshold and if the values are higher than pre-set threshold (meaning a sound loud enough was detected) we make BIttle perform a movement sequence.
2-2
Make Bittle count
In the next program we’re going to implement a more complicated logic using Sound sensor. First we’re going to count the number sound went above threshold of 800 in approximately 1 second of time. Experimentally we can find out that if we tap Bittle on the head once, that count is going to be below 5, and we tap twice it is going to be more than 5 - then according to the number of times tapped we perform different movements.
We also print out the count variable on Serial monitor and change the color of LEDs - green meaning listening for sound (or vibration in case with tapping) and red means executing the movement.
Part IV Expanding the knowledge
To use Grove Speech recognizer, connect it to any of the two digital pins on Bittle mainboard (we’ll use D6 in this example). 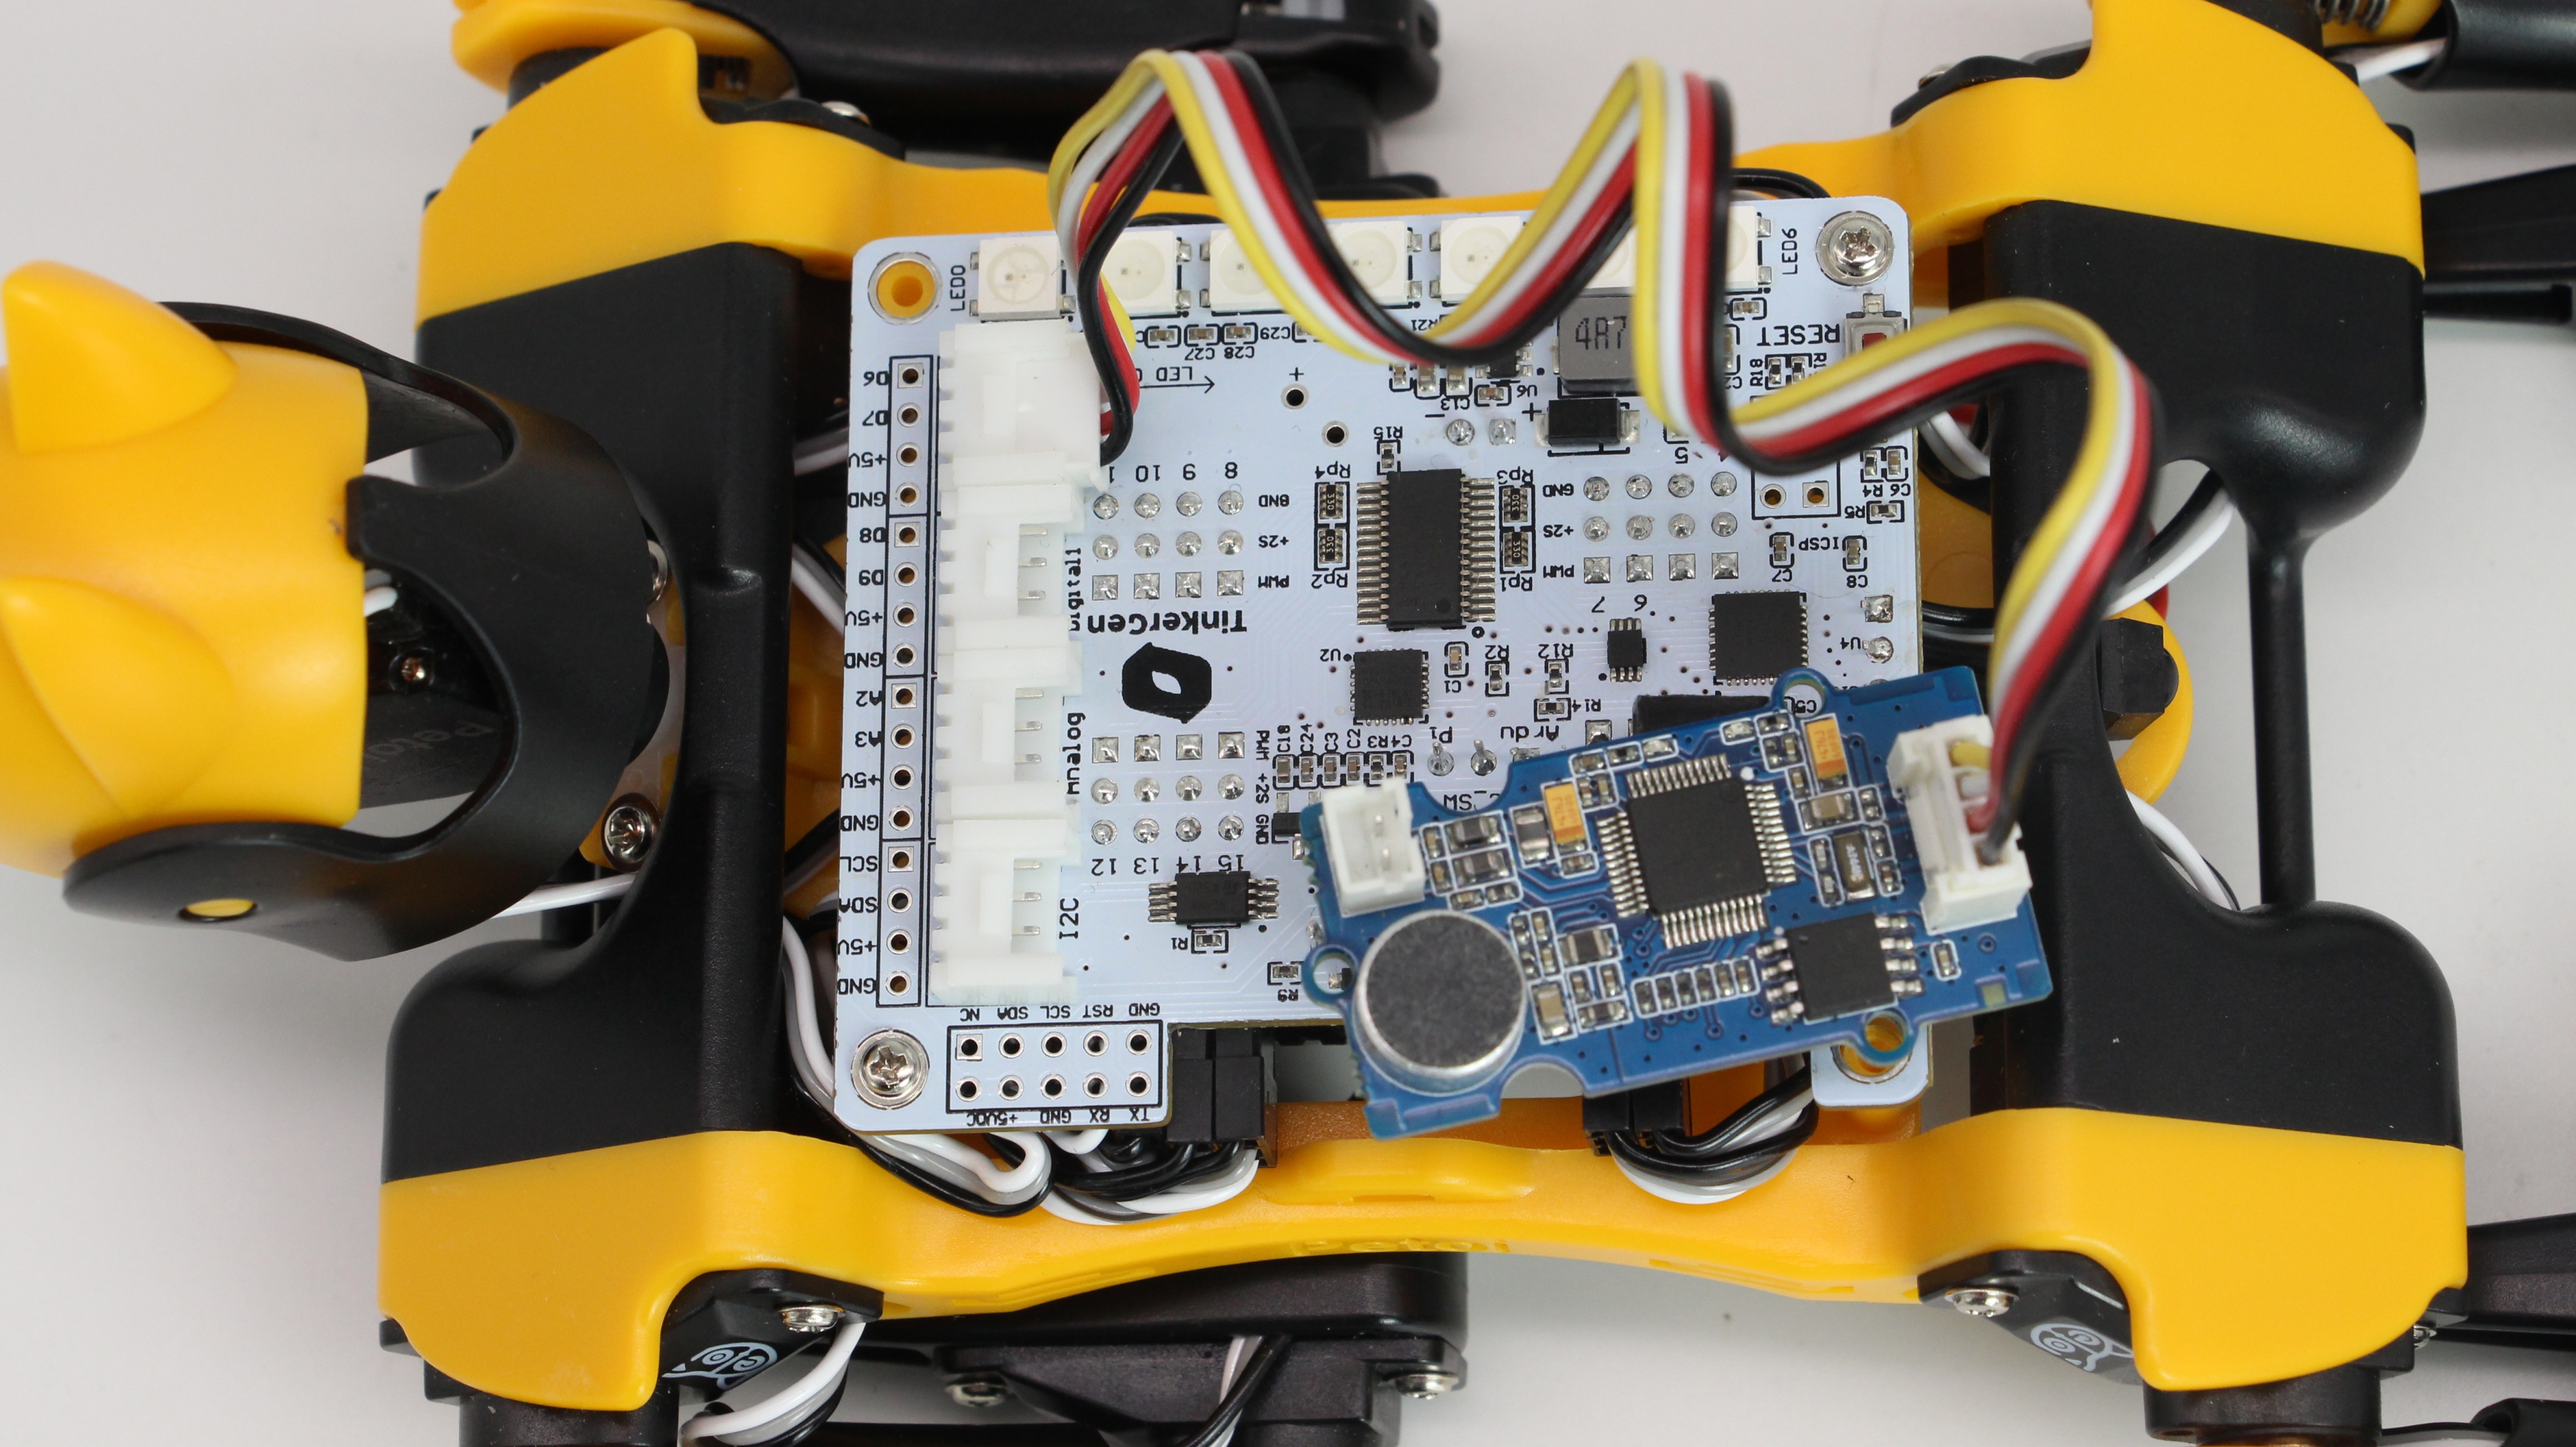
You can find Speech Recognizer blocks in the bottom of Grove Digital category. Then check the output of Speech recognizer with the following sample code: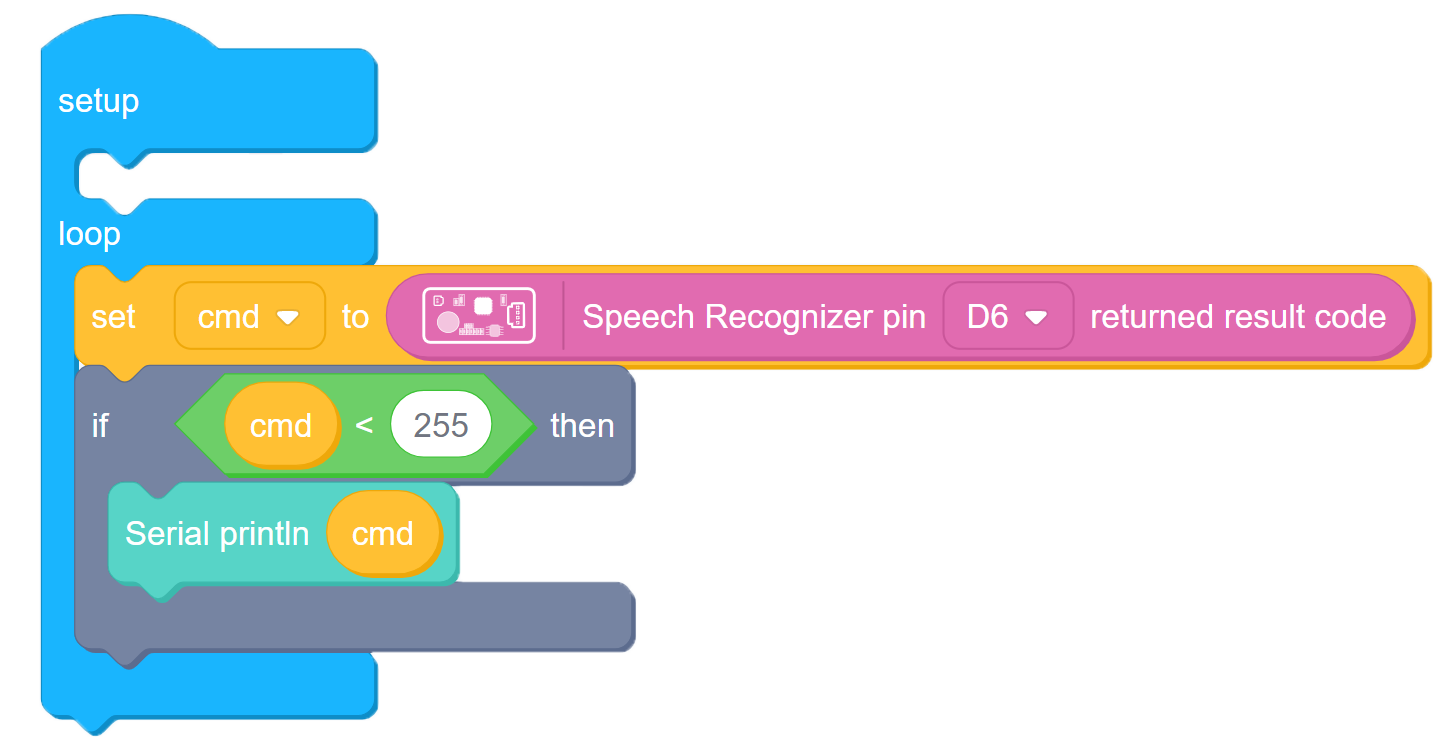
2-4
Once this code is uploaded, activate Speech recognizer module by saying wake-up word(“Hicell”, pronounced as “high-sell”) and then say one of the speech commands from list here:
| Command | Value |
|---|---|
| Turn on the light | 1 |
| Turn off the light | 2 |
| Play music | 3 |
| Pause | 4 |
| Next | 5 |
| Previous | 6 |
| Up | 7 |
| Down | 8 |
| Turn on the TV | 9 |
| Turn off the TV | 10 |
| Increase temperature | 11 |
| Decrease temperature | 12 |
| What’s the time | 13 |
| Open the door | 14 |
| Close the door | 15 |
| Left | 16 |
| Right | 17 |
| Stop | 18 |
| Start | 19 |
| Mode 1 | 20 |
| Mode 2 | 21 |
| Go | 22 |
For actual robot control you can use bool blocks, such as in example below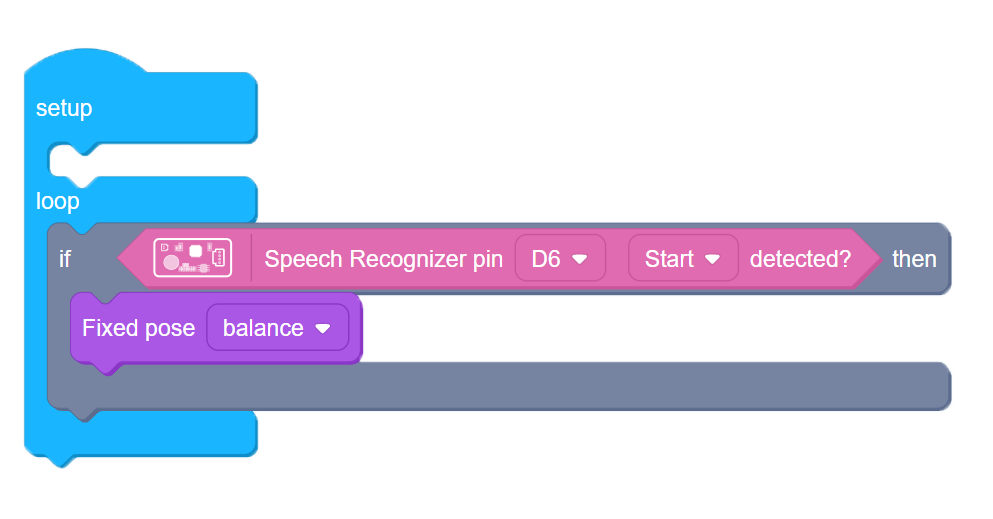
2-5
or first get the value of the detected command and save it in the variable and then compare the value of the variable with known values for commands, as in the picture below: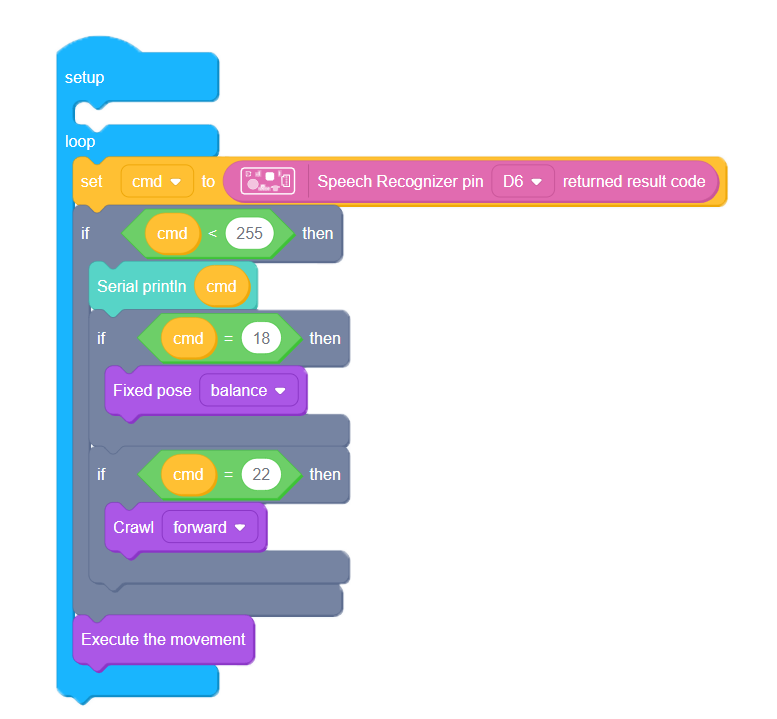
2-6
The first option works well if you only have one command that needs detection. In case you want to check for multiple commands, use the second example!

若有收获,就点个赞吧
0 人点赞
