Introduction to a problem
Real blood and flesh dogs can be taught to understand (albeit partially) human language and trained to do the tasks. Our robotic dog on the other hand cannot just “learn” how to do the tricks and when to do them. It has to be explicitly “told” what to do in form of specific instructions, that can be processed by integrated circuit (also called “computer chip” in more colloquial language). A set of this specific instructions that is executed in sequence is called a program. How to write programs and what are the rules you need to be aware of? Let’s find out!
Note: This lesson is meant as a brush up exercise for people already familiar with Scratch or other graphical coding environment. If you are a total beginner to coding, we recommend you do a series of introductory lessons to graphical programming first, which you can find by going to https://ide.tinkergen.com/ and scrolling down to Codecraft courses section.
Explaining the knowledge
What is a computer program?
A computer program is a series of instructions that tell a computer to perform an action. You can plan a code by drawing a flowchart on a piece of paper.
A flowchart shows a decision-making process that is a bit like a code. Imagine the following situation: a program for turtle to cross the road. If the road is clear, the computer completes the action and the tortoise crosses the road. If it’s not clear, the computer keeps checking until it is. Eventually the tortoise gets to cross the road. A more complicated program would tell the computer what to do in lots of other situations that might happen while crossing the road. 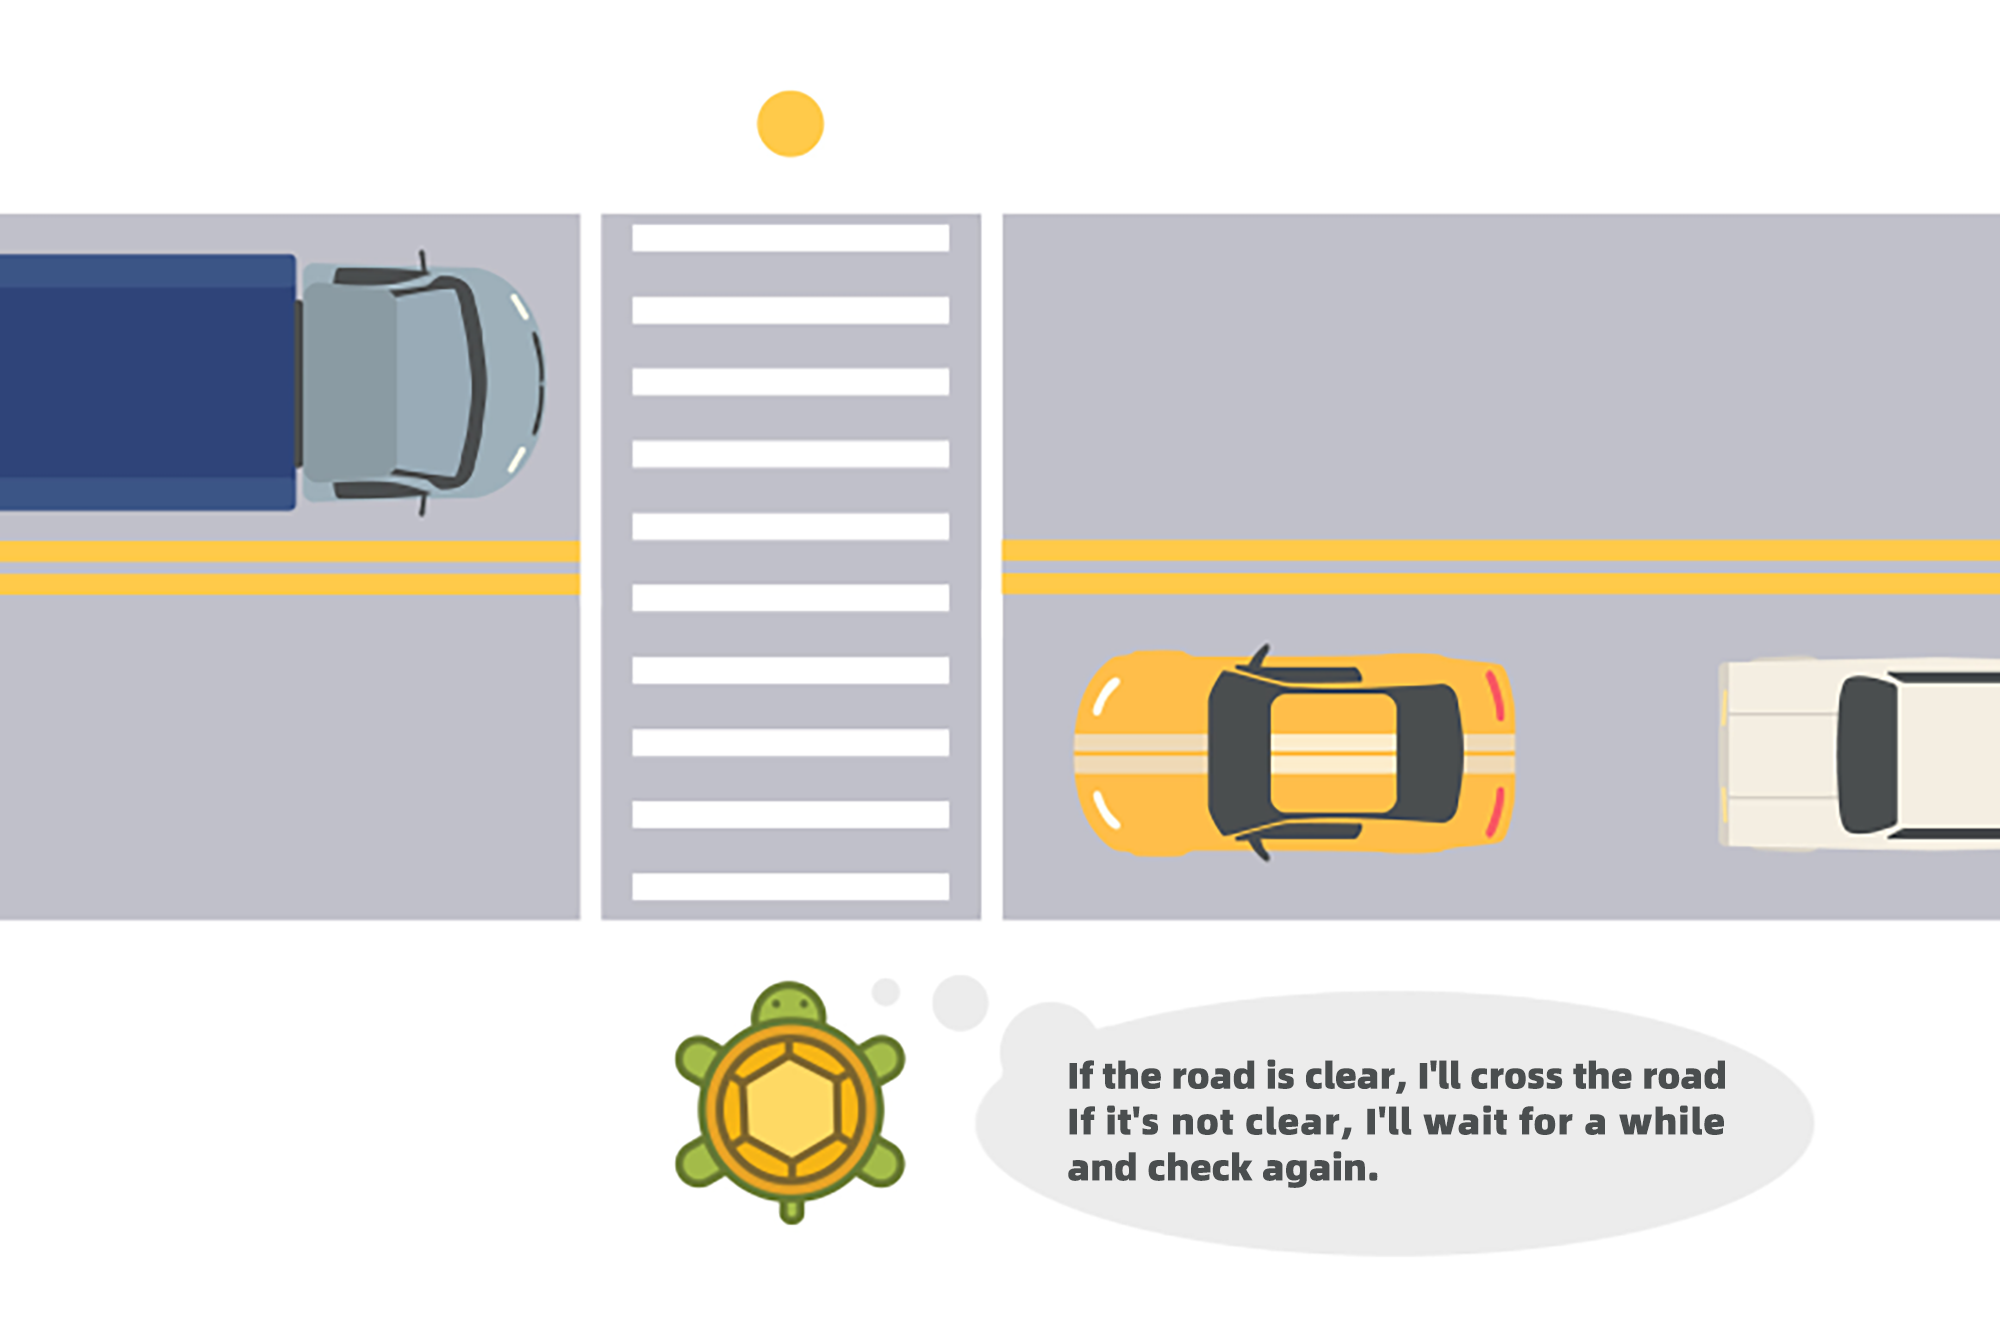
Different programming languages
There are many programming languages our there, some are easy and some are hard to learn. Bittle is programmed using C language, but since it can be quite intimidating for beginners to write code in C, we will use Codecraft, a graphical programming environment, that is based on blocks.
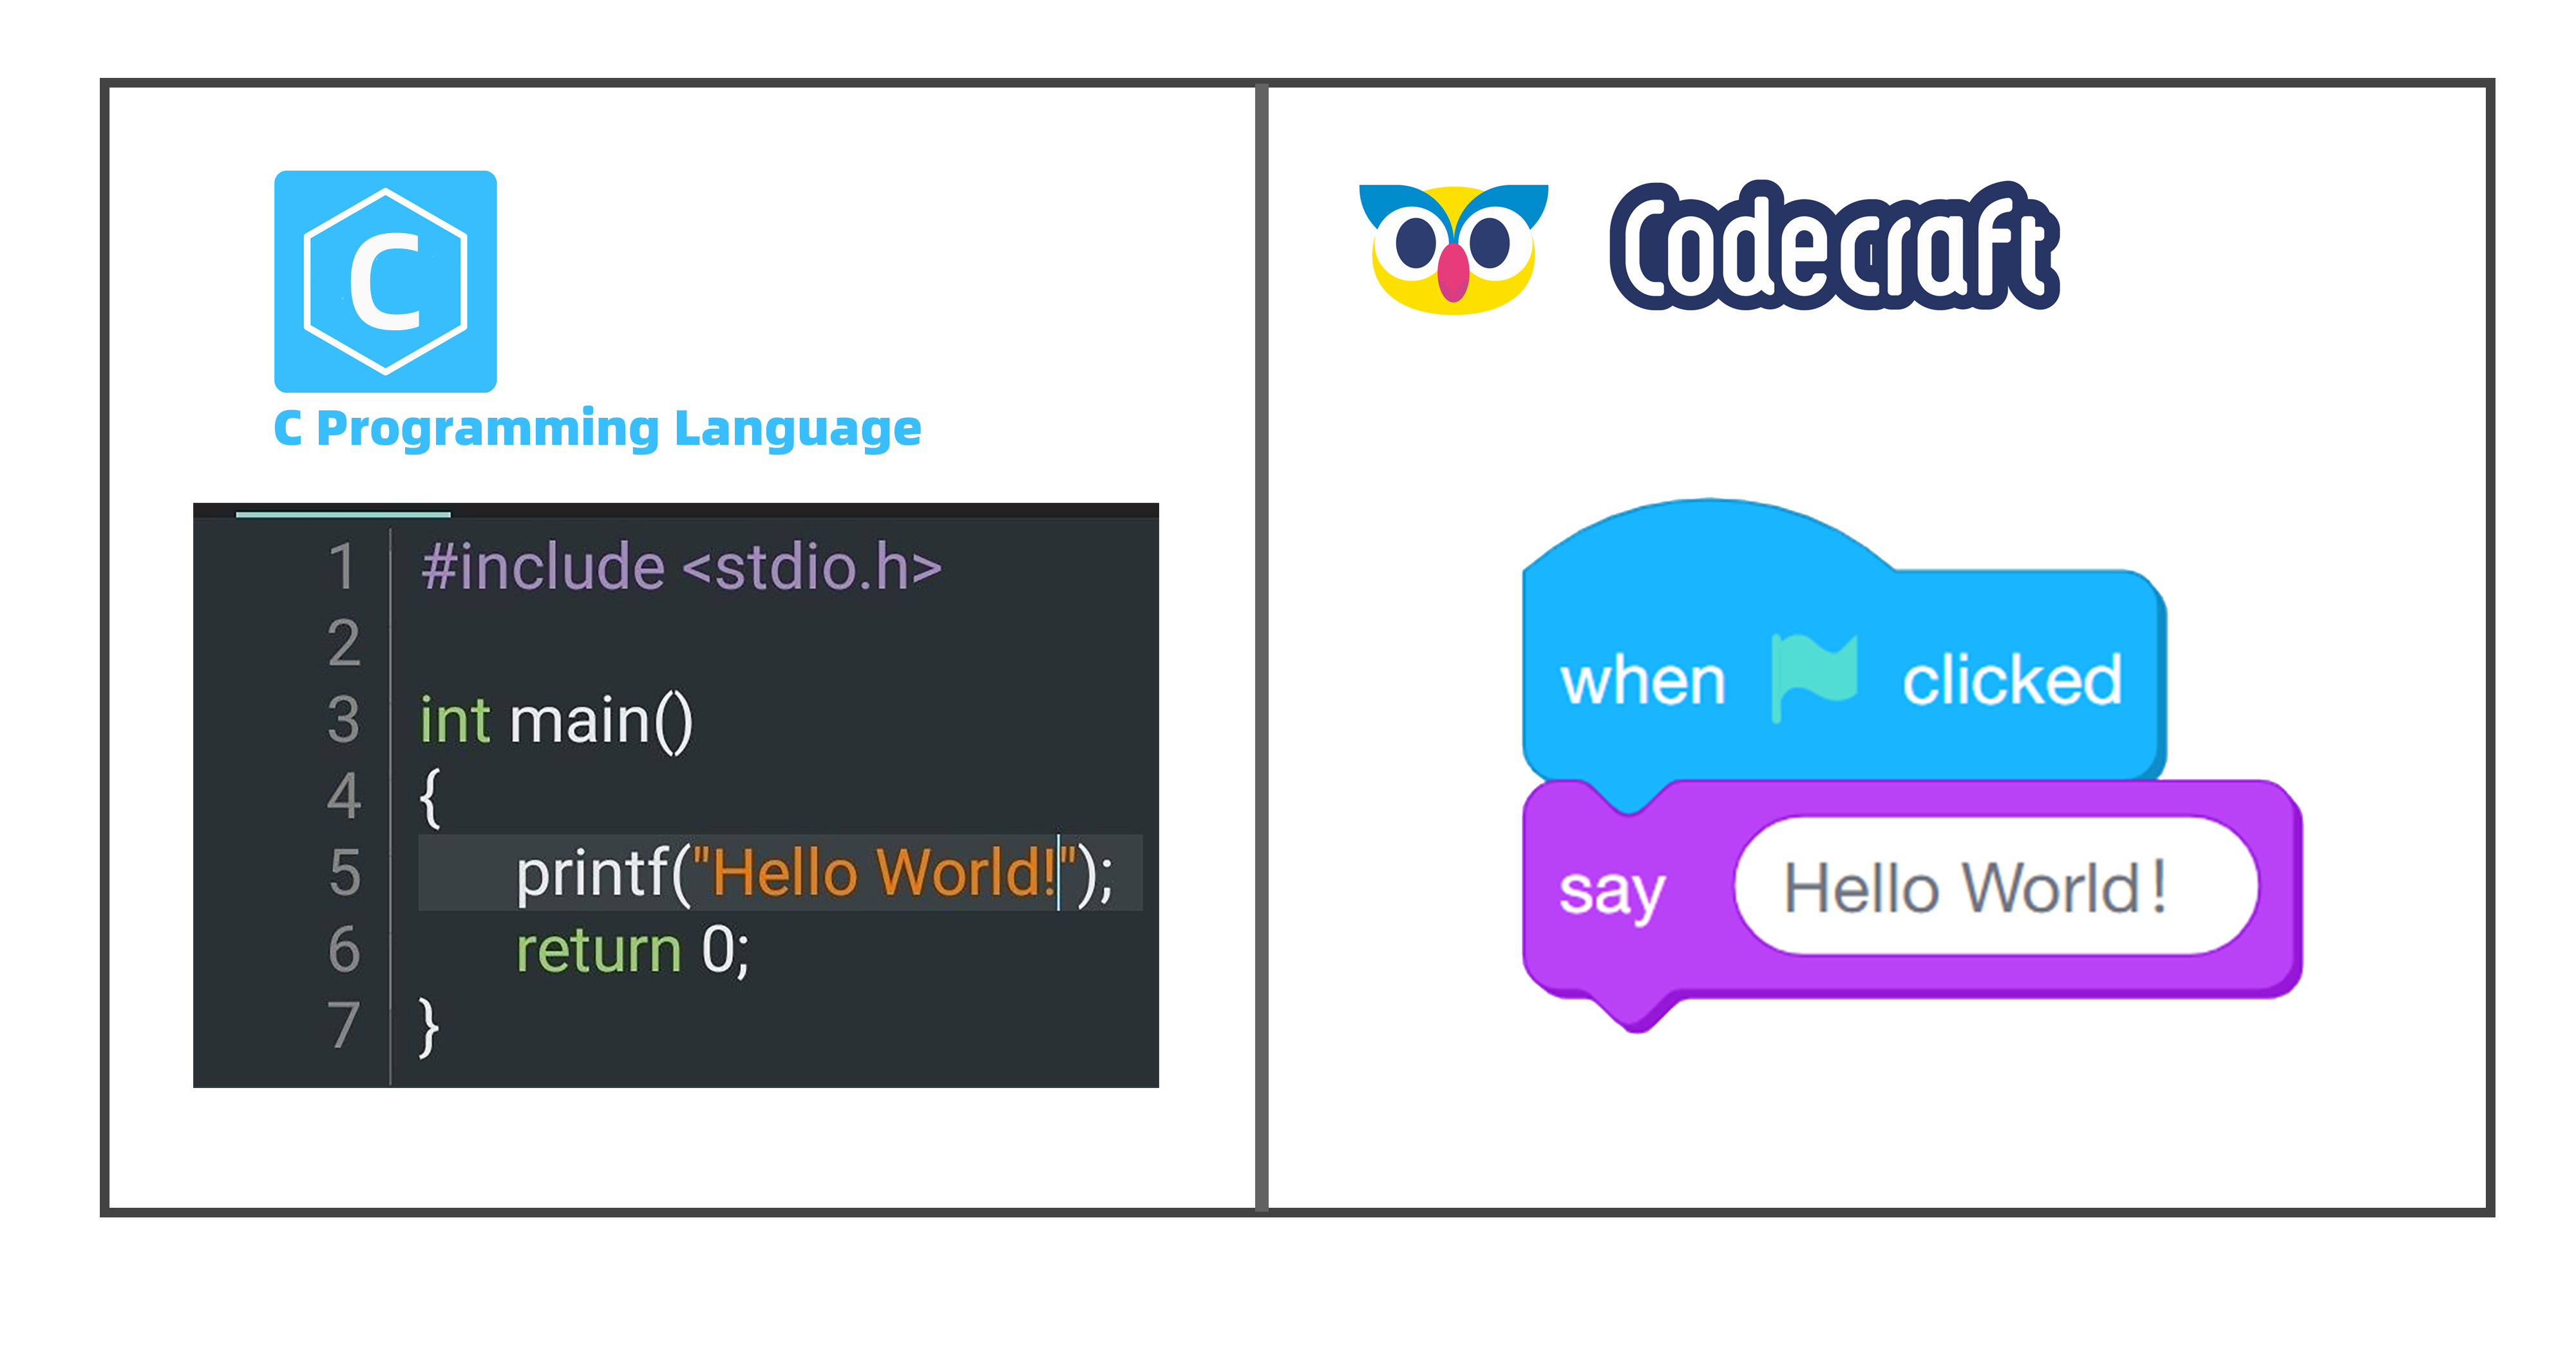
By dragging and connecting different blocks with each other, we get our program, that can be uploaded to Bittle. In the next part we will go over basic concepts of programming and write our first programs for the robotic dog!
Solving a problem
Before starting this lesson make sure you have Codecraft, TinkerGen’s graphical programming software installed on your computer. The installation steps are described in Preface chapter.
Task 1: Rise and shine!
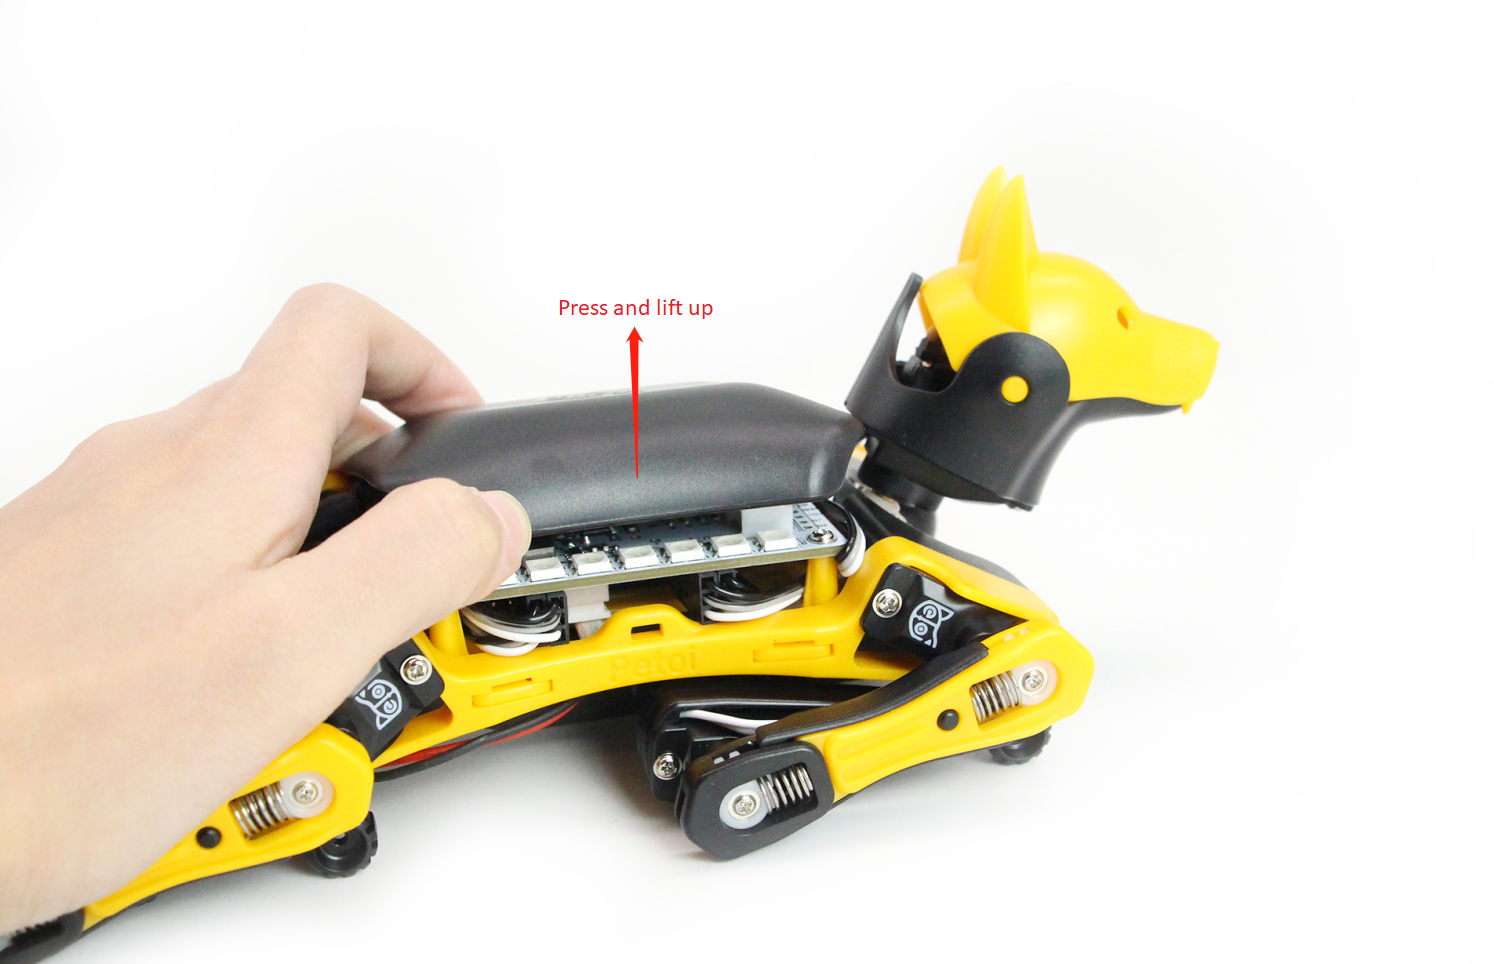
You’re probably eager to try out programming Bittle at this point. Let’s connect Bittle to computer and write our first program for robotic dog. In order to connect BIttle to PC, first, lift up the back cover.
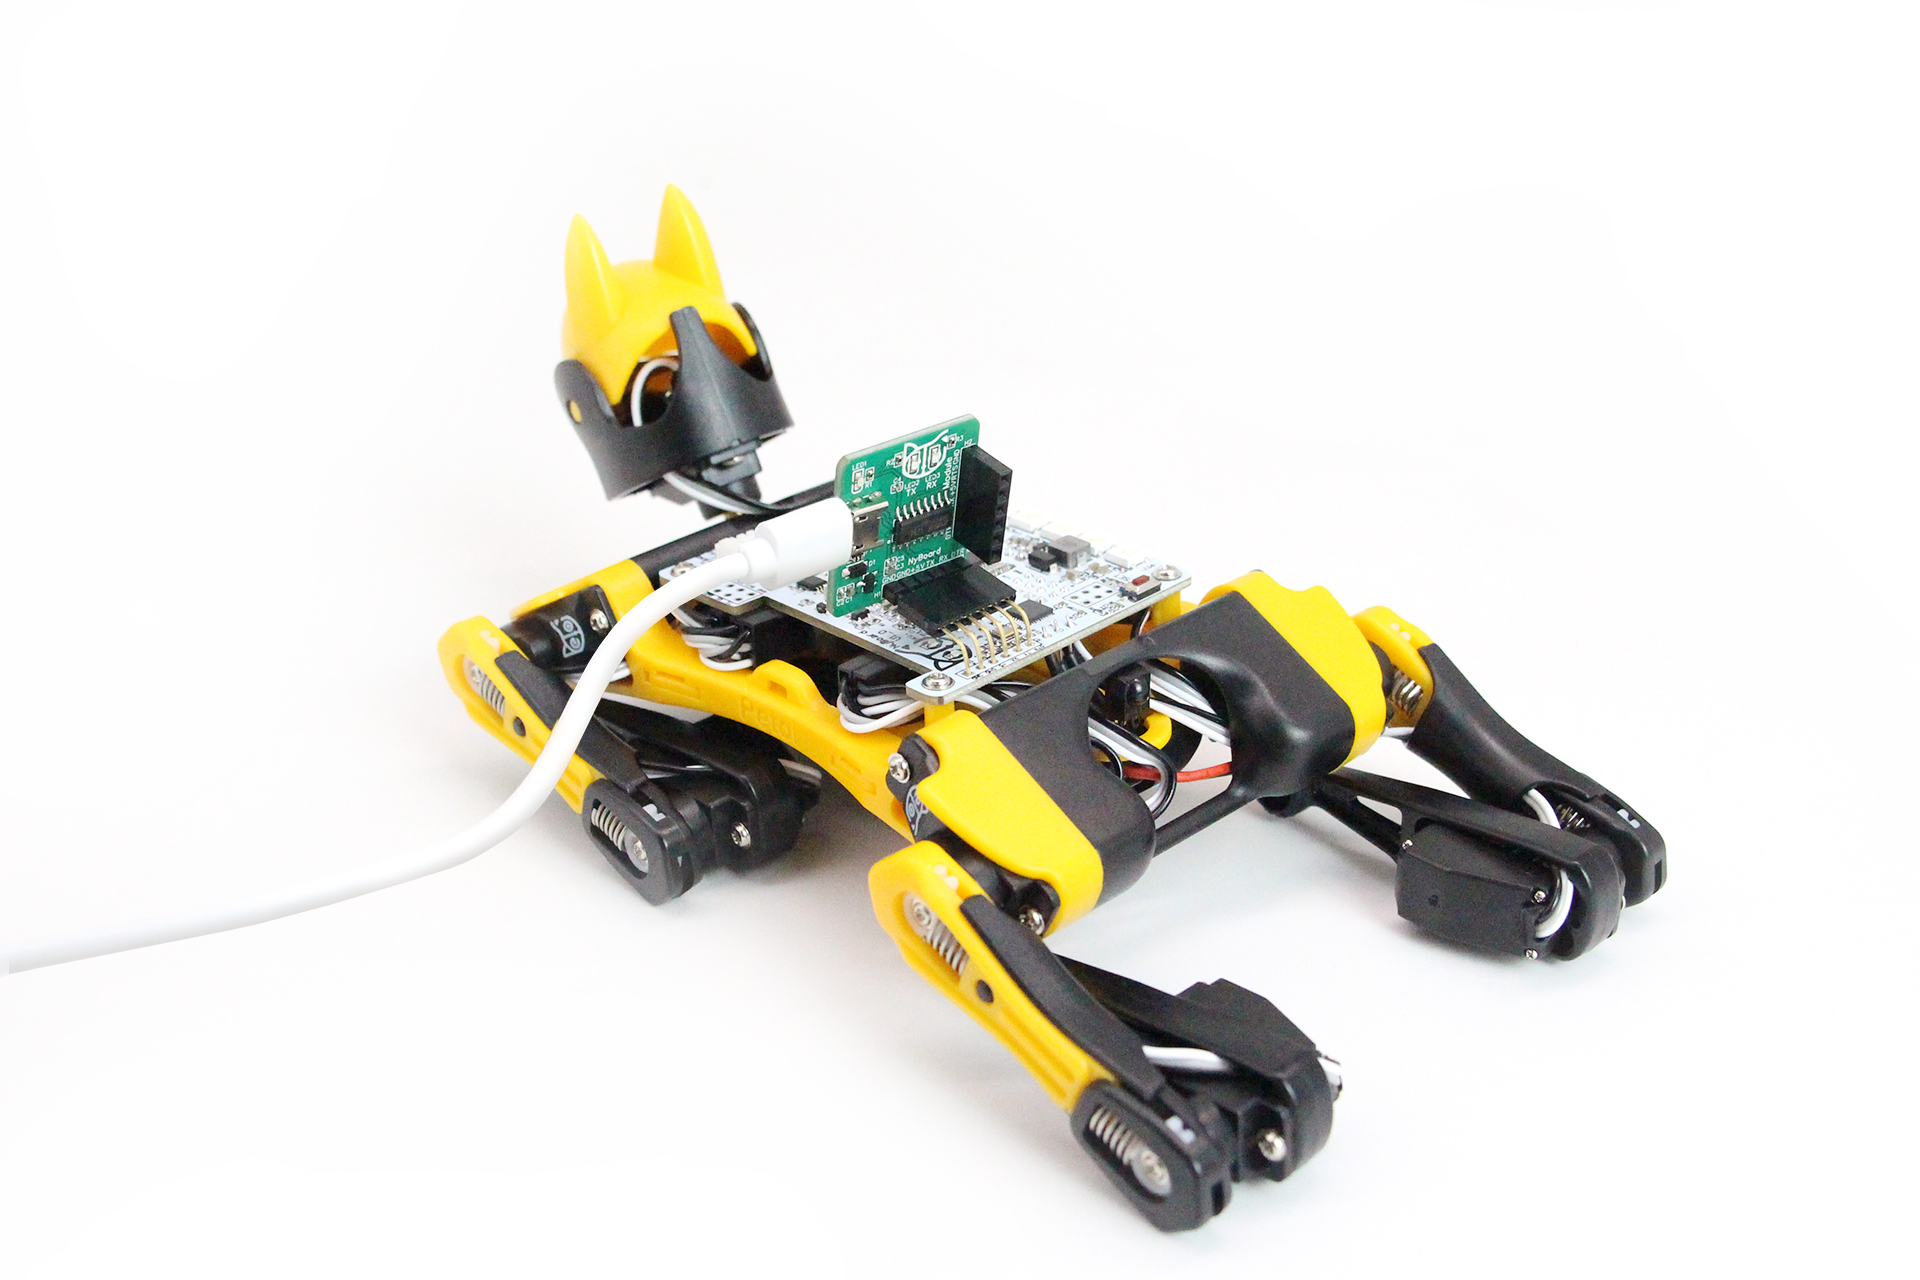
Then attach USB-TTL converter to Bittle’s mainboard - pay attention to pin order! It should be the same on USB-TTL converter and Bittle’s mainboard. Then connect USB-TTL converter to PC with USB.
If you are not sure how to insert USB-TTL converter, pay attention to pins (for example DTR) - they should be matching on USB-TTL converter and BIttle mainboard. Inserting USB-TTL converter may damage the mainboard!
Then switch on BIttle by pressing power button on the battery for 3s and connect USB-TTL converter to PC with provided USB cable.

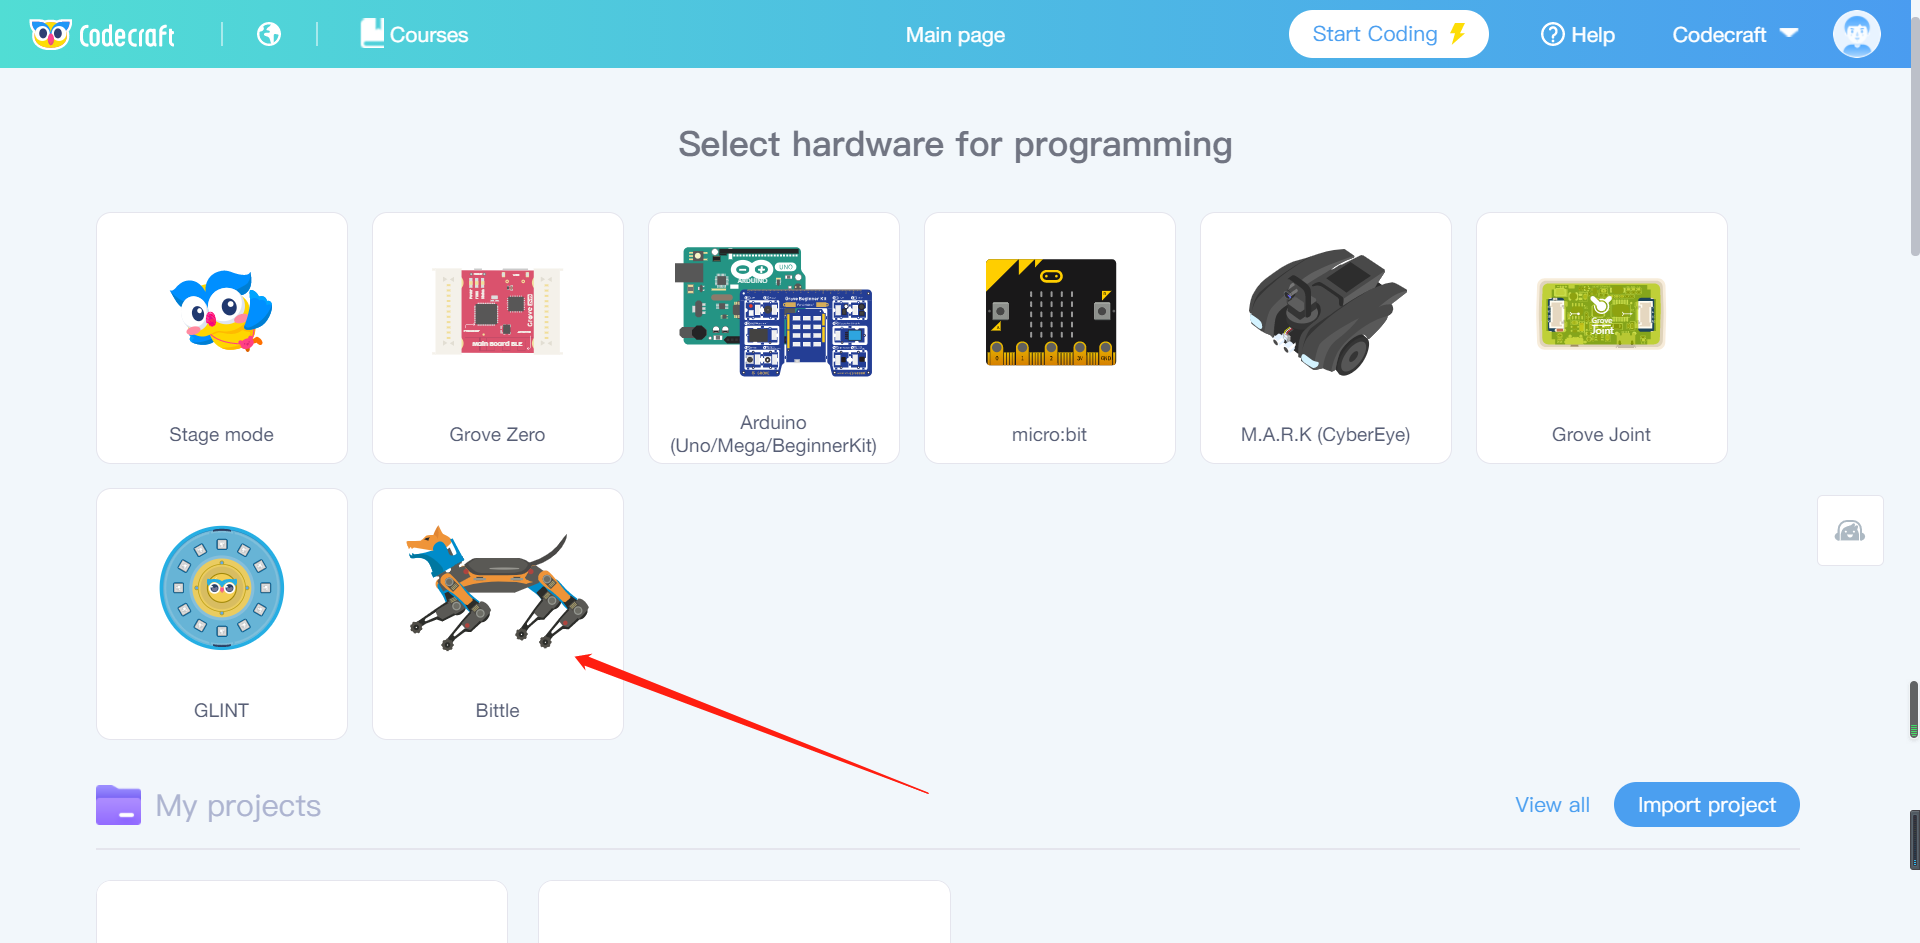
In Codecraft go to Device mode and choose BIttle as device.
The first program we’re going to make is a simple sequence of actions.
If the Bittle board is the old NyBoard V1_0:
First we need to place a setup-loop block into coding area, you can find it in System category. All the blocks placed in setup section are going to be executed just once, on Bittle power up or restart - think of setup section as initialization. The blocks in loop section are going to be executed repeatedly in sequence. Then place Fixed pose balance and RGB LED All set color to … blocks as shown in picture below. You can find fixed pose block in Skill category and RGB LED in system category.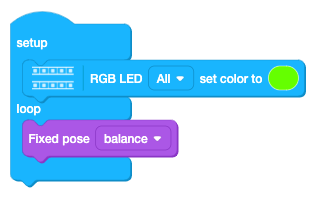
If the Bittle board is the new NyBoard V1_1:
First connect the RGB LED lights to the D6 Grove connector.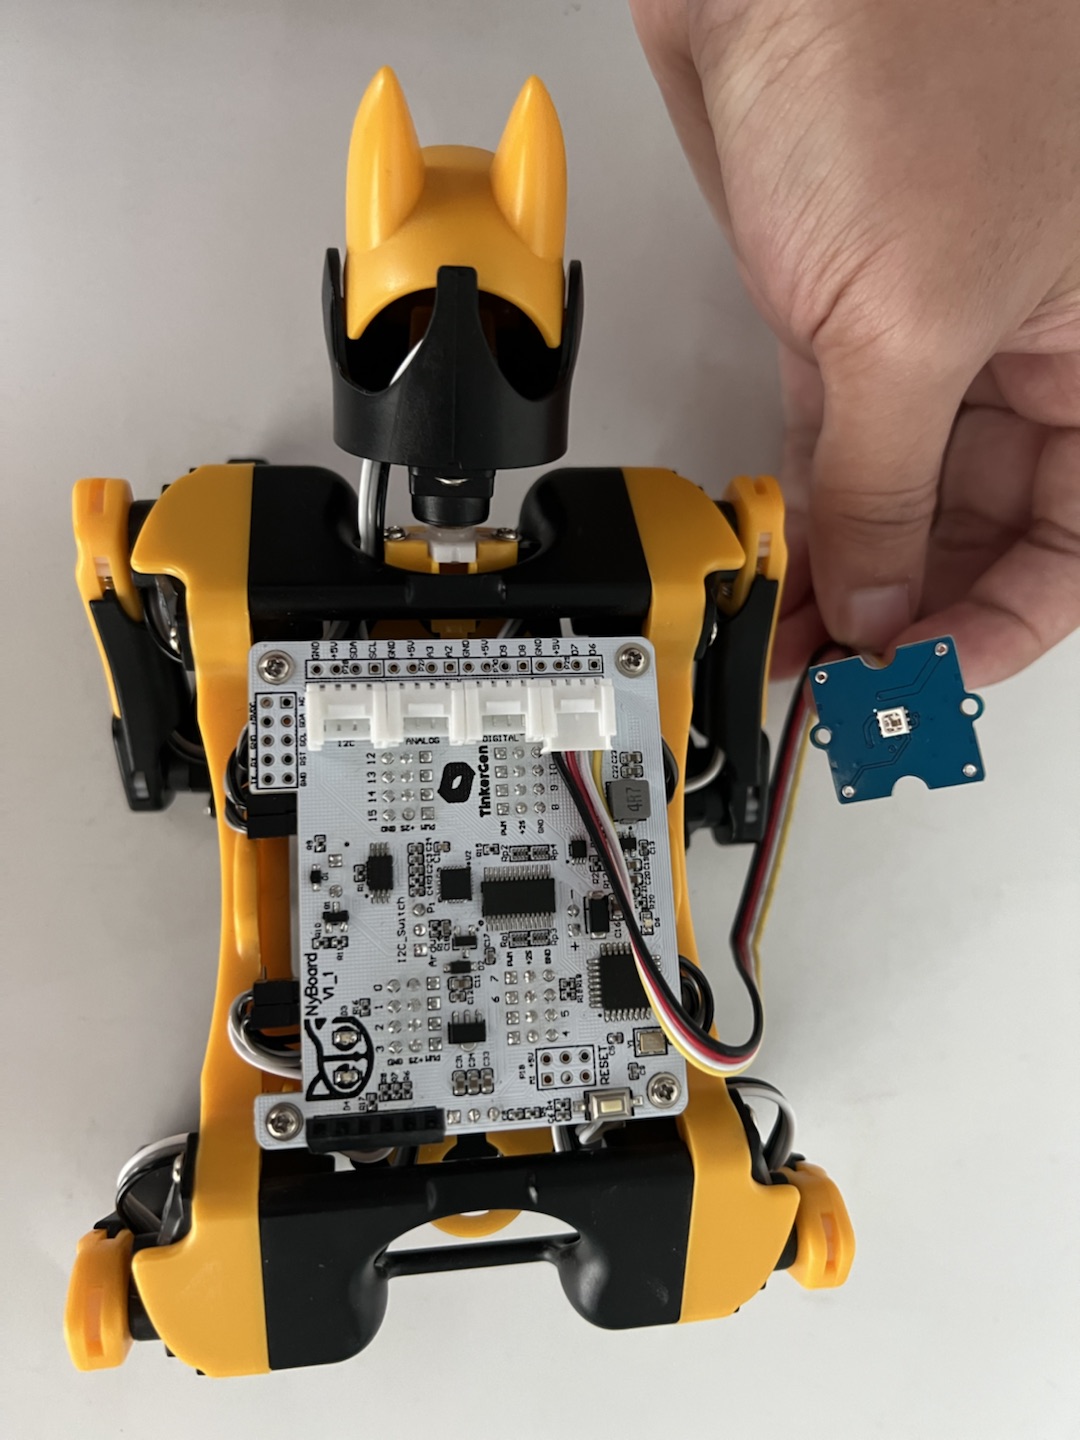
Then we need to place a setup-loop block into coding area, you can find it in System category. All the blocks placed in setup section are going to be executed just once, on Bittle power up or restart - think of setup section as initialization. The blocks in loop section are going to be executed repeatedly in sequence. Finally place Fixed pose balance and WS2813 Mini RGB LED pin D6 show R 0 G 0 B 0 count 1 blocks as shown in picture below. You can find fixed pose block in Skill category and WS2813 Mini RGB LED in Grove Digital.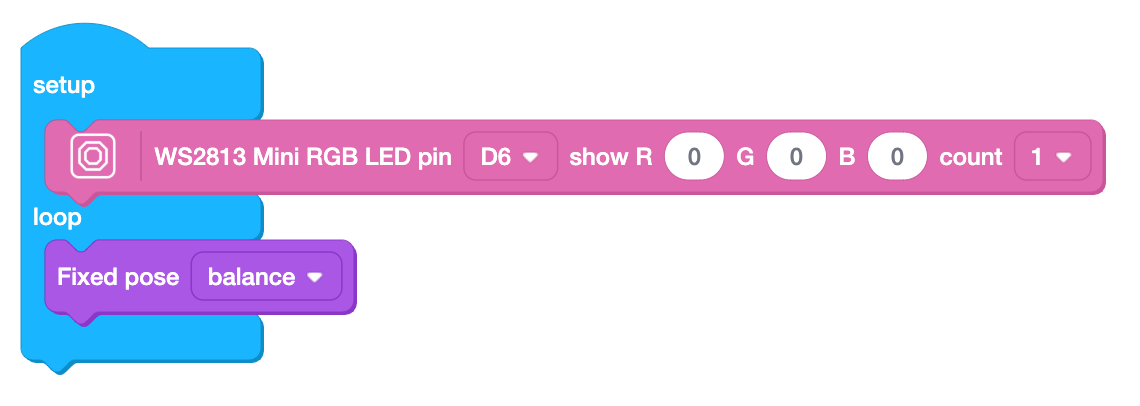
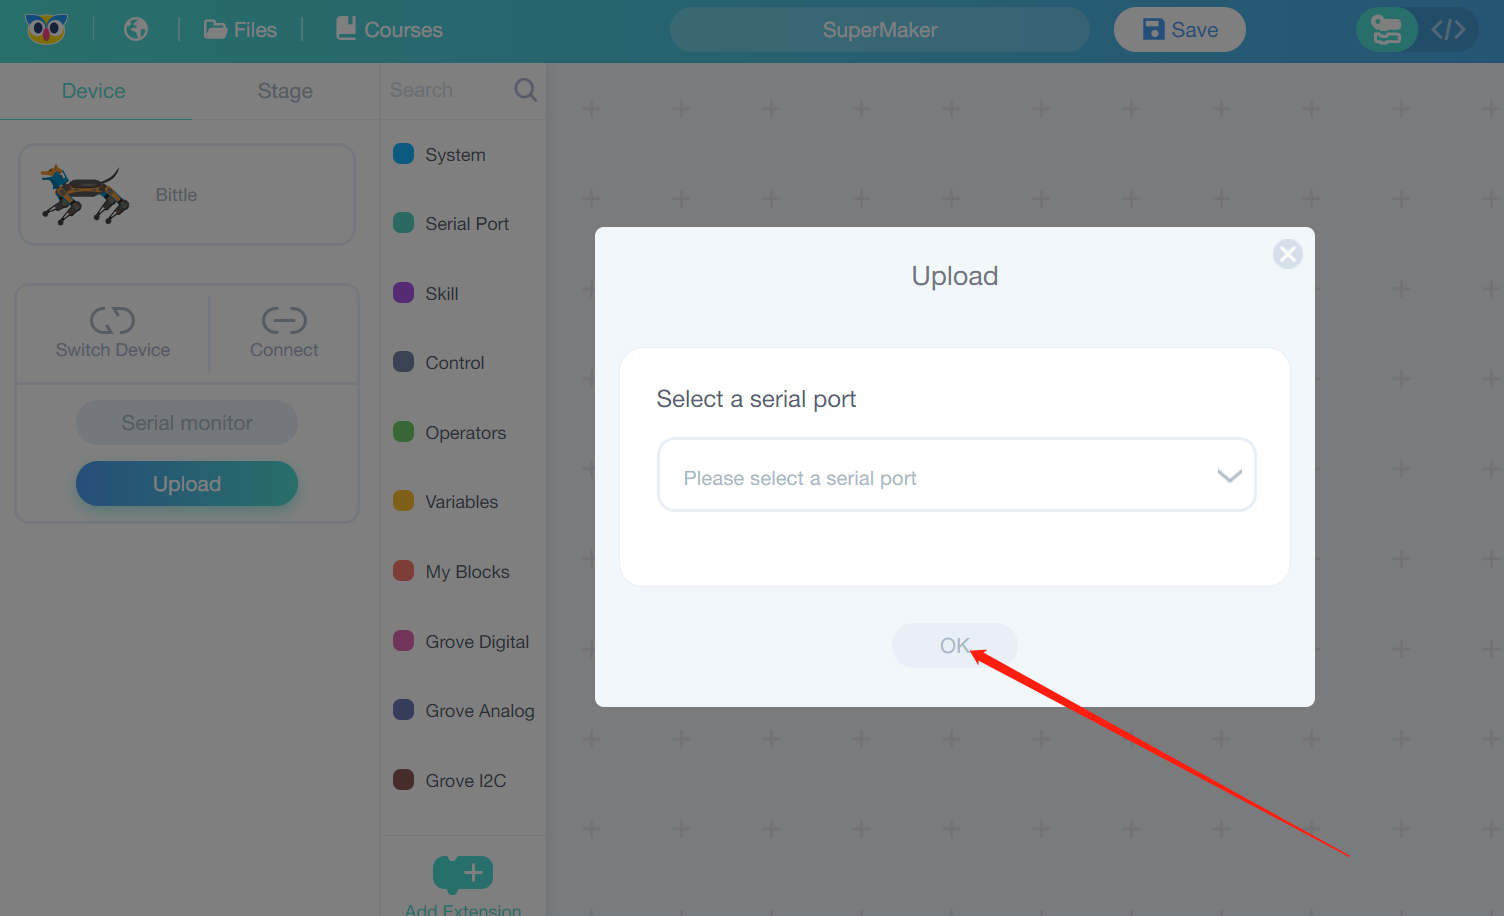
When you finished making the program, press the Upload button and choose corresponding port on your system - if you choose the wrong port, don’t worry, nothing bad will happen. The upload will fail in that case and you will need to choose the correct port.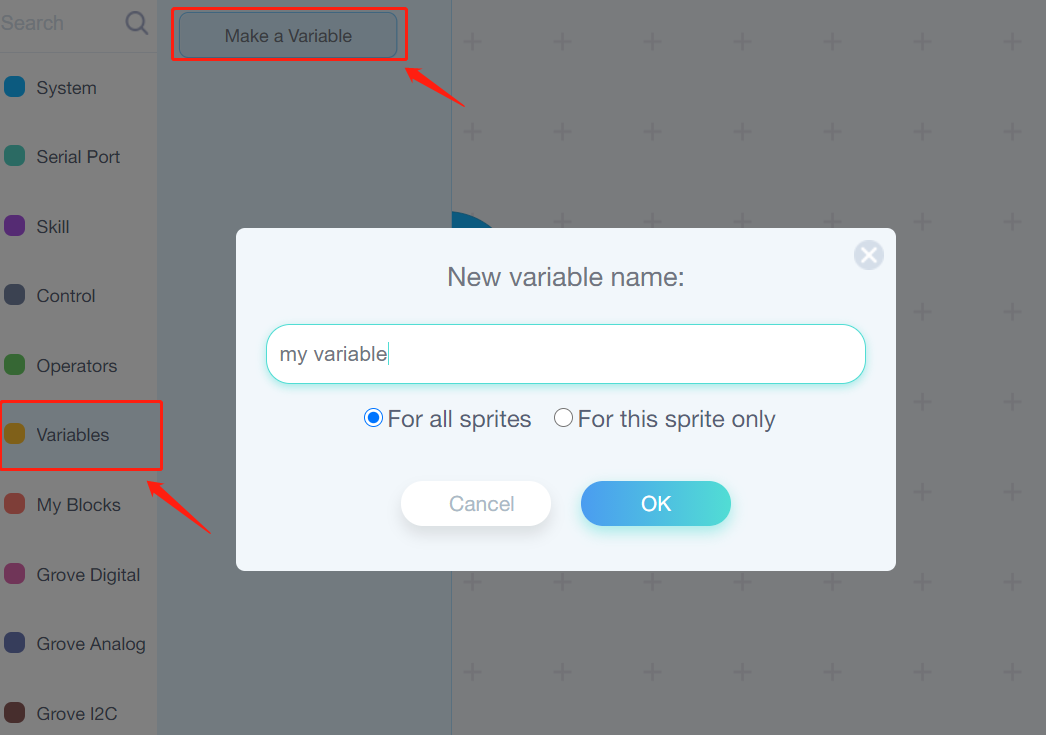
You can try different poses and colors before you continue to the next program!
The experimental results of the old board NyBoard V1_0:
 The experimental results of the new board NyBoard V1_1:
Task 2: Use variables for randomizing LED colors
For the next program, we’re going to use a variable. Variables are “objects” stored in computer memory. It can be a word, a number of a sentence! 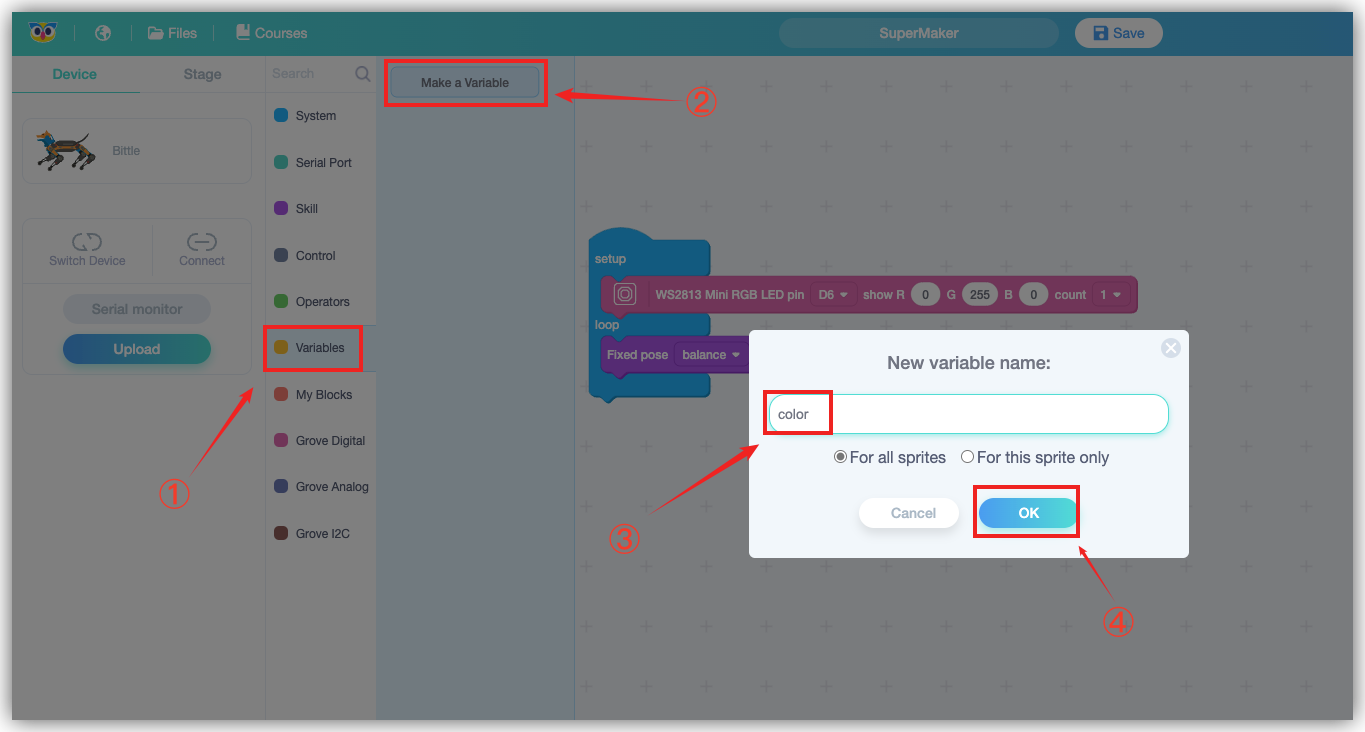
We can set the variable and access it and change it. In this program we define a variable “color” and set it to a random number from 0 to 255 on BIttle start-up. Then we set Red Green Blue values of LEDs on BIttle mainboard to this variable - the result is shiny!
If the Bittle board is the old NyBoard V1_0, the code written is as follows:
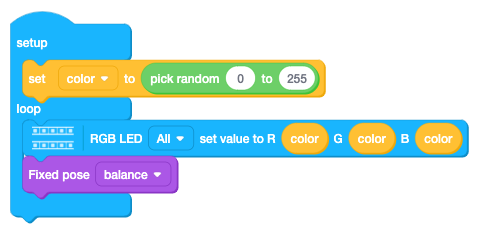
If the Bittle board is the new board NyBoard V1_1, the code written is as follows: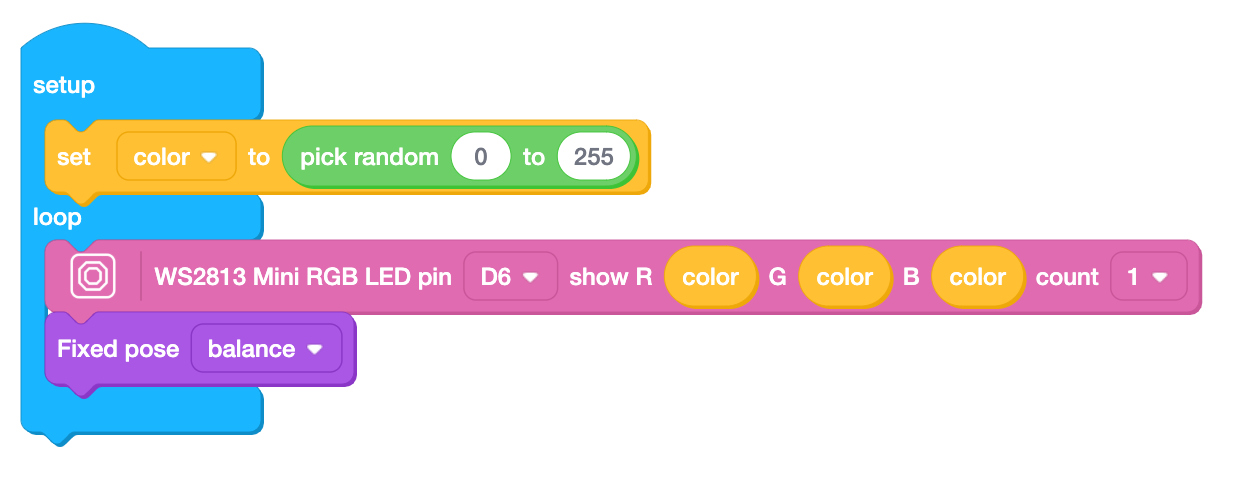
The experimental results of the old board NyBoard V1_0:
The experimental results of the new board NyBoard V1_1:
Task 3: Use conditions to randomize pose
Sometimes we only need to execute a certain action only if condition is right. Think of you crossing the road. You need to make sure there are no cars on the road, then you can cross. In the program you use IF condition to do this check. Make the following program - you can find green EQUAL operator block in Operators category.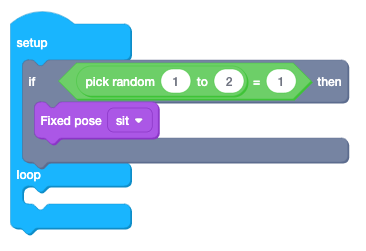
On start-up Bittle’s mainboard will randomly choose a number, 1 or 2. Then if picked number is 1 BIttle will sit down. Otherwise it will do nothing.
Sometimes you want to specify the action that needs to be done if the condition IS NOT met. Going back to our crossing the road example: IF there are no cars, THEN cross the road, ELSE wait. Using ELSE speeds up the execution of the program, because once the IF condition is NOT met, the program immediately executes the ELSE condition. In the following example we set BIttle to sit if random number is one, else(in this case if number is NOT one) sleep. You can change random number range, for example set it to 1 to 100 - the result is going to be the same.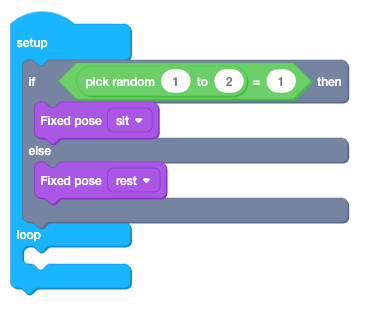 Congratulations, you just made your first programs for Bittle, the bionic robot dog! In the next lesson we will continue reviewing programming concepts and learn more about how to make BIttle move
Expanding the knowledge
Think of your own program using IF, ELSE, conditions and a variable. Write it in Codecraft and make a flowchart.
Summarizing the knowledge

若有收获,就点个赞吧
0 人点赞
