Introduction to a problem
The nature had millions of years to perfect animals movement coordination in a process of natural selection. You might have leaned about evolution and natural selection in the biology class In short, it is survival of the fittest - the living beings that have mastered the movement have better chances of finding prey and/or escaping predators, which in turn means they are more likely to survive and pass their genes to the next generation by having offspring. The downside is of course that it takes a lot of time to achieve perfection. When making robots we don’t have that much time and take the road of scientific exploration and engineering instead. Let’s learn more about Bittle movement capabilities and how it achieves them.
Explaining the knowledge
In a nutshell, Bittle achieves movement coordination by combining the data from sensors and adjusting for it when performing pre-defined movement sequences. What does that mean in practice? The control chip on the mainboard, Arduino 238p receives the information about Bittle orientation from gyroscope and speed from accelerometer.
Gyroscope
A gyroscope is a device that uses Earth’s gravity to help determine orientation. Traditional mechanical gyroscope consists of a freely-rotating disk called a rotor, mounted onto a spinning axis in the center of a larger and more stable wheel. As the axis turns, the rotor remains stationary to indicate the central gravitational pull, and thus which way is “down.”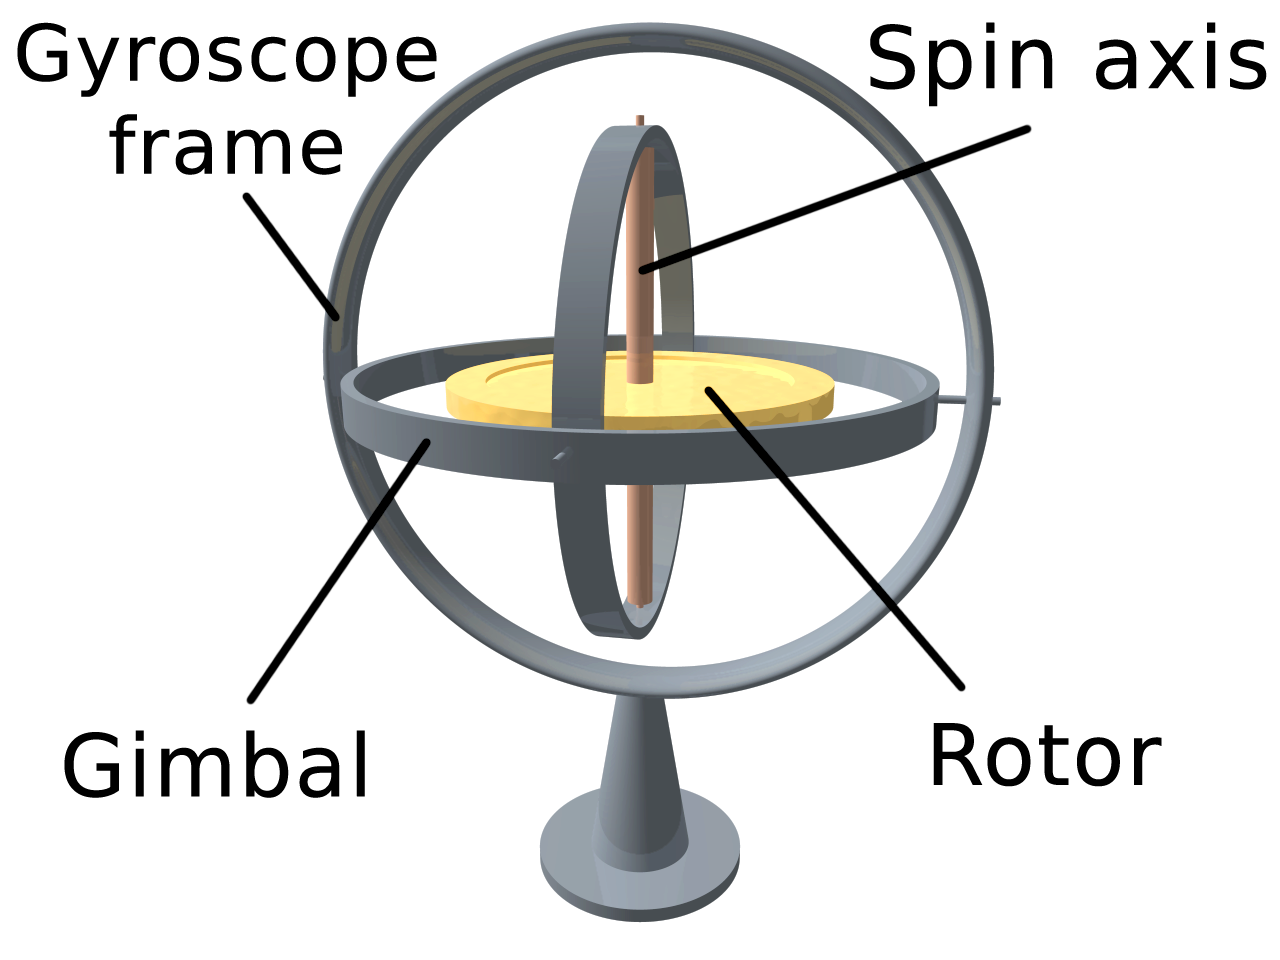
Accelerometer
An accelerometer is a compact device designed to measure non-gravitational acceleration. When the object it’s integrated into goes from a standstill to any velocity, the accelerometer is designed to respond to the vibrations associated with such movement.
Of course there are no rotating discs or other large mechanical structures inside of our robot - instead it uses MEMS gyroscope and accelerometer, where MEMS stands for micro-electromechanical system, a miniature machine that has both mechanical and electronic components.
Bittle movement sequences
Bittle mainboard has sequences for movements saved in its memory, here is one for trotting for example: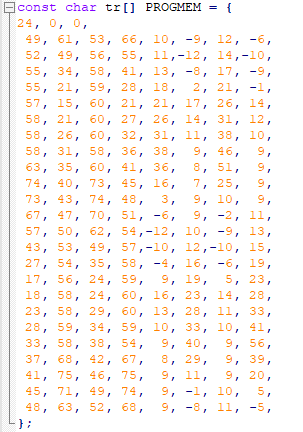
The numbers here are angles for every joint - so at the first step of trot, the first servo will turn to angle 49, the second servo will turn to angle 61 and so on. When our robot actually performs the movement it changes the angles slightly according to the data from sensors to better maintain the balance. For example if gyroscope detects tilt to the right, the servos on the right side need to balance that out.
 It’s of course a simplified explanation, but it is enough for us to understand the basics - and advanced users can have a look at Bittle source code at https://github.com/PetoiCamp/OpenCat to get detailed view into internal software that keeps robot dog in balance.
Solving a problem
If you open Skill category, which contains various skills for Bittle you will see that these can be divided into three different types:
- movements
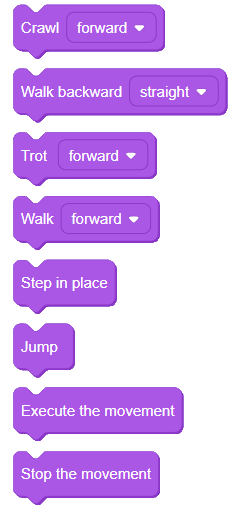
These blocks activate skills that move Bittle in space, allowing it to walk, crawl, trot and jump.
- Fixed poses

These blocks activate skills that corresponds to static pose, such as sitting, calibration, etc.
- Sequences
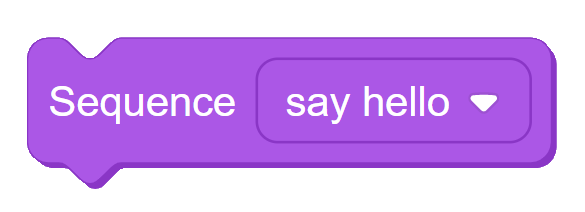
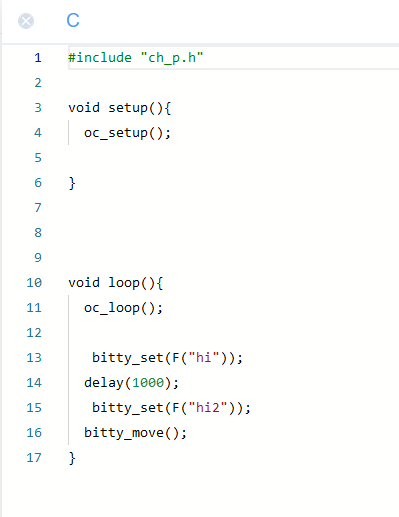
These blocks correspond to sequences of static poses, you can think of them as composite fixed poses. If you switch between blocks mode and code mode, this is the code you will see generated for the following sequence of blocks: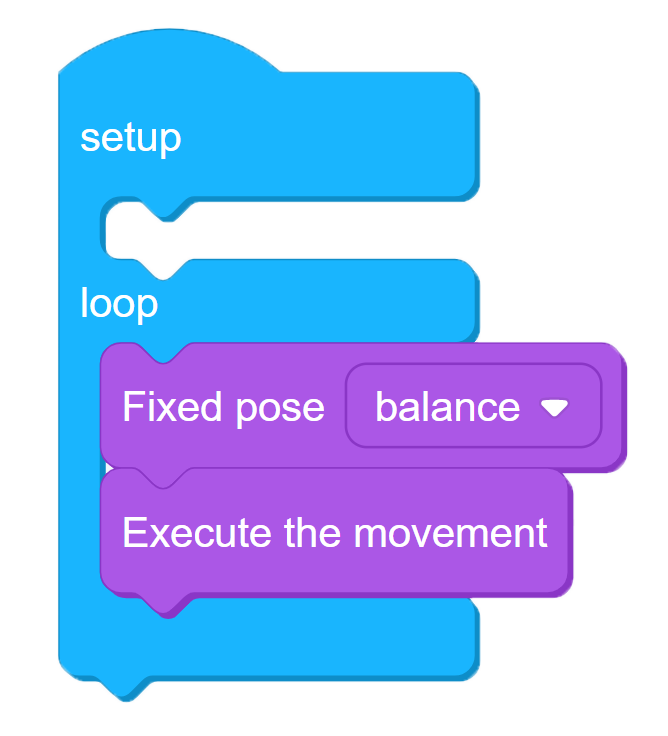
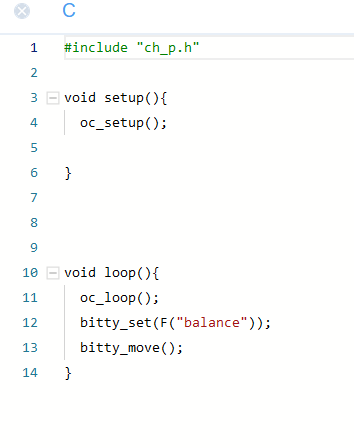
And for program that has a sequence block, the code will be: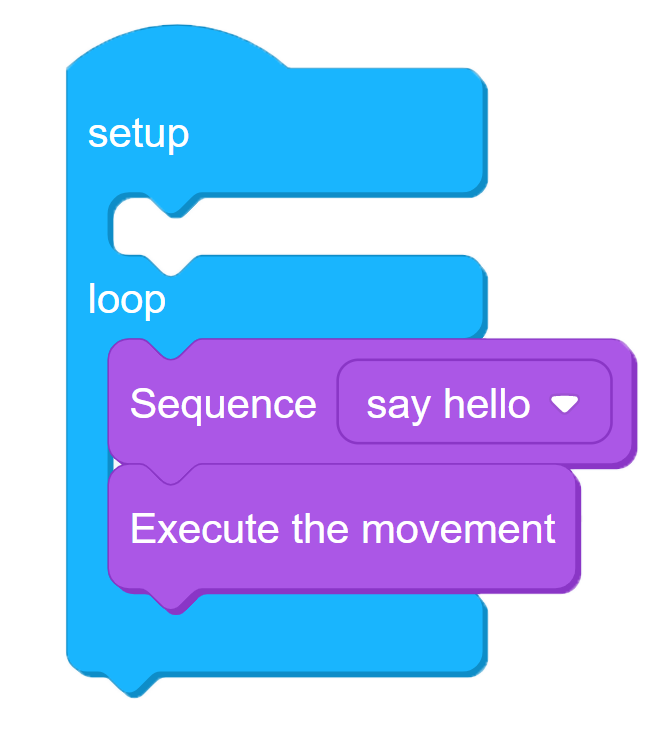
Task 1: Make Bittle trot forward
So, how do we make BIttle move? The simplest code for movement includes at least three blocks:
- setup-loop block
- set movement block
- execute movement block
Connect BIttle to PC as described in previous lesson and upload the following code: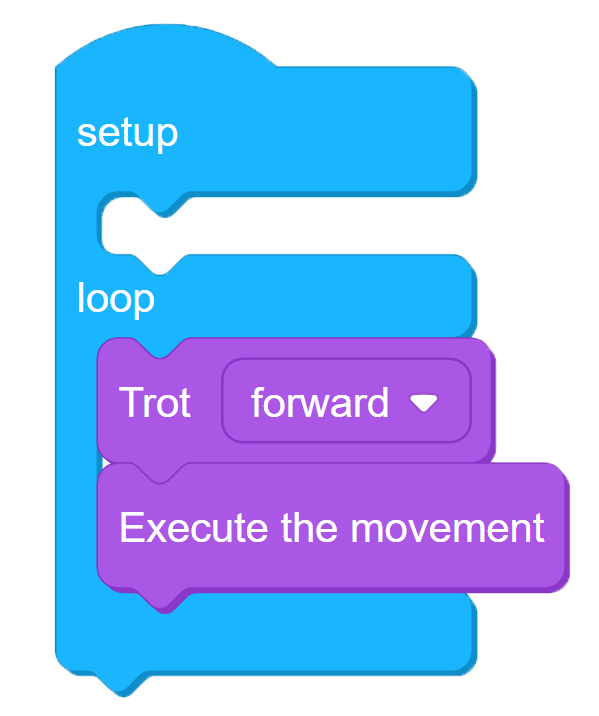
4-1
This code will make Bittle trot forward. Keep in mind that Execute the movement block is necessary!
Task 2: Make Bittle walk forward and then backward
Now, what if you want Bittle to run forward and then backward? Will this code work?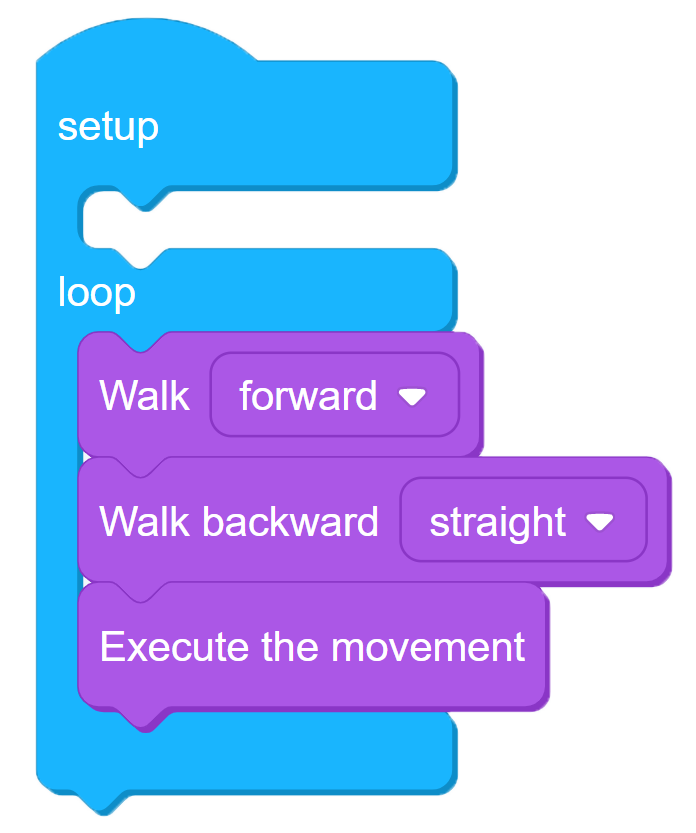
This code will not yield the result you wanted - BIttle running forward and then backward. Instead our robot dog will step awkwardly in place. What’s wrong? Well, the set movement blocks only set the movement to be executed - the execution of movement happens in Execute the movement block.
This is quite different from wheeled Arduino robots you might have handled before. Unlike wheeled robots, which only require a simple ON/OFF command given to the motors to start and continue the movement, Bittle requires a sequence of joint angles to be read from memory and sent to joint servos - and this is a continuous process.
So, what is the right way to make program for walking forward and backward? We will need to use while or for loop for that. In this case let’s make use of repeat block to allow Bittle to walk forward for 1000 frames and backward 1000 frames.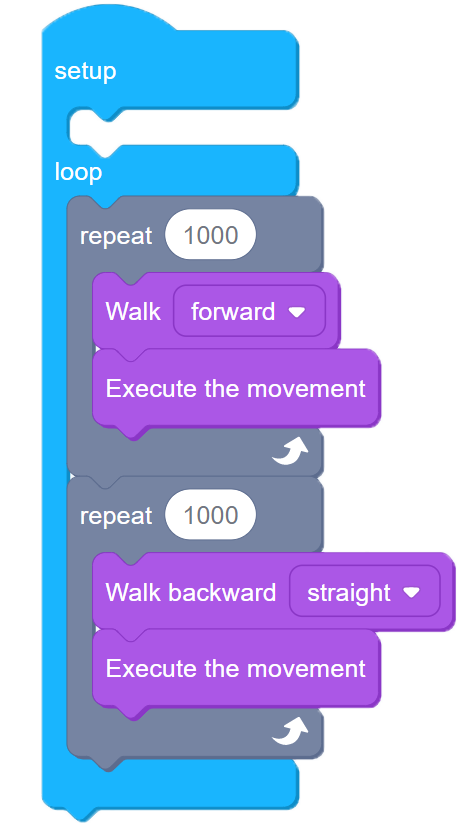
4-2
The word frame here refers to a single step in the gait sequence. Remember the long list of numbers you saw earlier in this lesson?
One frame of movement is one line in this array, each line specifies the angles for each joint. Don’t worry if it seems confusing now, we’ll discuss it in more details in later lessons.
Task 3: Make Bittle trot forward for random amount of time
Using operator blocks and repeat until block we can make Bittle execute an action until a certain condition is met. For example let’s write code for Bittle to walk until random number picked is larger than 1000: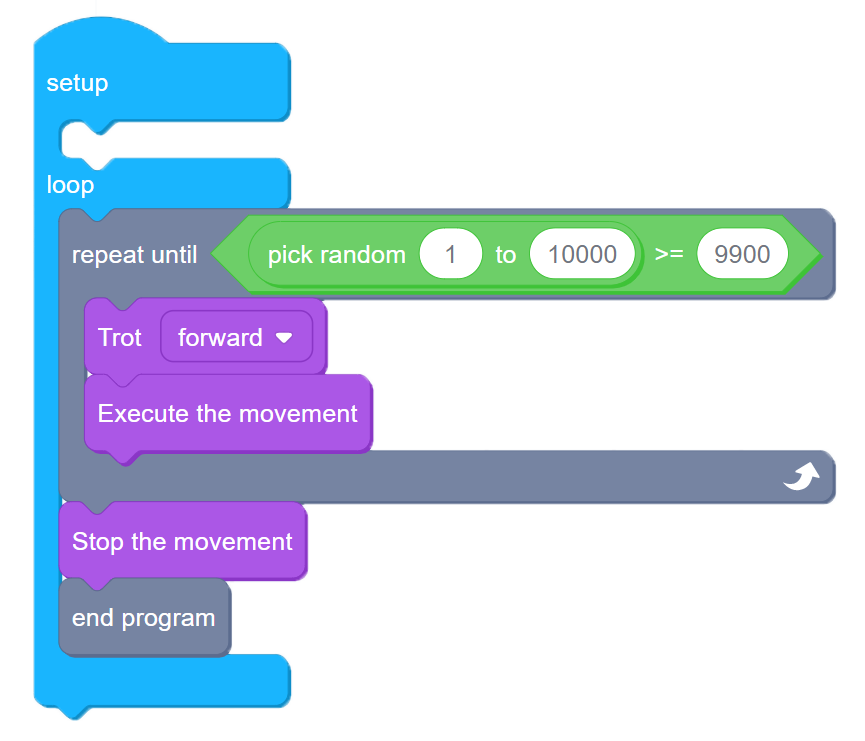
4-3
You’ll notice that after uploading program, Bittle will trot for a random period of time and then stop.
Expanding the knowledge
Our Bittle is an intricate system - all the joint angles must be properly centered when in rest position. The process of joint servo angles adjustment is called calibration. Your Bittle already has all servos calibrated, otherwise it wouldn’t be able to walk properly. However after some time, the calibration process might need to be repeated. If you notice that your Bittle doesn’t walk properly, perform this simple calibration routine.
Connect Bittle to PC and then in device mode, with Bittle selected click on Connect and choose the corresponding COM port, then click Connect. After that click on Add Extension and choose Calibrate Servos extension. 
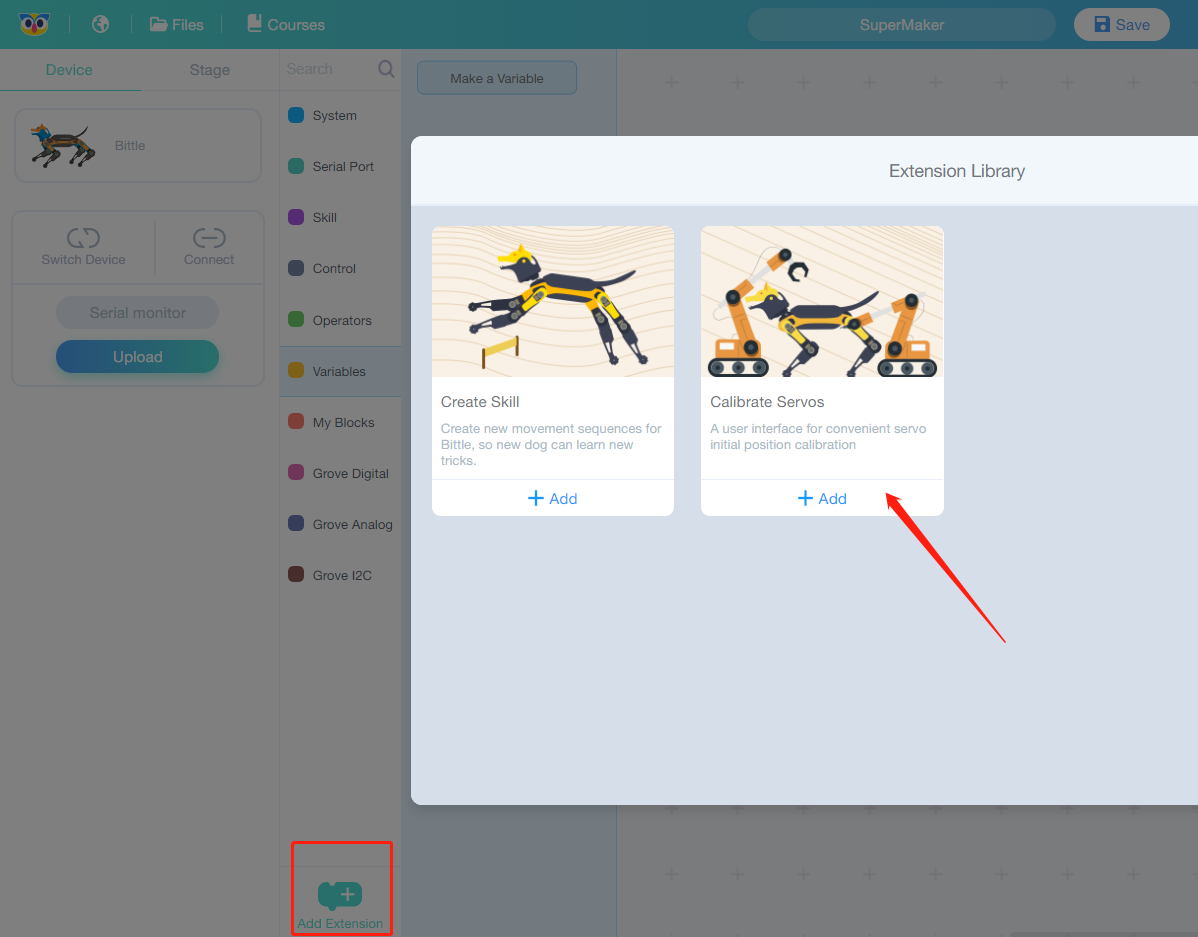
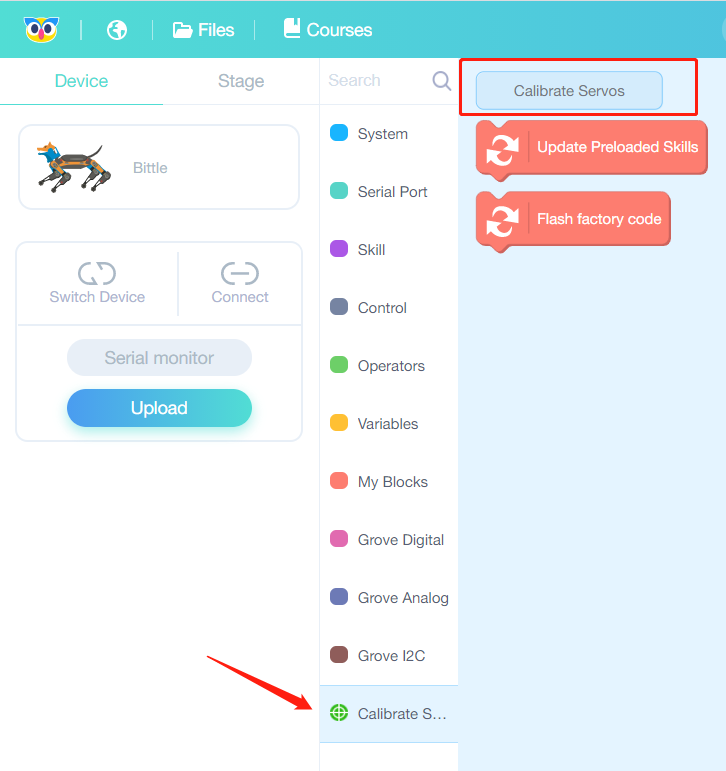
Open newly-appeared Calibrate Servos category and press on Calibrate Servos button.
Bittle will enter calibration pose. On your PC screen you will see the following interface:
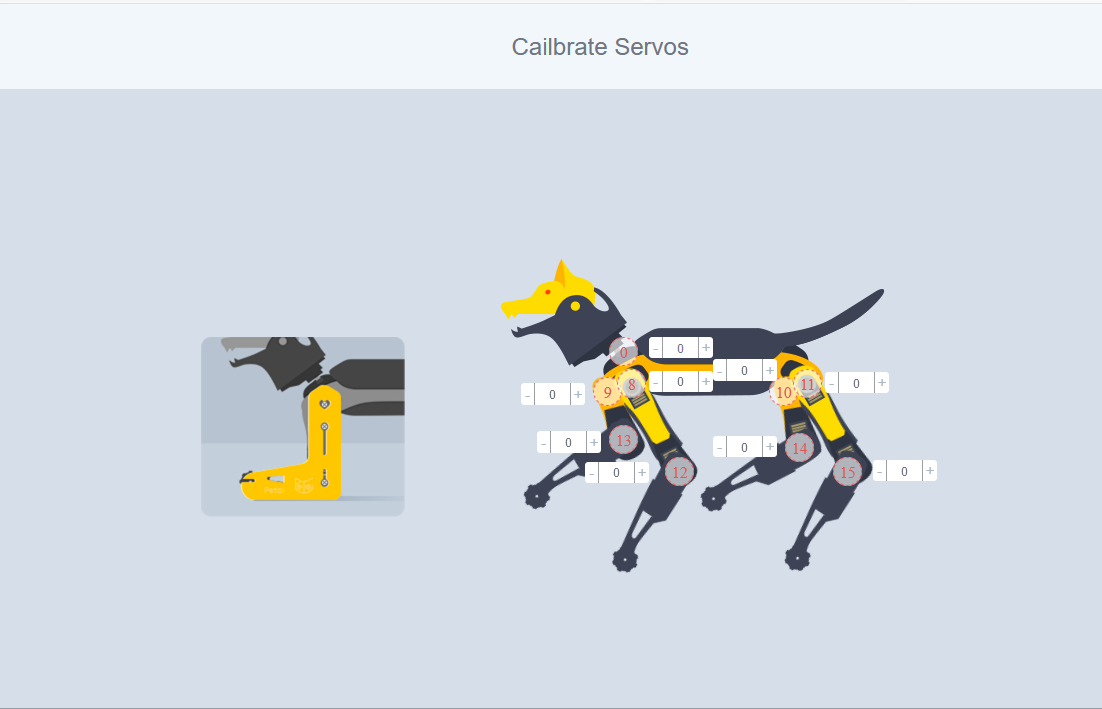
Use the calibration tool and adjust servo angles with + and - buttons for every joint, so the result for every joint looks like picture on the left in the calibration interface. 
Remember to Save calibration results before exiting!

若有收获,就点个赞吧
0 人点赞
