准备
- Linux 系统服务器(一般服务器自带)
- 域名(可选)
- 待部署的 Node 应用
服务器环境配置
- Node.js
- MongoDB
- nginx
服务器准备
1、购买服务器
注: 使用阿里云服务器esc的话,环境都会默认配置好, 自己不需要再安装 Ubuntu 20.04 ,登录服务器便自带环境

2、登录服务器
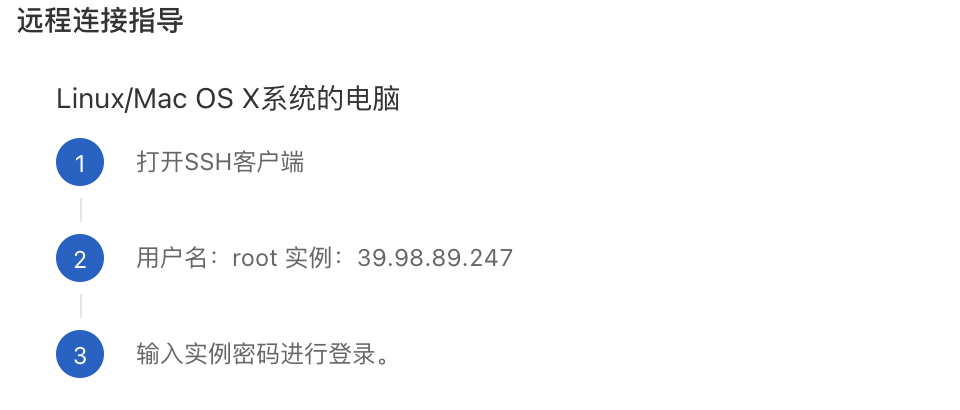
这里以 Ubuntu 20.04 为例。
在进行下面的操作之前先更新软件包:
apt updateapt upgrade
建议将 Ubuntu 镜像源切换为国内镜像地址,比如清华大学 Ubuntu 镜像源。
sudo sed -i "s@http://.*archive.ubuntu.com@https://mirrors.tuna.tsinghua.edu.cn@g" /etc/apt/sources.listsudo sed -i "s@http://.*security.ubuntu.com@https://mirrors.tuna.tsinghua.edu.cn@g" /etc/apt/sources.list
安装 Node
建议使用 nvm 安装和管理 Node 服务。
curl -o- https://raw.githubusercontent.com/nvm-sh/nvm/v0.37.2/install.sh | bash
修改 nvm 安装 node 的镜像源:
# .bashrcexport NVM_NODEJS_ORG_MIRROR=http://npm.taobao.org/mirrors/node
安装 Node:
nvm install 14.15.4nvm alias default 14.15.4node --version
把 npm 安装地址修改为淘宝镜像源:
npm i -g nrm --registry=https://registry.npm.taobao.orgnrm lsnrm use taobao
安装 MongoDB
建议参考 MongoDB 官方推荐的安装方式。
如果乌班图版本选择错误,则会启动服务失败,看好购买的服务器操作系统是否和mongod 版本匹配
安装 MongoDB:
wget -qO - https://www.mongodb.org/static/pgp/server-4.4.asc | sudo apt-key add -sudo apt-get install gnupgwget -qO - https://www.mongodb.org/static/pgp/server-4.4.asc | sudo apt-key add -echo "deb [ arch=amd64,arm64 ] https://repo.mongodb.org/apt/ubuntu focal/mongodb-org/4.4 multiverse" | sudo tee /etc/apt/sources.list.d/mongodb-org-4.4.listsudo apt-get updatesudo apt-get install -y mongodb-org
管理 MongoDB:
# 启动 MongoDBsudo systemctl start mongod# 查看 MongoDB 启动状态sudo systemctl status mongod# 将 MongoDB 设置为开机启动sudo systemctl enable mongod# 停止 MongoDBsudo systemctl stop mongod# 重启 MongoDBsudo systemctl restart mongod# 使用自带的命令行客户端连接 MongoDBmongo
安装 nginx
例如 Ubuntu 20.04 的安装方式建议参考:https://www.digitalocean.com/community/tutorials/how-to-install-nginx-on-ubuntu-20-04。
sudo apt install nginx
查看进程:
lsof -i: 端口号
杀死进程
kill-9 pid
管理 nginx 服务:
# 启动 nginxsudo systemctl start nginx# 查看 nginx 运行状态systemctl status nginx# 停止 nginxsudo systemctl stop nginx# 重启 nginxsudo systemctl restart nginx# 热重启:如果仅更改配置,Nginx通常可以重新加载而不断开连接sudo systemctl reload nginx# 添加开机启动 nginxsudo systemctl enable nginx# 禁止开机启动 nginxsudo systemctl disable nginx
安装 Git
apt install gitgit --version
手动部署
关于 Egg.js 应用部署:https://eggjs.org/zh-cn/core/deployment.html。
1、将代码提交到 GitHub 远程仓库
2、在远程服务器下载 GitHub 远程仓库
3、启动运行
cd 项目目录npm i --productionnpm start
启动成功之后可以通过 ip 地址访问测试一下:http://服务器ip地址:7001。
注意:云服务器防火墙需要开放 7001、80 端口的访问权限。
如果需要通过域名访问:
1、添加域名解析记录
2、配置 nginx 代理
# /etc/nginx/conf.d/youtubecloneserver {# 监听端口listen 80;# 域名可以有多个,用空格隔开# server_name www.w3cschool.cn w3cschool.cn;server_name onino.vip;# 对 / 启用反向代理location / {proxy_set_header X-Real-IP $remote_addr;# 后端的Web服务器可以通过 X-Forwarded-For 获取用户真实 IPproxy_set_header X-Forwarded-For $proxy_add_x_forwarded_for;# 获取真实的请求主机名proxy_set_header Host $http_host;# 标识该请求由 nginx 转发proxy_set_header X-Nginx-Proxy true;# 代理到本地的 3000 端口服务proxy_pass http://127.0.0.1:7001;}}
3、重启 nginx 服务
4、测试通过域名访问
如果需要更新:
- 本地开发
- 提交更新到远程仓库
- 在远程服务器拉取变更,重新启动服务
设置后端在服务器后台运行 https://xkcoding.com/2018/09/28/run-node-service-in-background.html
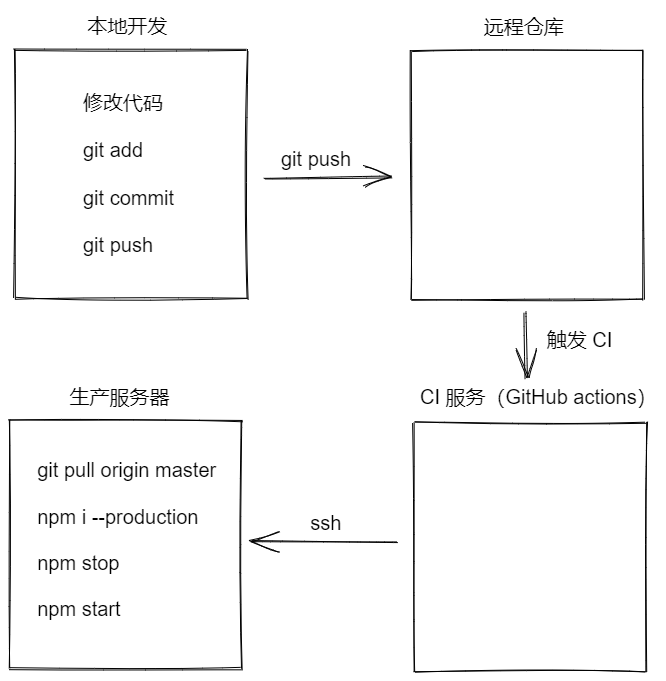
自动部署
1、如果是私有 Git 仓库需要配置服务器通过 SSH 连接 github 的权限
# 生成 SSH keyssh-keygen -o# 查看并复制公钥cat ~/.ssh/id_rsa.pub
2、配置 GitHub 仓库 secrets
- USERNAME 服务器用户
- PASSWORD 服务器用户密码
- HOST 服务器主机地址
- PORT 服务器主机端口号
- ACCESSKEYID 阿里云视频点播服务 access id
- ACCESSKEYSECRET 阿里云视频点播服务 access key sec
3、编写 GitHub Actions 脚本
# .github/workflows/nodejs.ymlname: Node.js CIon:push:branches: [ master ]jobs:build:runs-on: ${{ matrix.os }}strategy:fail-fast: falsematrix:node-version: [10]os: [ubuntu-latest]steps:- name: deployuses: appleboy/ssh-action@masterenv:ACCESSKEYID: ${{ secrets.ACCESSKEYID }}ACCESSKEYSECRET: ${{ secrets.ACCESSKEYSECRET }}with:host: ${{ secrets.HOST }}username: ${{ secrets.USERNAME }}password: ${{ secrets.PASSWORD }}port: ${{ secrets.PORT }}envs: ACCESSKEYID,ACCESSKEYSECRETscript: |export ACCESSKEYID=$ACCESSKEYIDexport ACCESSKEYSECRET=$ACCESSKEYSECRETexport NVM_DIR="$HOME/.nvm"[ -s "$NVM_DIR/nvm.sh" ] && \. "$NVM_DIR/nvm.sh"[ -s "$NVM_DIR/bash_completion" ] && \. "$NVM_DIR/bash_completion"cd /root/node-egggit pull origin masternpm install --productionnpm run stopnpm run start
4、将源码提交到 GitHub 远程仓库
5、等待执行自动部署
6、查看部署结果
配置 HTTPS
一、将前端资源部署到服务器上
二、使用OSS 部署前端资源

若有收获,就点个赞吧
0 人点赞
