Spring Web MVC 是建立在 Servlet API 上的原始 Web 框架,从一开始就包含在 Spring 框架中。它的正式名称 「Spring Web MVC」来自其源模块的名称(spring-webmvc),但它更多地被称为 「Spring MVC」。
与 Spring Web MVC 并行,Spring Framework 5.0 引入了一个反应堆 Web 框架,其名称为 「Spring WebFlux」,也是基于其源模块(spring-webflux)。本节介绍了 Spring Web MVC。下一节将介绍 Spring WebFlux。
关于基线信息以及与 Servlet 容器和 Java EE 版本范围的兼容性,请参见 Spring Framework Wiki。
快速搭建一个 mvc 项目
用太久的 SpringBoot 之后,原始的 servlet 项目不知道如何部署了,这里记录下步骤,方便后面文档知识的理解和测试
这里分为两种启动方式:
- 外部 Tomcat 启动:传统的 war 包部署,这种感觉好像无法 debug 了,不知道怎么弄的
- 内嵌 Tomcat 启动:类似简单版的 spring boot 启动,这里建议使用这种方式启动,后续还要学习 boot 的,
外部 tomcat 启动方式
项目创建
下图是项目结构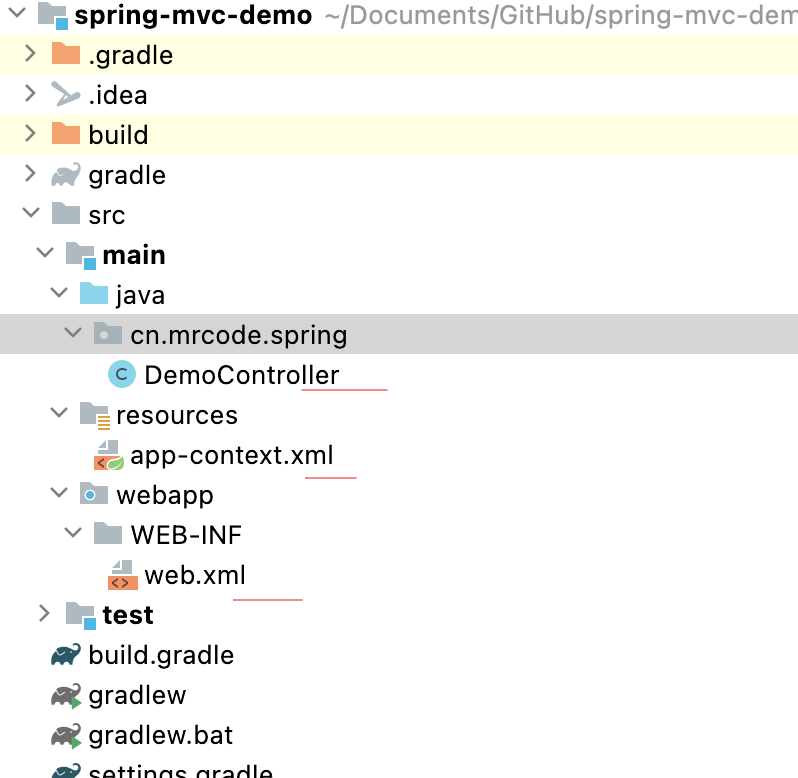
我是用 Gradle(版本 7.1.1) 部署的。build.gradle
plugins {id 'war'id 'java'}group 'cn.mrcode'version '1.0-SNAPSHOT'repositories {mavenCentral()}dependencies {implementation group: 'org.springframework', name: 'spring-webmvc', version: '5.3.15'}test {useJUnitPlatform()}
web.xml
<web-app><listener><listener-class>org.springframework.web.context.ContextLoaderListener</listener-class></listener><context-param><param-name>contextConfigLocation</param-name><param-value>classpath:app-context.xml</param-value></context-param><servlet><servlet-name>app</servlet-name><servlet-class>org.springframework.web.servlet.DispatcherServlet</servlet-class><init-param><param-name>contextConfigLocation</param-name><param-value></param-value></init-param><load-on-startup>1</load-on-startup></servlet><servlet-mapping><servlet-name>app</servlet-name><url-pattern>/</url-pattern></servlet-mapping></web-app>
app-context.xml
<?xml version="1.0" encoding="UTF-8"?><beans xmlns="http://www.springframework.org/schema/beans"xmlns:xsi="http://www.w3.org/2001/XMLSchema-instance"xmlns:context="http://www.springframework.org/schema/context"xmlns:mvc="http://www.springframework.org/schema/mvc"xsi:schemaLocation="http://www.springframework.org/schema/beanshttps://www.springframework.org/schema/beans/spring-beans.xsd http://www.springframework.org/schema/context https://www.springframework.org/schema/context/spring-context.xsd http://www.springframework.org/schema/mvc https://www.springframework.org/schema/mvc/spring-mvc.xsd"><!-- ioc 核心包扫描:为了能用上注解配置,这里直接扫描根路径 --><context:component-scan base-package="cn.mrcode.spring"></context:component-scan><!-- 这是启用 mvc 相关的注解支持 --><mvc:annotation-driven/></beans>
DemoController
package cn.mrcode.spring;import org.springframework.web.bind.annotation.GetMapping;import org.springframework.web.bind.annotation.RestController;/*** @author mrcode* @date 2022/3/28 20:06*/@RestControllerpublic class DemoController {public DemoController() {System.out.println("sss");}@GetMapping("/aabb")public String test() {return "success";}}
项目启动
这里用 Tomcat8 来部署的,需要注意一些事项
检查以下地方是否有报错,选中项目目录,然后按 F4 打开这个配置弹框
工件是否正常生成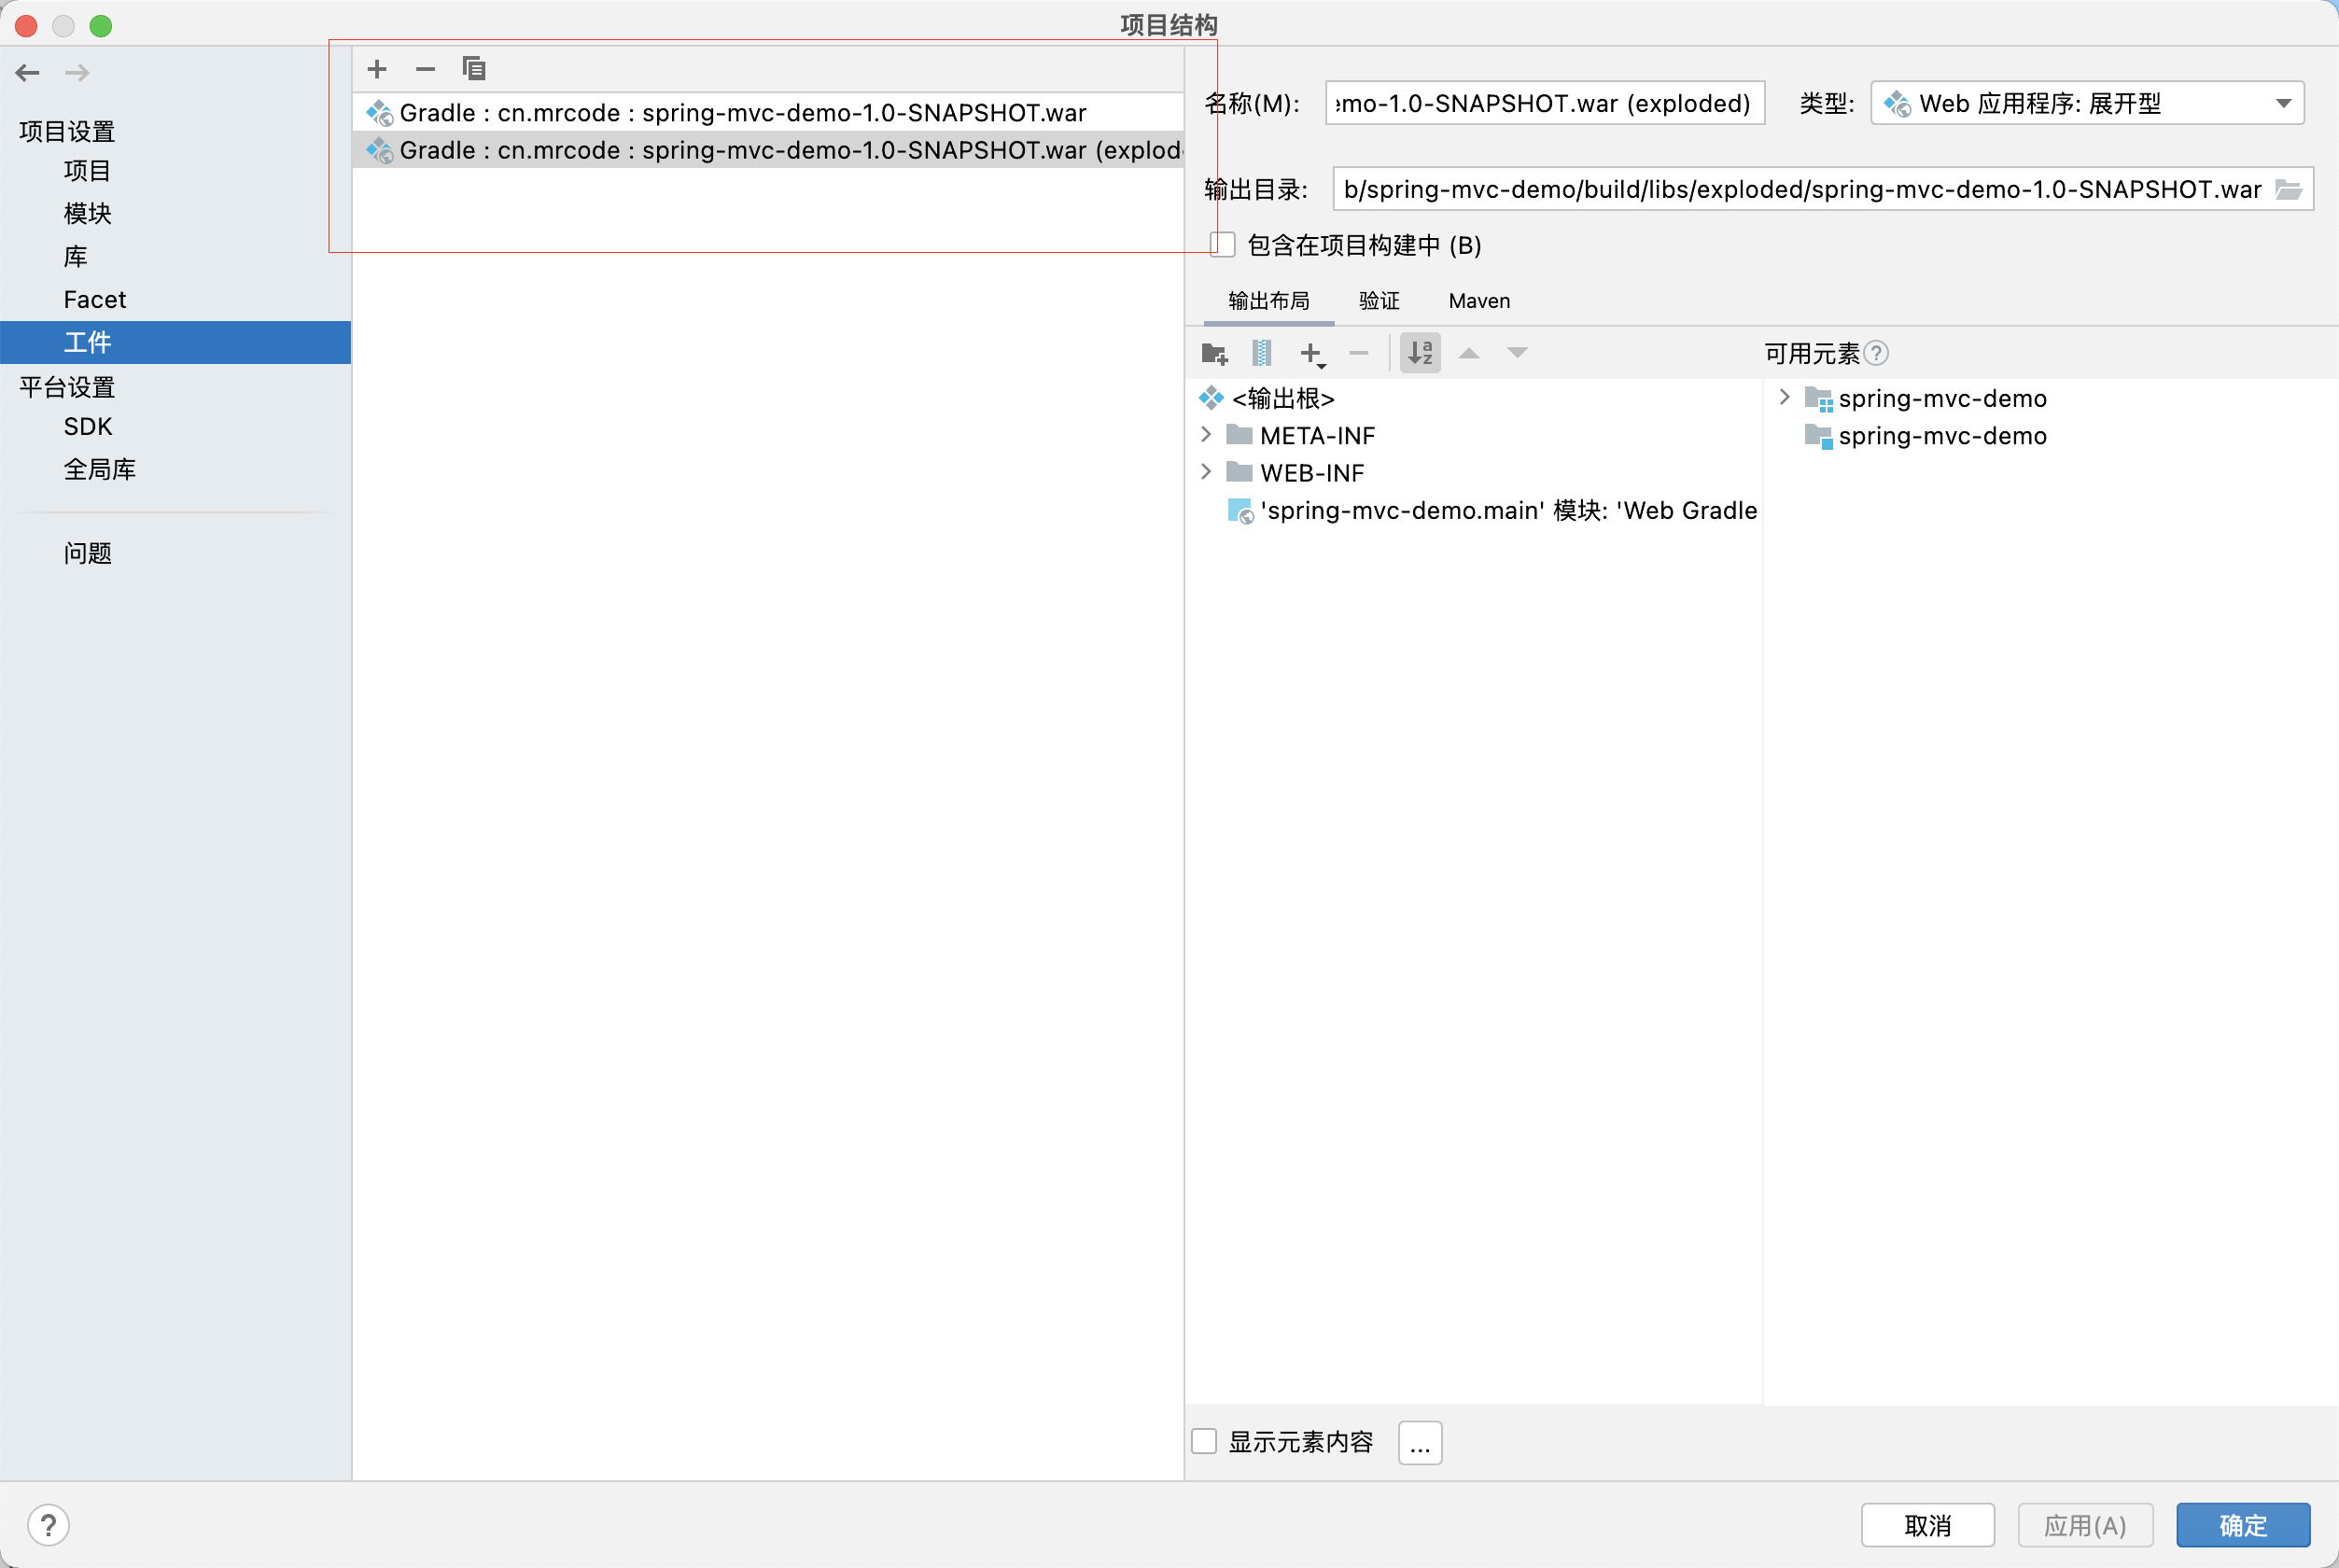
然后编辑配置,添加一个 tomcat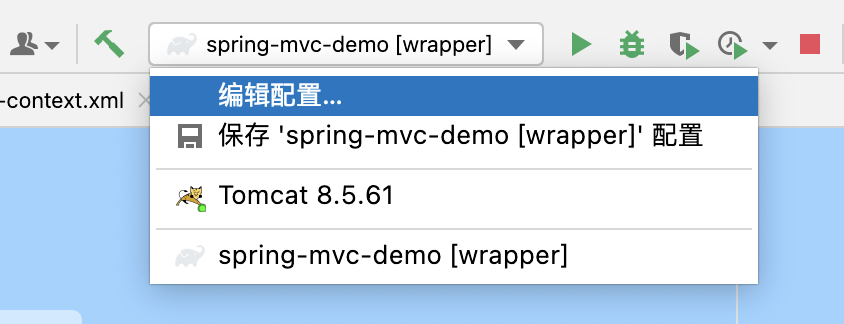
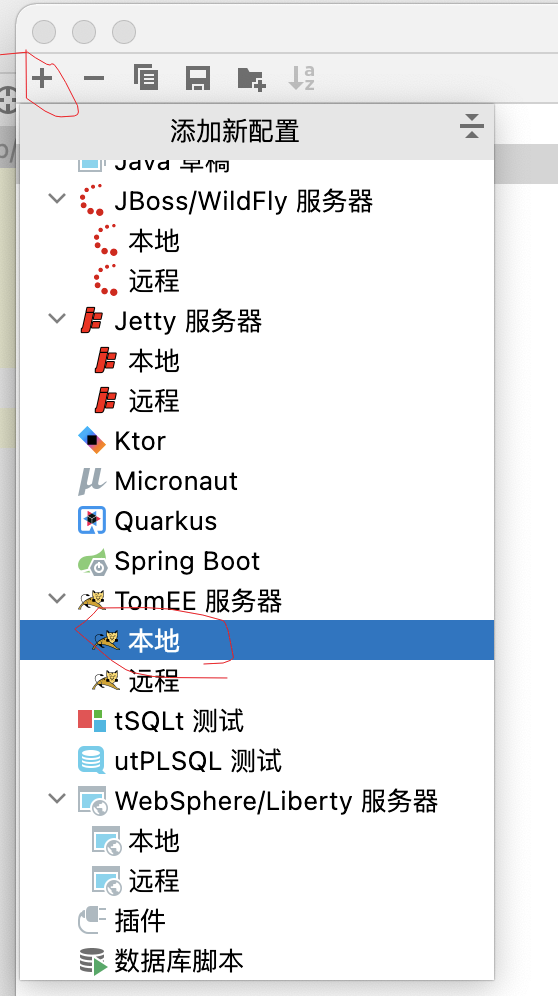
服务器配置界面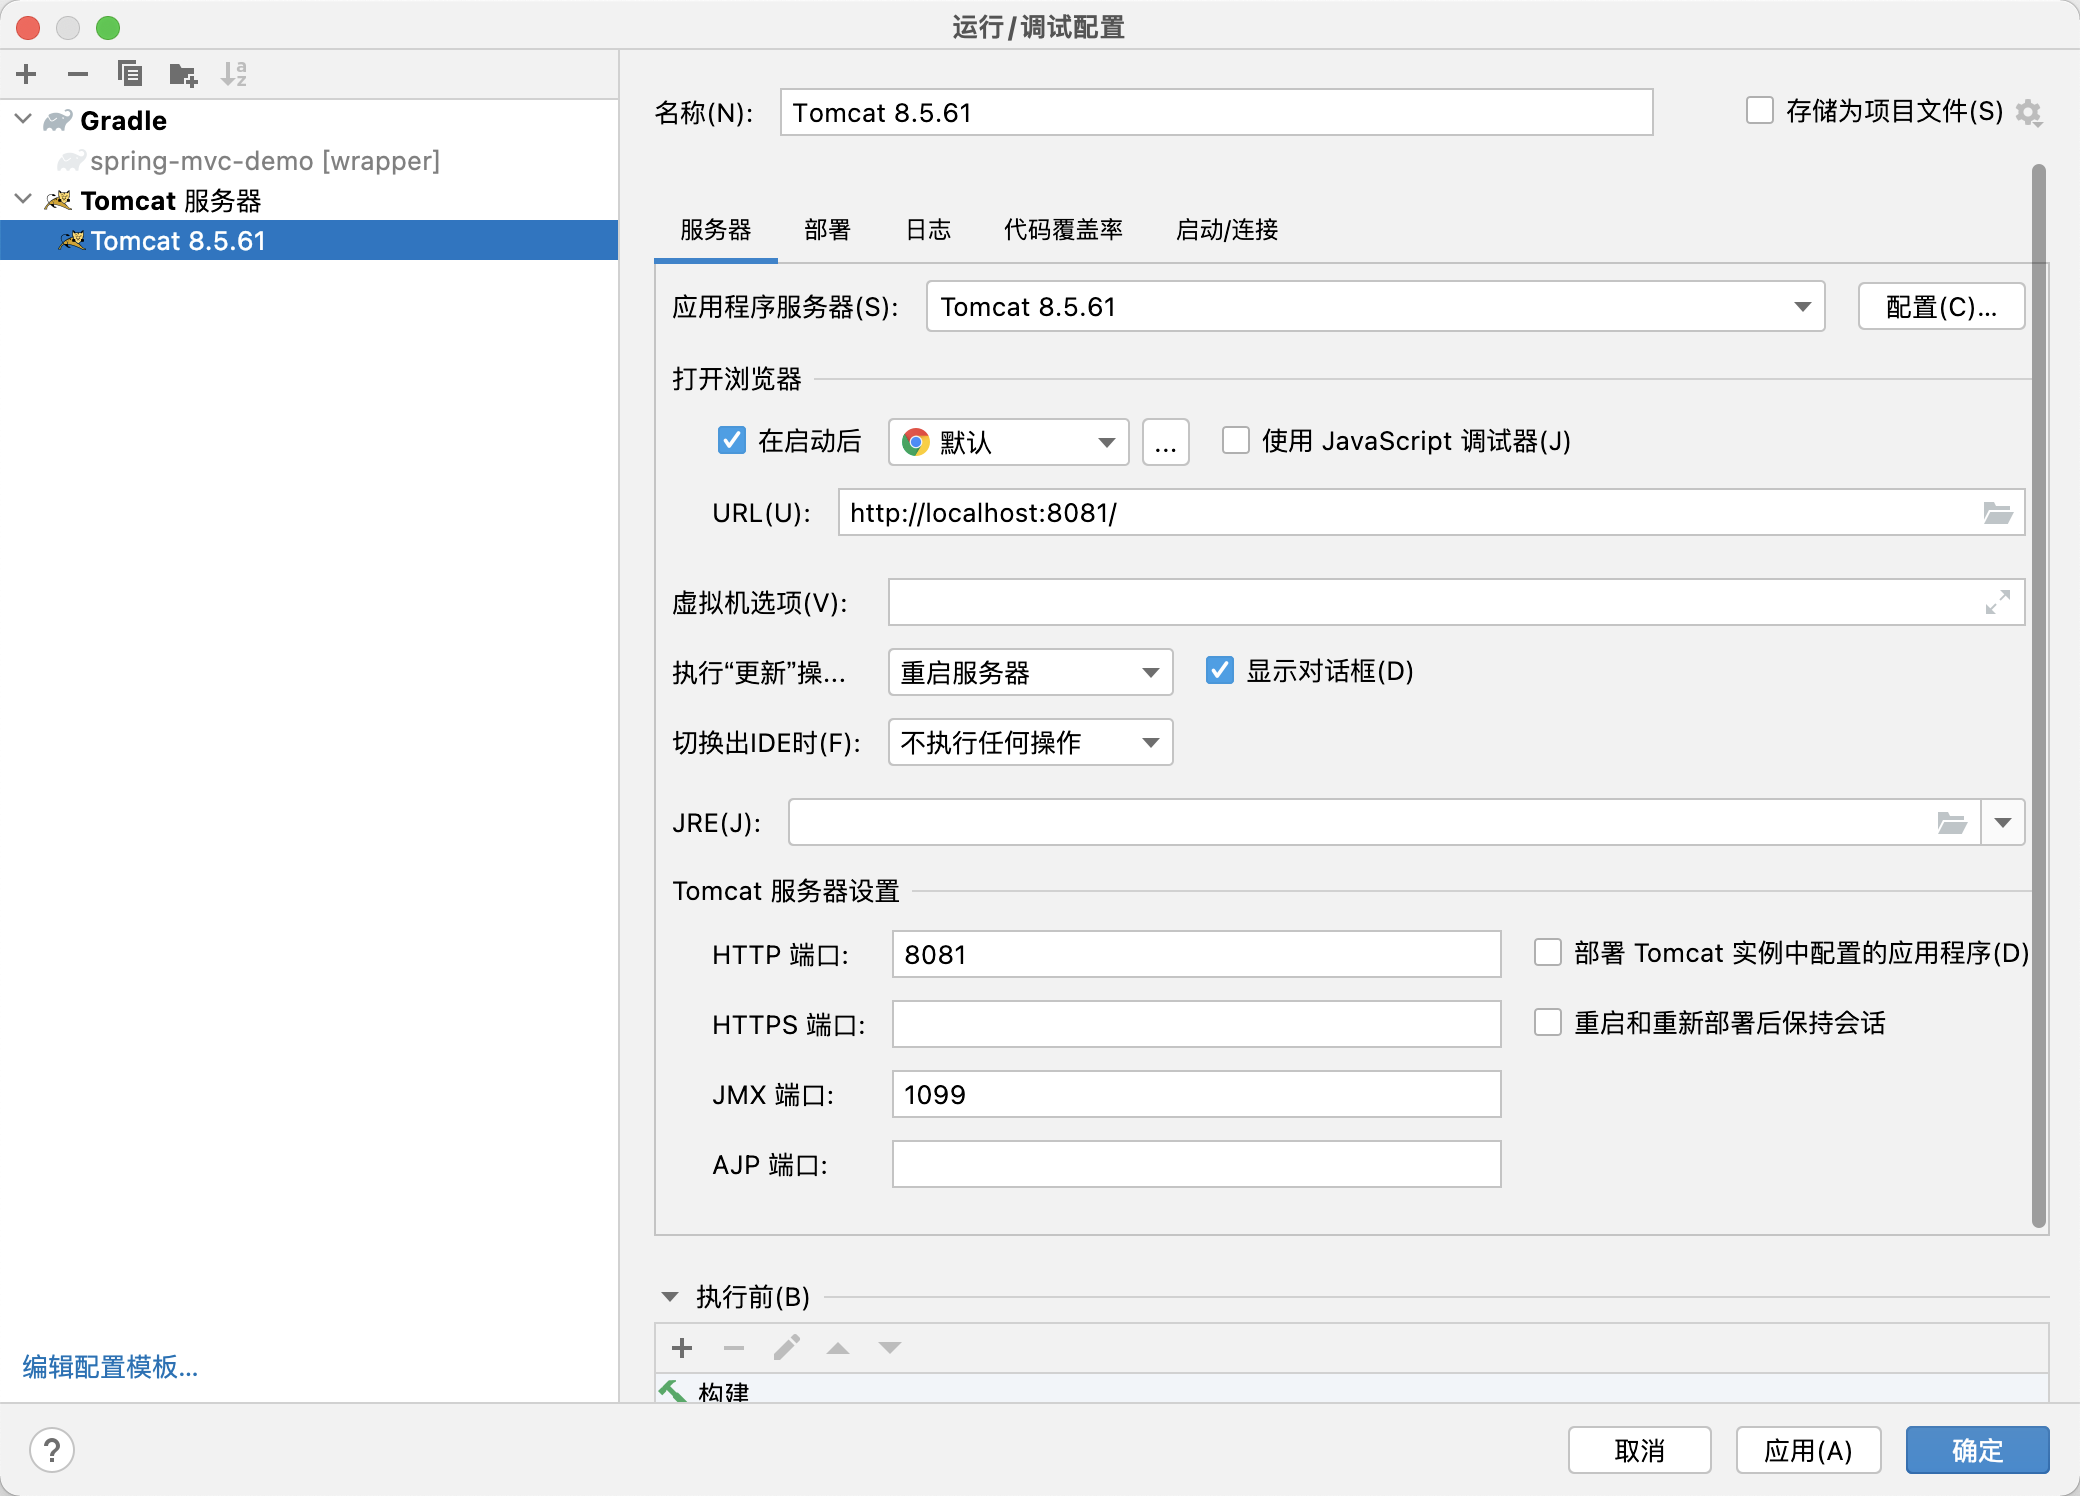
在部署界面,添加工件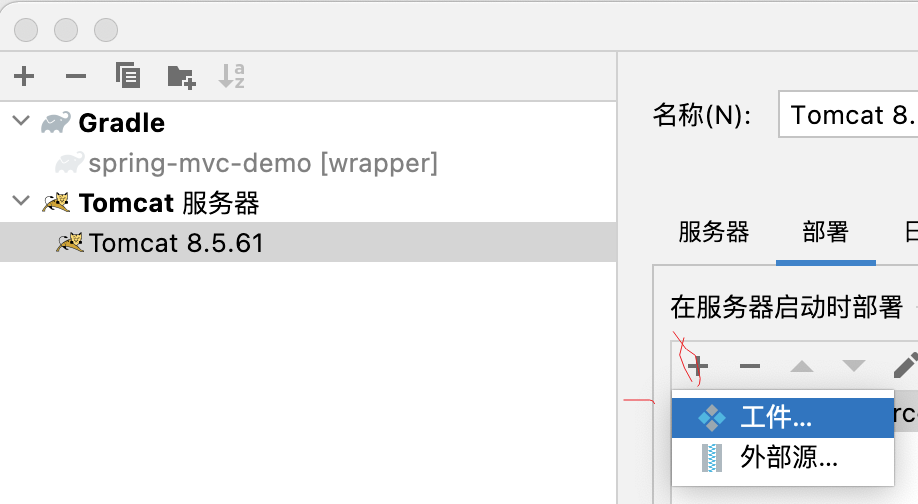
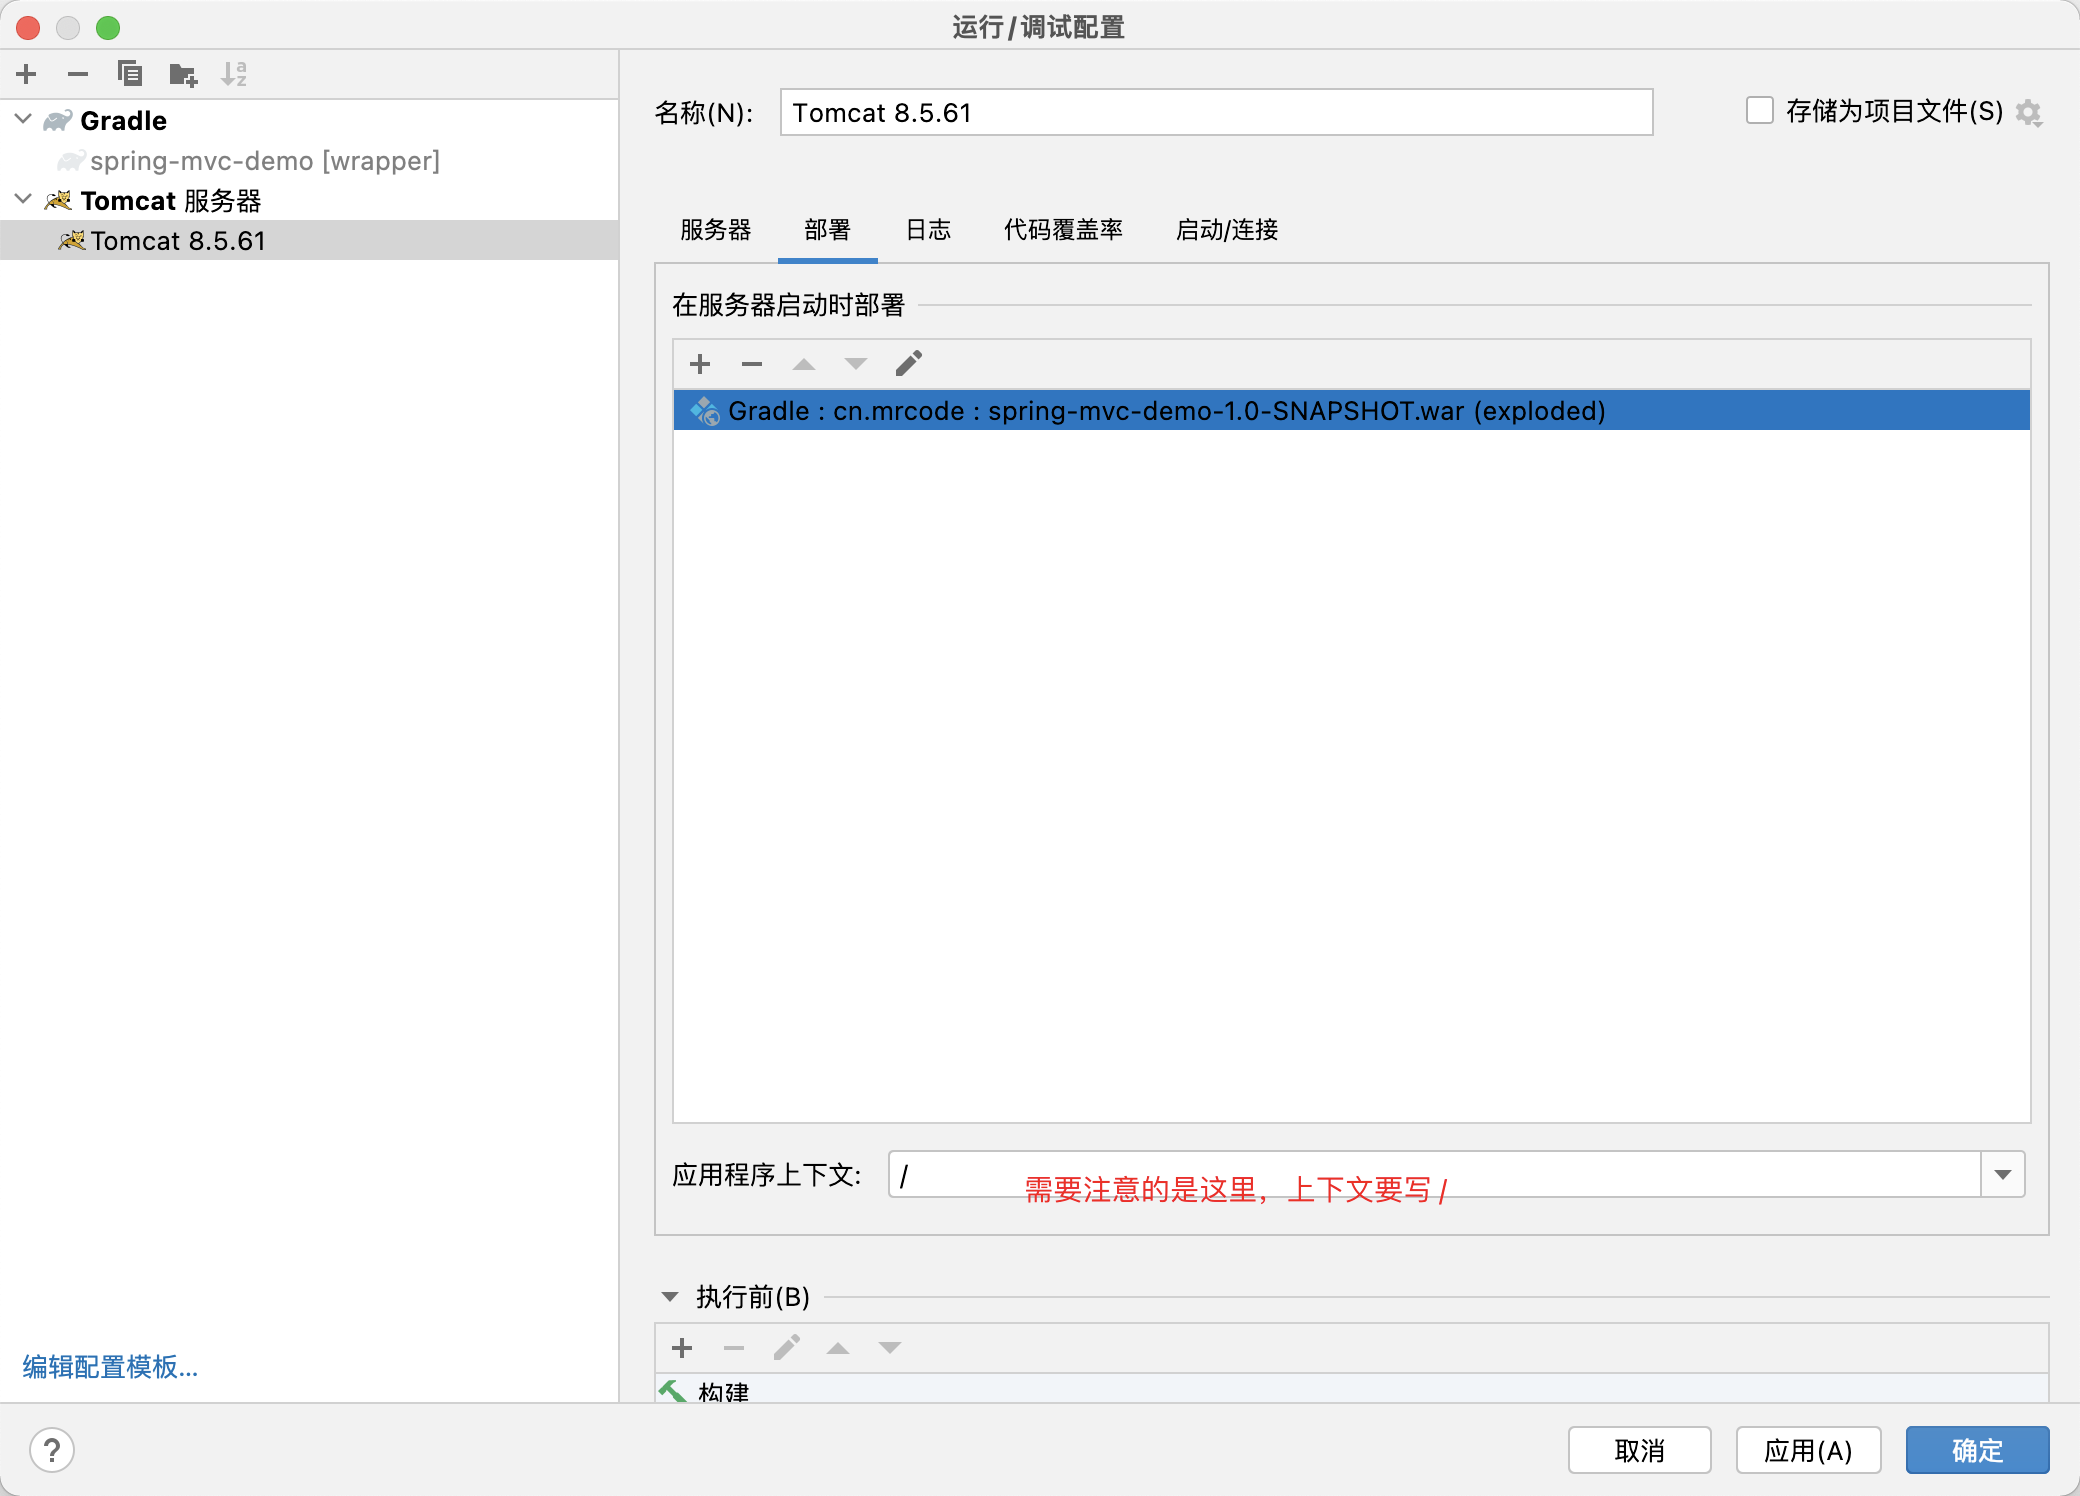
启动后访问:http://localhost:8081/aabb 返回 success ,环境部署成功。
内嵌 Tomcat
内嵌 Tomcat 方式是 100% 使用注解方式,无 xml 配置,实现 SpringMVC 的使用,也不依赖于外部的 Tomcat 容器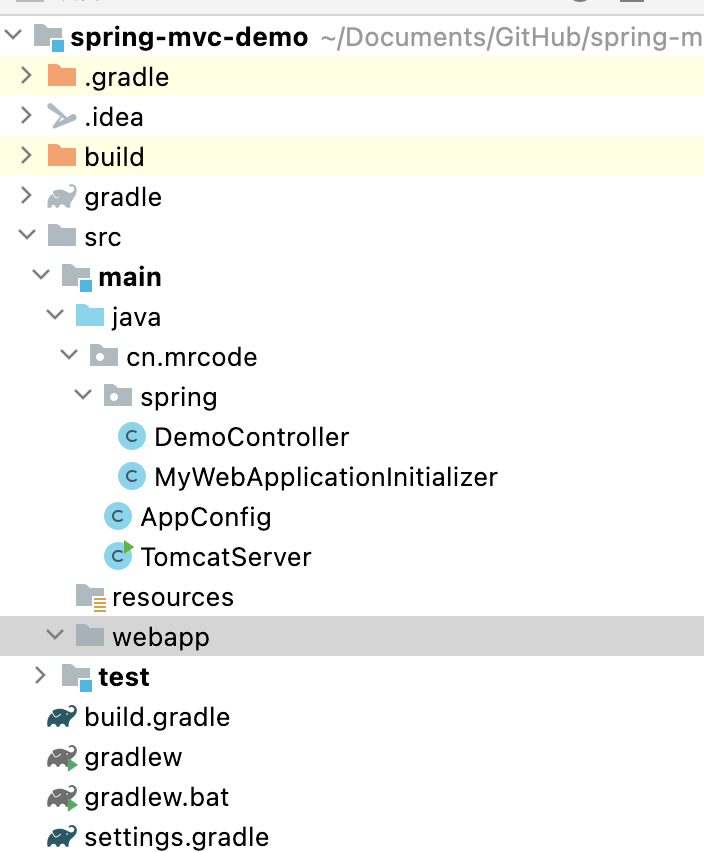
build.gradle
plugins {id 'java'}group 'cn.mrcode'version '1.0-SNAPSHOT'repositories {mavenCentral()}dependencies {implementation group: 'org.springframework', name: 'spring-webmvc', version: '5.3.15'implementation group: 'org.apache.tomcat.embed', name: 'tomcat-embed-core', version: '8.5.77'}test {useJUnitPlatform()}
内嵌 tomcat 启动类
package cn.mrcode;import org.apache.catalina.startup.Tomcat;import java.io.File;/*** @author mrcode* @date 2022/3/28 20:50*/public class TomcatServer {public static void main(String[] args) {Tomcat tomcat = new Tomcat();try {String docBase = "src/main/webapp/";String contextPath = "/";/** tomcat 加入 web 工程** host: 缺省默认为 localhost* contextPath: 在浏览器中访问项目的根路径* 例:localhost:port/{contextPath}/xx* docBase:项目中 webapp 所在路径*/// tomcat.addWebapp(host, contextPath, docBase)tomcat.addWebapp(contextPath, new File(docBase).getAbsolutePath());tomcat.setBaseDir(".");tomcat.setPort(8081);tomcat.start();System.out.println("tomcat服务启动成功。。");tomcat.getServer().await();} catch (Exception e) {System.out.println("tomcat服务启动失败。。");e.printStackTrace();}}}
:::tips 这里并没有代码指向后面的 WebApplicationInitializer 类,原理是 WebApplicationInitializer 使用了 JDK 的 servlet SPI 策略规范,所以会被扫描到,这个可以在 WebApplicationInitializer 类注释上看到说明 ::: 注解风格的 AppConfig
package cn.mrcode;import org.springframework.context.annotation.ComponentScan;import org.springframework.context.annotation.Configuration;import org.springframework.web.servlet.config.annotation.EnableWebMvc;/*** @author mrcode* @date 2022/3/28 20:53*/@Configuration@EnableWebMvc@ComponentScan("cn.mrcode.spring")public class AppConfig {}
编程式的 DispatcherServlet 初始化
package cn.mrcode.spring;import cn.mrcode.AppConfig;import org.springframework.web.WebApplicationInitializer;import org.springframework.web.context.ContextLoaderListener;import org.springframework.web.context.support.AnnotationConfigWebApplicationContext;import org.springframework.web.servlet.DispatcherServlet;import javax.servlet.ServletContext;import javax.servlet.ServletRegistration;/*** @author mrcode* @date 2022/3/28 20:53*/public class MyWebApplicationInitializer implements WebApplicationInitializer {@Overridepublic void onStartup(ServletContext servletContext) {// 加载 Spring web application configurationAnnotationConfigWebApplicationContext context = new AnnotationConfigWebApplicationContext();context.register(AppConfig.class);// Manage the lifecycle of the root application contextservletContext.addListener(new ContextLoaderListener(context));// 创建和注册 DispatcherServletDispatcherServlet servlet = new DispatcherServlet(context);ServletRegistration.Dynamic registration = servletContext.addServlet("app", servlet);registration.setLoadOnStartup(1);registration.addMapping("/");}}
一个测试 controller
package cn.mrcode.spring;import org.springframework.web.bind.annotation.GetMapping;import org.springframework.web.bind.annotation.RestController;/*** @author mrcode* @date 2022/3/28 20:06*/@RestControllerpublic class DemoController {public DemoController() {System.out.println("sss");}@GetMapping("/aabb")public String test() {return "success";}}
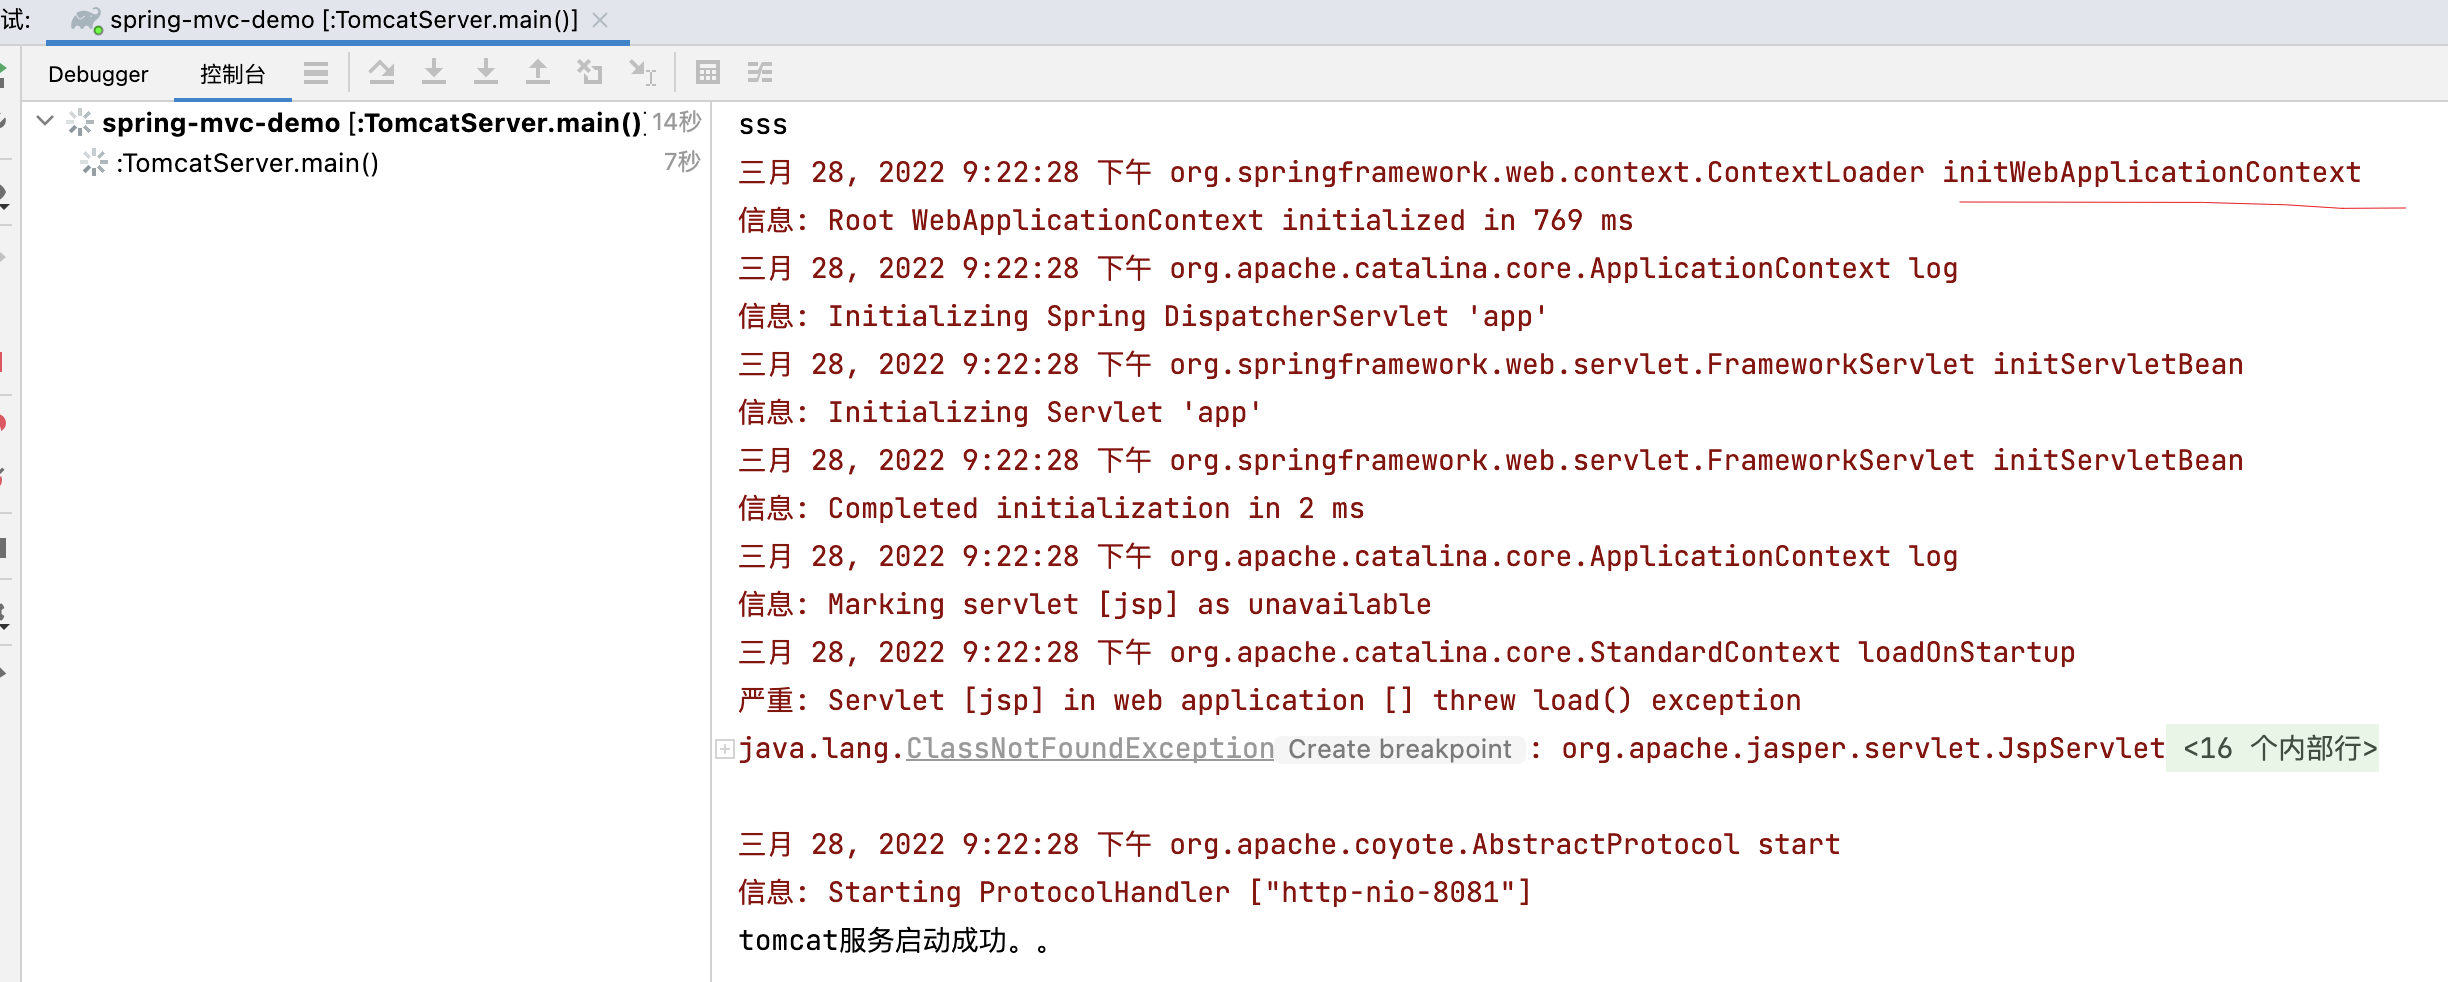
可以看到启动后,spring 相关的也初始化了
启动后访问 http://localhost:8081/aabb 响应 success

若有收获,就点个赞吧
0 人点赞
