- 问题: MaterialApp的Title是干嘛的?
- 来由
- 去除Tabbar的Material Design点击效果
- AppBar去除底部阴影
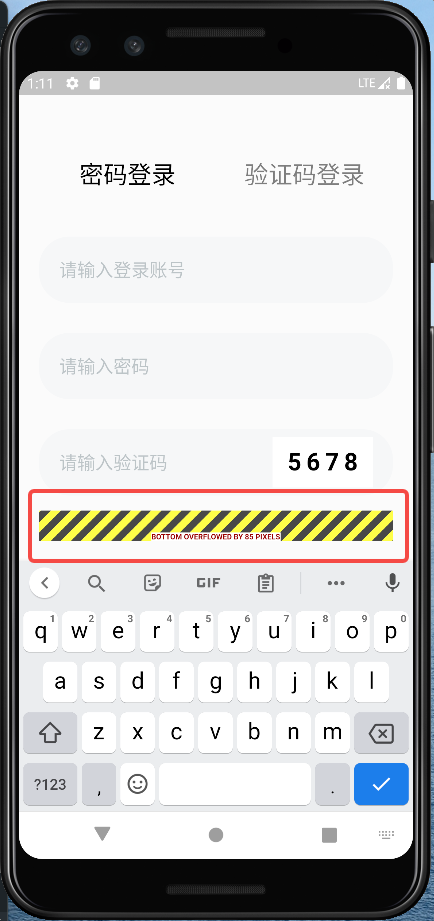
- Bottom overflowed by xx pixels 问题
- JsonToDart工具
- iOS模拟器中无法弹出键盘的问题
- initalRoute和home属性为什么不建议同时使用
- Cannot fit requested classes in a single dex file (# methods: 74083 > 65536)
- 点击空白处取消TextField、TextFormField焦点
- Vertical viewport was given unbounded height
- 键盘类型选择中开启小数点键盘
- 对TextField,TextFormField设置输入格式约束
问题: MaterialApp的Title是干嘛的?
来由
当查看代码是,发现MaterialApp也包含一个title的属性,这个值修改后,没有引起UI界面上任何改变。
遂有疑问:MaterialApp的title是干嘛用的?
在网上,也查到了相应的疑问,但被选中的回答并不完全正确。
https://stackoverflow.com/questions/50615006/where-does-the-title-of-material-app-used-in-flutter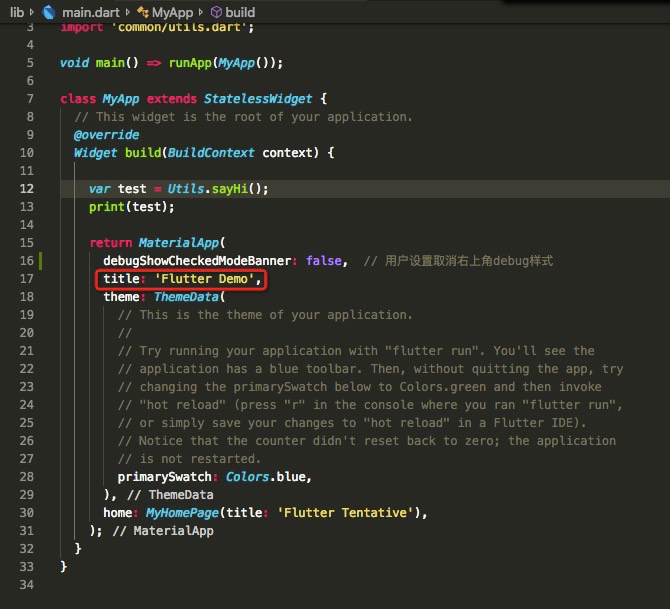
import 'package:flutter/material.dart';import 'views/counter.dart';import 'common/utils.dart';void main() => runApp(MyApp());class MyApp extends StatelessWidget {// This widget is the root of your application.@overrideWidget build(BuildContext context) {return MaterialApp(debugShowCheckedModeBanner: false, // 用户设置取消右上角debug样式title: 'Flutter Demo', // 这个title的作用是什么?theme: ThemeData(// This is the theme of your application.//// Try running your application with "flutter run". You'll see the// application has a blue toolbar. Then, without quitting the app, try// changing the primarySwatch below to Colors.green and then invoke// "hot reload" (press "r" in the console where you ran "flutter run",// or simply save your changes to "hot reload" in a Flutter IDE).// Notice that the counter didn't reset back to zero; the application// is not restarted.primarySwatch: Colors.blue,),home: MyHomePage(title: 'Flutter Tentative'),);}}
在进入到MaterialApp的源码中(app.dart)查看时,看到下面的这段话: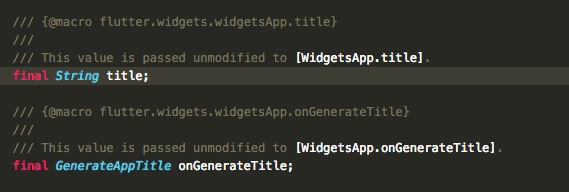
结合 onGenerateTitle 分析,这个方法是可以动态生成App title的。那么 final String title; 这段代码即表示 WidgetsApp的固定title属性。其他用途,后续遇到再分析吧。
去除Tabbar的Material Design点击效果
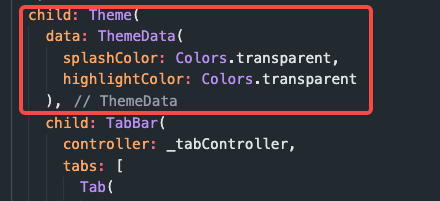
在TabBar的外层套一个Theme Widget
将Theme改为透明即可
https://www.codeleading.com/article/61775510629/
AppBar去除底部阴影
elevation: 0, //去掉Appbar底部阴影
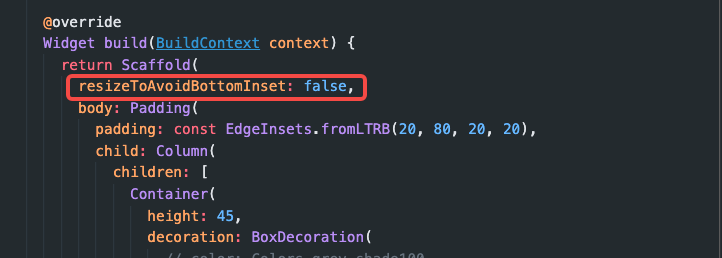
Bottom overflowed by xx pixels 问题
处理这个问题:
- 可以使用 SingleChildScrollView 组件
- 直接在 Scaffold里添加 resizeToAvoidBottomInset = false
JsonToDart工具
用于(或限于国内IT环境下前端与后端的对接场景)将后端返回的(不规则的)JSON数据格式转换为可用的Dart对象。
https://github.com/fluttercandies/JsonToDart
国外使用比较多的是基于这个视频上介绍的处理方法:
官方:https://flutter.cn/docs/development/data-and-backend/json#code-generation
油管:https://www.youtube.com/watch?v=8fFoLs9qVQA
iOS模拟器中无法弹出键盘的问题
选择Simulator -> I/O -> Keyboard -> Connect Hardware Keyboard勾选掉即可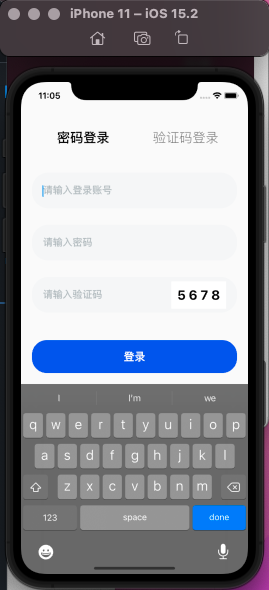
initalRoute和home属性为什么不建议同时使用
这个问题在官方文档上有明确的warning提示:
NOTE:但实际使用中即使同时也还OK(TBD)
在stackoverflow中有明确的说明:
https://stackoverflow.com/questions/61764803/difference-between-initialroute-and-home-in-materialapp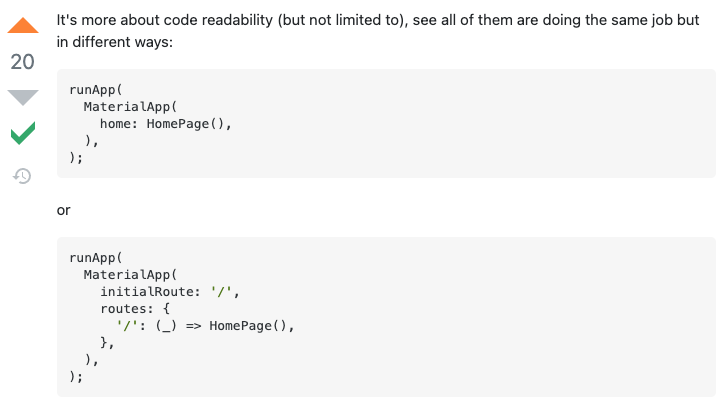
Cannot fit requested classes in a single dex file (# methods: 74083 > 65536)
出现这样的问题一般都是项目逐渐变大的情况下产生的。(指向Android模拟器启动时)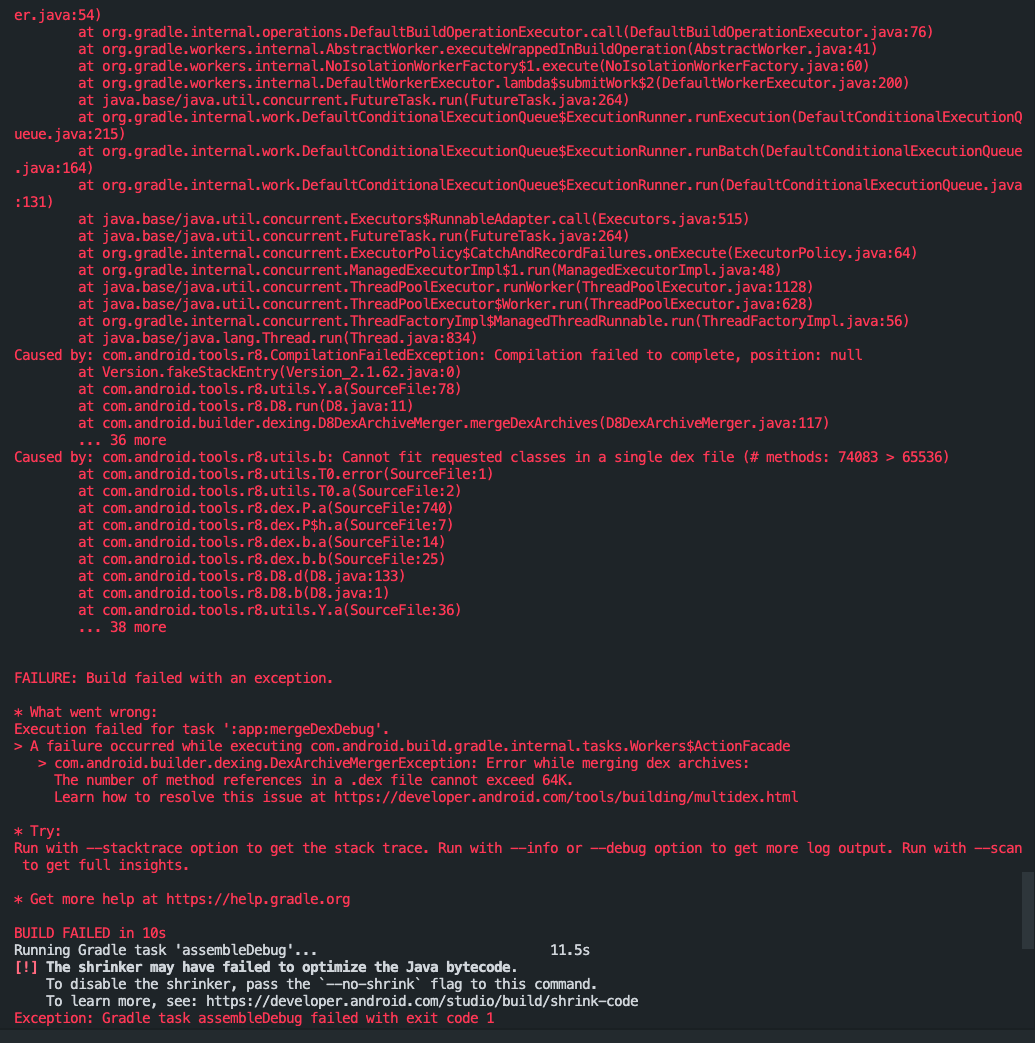
解决这样的问题需要在flutter项目的Android项目中找到 app下的build.gradle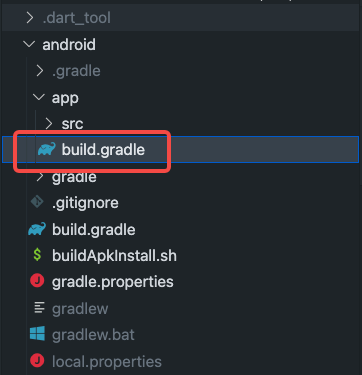
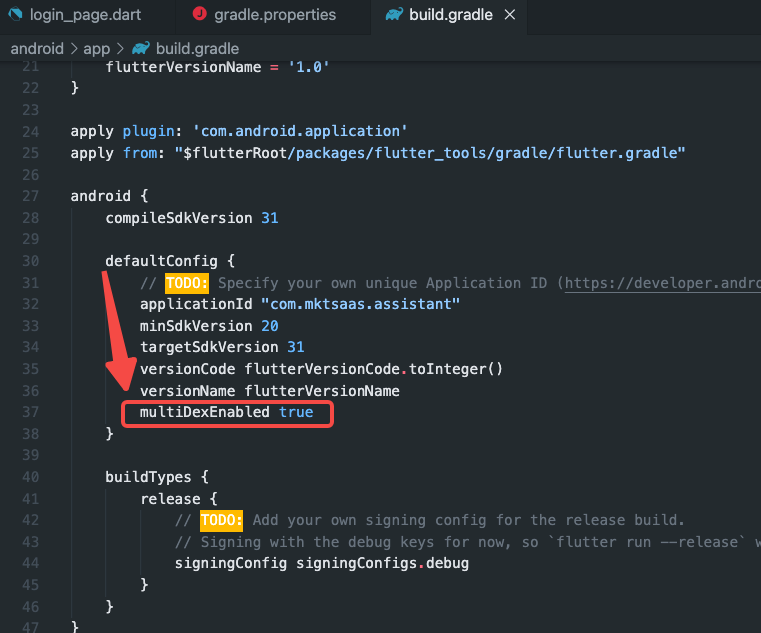
添加:mulitDexEnable 为 true 即可。
点击空白处取消TextField、TextFormField焦点
在最外层使用GestureDetector,并设置onTap方法为:FocusScope.of(context).unfocus(); 即可。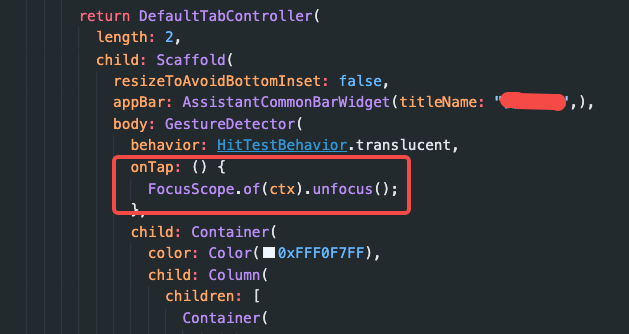
Vertical viewport was given unbounded height
当widget直接返回 listview 或 listview.builder的时候,容易发生这样的问题。
当listview被container组件包裹的时候,可以为container设置一个高度,或者,将listview的属性:shrinkWrap 设置为 true。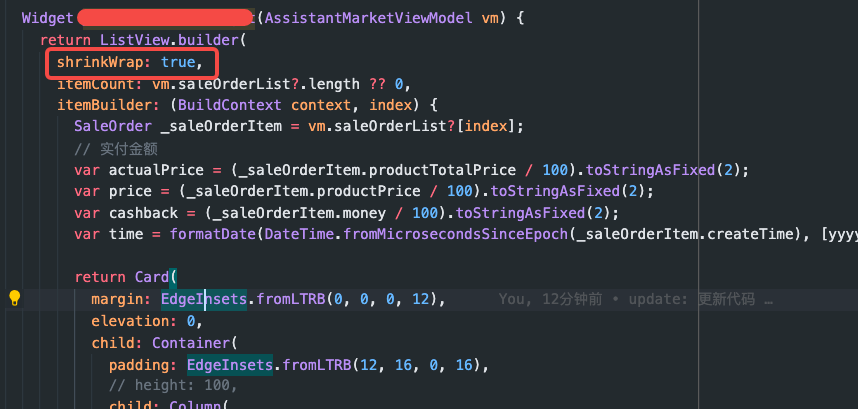
键盘类型选择中开启小数点键盘
在flutter中使用TextField或TextFormField的时候,需要设置键盘类型,通常的选择如下:
单很多时候,比如,选择number的时候,需要包括小数点后面的数字,默认情况在iOS上,如果选择:
TextInputType.number时,是不带小数点键盘的。
选择如下属性可以设置iOS开启包含小数点的键盘。keyboardType: TextInputType.numberWithOptions(decimal: true)
对TextField,TextFormField设置输入格式约束
采用属性:inputFormatters: []
它接受一个格式数组用来对输入框进行约束。
例如 - 限制输入数据整数部分上限及保留小数点后x位的格式如下:integerLength = 5 表示整数部分限制输入5位数,decimalLength = 2 表示小数点后保留两位。
class WithdrawAmountFormatter extends TextInputFormatter {int integerLength;int decimalLength;// bool? allowInputDecimal;WithdrawAmountFormatter({this.integerLength = 5, this.decimalLength = 2}) : super();@overrideTextEditingValue formatEditUpdate(TextEditingValue oldValue, TextEditingValue newValue) {String value = newValue.text;int selectionIndex = newValue.selection.end;if (newValue.text.contains('.')) {int pointIndex = newValue.text.indexOf('.');String beforePoint = newValue.text.substring(0, pointIndex);//小数点前内容大于integerLengthif (beforePoint.length > integerLength) {value = oldValue.text;selectionIndex = oldValue.selection.end;} else//小数点前内容小于等于integerLength{String afterPoint = newValue.text.substring(pointIndex + 1, newValue.text.length);if (afterPoint.length > decimalLength) {value = oldValue.text;selectionIndex = oldValue.selection.end;}}} else {if (newValue.text.length > integerLength) {value = oldValue.text;selectionIndex = oldValue.selection.end;}}return new TextEditingValue(text: value,selection: new TextSelection.collapsed(offset: selectionIndex),);}}

若有收获,就点个赞吧
0 人点赞
