1. 开发环境
- Ubuntu 18.04
- gcc 7.5.0
- OpenCV 3.4.3
2. 获取LibTorch
从PyTorch官网获取。选取C++11版本,否则单独可以正常使用,但是和OpenCV联合编译会报错。
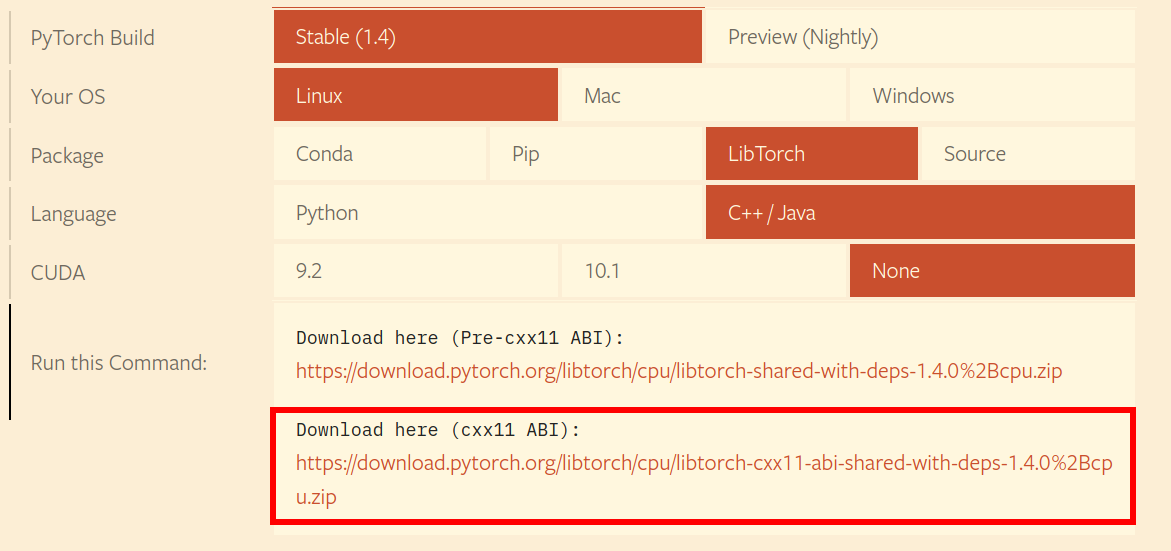
如果官网下载不顺,可以使用下面我已经上传的压缩包。
libtorch-cxx11-abi-shared-with-deps-1.4.0+cpu.zip
解压即可。注意文件路径在CMake中会会使用到。
3. 编写CMakeLists.txt文件
cmake_minimum_required(VERSION 3.7)project(cplus_test)set(CMAKE_CXX_STANDARD 11)# 指定文件夹位置set(OPENCV_DIR /home/luzhan/软件/opencv-3.4.3)set(Torch_DIR /home/luzhan/软件/LibTorch_CPU/share/cmake/Torch)# 自动查找包find_package(Torch REQUIRED)find_package(OpenCV 3.4.3 REQUIRED)# 添加源程序add_executable(cplus_testmain.cpp)# 添加头文件include_directories(${OpenCV_INCLUDE_DIRS} ./include)# 加入库文件位置target_link_libraries(cplus_test ${OpenCV_LIBS} ${TORCH_LIBRARIES})
4. C++部分编写
#include <torch/script.h>#include <torch/torch.h>#include <opencv2/opencv.hpp>#include <iostream>using namespace cv;using namespace std;int main() {// 加载模型torch::jit::script::Module module = torch::jit::load("../model.pt");// 制造假数据测试std::vector<torch::jit::IValue> inputs;inputs.push_back(torch::ones({1, 1, 28, 28}));// 模型计算并输出at::Tensor output = module.forward(inputs).toTensor();std::cout << output.slice(/*dim=*/1, /*start=*/0, /*end=*/5) << '\n';return 0;}
输出结果
1.0754 -1.3711[ CPUFloatType{1,2} ]
5. 和OpenCV一起使用
#include <torch/script.h>#include <torch/torch.h>#include <opencv2/opencv.hpp>#include <iostream>using namespace cv;using namespace std;int main() {torch::jit::script::Module module = torch::jit::load("../model.pt");cv::Mat img;img = cv::imread("../1.jpg", CV_8UC1);// 正则化img.convertTo(img, CV_32FC1, 1.0f / 255.0f);// 模型用的是 28*28 的单通道灰度图cv::resize(img, img, Size(28, 28));// 将 OpenCV 的 Mat 转换为 Tensor, 注意两者的数据格式// OpenCV: H*W*C 高度, 宽度, 通道数auto input_tensor = torch::from_blob(img.data, {1, img.cols, img.rows, 1});// Tensor: N*C*H*W 数量, 通道数, 高度, 宽度input_tensor = input_tensor.permute({0, 3, 1, 2});// 添加数据std::vector<torch::jit::IValue> inputs;inputs.push_back(input_tensor);// 模型计算at::Tensor output = module.forward(inputs).toTensor();std::cout << output.slice(/*dim=*/1, /*start=*/0, /*end=*/5) << '\n';// 输出分类的结果int ans = output.argmax(1).item().toInt();cout << ans;return 0;}
输出结果,最后的数字即为分类的结果,和数据集的标签对应。
-3.3254 2.4606[ CPUFloatType{1,2} ]1
6. 参考链接
https://pytorch.org/cppdocs/installing.html#minimal-example
https://www.jianshu.com/p/1034b23c703a
https://zhuanlan.zhihu.com/p/66832878
https://oldpan.me/archives/pytorch-c-libtorch-inference
7. 完整工程文件

若有收获,就点个赞吧
0 人点赞
