配置服务文件参数
[root@localhost ~]# yum -y install httpd[root@localhost ~]# systemctl start httpd[root@localhost ~]# systemctl enable httpd[root@localhost ~]# firewall-cmd --add-service=http --permanent[root@localhost ~]# firewall-cmd --reload
Linux系统中的配置文件
| 配置文件的名称 | 存放位置 |
|---|---|
| 服务目录 | /etc/httpd |
| 主配置文件 | /etc/httpd/conf/httpd.conf |
| 网站数据目录 | /var/www/html |
| 访问日志 | /var/log/httpd/access_log |
| 错误日志 | /var/log/httpd/error_log |
[root@localhost ~]# cat /etc/httpd/conf/httpd.conf | grep -v '#' | grep -v '^$'ServerRoot "/etc/httpd"Listen 80Include conf.modules.d/*.confUser apacheGroup apacheServerAdmin root@localhost<Directory />AllowOverride noneRequire all denied</Directory>DocumentRoot "/var/www/html"<Directory "/var/www">AllowOverride NoneRequire all granted</Directory><Directory "/var/www/html">Options Indexes FollowSymLinksAllowOverride NoneRequire all granted</Directory><IfModule dir_module>DirectoryIndex index.html</IfModule><Files ".ht*">Require all denied</Files>ErrorLog "logs/error_log"LogLevel warn<IfModule log_config_module>LogFormat "%h %l %u %t \"%r\" %>s %b \"%{Referer}i\" \"%{User-Agent}i\"" combinedLogFormat "%h %l %u %t \"%r\" %>s %b" common<IfModule logio_module>LogFormat "%h %l %u %t \"%r\" %>s %b \"%{Referer}i\" \"%{User-Agent}i\" %I %O" combinedio</IfModule>CustomLog "logs/access_log" combined</IfModule><IfModule alias_module>ScriptAlias /cgi-bin/ "/var/www/cgi-bin/"</IfModule><Directory "/var/www/cgi-bin">AllowOverride NoneOptions NoneRequire all granted</Directory><IfModule mime_module>TypesConfig /etc/mime.typesAddType application/x-compress .ZAddType application/x-gzip .gz .tgzAddType text/html .shtmlAddOutputFilter INCLUDES .shtml</IfModule>AddDefaultCharset UTF-8<IfModule mime_magic_module>MIMEMagicFile conf/magic</IfModule>EnableSendfile onIncludeOptional conf.d/*.conf
配置httpd服务程序时最常用的参数以及用途描述
| 参数 | 用途 |
|---|---|
| ServerRoot | 服务目录 |
| ServerAdmin | 管理员邮箱 |
| User | 运行服务的用户 |
| Group | 运行服务的用户组 |
| ServerName | 网站服务器的域名 |
| DocumentRoot | 网站数据目录 |
| Directory | 网站数据目录的权限 |
| Listen | 监听的IP地址与端口号 |
| DirectoryIndex | 默认的索引页页面 |
| ErrorLog | 错误日志文件 |
| CustomLog | 访问日志文件 |
| Timeout | 网页超时时间,默认为300秒 |
网站数据是保存在/var/www/html目录中,而如果想把保存网站数据的目录修改为/home/wwwroot目录
第1步:建立网站数据的保存目录,并创建首页文件
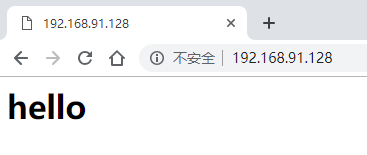
[root@localhost ~]# mkdir /home/wwwroot[root@localhost ~]# echo "<h1>hello</h1>" > /home/wwwroot/index.html
第2步:打开httpd服务程序的主配置文件,将用于定义网站数据保存路径的参数DocumentRoot修改为/home/wwwroot,同时还需要将用于定义目录权限的参数Directory后面的路径也修改为/home/wwwroot
[root@localhost ~]# vim /etc/httpd/conf/httpd.confServerRoot "/etc/httpd"Listen 80Include conf.modules.d/*.confUser apacheGroup apacheServerAdmin root@localhost<Directory />AllowOverride noneRequire all denied</Directory>DocumentRoot "/home/wwwroot" #这个地方要改<Directory "/home/wwwroot"> #这个地方要改AllowOverride NoneRequire all granted</Directory><Directory "/var/www/html">Options Indexes FollowSymLinksAllowOverride NoneRequire all granted</Directory>..................................
第3步:重新启动httpd服务程序并验证效果
[root@localhost ~]# systemctl restart httpd
第4步:修改selinux安全上下文,在我们新建的目录selinux权限中添加
[root@localhost ~]# ls -Zd /var/www/html/drwxr-xr-x. root root system_u:object_r:httpd_sys_content_t:s0 /var/www/html/[root@localhost ~]# semanage fcontext -a -t httpd_sys_content_t /home/wwwroot/[root@localhost ~]# restorecon -Rv /home/wwwroot/restorecon reset /home/wwwroot context unconfined_u:object_r:home_root_t:s0->unconfined_u:object_r:user_home_dir_t:s0restorecon reset /home/wwwroot/index.html context unconfined_u:object_r:home_root_t:s0->unconfined_u:object_r:httpd_sys_content_t:s0
个人用户主页功能
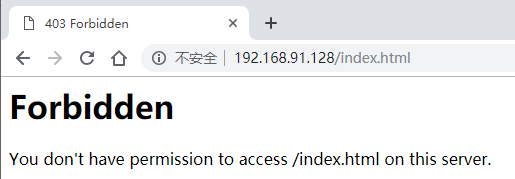
第1步:在httpd服务程序中,默认没有开启个人用户主页功能
在第17行的UserDir disabled参数前面加上井号(#),表示让httpd服务程序开启个人用户主页功能;同时再把第24行的UserDir public_html参数前面的井号(#)去掉(UserDir参数表示网站数据在用户家目录中的保存目录名称,即public_html目录)
[root@localhost ~]# vim /etc/httpd/conf.d/userdir.conf1 #2 # UserDir: The name of the directory that is appended onto a user's home3 # directory if a ~user request is received.4 #5 # The path to the end user account 'public_html' directory must be6 # accessible to the webserver userid. This usually means that ~userid7 # must have permissions of 711, ~userid/public_html must have permissions8 # of 755, and documents contained therein must be world-readable.9 # Otherwise, the client will only receive a "403 Forbidden" message.10 #11 <IfModule mod_userdir.c>12 #13 # UserDir is disabled by default since it can confirm the presence14 # of a username on the system (depending on home directory15 # permissions).16 #17 # UserDir disabled1819 #20 # To enable requests to /~user/ to serve the user's public_html21 # directory, remove the "UserDir disabled" line above, and uncomment22 # the following line instead:23 #24 UserDir public_html25 </IfModule>2627 #28 # Control access to UserDir directories. The following is an example29 # for a site where these directories are restricted to read-only.30 #31 <Directory "/home/*/public_html">32 AllowOverride FileInfo AuthConfig Limit Indexes33 Options MultiViews Indexes SymLinksIfOwnerMatch IncludesNoExec34 Require method GET POST OPTIONS35 </Directory>
第2步:在用户家目录中建立用于保存网站数据的目录及首页面文件。另外,还需要把家目录的权限修改为755,保证其他人也有权限读取里面的内容
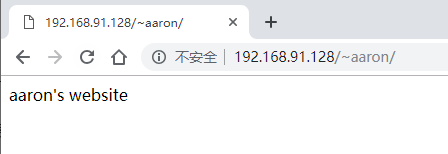
[root@localhost ~]# su - aaron[aaron@localhost ~]$ mkdir public_html[aaron@localhost ~]$ echo "aaron's website" > public_html/index.html[aaron@localhost ~]$ chmod -Rf 755 /home/aaron/
第3步:重新启动httpd服务程序,修改selinux安全上下文,网址格式为网址/~用户名(其中的波浪号是必需的,而且网址、波浪号、用户名之间没有空格)
[root@localhost ~]# getsebool -a | grep httphttpd_anon_write --> offhttpd_builtin_scripting --> onhttpd_can_check_spam --> offhttpd_can_connect_ftp --> offhttpd_can_connect_ldap --> offhttpd_can_connect_mythtv --> offhttpd_can_connect_zabbix --> offhttpd_can_network_connect --> offhttpd_can_network_connect_cobbler --> offhttpd_can_network_connect_db --> offhttpd_can_network_memcache --> offhttpd_can_network_relay --> offhttpd_can_sendmail --> offhttpd_dbus_avahi --> offhttpd_dbus_sssd --> offhttpd_dontaudit_search_dirs --> offhttpd_enable_cgi --> onhttpd_enable_ftp_server --> offhttpd_enable_homedirs --> offhttpd_execmem --> offhttpd_graceful_shutdown --> onhttpd_manage_ipa --> offhttpd_mod_auth_ntlm_winbind --> offhttpd_mod_auth_pam --> offhttpd_read_user_content --> offhttpd_run_ipa --> offhttpd_run_preupgrade --> offhttpd_run_stickshift --> offhttpd_serve_cobbler_files --> offhttpd_setrlimit --> offhttpd_ssi_exec --> offhttpd_sys_script_anon_write --> offhttpd_tmp_exec --> offhttpd_tty_comm --> offhttpd_unified --> offhttpd_use_cifs --> offhttpd_use_fusefs --> offhttpd_use_gpg --> offhttpd_use_nfs --> offhttpd_use_openstack --> offhttpd_use_sasl --> offhttpd_verify_dns --> offnamed_tcp_bind_http_port --> offprosody_bind_http_port --> off[root@localhost ~]# setsebool -P httpd_enable_homedirs=on
给网页加密码
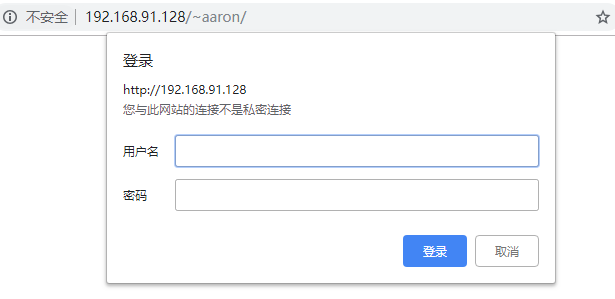
第1步:先使用htpasswd命令生成密码数据库。-c参数表示第一次生成;后面再分别添加密码数据库的存放文件,以及验证要用到的用户名称(该用户不必是系统中已有的本地账户)。
[root@localhost ~]# htpasswd -c /etc/httpd/passwd aaronNew password:Re-type new password:Adding password for user aaron
第2步:编辑个人用户主页功能的配置文件
把第31~35行的参数信息修改成下列内容,其中井号(#)开头的内容为刘遄老师添加的注释信息,可将其忽略。随后保存并退出配置文件,重启httpd服务程序即可生效
[root@localhost ~]# vim /etc/httpd/conf.d/userdir.conf31 <Directory "/home/*/public_html">32 AllowOverride all33 authuserfile "/etc/httpd/passwd"34 authname "My privately website"35 authtype basic36 # AllowOverride FileInfo AuthConfig Limit Indexes37 require user aaron38 </Directory>
虚拟主机功能
第1步:分别在/home/wwwroot中创建用于保存不同网站数据的三个目录,并向其中分别写入网站的首页文件。每个首页文件中应有明确区分不同网站内容的信息
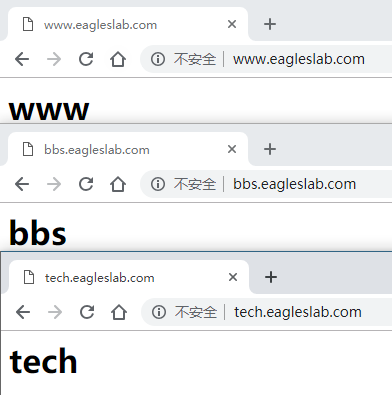
[root@localhost ~]# mkdir -p /home/wwwroot/www[root@localhost ~]# mkdir -p /home/wwwroot/bbs[root@localhost ~]# mkdir -p /home/wwwroot/tech[root@localhost ~]# echo "<h1>www</h1>" > /home/wwwroot/www/index.html[root@localhost ~]# echo "<h1>bbs</h1>" > /home/wwwroot/bbs/index.html[root@localhost ~]# echo "<h1>tech</h1>" > /home/wwwroot/tech/index.html
第2步:在httpd服务的配置文件中,分别追加写入三个基于主机名的虚拟主机网站参数,然后保存并退出。记得需要重启httpd服务,这些配置才生效
[root@localhost ~]# vim /etc/httpd/conf/httpd.conf[root@localhost ~]# tail -n 30 /etc/httpd/conf/httpd.conf #在最后加上虚拟主机的配置AddDefaultCharset UTF-8<IfModule mime_magic_module>MIMEMagicFile conf/magic</IfModule>EnableSendfile onIncludeOptional conf.d/*.conf<VirtualHost 192.168.91.128>DocumentRoot "/home/wwwroot/www"ServerName "www.eagleslab.com"<Directory "/home/wwwroot/www">AllowOverride NoneRequire all granted</Directory></VirtualHost><VirtualHost 192.168.91.128>DocumentRoot "/home/wwwroot/bbs"ServerName "bbs.eagleslab.com"<Directory "/home/wwwroot/bbs">AllowOverride NoneRequire all granted</Directory></VirtualHost><VirtualHost 192.168.91.128>DocumentRoot "/home/wwwroot/tech"ServerName "tech.eagleslab.com"<Directory "/home/wwwroot/tech">AllowOverride NoneRequire all granted</Directory></VirtualHost>[root@localhost ~]# systemctl restart httpd
第3步:因为当前的网站数据目录还是在/home/wwwroot目录中,因此还是必须要正确设置网站数据目录文件的SELinux安全上下文,使其与网站服务功能相吻合。最后记得用restorecon命令让新配置的SELinux安全上下文立即生效,这样就可以立即访问到虚拟主机网站了
[root@localhost ~]# semanage fcontext -a -t httpd_sys_content_t /home/wwwroot[root@localhost ~]# semanage fcontext -a -t httpd_sys_content_t /home/wwwroot/www[root@localhost ~]# semanage fcontext -a -t httpd_sys_content_t /home/wwwroot/www/*[root@localhost ~]# semanage fcontext -a -t httpd_sys_content_t /home/wwwroot/bbs[root@localhost ~]# semanage fcontext -a -t httpd_sys_content_t /home/wwwroot/bbs/*[root@localhost ~]# semanage fcontext -a -t httpd_sys_content_t /home/wwwroot/tech[root@localhost ~]# semanage fcontext -a -t httpd_sys_content_t /home/wwwroot/tech/*[root@localhost ~]# restorecon -Rv /home/wwwrootrestorecon reset /home/wwwroot context unconfined_u:object_r:user_home_dir_t:s0->unconfined_u:object_r:httpd_sys_content_t:s0restorecon reset /home/wwwroot/bbs context unconfined_u:object_r:user_home_t:s0->unconfined_u:object_r:httpd_sys_content_t:s0restorecon reset /home/wwwroot/bbs/index.html context unconfined_u:object_r:user_home_t:s0->unconfined_u:object_r:httpd_sys_content_t:s0restorecon reset /home/wwwroot/tech context unconfined_u:object_r:user_home_t:s0->unconfined_u:object_r:httpd_sys_content_t:s0restorecon reset /home/wwwroot/tech/index.html context unconfined_u:object_r:user_home_t:s0->unconfined_u:object_r:httpd_sys_content_t:s0

若有收获,就点个赞吧
0 人点赞
