docker下安装rabbitmq: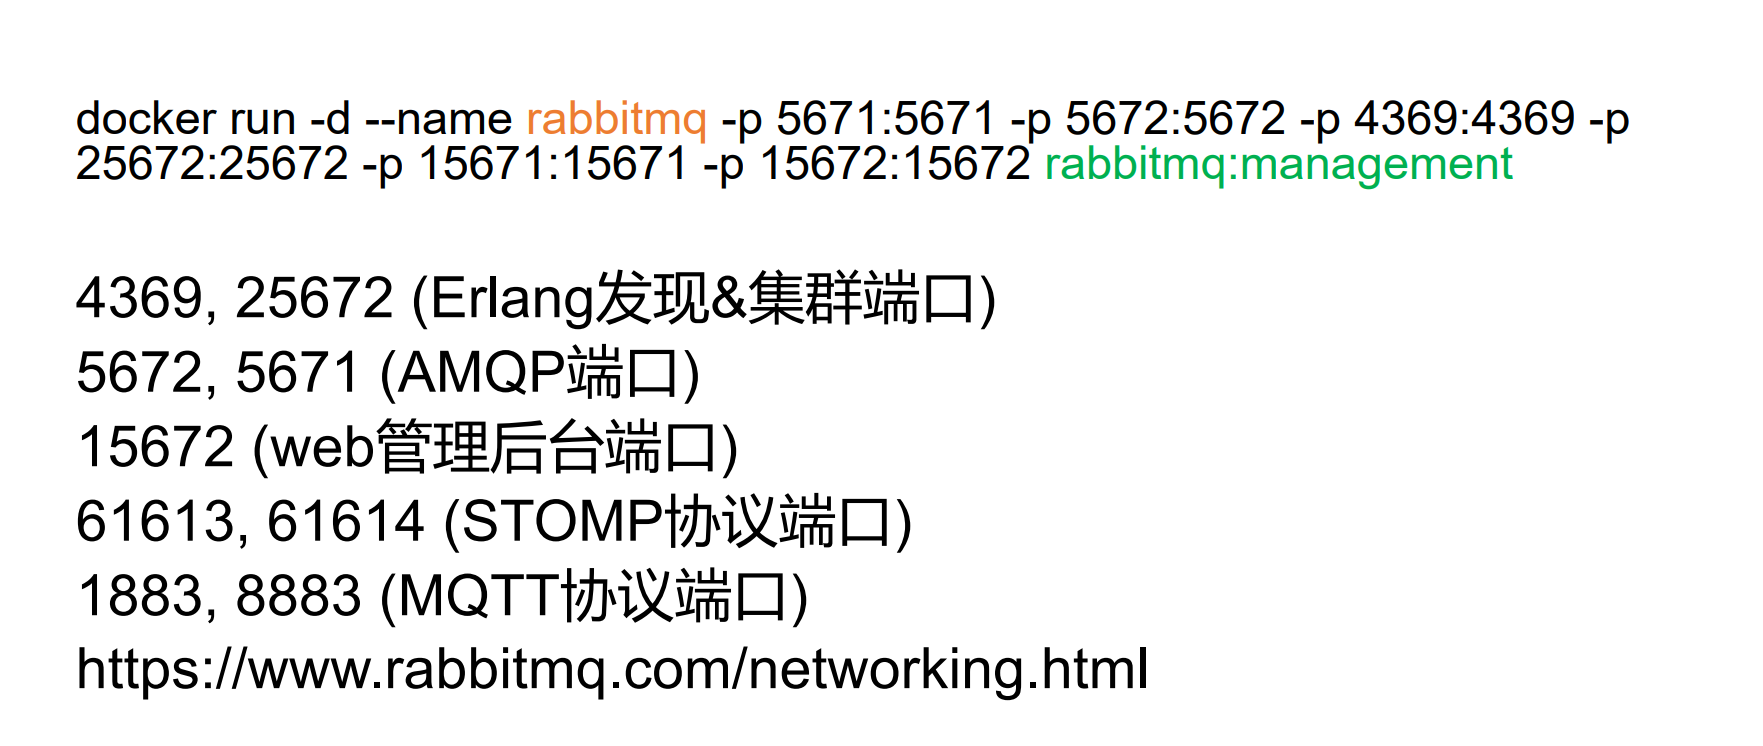
启动镜像后,访问镜像所在服务器的15672端口: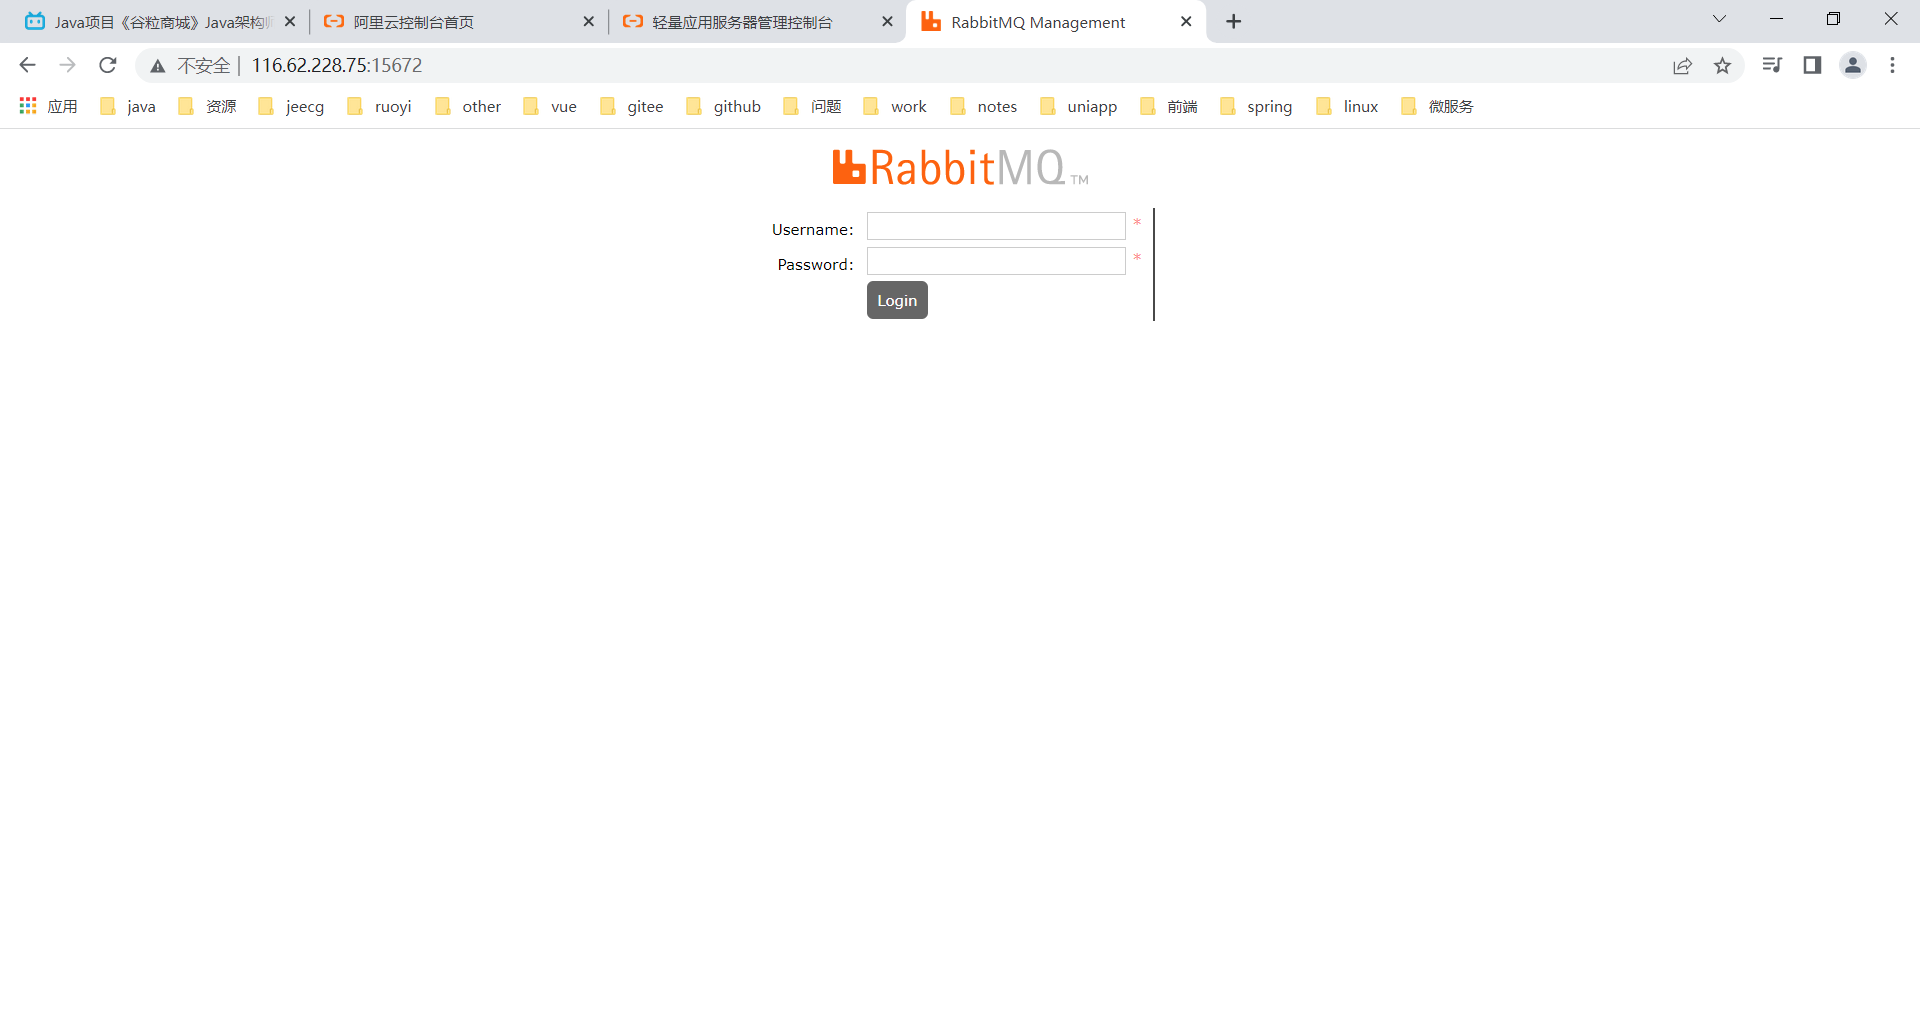
默认的账号密码为 guest/guest
springboot整合rabbitmq:
以订单服务gulimall-order为例,整合rabbitmq:
依赖:
<!-- rabbitmq启动器 --><dependency><groupId>org.springframework.boot</groupId><artifactId>spring-boot-starter-amqp</artifactId></dependency>
配置文件:
spring.rabbitmq.host=116.62.228.75
spring.rabbitmq.port=5672
spring.rabbitmq.virtual-host=/
启动类:
package com.atguigu.gulimall.order;

import org.mybatis.spring.annotation.MapperScan;
import org.springframework.amqp.rabbit.annotation.EnableRabbit;
import org.springframework.boot.SpringApplication;
import org.springframework.boot.autoconfigure.SpringBootApplication;
import org.springframework.cloud.client.discovery.EnableDiscoveryClient;


@EnableRabbit
@EnableDiscoveryClient
@MapperScan("com.atguigu.gulimall.order.dao")
@SpringBootApplication
public class GulimallOrderApplication {

    public static void main(String[] args) {
        SpringApplication.run(GulimallOrderApplication.class, args);
    }

}
一些测试
package com.atguigu.gulimall.order;

import com.atguigu.gulimall.order.entity.OrderEntity;
import com.atguigu.gulimall.order.entity.OrderReturnReasonEntity;
import lombok.extern.slf4j.Slf4j;
import org.junit.Test;
import org.junit.runner.RunWith;
import org.springframework.amqp.core.AmqpAdmin;
import org.springframework.amqp.core.Binding;
import org.springframework.amqp.core.DirectExchange;
import org.springframework.amqp.core.Queue;
import org.springframework.amqp.rabbit.connection.CorrelationData;
import org.springframework.amqp.rabbit.core.RabbitTemplate;
import org.springframework.beans.factory.annotation.Autowired;
import org.springframework.boot.test.context.SpringBootTest;
import org.springframework.test.context.junit4.SpringRunner;

import java.util.Date;
import java.util.UUID;

@Slf4j
@RunWith(SpringRunner.class)
@SpringBootTest
public class GulimallOrderApplicationTests {

    @Autowired
    private AmqpAdmin amqpAdmin;

    @Autowired
    RabbitTemplate rabbitTemplate;

    /**
     * 创建交换机
     *
     * 1、如何创建Exchange[hello-java-exchange]、Queue、Binding
     * 1)、使用 AmqpAdmin 进行创建
     * 2、如何收发消息
     */
    @Test
    public void createExchange() {
        //amqpAdmin
        //Exchange
        /**
         * direct类型的交换机
         * DirectExchange(String name, boolean durable, boolean autoDelete, Map<String, Object> arguments)
         */
        DirectExchange directExchange = new DirectExchange("hello-java-exchange", true, false);
        amqpAdmin.declareExchange(directExchange);
        log.info("Exchange[{}]创建成功", "hello-java-exchange");
    }

    /**
     * 创建队列
     * Queue 是 org.springframework.amqp.core 包下的,不要错弄成java.util下的了
     * 使用 AmqpAdmin 进行创建
     */
    @Test
    public void createQueue() {
        //public Queue(String name, boolean durable, boolean exclusive, boolean autoDelete, Map<String, Object> arguments)
        Queue queue = new Queue("hello-java-queue", true, false, false);
        amqpAdmin.declareQueue(queue);
        log.info("Queue[{}]创建成功", "hello-java-queue");
    }

    /**
     * 创建绑定,使用AmqpAdmin 进行创建
     */
    @Test
    public void createBinding() {
        //(String destination【目的地】,
        // DestinationType destinationType【目的地类型】,
        // String exchange【交换机】,
        // String routingKey【路由键】,
        //Map<String, Object> arguments【自定义参数】)
        //将exchange指定的交换机和destination目的地进行绑定,使用routingKey作为指定的路由键
        Binding binding = new Binding("hello-java-queue",
                Binding.DestinationType.QUEUE,
                "hello-java-exchange",
                "hello.java", null);
        amqpAdmin.declareBinding(binding);
        log.info("Binding[{}]创建成功", "hello-java-binding");
    }


    /**
     *  使用 RabbitTemplate 收发消息
     */
    @Test
    public void sendMessageTest() {

        //1、发送消息,如果发送的消息是个对象,我们会使用序列化机制,将对象写出去。对象必须实现Serializable
        String msg = "Hello World!";

        //2、发送的对象类型的消息,可以转成一个json
        for (int i=0;i<10;i++){
            if(i%2 == 0){
                OrderReturnReasonEntity reasonEntity = new OrderReturnReasonEntity();
                reasonEntity.setId(1L);
                reasonEntity.setCreateTime(new Date());
                reasonEntity.setName("哈哈-"+i);
                rabbitTemplate.convertAndSend("hello-java-exchange", "hello.java", reasonEntity,new CorrelationData(UUID.randomUUID().toString()));
            }else {
                OrderEntity entity = new OrderEntity();
                entity.setOrderSn(UUID.randomUUID().toString());
                rabbitTemplate.convertAndSend("hello-java-exchange", "hello.java", entity,new CorrelationData(UUID.randomUUID().toString()));
            }
            log.info("消息发送完成{}");
        }

    }


}
RabbitMQ配置类
我们可以通过添加rabbitmq的配置类,在配置类中添加配置,来实现改变序列化机制为json等操作:
package com.atguigu.gulimall.order.config;

import org.springframework.amqp.core.Message;
import org.springframework.amqp.rabbit.connection.ConnectionFactory;
import org.springframework.amqp.rabbit.connection.CorrelationData;
import org.springframework.amqp.rabbit.core.RabbitTemplate;
import org.springframework.amqp.support.converter.Jackson2JsonMessageConverter;
import org.springframework.amqp.support.converter.MessageConverter;
import org.springframework.context.annotation.Bean;
import org.springframework.context.annotation.Configuration;
import org.springframework.context.annotation.Primary;

@Configuration
public class MyRabbitConfig {

//
//    @Autowired
    RabbitTemplate rabbitTemplate;


//    public MyRabbitConfig(RabbitTemplate rabbitTemplate){
//        this.rabbitTemplate = rabbitTemplate;
//        initRabbitTemplate();
//    }
    //TODO
    @Primary
    @Bean
    public RabbitTemplate rabbitTemplate(ConnectionFactory connectionFactory){
        RabbitTemplate rabbitTemplate = new RabbitTemplate(connectionFactory);
        this.rabbitTemplate = rabbitTemplate;
        rabbitTemplate.setMessageConverter(messageConverter());
        initRabbitTemplate();
        return rabbitTemplate;
    }

    /**
     * 使用JSON序列化机制,进行消息转换
     */
    @Bean
    public MessageConverter messageConverter(){

        return new Jackson2JsonMessageConverter();
    }

    /**
     * 定制RabbitTemplate
     * 1、服务器收到消息就回调
     *      1、spring.rabbitmq.publisher-confirms=true
     *      2、设置确认回调ConfirmCallback
     * 2、消息正确抵达队列进行回调
     *      1、 spring.rabbitmq.publisher-returns=true
     *          spring.rabbitmq.template.mandatory=true
     *      2、设置确认回调ReturnCallback
     *
     * 3、消费端确认(保证每个消息被正确消费,此时才可以broker删除这个消息)。
     *      spring.rabbitmq.listener.simple.acknowledge-mode=manual 手动签收
     *      1、默认是自动确认的,只要消息接收到,客户端会自动确认,服务端就会移除这个消息
     *          问题:
     *              我们收到很多消息,自动回复给服务器ack,只有一个消息处理成功,宕机了。就会发生消息丢失;
     *              消费者手动确认模式。只要我们没有明确告诉MQ,货物被签收。没有Ack,
     *                  消息就一直是unacked状态。即使Consumer宕机。消息不会丢失,会重新变为Ready,下一次有新的Consumer连接进来就发给他
     *      2、如何签收:
     *          channel.basicAck(deliveryTag,false);签收;业务成功完成就应该签收
     *          channel.basicNack(deliveryTag,false,true);拒签;业务失败,拒签
     */
//    @PostConstruct //MyRabbitConfig对象创建完成以后,执行这个方法
    public void initRabbitTemplate(){
        //设置确认回调
        rabbitTemplate.setConfirmCallback(new RabbitTemplate.ConfirmCallback() {

            /**
             *
             * 1、只要消息抵达Broker就ack=true
             * @param correlationData 当前消息的唯一关联数据(这个是消息的唯一id)
             * @param ack  消息是否成功收到
             * @param cause 失败的原因
             */
            @Override
            public void confirm(CorrelationData correlationData, boolean ack, String cause) {

                /**
                 * 1、做好消息确认机制(pulisher,consumer【手动ack】)
                 * 2、每一个发送的消息都在数据库做好记录。定期将失败的消息再次发送一遍
                 */
                //服务器收到了;
                //修改消息的状态
                System.out.println("confirm...correlationData["+correlationData+"]==>ack["+ack+"]==>cause["+cause+"]");
            }
        });

        //设置消息抵达队列的确认回调
        rabbitTemplate.setReturnCallback(new RabbitTemplate.ReturnCallback() {
            /**
             * 只要消息没有投递给指定的队列,就触发这个失败回调
             * @param message   投递失败的消息详细信息
             * @param replyCode 回复的状态码
             * @param replyText 回复的文本内容
             * @param exchange  当时这个消息发给哪个交换机
             * @param routingKey 当时这个消息用哪个路由键
             */
            @Override
            public void returnedMessage(Message message, int replyCode, String replyText, String exchange, String routingKey) {
                //报错误了。修改数据库当前消息的状态->错误。
                System.out.println("Fail Message["+message+"]==>replyCode["+replyCode+"]==>replyText["+replyText+"]===>exchange["+exchange+"]===>routingKey["+routingKey+"]");
            }
        });
    }

}
使用总结
/
使用RabbitMQ
1、引入amqp场景;RabbitAutoConfiguration 就会自动生效
2、RabbitAutoConfiguration自动生效之后,就会给我们的spring容器汇总,自动配置
RabbitTemplate、AmqpAdmin、CachingConnectionFactory (连接工厂)、RabbitMessagingTemplate;
3、给配置文件中配置 spring.rabbitmq 信息
4、在启动类上标注@EnableRabbit,开启RabbitMQ功能
—>只想给消息队列创建组件等,不需要这个注解,但是想监听消息,必须要有这个注解
5、监听消息:使用@RabbitListener;(想使用这个注解,启动类上必须有@EnableRabbit开启rabbitmq功能)
* @RabbitListener: 类+方法上(监听哪些队列即可)
* @RabbitHandler: *标在方法上(重载区分不同的消息)
使用时,可以把@RabbitListener标注在类上,其参数注明接收哪个(哪些)队列的消息;
把@RabbitHandler标注在方法上,这些方法,可以接收不同类型的消息;
一旦监听的队列中有新消息,就会自动接收;
*/
@RabbitListener和@RabbitHandler示例
发消息:
 @Autowired
    RabbitTemplate rabbitTemplate;

/**
     *  使用 RabbitTemplate 收发消息
     */
    @Test
    public void sendMessageTest() {

        //1、发送消息,如果发送的消息是个对象,我们会使用序列化机制,将对象写出去。对象必须实现Serializable
        String msg = "Hello World!";

        //2、发送的对象类型的消息,可以转成一个json
        for (int i=0;i<10;i++){
            if(i%2 == 0){
                OrderReturnReasonEntity reasonEntity = new OrderReturnReasonEntity();
                reasonEntity.setId(1L);
                reasonEntity.setCreateTime(new Date());
                reasonEntity.setName("哈哈-"+i);
                rabbitTemplate.convertAndSend("hello-java-exchange", "hello.java", reasonEntity,new CorrelationData(UUID.randomUUID().toString()));
            }else {
                OrderEntity entity = new OrderEntity();
                entity.setOrderSn(UUID.randomUUID().toString());
                rabbitTemplate.convertAndSend("hello-java-exchange", "hello.java", entity,new CorrelationData(UUID.randomUUID().toString()));
            }
            log.info("消息发送完成{}");
        }

    }
收消息:
package com.atguigu.gulimall.order.service.impl;

import com.atguigu.gulimall.order.entity.OrderReturnReasonEntity;
import com.rabbitmq.client.Channel;
import org.springframework.amqp.core.Message;
import org.springframework.amqp.core.MessageProperties;
import org.springframework.amqp.rabbit.annotation.RabbitHandler;
import org.springframework.amqp.rabbit.annotation.RabbitListener;
import org.springframework.stereotype.Service;
import java.util.Map;
import com.baomidou.mybatisplus.core.conditions.query.QueryWrapper;
import com.baomidou.mybatisplus.core.metadata.IPage;
import com.baomidou.mybatisplus.extension.service.impl.ServiceImpl;
import com.atguigu.common.utils.PageUtils;
import com.atguigu.common.utils.Query;

import com.atguigu.gulimall.order.dao.OrderItemDao;
import com.atguigu.gulimall.order.entity.OrderItemEntity;
import com.atguigu.gulimall.order.service.OrderItemService;

@RabbitListener(queues = {"hello-java-queue"})
@Service("orderItemService")
public class OrderItemServiceImpl extends ServiceImpl<OrderItemDao, OrderItemEntity> implements OrderItemService {

    @Override
    public PageUtils queryPage(Map<String, Object> params) {
        IPage<OrderItemEntity> page = this.page(
                new Query<OrderItemEntity>().getPage(params),
                new QueryWrapper<OrderItemEntity>()
        );

        return new PageUtils(page);
    }

    /**
     * queues:声明需要监听的所有队列
     *
     * org.springframework.amqp.core.Message
     *
     * 参数可以写一下类型
     * 1、Message message:原生消息详细信息。头+体
     * 2、T<发送的消息的类型> OrderReturnReasonEntity content;
     * 3、Channel channel:当前传输数据的通道
     *
     * Queue:可以很多人都来监听。只要收到消息,队列删除消息,而且只能有一个收到此消息
     * 场景:
     *    1)、订单服务启动多个;同一个消息,只能有一个客户端收到
     *    2)、 只有一个消息完全处理完,方法运行结束,我们就可以接收到下一个消息
     */
//    @RabbitListener(queues = {"hello-java-queue"})
    @RabbitHandler
    public void receiveMessage(Message message,
                               OrderReturnReasonEntity content,
                               Channel channel) throws InterruptedException {
        //{"id":1,"name":"哈哈","sort":null,"status":null,"createTime":1581144531744}
        System.out.println("接收到消息..."+content);
        byte[] body = message.getBody();
        //消息头属性信息
        MessageProperties properties = message.getMessageProperties();
//        Thread.sleep(3000);
        System.out.println("消息处理完成=>"+content.getName());
        //channel内按顺序自增的。
        long deliveryTag = message.getMessageProperties().getDeliveryTag();
        System.out.println("deliveryTag==>"+deliveryTag);

        //签收货物,非批量模式
        try {
            if(deliveryTag%2 == 0){
                //收货
                channel.basicAck(deliveryTag,false);
                System.out.println("签收了货物..."+deliveryTag);
            }else {
                //退货 requeue=false 丢弃  requeue=true 发回服务器,服务器重新入队。
                //long deliveryTag, boolean multiple, boolean requeue
                //签收了货物...6
                channel.basicNack(deliveryTag,false,true);
                //long deliveryTag, boolean requeue
//                channel.basicReject();
                System.out.println("没有签收了货物..."+deliveryTag);
            }

        }catch (Exception e){
            //网络中断
        }

    }

}
RabbitMQ消息确认机制—可靠抵达
以往,为了保证消息不丢失、可靠抵达,会使用事务消息,虽然能保证,但是性能下降很多(约降低250倍);
为此,引入消息确认机制。
消息的发送主要分为

若有收获,就点个赞吧
0 人点赞
