Playbook
Playbook是一个不同于使用Ansible命令行执行方式的模式,其功能更强大灵活,简单来说,Playbook是一个非常简单的配置管理和多主机部署系统,不同于任何已经存在的模式,可作为一个适合部署复杂应用程序的基础
模块执行是幂等性的,因此Playbook执行也是幂等性的,多次执行结果相同
值得注意的是Playbook是通过YAML格式来进行描述定义的
YAML标记语言
YAML是一种表达资料序列的格式,由于参考了其他多张语言,所以具有很高的可读性,其特性如下:
- 具有很好的可读性,易于实现
- 表达能力强,扩展性好
- 和脚本语言的交互性好
- 有一个一致的信息模型
- 可以基于流来处理
基本语法规则
- 大小写敏感
- 使用缩进表示层级关系
- 缩进时不允许使用Tab键,只允许使用空格。
- 缩进的空格数目不重要,只要相同层级的元素左侧对齐即可
- ‘#’表示注释
支持的数据结构
YAML 支持以下几种数据类型:
- 对象:键值对的集合,又称为映射(mapping)/ 哈希(hashes) / 字典(dictionary)
- 数组:一组按次序排列的值,又称为序列(sequence) / 列表(list)
- 纯量(scalars):单个的、不可再分的值
YAML对象
对象键值对使用冒号结构表示 key: value,冒号后面一定要加一个空格
也可以使用 key:{key1: value1, key2: value2, …}
用缩进表示层级关系
yum:name: httpdstate: latest
YAML数组
以 - 开头的行表示构成一个数组:
- A- B- C# ["A","B","C"]
多维数组
key: [value1, value2, ...]
子成员是数组
-- A- B- C# [["A","B","C"]]
复合结构
例如:
languages:- Ruby- Perl- Pythonwebsites:YAML: yaml.orgRuby: ruby-lang.orgPython: python.orgPerl: use.perl.org
转为JSON为
{languages: [ 'Ruby', 'Perl', 'Python'],websites: {YAML: 'yaml.org',Ruby: 'ruby-lang.org',Python: 'python.org',Perl: 'use.perl.org'}}
核心字段
- hosts:执行的远程主机列表
- tasks:任务,由模块定义操作列表
- variables:内置变量或者自定义变量
- templates:模板,模板文件一般是由Jinja2语言编写的
- handlers:和nogity结合使用,为条件触发操作,满足条件则执行
- roles:角色
官方示例剧本
- name: update web servers # 剧本名称hosts: webservers # 远程主机列表remote_user: root # 指定远程用户tasks:- name: ensure apache is at the latest version # 安装httpdyum:name: httpdstate: latest- name: write the apache config file # 编写httpd配置文件template:src: /srv/httpd.j2dest: /etc/httpd.conf
- name: update db servers # 剧本名称hosts: databases # 远程主机列表remote_user: root # 指定远程用户tasks:- name: ensure postgresql is at the latest version # 安装postgresqlyum:name: postgresqlstate: latest- name: ensure that postgresql is started # 启动postgresqlservice:name: postgresqlstate: started
简单案例
Apache部署
- 修改主机清单文件
[root@server1 ~]# vim /etc/ansible/hosts[server2]192.168.31.20
- 创建剧本配置文件
[root@server1 ~]# mkdir /playbook/file -p[root@server1 ~]# vim /playbook/apache-virtualhost-port.yaml- name: Update web servershosts: server2remote_user: roottasks:- name: ensure apache is the latest version # 安装httpdyum:name: httpdstate: latest- name: copy site1.conf to apache web server # 创建httpd虚拟主机配置文件copy:src: /playbook/file/site1.confdest: /etc/httpd/conf.d/site1.conf- name: create directory1 for apache web server # 创建httpd网站根目录file:name: /data/site1/state: directory- name: create directory2 for apache web server # 创建httpd网站根目录file:name: /data/site2/state: directory- name: write index.html # 编写index.html文件shell: echo "site1" > /data/site1/index.html && echo "site2" > /data/site2/index.html- name: start apache web server # 启动httpd文件service:name: httpdstate: restarted- name: test virtual hosts # 测试shell: curl 192.168.31.20:8080 && curl 192.168.31.20:8090
- 创建虚拟主机配置文件
[root@server1 ~]# vim /playbook/file/site1.confListen 8080Listen 8090<Directory "/data/">Require all granted</Directory><VirtualHost *:8080>DocumentRoot "/data/site1/"</VirtualHost><VirtualHost *:8090>DocumentRoot "/data/site2/"</VirtualHost>
- 检查并启动剧本
[root@server1 ~]# cd /playbook[root@server1 playbook]# ansible-playbook apache-virtualhost-port.yaml --syntax-check[root@server1 playbook]# ansible-playbook apache-virtualhost-port.yaml

- 测试网站
[root@server1 ~]# curl 192.168.31.20:8080site1[root@server1 ~]# curl 192.168.31.20:8090site2
Nginx部署
- 修改主机清单文件
[root@server1 ~]# vim /etc/ansible/hosts[server3]192.168.31.30
- 创建剧本配置文件
[root@server1 ~]# vim /playbook/nginx-virtualhost-port.yaml- name: Update web servershosts: server3remote_user: roottasks:- name: install epel # 安装扩展源yum:name: epel-release.noarchstate: latest- name: ensure nginx is the latest version # 安装Nginxyum:name: nginxstate: latest- name: copy site1.conf to nginx web server # 创建Nginx虚拟主机配置文件copy:src: /playbook/file/site2.confdest: /etc/nginx/conf.d/site2.conf- name: create directory for nginx web server # 创建网站根目录file:name: /datastate: directory- name: write index.html # 编写index.htmlshell: echo "nginx server" > /data/index.html- name: start nginx web server # 启动服务service:name: nginxstate: restarted
- 创建虚拟主机配置文件
[root@server1 ~]# vim playbook/file/site2.confserver {listen 8080;server_name 192.168.31.30:8080;location /{root /data;index index.html;}}
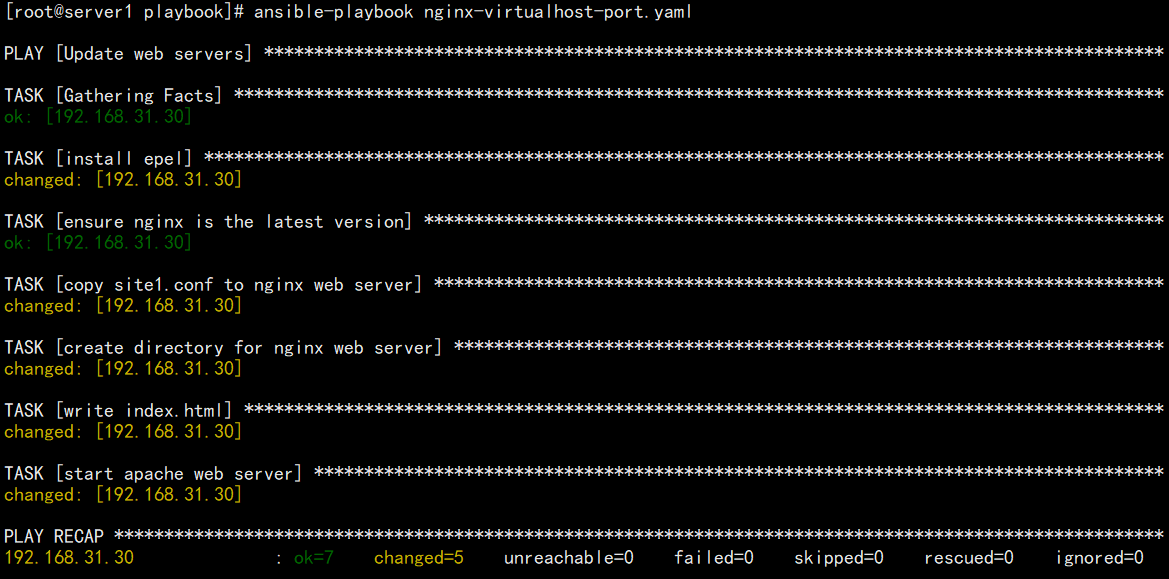
- 检查并启动剧本
[root@server1 ~]# cd /playbook[root@server1 playbook]# ansible-playbook nginx-virtualhost-port.yaml --syntax-check[root@server1 playbook]# ansible-playbook nginx-virtualhost-port.yaml
- 测试网站
[root@server1 ~]# curl 192.168.31.30:8080nginx server
剧本变量
变量的来源:
- 远程主机的所有变量都可以通过
ansible -m setup nodes命令来获取 - 自定义变量
优先级
- 通过命令行指定变量优先级
- /etc/ansible/hosts定义的变量(针对单个主机定义,针对主机组进行定义)
- playbook中定义的变量
常见系统变量:
主机名: "{{ ansible_hostname }}"inventory下面的所有主机和主机组信息:"{{ groups }}"操作系统版本: "{{ ansible_distribution }}" "{{ ansible_distribution_version }}"内核版本: "{{ ansible_kernel }}"系统位数: "{{ ansible_userspace_bits }}"网卡:"{{ ansible_eth0["device"] }}"IP地址: "{{ ansible_eth0.ipv4.address}}"子网掩码: "{{ ansible_eth0.ipv4.netmask}}"总内存: "{{ ansible_memory_mb["real"]["total"] }}"内存空闲: "{{ ansible_memfree_mb }}"
Ansible handler
handler的作用
可以让某些任务不做一些不必要的重复工作,减少一些无谓的操作
比如说在某个剧本中的任务有:修改Nginx配置文件、重启Nginx服务、修改Nginx主页
那么就可以使用handler,在修改Nginx配置文件的下面加上一个notify,notify对应handlers下配置的任务(重启Nginx服务),然后只有当真的修改了Nginx配置文件后才会调用handler,即重启服务
否则假如只是修改了个主页文件,还要把所有任务执行一遍(包括重启服务),对于Nginx服务器来说岂不是很没必要
下面会举出这个例子
handler的特点
- 在Ansible Playbook中,handler事实上也是个task,只不过这个task默认并不执行,只有在被触发时才执行
- handler通过
notify来监视某个或者某几个task,一旦task执行结果发生变化,则触发handler,执行相应操作 - 在
notify中定义内容一定要和handlers中定义的- name内容一样,这样才能达到触发的效果,否则会不生效 - handler会在所有的play都执行完毕之后才会执行,并且handler下的任务只会执行一次
- 任务表中的任务都是有状态的,也就是任务执行后的结果:
changed或者ok,在Ansible中,只有在任务的执行状态为changed时,才会执行该任务调用的handler - handler是按照定义的顺序执行的(即在
handlers下面写的顺序),而不是按照在任务中的调用顺序执行的
- name: Update web servershosts: server3remote_user: root- name: copy configuration file # 修改配置文件copy:src: /playbook/file/site2.confdest: /etc/nginx/conf.d/site2.confnotify:- restart nginx web server- name: write index.html # 编写主页文件shell: echo "nginx server" > /data/index.htmlhandlers:- name: restart nginx web server # 重启服务service:name: nginxstate: restarted
剧本模板
Ansible模板介绍
- 模板的本质是文本文件,内部嵌套有模板语言的脚本
- 编写语言为Jinja2语法,由Python编写
- 功能:将模板文件中的变量转换成对应的本地主机的确定值
语法:
- 字符串:使用单引号或者双引号代表字符串
- 数字
- 列表:使用中括号括起来表示的是列表[ ]
- 元组:使用小括号表示元组( )
- 字典:使用大括号表示字典{ }
- 算数运算:+ - * / ………
- 比较操作:== != > < ………
- 逻辑运算:and or not
Jinja2语法
变量
{{name}}
控制语句
{% if A.safe %}A is safe.{% elif A.dead %}A is dead{% else %}A is okay{% endif %}
模板继承
父模板
# base.html<html><head>{% block head %}<title>{% block title %}{% end block %}</title>{% end block %}</head><body>{% block body %}{% end block %}</body></html>
继承模板
{% extends 'base.html' %} # 继承base.html文件{% block head %}{{ super() }} # 用于获取原有的内容{% end block %}{% block title %}Index # 定制title部分的内容{% end block %}{% block body %}<h1>hello world</h1> # 定制body部分的内容{% end block %}
生成hosts解析文件
- 创建模板文件
/playbook/hosts.j2
127.0.0.1 localhost localhost.localdomain localhost4 localhost4.localdomain4::1 localhost localhost.localdomain localhost6 localhost6.localdomain6{% for host in groups.all %}{{hostvars[host].ansible_ens33.ipv4.address}} {{hostvars[host].ansible_hostname}}{% endfor %}
- 创建剧本配置文件
/playbook/hosts.yaml
- name: Config hosts filehosts: allremote_user: roottasks:- name: copy hosts.j2 to group serverstemplate:src: hosts.j2dest: /etc/hosts
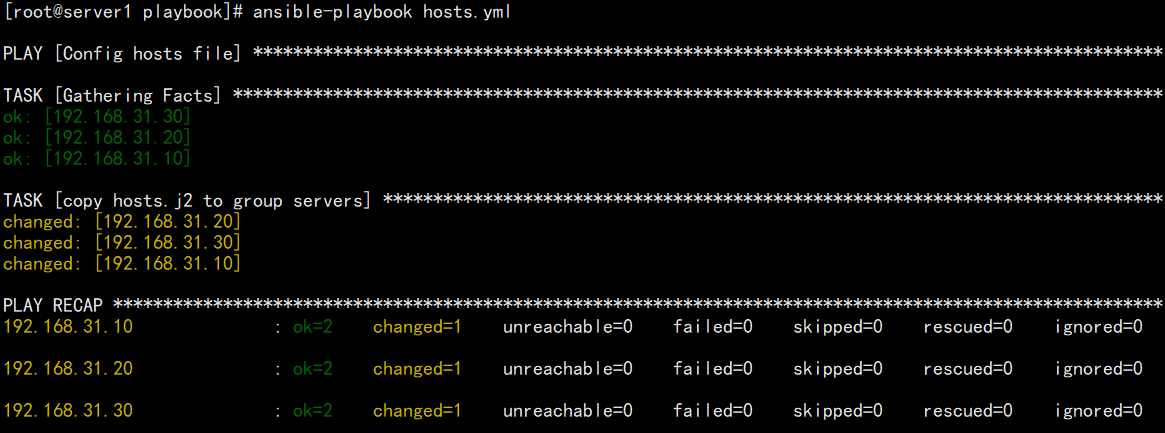
- 检查并运行剧本
[root@server1 playbook]# ansible-playbook hosts.yaml --syntax-check[root@server1 playbook]# ansible-playbook hosts.yaml
- 查看hosts文件(server1/server2/server3)
[root@server1 ~]# cat /etc/hosts127.0.0.1 localhost localhost.localdomain localhost4 localhost4.localdomain4::1 localhost localhost.localdomain localhost6 localhost6.localdomain6192.168.31.10 server1192.168.31.20 server2192.168.31.30 server3
- 进行互ping测试
[root@server1 ~]# ping server1[root@server1 ~]# ping server2[root@server1 ~]# ping server3
PS:
如果出现这种情况,是因为没有给这个主机设置免密登录导致的,给这台主机设置一下免密登录就可以了

生成Nginx配置文件
- 创建模板文件
/playbook/nginx.j2
{% for vhost in nginx_vhosts %}server {listen {{ vhost.listen }}{% if vhost.server_name is defined %}server_name {{ vhost.server_name }}{% endif %}root {{ vhost.root }}}{% endfor %}
- 创建剧本配置文件
/playbook/nginx.yml
- hosts: allremote_user: rootvars:nginx_vhosts:- web1:listen: 8080root: "/data/web1/"- web2:listen: 8080server_name: "www.web2.com"root: "/data/web2/"- web3:listen: 8080server_name: "www.web3.com"root: "/data/web3/"tasks:- name: template config totemplate:src: nginx.j2dest: /etc/nginx/conf.d/nginx3.conf
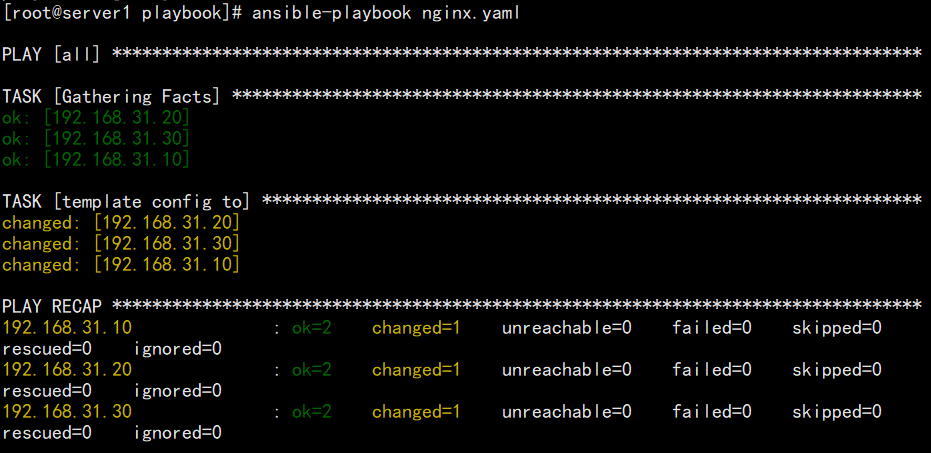
- 检查并运行剧本
[root@server1 playbook]# ansible-playbook nginx.yaml --syntax-check[root@server1 playbook]# ansible-playbook nginx.yaml
- 查看由剧本创建的Nginx虚拟主机配置文件(server1/server2/server3)
[root@server2 ~]# cat /etc/nginx/conf.d/nginx3.confserver {listen 8080root /data/web1/}server {listen 8080server_name www.web2.comroot /data/web2/}server {listen 8080server_name www.web3.comroot /data/web3/}
循环迭代
with_items(简单循环)
with_items是Playbook标准循环,可以用于迭代一个列表或字典,通过{{ item }}获取每次迭代的值
基于字符串列表
- hosts: allremote_user: roottasks:- name: create rsyncd filecopy: src={{ item }} dest=/tmp/{{ item }}with_items:- a- b- c- d
基于字典列表
- hosts: allremote_user: roottasks:- name: add several usersuser: name={{ item.name }} state=present groups={{ item.groups }}with_items:- { name: 'testuser1' , groups: 'wheel'}- { name: 'testuser2' , groups: 'root' }
with_list(嵌套循环)
with_items和with_list都可以用作简单循环,但是with_items不能用在嵌套循环,它会将列表展开拉平然后将元素一个一个输出,而with_list则不会将嵌套列表拉平
- hosts: alltasks:- name: print msgdebug:msg: '{{ item }}'with_list:- [1,2,3]- [a,b]# 最后输出[1,2,3],[a,b]# 如果是with_items则是 1,2,3,a,b
- 还有一个关键字
with_flattened也是和with_items一样的,会将嵌套列表拉平 with_list只会处理最外层的列表,将最外层的列表中的每一项循环处理
with_together(合并对齐)
with_together会将每个小列表中的值对齐合并
- hosts: alltasks:- name: print msgdebug:msg: '{{ item }}'with_together:- [1,2,3]- [a,b,c]# 最后输出[1,a],[2,b],[3,c]# 如果没有写c,那么最后一个会是[3,null]
loop
Ansible 支持使用 loop 关键字对一组项目迭代任务,可以配置循环以利用列表中的各个项目、列表中的各个文件的内容、生成的数字序列或更为复杂任务
基于字符串列表
- hosts: alltasks:- name: print users namedebug:msg: '{{ item }}'loop:- tom- bob- alice# 或者- hosts: allvars:users:- tom- bob- alicetasks:- name: print users namedebug:msg: '{{ item }}'loop: "{{ users }}"
基于字典列表
- hosts: alltasks:- name: create usersuser:name: "{{ item.name }}"state: presentgroups: "{{ item.group }}"loop:- name: janegroup: whell- name: joegroup: root# 或者- hosts: allvars:users:- name: janegroups: teacher- name: joegroups: studenttasks:- name: create usersuser:name: "{{ item.name }}"groups: "{{ item.groups }}"state: presentloop: "{{ users }}"
剧本角色
介绍
角色(roles)是ansible自1.2版本开始引入的新特性,用于层次性,结构化地组织Playbook,分别将变量、文件、任务、模板及处理器放置于单独的目录中,并可以便捷地调用它们
角色的使用,让代码复用度提高,可以解决一些运维复杂的场景问题
当有多个角色时,可以将他们分别放于roles目录下的独立子目录中
初始化一个角色:ansible-galaxy init 角色名
目录说明
tasks目录:角色需要执行的主任务文件放置在此目录中,默认的主任务文件名为main.yml,当调用角色时,默认会执行main.yml文件中的任务;可以将其他需要执行的任务文件通过include的方式包含在tasks/main.yml文件中
handlers目录:当角色需要调用handlers时,默认会在此目录中的main.yml文件中查找对应的handlers
defaults目录:角色会使用的变量可以写入到此目录中的main.yml文件中,通常,defaults/main.yml文件中的变量都用于设置默认值
vars目录:角色会使用的变量可以写入到此目录中的main.yml文件中,看到这里你肯定会有疑问
PS:vars/main.yml文件和defaults/main.yml的区别:
defaults/main.yml文件中的变量的优先级是最低的,而vars/main.yml文件中的变量的优先级非常高如果只是想提供一个默认的配置,那么可以把对应的变量定义在defaults/main.yml中,如果想要确保在调用角色时,使用的值就是指定的值,则可以将变量定义在vars/main.yml中,因为定义在vars/main.yml文件中的变量的优先级非常高,所以其值比较难以覆盖
meta目录:如果你想要赋予这个角色一些元数据,则可以将元数据写入到meta/main.yml文件中,这些元数据用于描述角色的相关属性,比如作者信息、角色主要作用等等,你也可以在meta/main.yml文件中定义这个角色依赖于哪些其他角色,或者改变角色的默认调用设定
templates目录: 角色相关的模板文件可以放置在此目录中,当使用角色相关的模板时,如果没有指定路径,会默认从此目录中查找对应名称的模板文件
files目录:角色可能会用到的其他文件可以放置在此目录中,比如,当你定义nginx角色时,需要配置https,那么相关的证书文件即可放置在此目录中
安装Httpd
- 准备角色
[root@server1 roles]# ansible-galaxy init apache- Role apache was created successfully
- 编写角色主配置文件
[root@server1 roles]# vim site.yml- name: Install Apache web serverhosts: server3remote_user: rootroles:- apache
- 编写角色tasks里的main.yaml文件
[root@server1 roles]# vim apache/tasks/main.yml---# tasks file for apache- name: Install httpd # 安装httpd服务yum:name: httpdstate: present- name: start httpd # 启动httpd服务service:name: httpdstate: restarted- name: write conf file # 编写index.htmlcopy:content: "hello apache\n"dest: "/var/www/html/index.html"
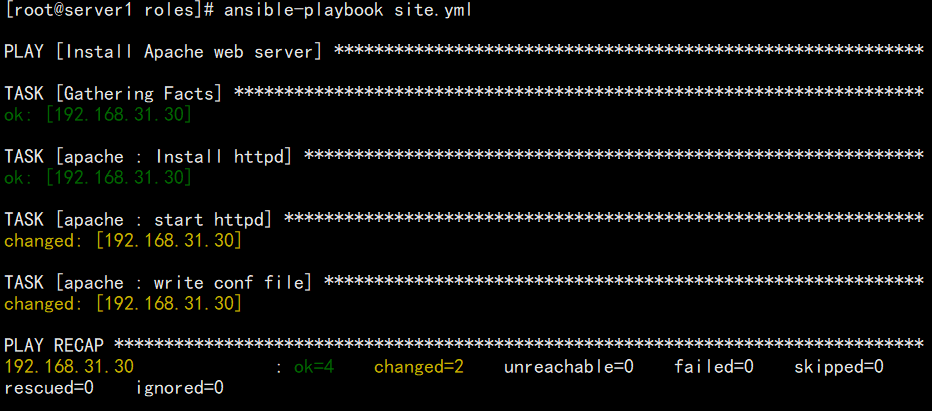
- 检查并运行剧本
[root@eagle roles]# ansible-playbook site.yaml --syntax-check[root@eagle tasks]# ansible-playbook site.yaml
- 验证结果
[root@server1 roles]# curl 192.168.31.30hello apache
安装Halo博客
Halo是一个博客系统,官方网址https://halo.run/
使用Ansible去自动部署Halo博客系统需要准备的有:Java Nginx Halo
- 准备角色
[root@server1 ~]# cd /etc/ansible/roles/[root@server1 roles]# ansible-galaxy init halo- Role halo was created successfully[root@server1 roles]# ansible-galaxy init java- Role java was created successfully[root@server1 roles]# ansible-galaxy init nginx- Role nginx was created successfully
- 编写剧本主配置文件site.yaml
[root@server1 roles]# vim site.yml- name: Install Halo Bloghosts: server2remote_user: rootstrategy: freepre_tasks:- name: config nginx repo for centos7yum_repository:name: nginxdescription: nginxbaseurl: http://nginx.org/packages/centos/$releasever/$basearch/gpgcheck: noroles:- nginx
- 查看目录结构
[root@server1 roles]# tree.├── halo│ ├── defaults│ │ └── main.yml│ ├── files│ ├── handlers│ │ └── main.yml│ ├── meta│ │ └── main.yml│ ├── README.md│ ├── tasks│ │ └── main.yml│ ├── templates│ ├── tests│ │ ├── inventory│ │ └── test.yml│ └── vars│ └── main.yml├── java│ ├── defaults│ │ └── main.yml│ ├── files│ ├── handlers│ │ └── main.yml│ ├── meta│ │ └── main.yml│ ├── README.md│ ├── tasks│ │ └── main.yml│ ├── templates│ ├── tests│ │ ├── inventory│ │ └── test.yml│ └── vars│ └── main.yml├── nginx│ ├── defaults│ │ └── main.yml│ ├── files│ ├── handlers│ │ └── main.yml│ ├── meta│ │ └── main.yml│ ├── README.md│ ├── tasks│ │ └── main.yml│ ├── templates│ ├── tests│ │ ├── inventory│ │ └── test.yml│ └── vars│ └── main.yml└── site.yml
Nginx角色配置
- 编写Nginx角色主配置剧本文件
[root@server1 roles]# vim nginx/tasks/main.yml---# tasks file for nginx- name: make sure nginx state is installed # 安装Nginxyum:name: nginxstate: present- name: copy halo to nginx config file # 虚拟主机反向代理配置文件template:src: halo.confdest: "/etc/nginx/conf.d/halo.conf"- name: make sure nginx service is running # 启动Nginxservice:name: nginxstate: restarted- name: make sure port is open # 等待端口启用wait_for:port: "{{ nginx_port }}"
- 修改Nginx角色的设定及其依赖关系
[root@server1 roles]# vim nginx/meta/main.ymldependencies:# List your role dependencies here, one per line. Be sure to remove the'[]' above,# if you add dependencies to this list.- role: java- role: halo
- 编写Nginx角色的反向代理配置
[root@server1 roles]# vim nginx/templates/halo.confupstream halo{server 127.0.0.1:8090;}server {listen 80;listen [::]:80;server_name {{ halo_domain }};client_max_body_size 1024m;location / {proxy_pass http://halo;proxy_set_header HOST $host;proxy_set_header X-Forwarded-Proto $scheme;proxy_set_header X-Real-IP $remote_addr;proxy_set_header X-Forwarded-For $proxy_add_x_forwarded_for;}}
Java角色配置
- 编写Java角色主配置剧本文件
[root@server1 roles]# vim java/tasks/main.yml---# tasks file for java- name: install java # 安装Java环境yum: name=java-11-openjdk state=installed
Halo角色配置
- 编写Halo角色主配置剧本文件
[root@server1 roles]# vim halo/tasks/main.yml---# tasks file for halo- name: get halo # 下载halo源码包get_url:url: https://dl.halo.run/release/halo-1.4.11.jardest: "{{ halopath }}"- name: add halo service file # 添加halo服务文件template:src: halo.servicedest: "/etc/systemd/system/halo.service"- name: touch ~/.halo directory # 创建.halo文件夹file:path: ~/.halostate: directory- name: copy halo config file # 拷贝application.yaml文件template:src: application.yamldest: "~/.halo/application.yaml"- name: start halo # 启动halo服务systemd:daemon_reload: yesname: halostate: startedenabled: yes
- 编写Halo角色变量配置文件
[root@server1 roles]# cat halo/vars/main.yml---# vars file for halomemory: 512mhalo_port: 8090halopath: /root/halo.jarhalo_domain: 192.168.31.20nginx_port: 80
- 下载Halo的service文件并配置,下载保存位置需要和halo的tasks中的main.yml编写的位置对应
[root@server1 roles]# wget https://dl.halo.run/config/halo.service -O halo/templates/halo.service[root@server1 roles]# vim halo/templates/halo.service[Unit]Description=Halo ServiceDocumentation=https://docs.halo.runAfter=network-online.targetWants=network-online.target[Service]Type=simpleUser=rootExecStart=/usr/bin/java -server -Xms256m -Xmx256m -jar /root/halo.jarExecStop=/bin/kill -s QUIT $MAINPIDRestart=alwaysStandOutput=syslogStandError=inherit[Install]WantedBy=multi-user.target
- 下载Halo的application.yaml文件,下载保存位置需要和halo的tasks中的main.yml编写的位置对应
[root@server1 roles]# wget https://dl.halo.run/config/application-template.yaml -O halo/templates/application.yaml
运行与测试
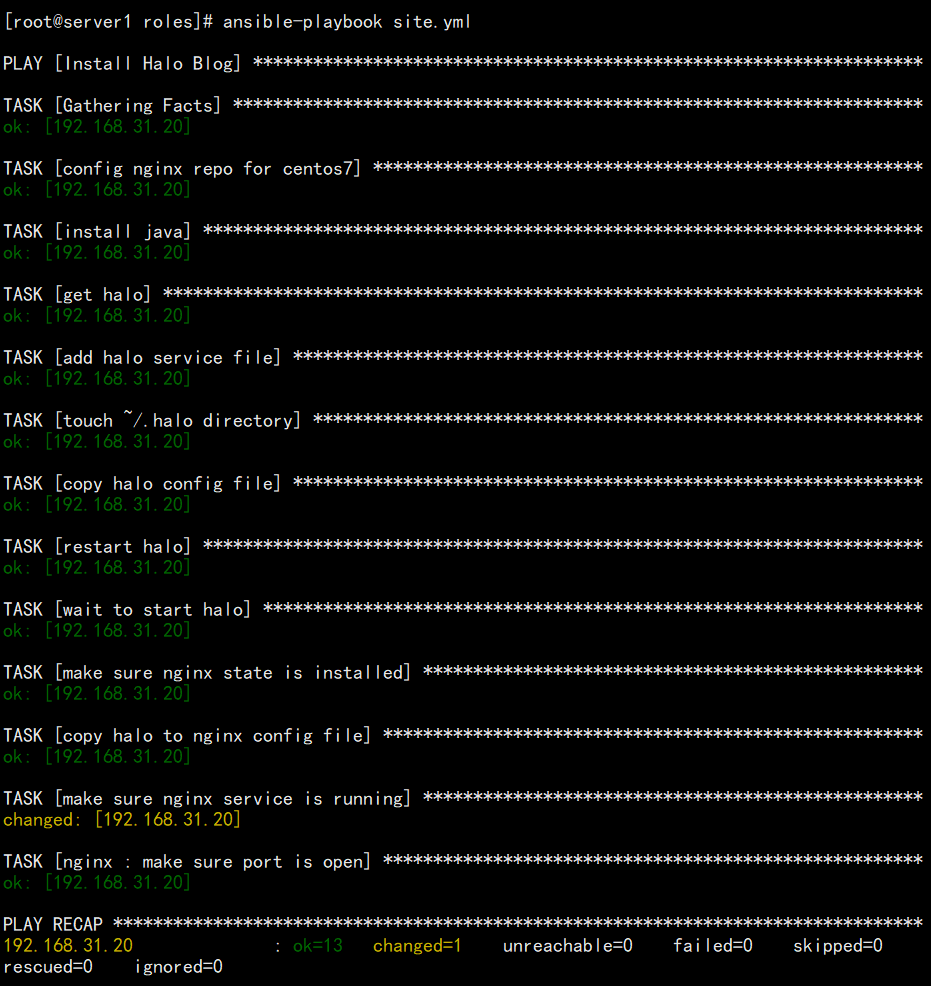
检查并运行site.yaml剧本
[root@server1 roles]# ansible-playbook site.yaml --syntax-check[root@server1 roles]# ansible-playbook site.yaml
- 进入浏览器查看结果192.168.31.20


若有收获,就点个赞吧
0 人点赞
