4.1 了解 runtime-core
runtime-core 是vue3 的核心逻辑,主要流程 , 是实现 mini-vue 的主要核心 。
runtime-core 在vue3中的作用:
- 符合vue3的开发逻辑,API 的设计, 配合其他模块应用
runtime-core 是vue3的运行时,主要内容有 组件 和 视图 Element
- 初始化模板,定义组件, 声明 Element内容
- 组件 、 Element的初始化、更新
- 实现组件的主要API :
$el | props | emit | slot的实现
初始化
runtime-core的主要流程- 初始化组件的流程
- 初始化 Element 流程
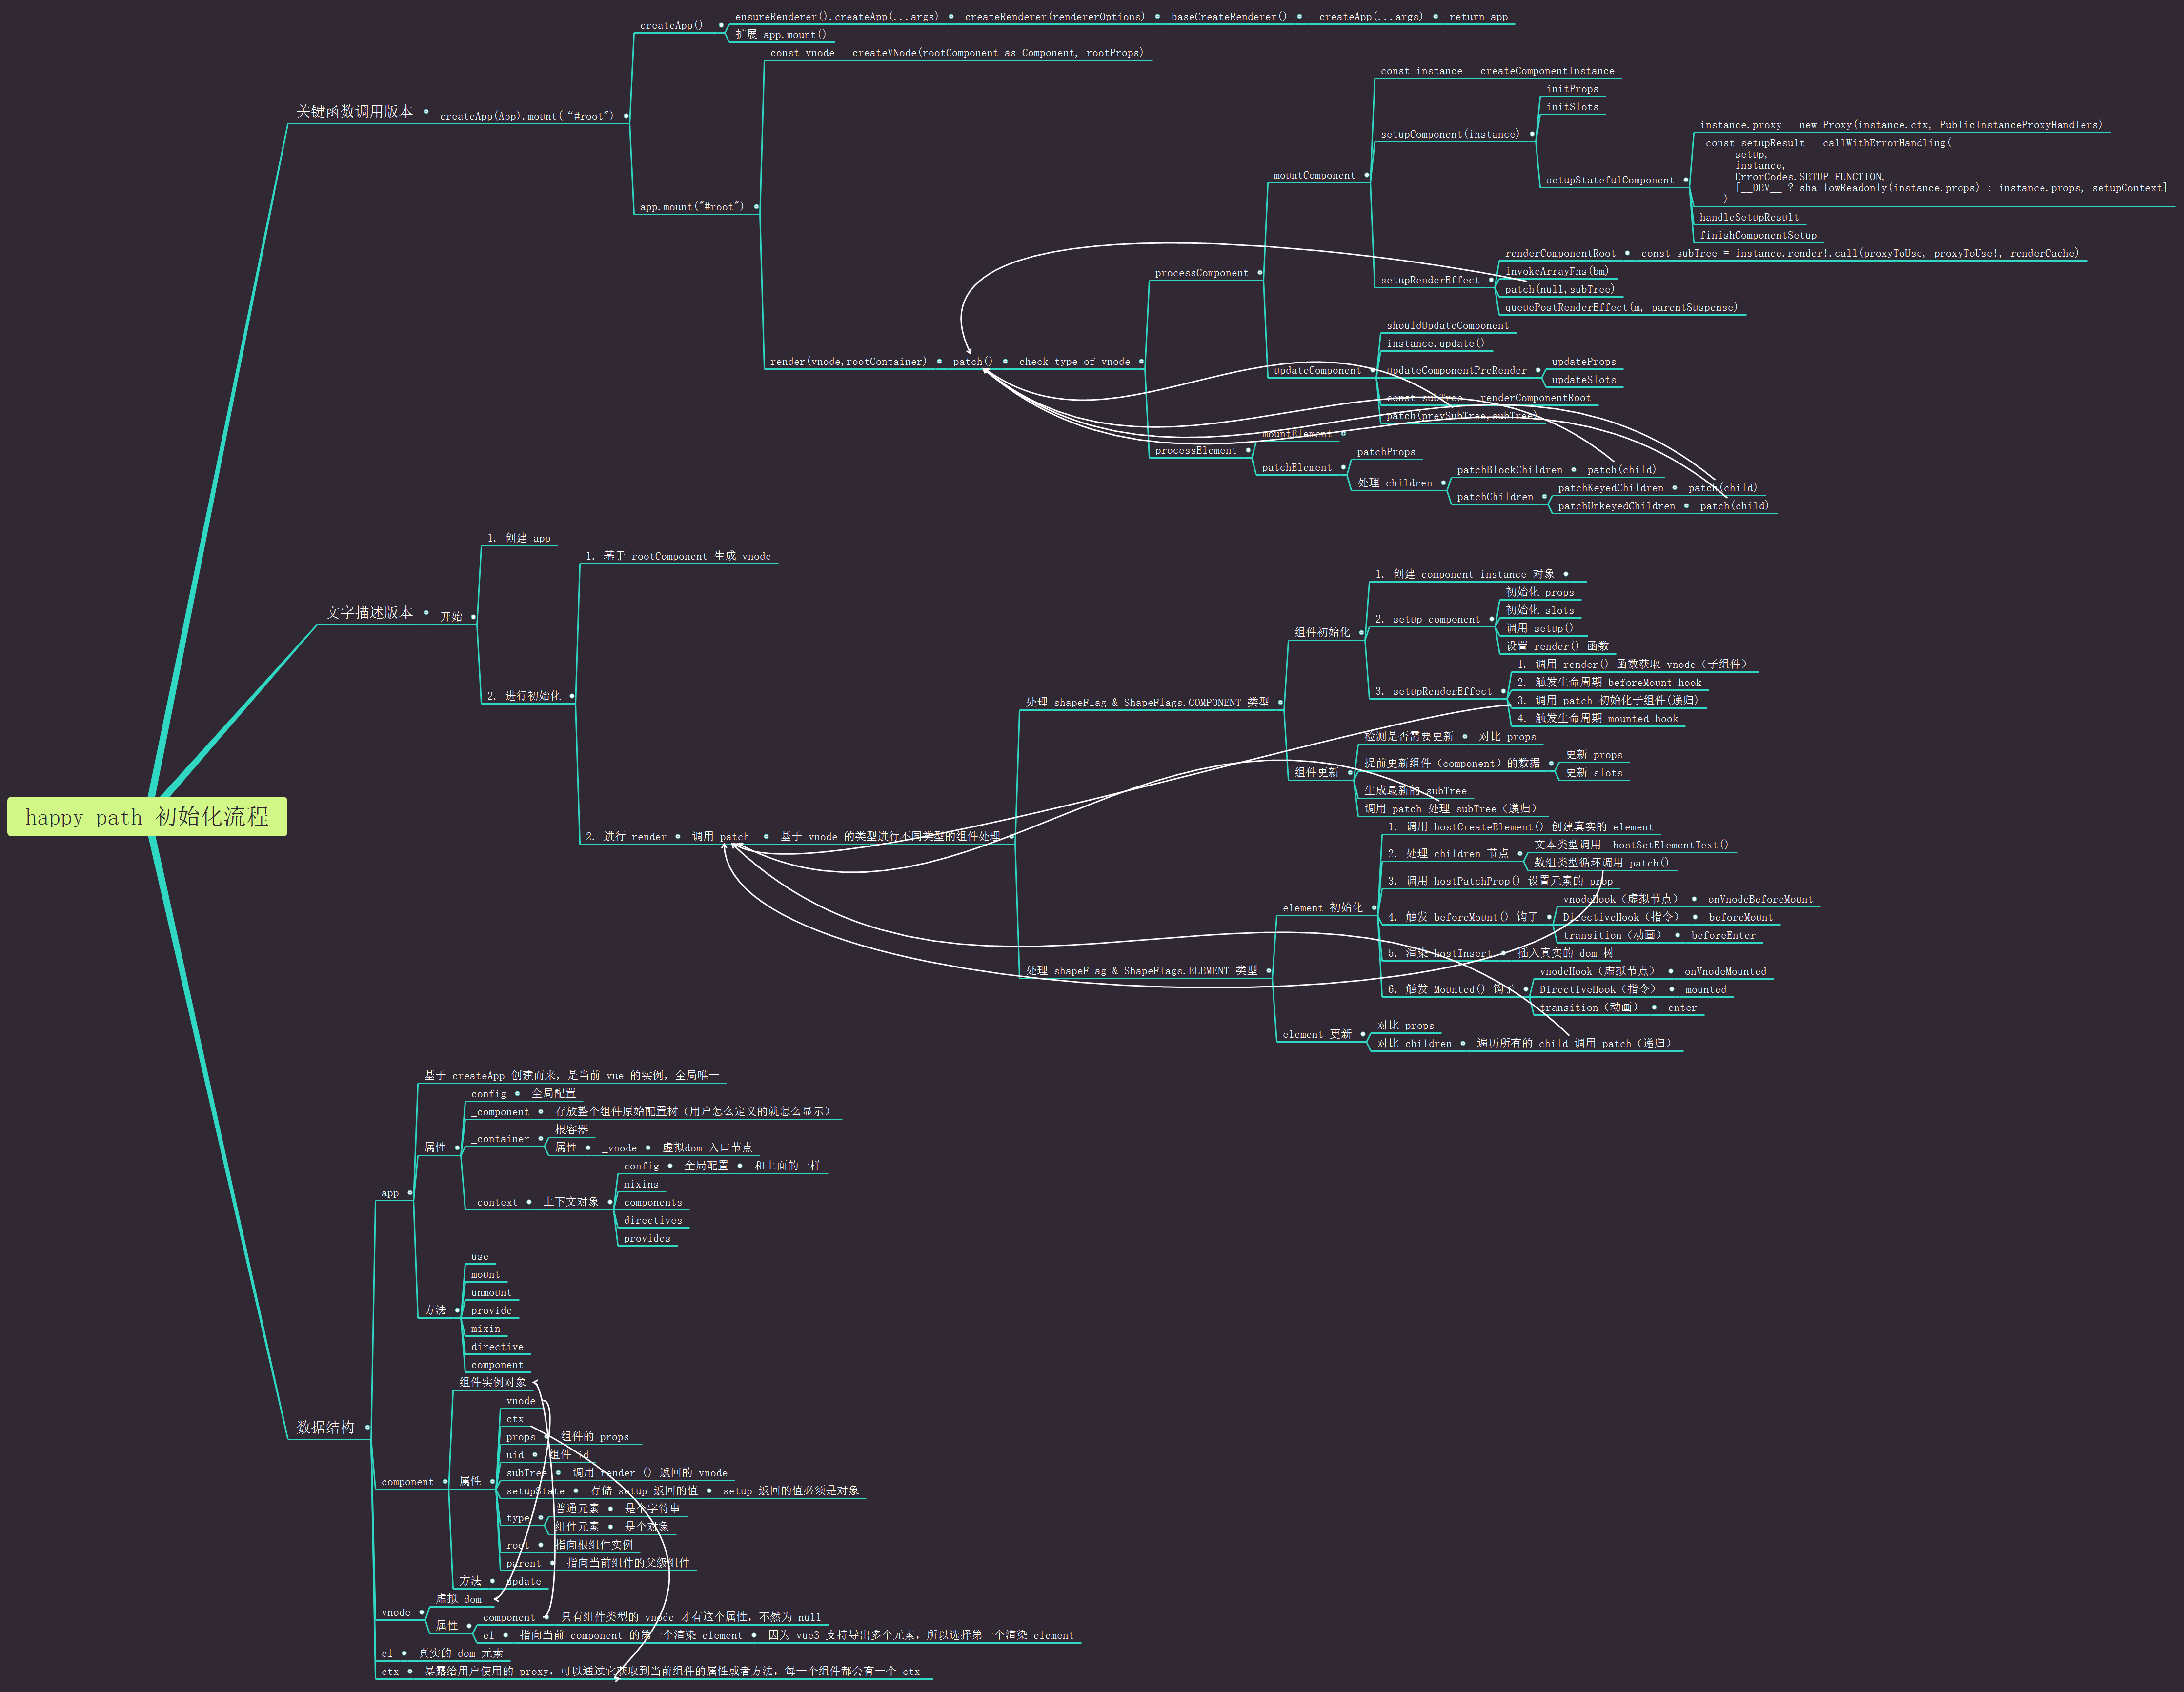
分析runtime-core主要流程 :
- 主要是根据组件生成创建出来的
vnode, 在patch()函数中判断 虚拟节点vnode的类型,Component: 初始化 组件Element: 创建element
happy path
初始化 模板和实现 基本的流程
- 需要有一个根组件 App,
createApp(App)时候传入 , 并且在createApp内部有一个对象, 包含mount()函数,mount()函数接收一个Element容器, 也就是id=app的容器。 - 根据传入过来的组件创建 虚拟节点
vnode 调用 定义的 render()
- 执行 render() -> 就是调用
patch()函数 patch()函数根据 vnode 的类型 判断是 创建 组件 还是 Element
- 执行 render() -> 就是调用
创建
example文件夹,存放模板和测试文件- 创建
helloworld文件夹 , 测试初始化的文件- index.html : 模板
- main.js : 入口文件
- App.js : App根组件
- 创建
<!-- index.html --><!DOCTYPE html><html lang="en"><head><meta charset="UTF-8" /><meta http-equiv="X-UA-Compatible" content="IE=edge" /><meta name="viewport" content="width=device-width, initial-scale=1.0" /><title>Document</title></head><body><!-- 根容器 --><div id="app"></div><!-- 引入 mian.js --><script src="main.js" type="module"></script></body></html>
/* main.js */import { App } from "./App.js"// 正常使用 vue3 一样createApp(App).mount('#app')
/* App.js */// 创建APP组件export const App = {// 这里先不写 template,因为 template 最终会转为 runner 函数// 先写 runderrender() {// ui 逻辑// 返回一个虚拟节点// h() 用于创建Element的虚拟节点return h("div", "hello" + this.msg)},// setup() 函数setup() {// 这里写 composition api 逻辑// 返回一个对象return {msg: "mini-vue"}}}
在Vue3 中,像App组件一般放在 .vue 文件中,而标签也是放在 <template> 中。在这里初始化时,因为 <template>标签最终都会编译为 render 函数。 而runtime-core 不具备编译功能,所以这里模拟组件都是使用 render() 函数。
4.2 实现Component 初始化的主流程
实现runtime-core 的过程,源代码文件放在 src/runtime-core
- 创建
createApp()函数, 接收App的组件实例 ,src/runtime-core/createApp.ts```typescript / createApp.ts /
// createApp 逻辑 export function createApp(rootComponent) { // 接收一个根组件容器 -> App // 返回一个对象 return { // 对象内部必须有一个 rootContainer , 根容器 -> id=app 的容器 // 目的是为了将 runner 函数渲染后给他 添加到
里面 mount(rootContainer) { } } }
2. 根据 App 组件创建按虚拟节点 `VNode````typescript/* vnode.ts */// 导出创建虚拟节点的方法export function createVNode(type, props?, children?) {// 参数:// type -> 传入进来的数据类型, 组件|Element// props -> 可选 -> 属性 | 组件的props// children -> 可选 -> 子节点 | 子组件const vnode = {type, // 组件类型props,children,}// 返回虚拟节点return vnode}
- 创建 h.ts , 在 render() 函数中使用的
h()接收element,并且返回 虚拟节点VNode, 所以h()也也使用到了createVNode()```typescript / h.ts /
// 用于调用 createVNode 返回一个 VNode export function h(type, props?, children?) { return createVNode(type, props, children) }
4. 在`createApp.ts` 调用 `createVNode()`得到虚拟节点, 在创建 `render()` 函数```typescript/* createApp.ts */// createApp 逻辑export function createApp(rootComponent) { // 接收一个根组件容器 -> App// 返回一个对象return {// 对象内部必须有一个 rootContainer , 根容器 -> id=app 的容器// 目的是为了将 runner 函数渲染后给他 添加到 <div id='app'></div> 里面mount(rootContainer) {// 1. 先将 rootComponent 根容器(App) 转为一个 虚拟节点 vnode// 将 组件转为虚拟节点// 将所有的逻辑操作 都会基于 vnode 做处理const vnode = createVNode(rootComponent)// vnode -> 返回出来的虚拟节点 vnode// createVNode(组件) -> 基于组件创建虚拟节点// 2.// 得到虚拟节点后 -> 可以调用 render() 函数reder(vnode, rootContainer)// runner(虚拟节点, 根容器)}}}
- 实现
render()方法的逻辑 , render() 的主要就是调用patch()方法, 这样做是为了方便递归调用patch()方法。 抽离实现render()的方法 到/runtime-core/renderer.ts文件 ```typescript / renderer.ts /
// 导出 render() 函数 export function render(vnode, container) { // render(虚拟节点, 根容器)
//render 的作用 -> 主要调用 patch() 方法
patch(vnode, container) // 使用 patch() 函数 为了方便递归 }
6. `patch` 方法的实现, 通过判断 VNode 的类型1. 如果是 Componet 类型 -> 调用 `processComponent()` 进行初始化组件的逻辑1. 在 `processComponent()`中主要 调用 `mountComponent()`初始化 组件。2. 如果是 Element 类型 -> 调用 `processElement()`1. `processElement()` 函数会在 Element初始化的主流程实现<br />这里先实现初始化组件 , 不用先判断```typescript/* renderer.ts */// patch(虚拟节点, 根容器)function patch(vnode, container) {// 这里主要处理组件// 1. 判断 vnode 的类型 -> 可能是 组件类型 或者 Element 类型// 如果是 组件类型// 去处理组件// 实现初始化组件的逻辑// 挂载组件 processComponent 的函数processComponent(vnode, container)}// 初始化组件function processComponent(vnode: any, container: any) {// 1. 挂载组件// 使用 mountComponent 函数 挂载组件mountComponent(vnode, container)}
- 实现组件的挂载逻辑,
mountComponent()mountComponent()执行逻辑- 调用
createComponentInstance()通过 VNode 创建组件实例instance,之后组件上的props、slots 都会挂载到这个组件的实例上 - 调用
setupComponent(), 主要的逻辑,初始化setup函数 , 执行组件的setup()函数 - 调用
setupRenderEffect()主要就是调用 组件的 render() 函数 ```typescript / renderer.ts/
- 调用
// 挂载组件的逻辑 function mountComponent(vnode: any, container) { // 1. 通过 vnode 创建一个组件的实例对象 -> instance const instance = createComponentInstance(vnode)
// 2. setupComponent() 初始化 // 2.1 解析处理组件的其他内置属性 比如: props , slots 这些 // 2.2 组件中setup() 的返回值 和 挂载 runder() 返回 setupComponent(instance)
// 3. 开始调用 组件的 runner 函数 setupRenderEffect(instance, container) }
将挂载组件的逻辑函数抽离到 `component.ts` 中 ->`createComponentInstance()` 和 `setupComponent()` 函数```typescript/* src/runtime-core/component.ts */// 创建组件的实例 instanceexport function createComponentInstance(vnode) {// 通过 vnode 创建一个组件的实例对象 component// 返回一个component对象const component = {vnode,// 为了简化操作——> 获取 type, VNode的类型type: vnode.type}// 返回 componentreturn component}
实现 setupComponent() 函数的逻辑
- 解析处理组件的其他内置属性, 比如: props , slots 这些
- 实现调用 setup(), 拿到返回值
- 设置 组件实例的 render() 函数 ```typescript / src/runtime-core/component.ts /
// …
// 通过 vnode 创建一个组件的实例对象 -> instance // instance 就是 虚拟节点 export function setupComponent(instance) { // 解析处理组件的其他内置属性 比如: props , slots 这些 // 和 组件中setup() 的返回值
// TODO: // 1. 先初始化 props // initProps()
// 2. 初始化 slots // initSlots()
// 3. 初始化component的状态, 也就是 调用 setup() 之后的返回值 setupStatefulComponent(instance) // 翻译: setupStatefulComponent -> 初始化有状态的 component }
`setupStatefulComponent()` 函数用于初始化有状态的的组件,与其相对的是没有状态的函数式组件。- 在`setupStatefulComponent`函数中首先调用`setup`- 之后调用`handleSetupResult`函数处理该方法的返回值。- 调用 `finishComponentSetup()` 将 `render()`函数绑定到 `instance` 上```typescript/* src/runtime-core/component.ts */// ...function setupStatefulComponent(instance: any) {// 拿到 setup() 的返回值// 1. 获取到虚拟节点的type , 也就是用户定义的 App 组件const Component = instance.type// 2. 解构出 setupconst { setup } = Component// 判断 setup 是否存在if (setup) {// 调用 setup() 拿到返回值const stupResult = setup()// 判断 stupResult 的类型handleStupResult(instance, stupResult)}}function handleStupResult(instance, stupResult: any) {// 因为 setup 可以返回出 Function | Object// 如果是 Function 类型,那么就是组件的 render 函数// 如果是 Object 类型,将这个对象 注入到这个组件的上下文中// TODO: 这里先实现 Object, 之后再去实现 Functionif (typeof stupResult === 'object') {// 将这个值注入到 instance 实例上instance.setupState = stupResult}// 需要保证 组件必须要用 runner 函数// 调用 finishComponentSetup() 将render() 函数绑定到 instance上finishComponentSetup(instance)}// 添加render() 到 instance 上function finishComponentSetup(instance: any) {const Component = instance.type// 判断组件中是否具有 runner()if (Component.render) {// 组件中具有 runner(), 将 runner 挂载到 instance 上instance.render = Component.render}}
- 实现调用 render() 函数的逻辑 ,
setupRenderEffect()的实现。
/* renderer.ts */// ... 其他代码// 实现调用renderfunction setupRenderEffect(instance: any, container: any) {// 调用 runder() 函数 返回 subTree// subTree 是 h() 函数返回的 vnode, 也是虚拟节点树 subTree// 当然 subTree 也有可能是 componet 的类型const subTree = instance.render()// 再基于返回过来的虚拟节点 vnode, 再进一步的调用 patch() 函数// vnode -> subTree 是一个 Element类型 -> 挂载 mountElement// 递归调用 -> patch(虚拟节点,容器)patch(subTree, container)// patch()再去判断,-> subTree 的类型 -> 可能是 组件类型 或者 Element类型 -> 一直递归进行下去}
到此已经完成组件的初始化主流程了
回顾效果图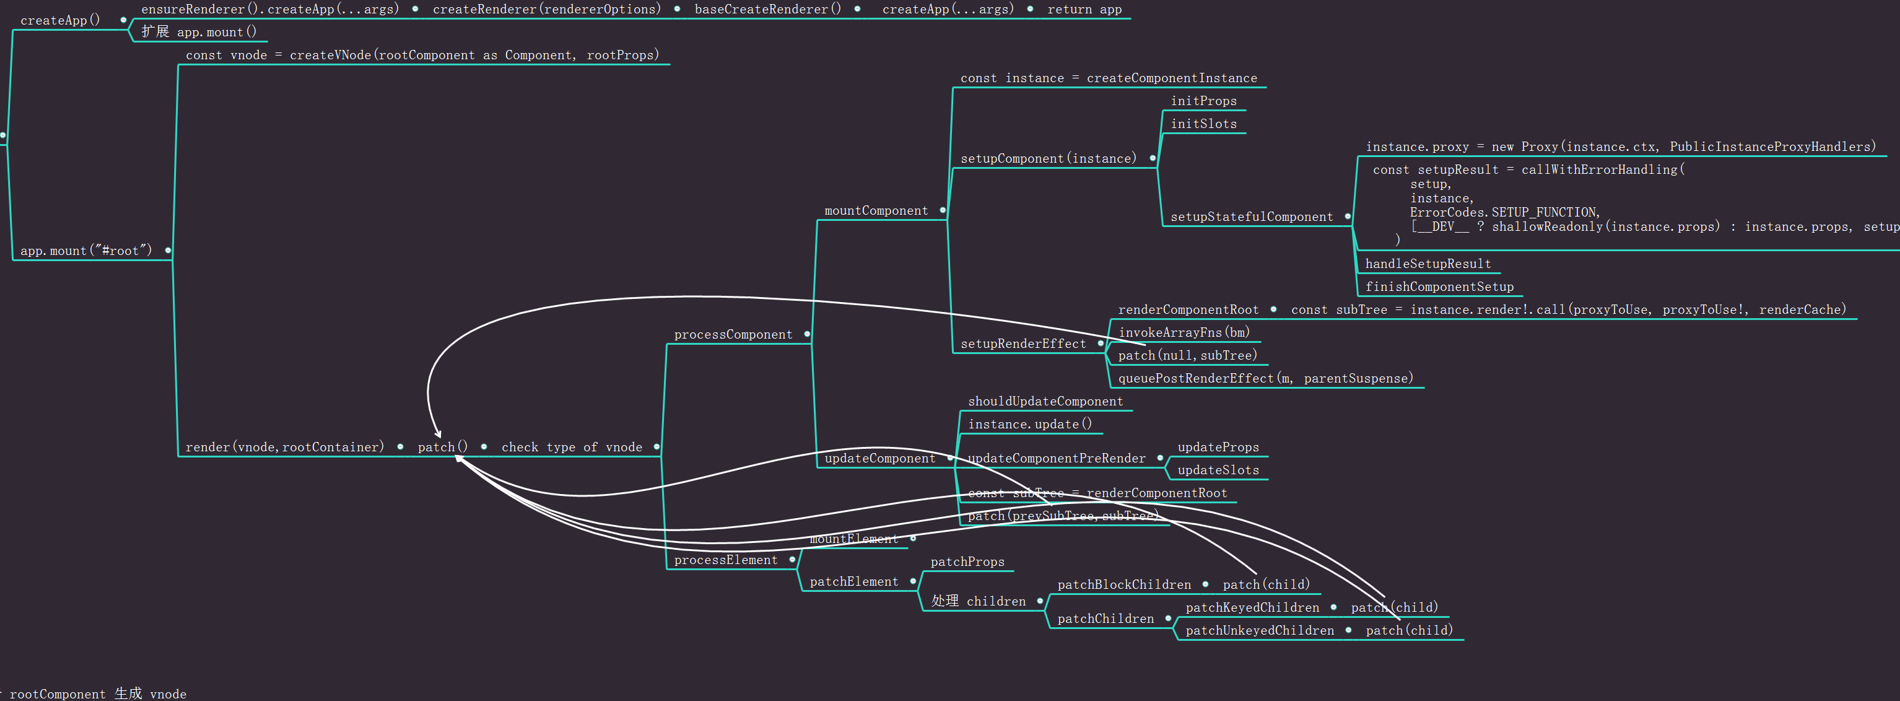
总结
/*** 初始化 runtime-core 的流程 和 初始化 组件 的流程总结** runtime-core: 实现的基本目的: 符合 vue3的设计思路 createApp(App).mount(#app)* 配合组件,实现组件的渲染,组件的更新,组件的销毁, 组件 Element 的渲染 等等**** 初始化组件:* 1. 在 mount(容器), 这个方法中, 对createApp 传入进来的 App组件容器, 进行转换为虚拟节点 vnode* 2. 通过得到转换的 vnode , 使用 runner(vnode, 容器) 函数,进一步处理 vnode* 3. runner() 函数的目的就是 负责调用 patch(vnode, 容器) 方法, 实现 patch()方法为了方便递归调用* 4. patch() 函数对vnode进行一个判断 ,如果 vnode 是一个组件,进行组件的初始化 ,如果它是 Element,就对 Element 进行渲染*** 5. 当前只实现了组件的初始化* - 1. 在 patch() 调用 processComponent()* - 2. 在 processComponent() 进行组件的挂载 -> mountComponent(vnode, container)* - 3. mountComponent(vnode, container) 挂载组件的逻辑* - 通过 vnode 创建一个 组件的实例对象 -> instance ; 使用 createComponentInstance(vnode) 方法* - 设置 setupComponent(instance) 初始化组件, 解析处理组件的其他内置属性 比如: props , slots 这些 和组件中setup() 的返回值 和 挂载 runder()* - 开始调用 render 方法* - 调用 instance.render() -> h() 返回出来的 subTree 虚拟 Element 节点* - 递归调用 patch(subTree, container) 进行一个 Element 的渲染*/
4.3 使用 rollup 打包
Webpack 一般用于项目的打包,rollup 常用于库的打包,Vue3 就是使用 rollup 进行打包的,因此 mini-vue3 也使用 rollup 进行打包。
- 在项目文件夹下执行
yarn add rollup @rollup/plugin-typescript tslib -D命令分别安装 rollup、rollup 打包 TypeScript 项目时所需的插件@rollup/plugin-typescript和该插件依赖的tslib - 在src目录下创建index.ts文件作为 mini-vue3 的出口文件,在src/runtime-core目录下创建index.ts文件作为 runtime-core 的出口文件,并在其中将createApp和h导出: ```typescript / src/runtime-core/index.ts /
// runtime-core 的出口 export { createApp } from “./createApp” export { h } from “./h”
```typescript/* src/index.ts */// 导出所有配置export * from './runtime-core'
- 配置
rollup.config.js```javascript / rollup.config.js /
// 导出package.json设置的文件目录 import pkg from ‘./package.json’ import typescript from “@rollup/plugin-typescript” export default { input: ‘src/index.ts’, output: [ // 1. commonjs -> cjs // 2. esm { format: ‘cjs’, // file: ‘lib/guide-mini-vue.cjs.js’, file: pkg.main, // 在package.json 定义了 main 和 module 的模式, 可以直接使用, 一个小优化 }, { format: ‘es’, // file: ‘lib/guide-mini-vue.esm.js’, file: pkg.module, } ],
plugins: [ typescript() ] }
4. 配置 `package.json````json{"name": "hidie-mini-vue","version": "1.0.0","main": "lib/guide-mini-vue.cjs.js","module": "lib/guide-mini-vue.esm.js","license": "MIT","scripts": {"test": "jest""build": "rollup -c rollup.config.js"},}
在
tsconfig.json设置module{"module": "ESNext", /* Specify what module code is generated. */}
执行打包命令
yarn build, 在lib目录会生成guide-mini-vue.cjs.js & guide-mini-vue.ems.js文件在
helloworld的main.js & App.js中引入createApp() & h()```typescript / main.js /
// 引入打包后的 createApp import { createApp } from ‘../../lib/guide-mini-vue.esm.js’ import { App } from “./App.js” // 正常使用 vue3 一样
// 获取容器 const rootContainer = document.querySelector(“#app”) createApp(App).mount(rootContainer)
打开`example/helloworld`目录下的`index.html`文件,可以看到 `Component `初始化的主流程正常运行,但是程序出现报错,这是由于 `Element `初始化的主流程还没有实现。<a name="OmJGW"></a># 4.4 实现 Element 初始化的主流程在实现 Element 初始化前, 对 `App.js` 组件改动。 对 `render()` 返回的 h() 函数参数更复杂一些, 也就是能在页面上渲染内容更多```typescript/* example/helloworld/App.js */render() {// ui 逻辑// 返回一个虚拟节点// return h("div", "hello" + this.msg)// return h("div", {// id: 'test1-id',// class: 'test2-class'// }, "hello mini-vue") // 当返回是 children 是 string时// 当children 是一个 Array 时return h('div', {id: 'test1-array-1',class: 'test2-array-1'}, [h('p', { class: 'red' }, '这是children的第一个数组'),h('p', { class: 'blue' }, '这是children的第二个数组')])},// setup() 函数
在 index.html添加对应的样式
<!-- index.html --><head><meta charset="utf-8"><title>Hello World</title><style>.red {color: red;}.blue {color: blue;}</style></head>
实现 Element 初始化的主流程是从 patch() 方法 判断 VNode 的类型为 Element 类型时,调用 procssElement() 函数开始。
- 在
patch()判断 VNode 的类型 -> 当 VNode.type 为string时,代表VNode 是 Element ```typescript / renderer.ts /
// 目的为了根据判断 虚拟节点,都组件或者是 Element 进行一个渲染 // patch(虚拟节点, 容器) function patch(vnode, container) { // 1. 判断 vnode 的类型 -> 可能是 组件类型 或者 Element 类型
// console.log(vnode.type)
//可以看到 vnode.type 要么是 组件类型 -> Object , 要么是 Element 类型 -> string
if (typeof vnode.type === “string”) { // 如果 vnode.type 是 string 类型, 表示它是 Element // 执行 processElement 初始化 Element processElement(vnode, container) } else if (isObject(vnode.type)) { // 如果 vnode.type 是 object 类型 , 表示它是 组件类型
// 如果是 组件类型// 去处理组件// 实现初始化组件的逻辑processComponent(vnode, container)
} }
2. `processElement()` 主要的逻辑就是对 Element 的初始化 和 Element 的更新 执行的逻辑 , 初始化调用 `mountElement()` 函数```typescript/* renderer.ts*/// 当 vnode 是一个 Element 类型执行这个函数function processElement(vnode: any, container: any) {// 进行 Element 的渲染// Element 初始化 分为两种情况 -> init 初始化 -> update 更新// 实现初始化Element的逻辑mountElement(vnode, container)// 实现 Element 更新逻辑之后去实现}
mountElement()对 Element 初始化挂载- 创建一个真实的
Element->vnode.type - 对 vnode 的 props , 解析属性 ->
vnode.props - 处理children , 解析 children, 然后赋值
- 将创建好的 节点,添加到
containerid=app的容器上 ```typescript / renderer.ts/
- 创建一个真实的
// 初始化 Element function mountElement(vnode: any, container: any) {
// 1. 创建一个真实的 Element -> vnode.type const el = document.createElement(vnode.type)
// 2. props , 解析属性 -> vnode // 解构 props const { props } = vnode if (props) { // 当props 不为空时 for (const key in props) { // 拿到 prosp 对应的属性值 -> {class: ‘red’} const val = props[key] // 设置 el 的属性值 el.setAttribute(key, val) } }
// 3. children, 解析然后赋值 // children 有两种情况, 是一个数组, 或者是一个字符串 const { children } = vnode if (typeof children === ‘string’) { // 直接设置 el 的文本内容 el.textContent = children } else if (Array.isArray(children)) { // 表示 [h(), h()] // 使用 mountChildren 重构 children - Array 的渲染 mountChildren(vnode, el) }
// 4. 挂载 el 到 容器 container 上 container.appendChild(el) }
4. 处理 `children`为数组的逻辑 `mountChildren()` 函数因为 `children()`有两种情况, 是一个数组, 或者是一个字符串- `returnh("div",{class: 'text'}, "hello"+this.msg)`- `returnh("div", {class: 'text'}, [h('p', { class: 'red' }, '这是children的第一个数组'), h('p', { class: 'blue' }, '这是children的第二个数组'),]`当 `childer` 是 `string` 时,就是一个简单的文本,直接赋值给 `el` 就行 `el.textContent = children`<br />当 `children` 时, 执行 `mountChildren()` 传入 `vnode & el` ,循环 `children`, 再次递归调用 `patch(v,el)`,递归调用的区别是 `patch`的容器参数 变为了 `el````typescript/* renderder.ts */function mountElement(vnode: any, container: any) {// 省略代码const { children } = vnodeif (typeof children === 'string') {// 直接设置 el 的文本内容el.textContent = children} else if (Array.isArray(children)) {// 表示 [h(), h()]// 使用 mountChildren 重构 children - Array 的渲染mountChildren(vnode, el)}}// 封装 渲染 children 为 children 的函数function mountChildren(vnode, container) {// 循环 children 内的虚拟节点, 然后调用 patch()进行递归->再去渲染vnode.children.forEach((v) => {// 这里 container 容器设置为 el// 递归调用 patch()patch(v, container)})}
以上就完成了初始化 Element 的主流程。 执行 yarn build 重新打包, 然后查看 index.html 渲染出来的内容 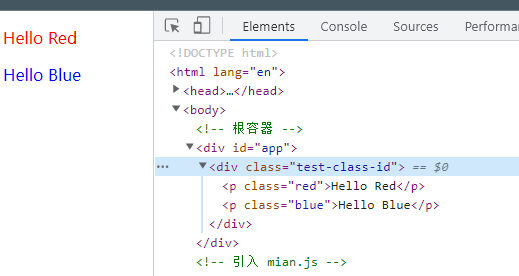
最后总结分析runtime-core Element的流程 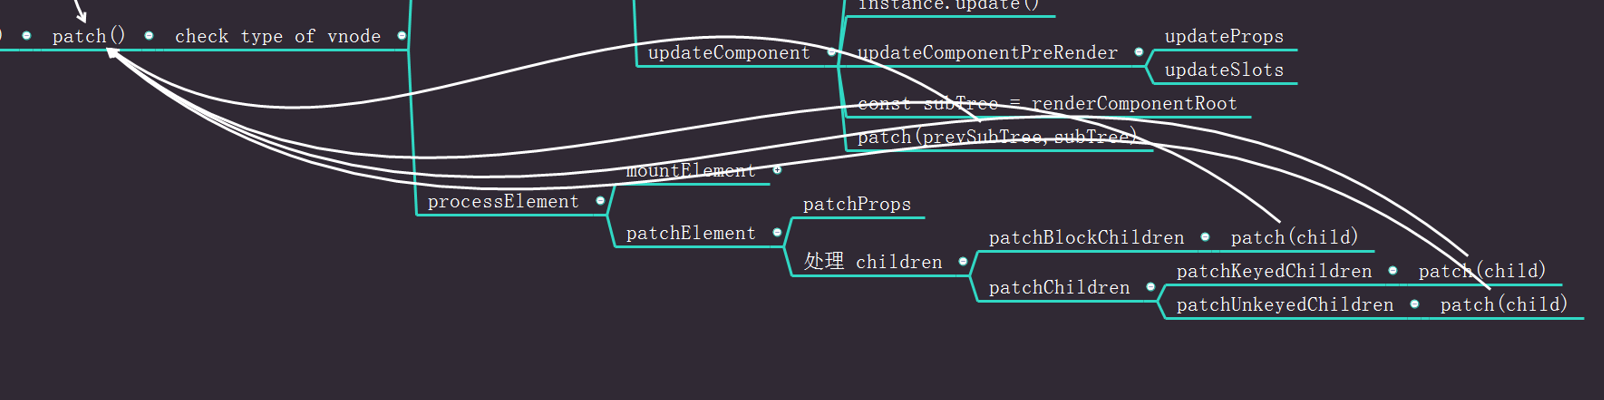
4.5 实现组件代理对象
为了实现在render() -> h() 渲染时能够取到setup() 的返回值
/* App.js */render() {// ui 逻辑return h('div', { class: 'test-class-id' }, this.msg)// return h('div', { class: 'test-class-id' }, [// h('p', { class: 'red' }, 'Hello Red'),// h('p', { class: 'blue' }, 'Hello Blue')// ])},// 在 render 中还需要实现 :// 1. 实现 render() 中能够 setupState -> setup 的返回值// 这里的this.msg 应该是 setup()返回出来的 msg , 怎么样能够拿到这个 setup() 中的 msg呢?// 只需要把 setup() 的返回值,绑定到 render() 的 this 上即可setup() {return {msg: 'Hello World'};}
实现逻辑 : 由于之前在Component已经实现将 setup() 的返回值赋值给了 instance 当前组件的实例 setupState 上, 所以要实现 render() 中获取 setup 的返回值就在 setupState 上获取。
因为在render()中通过 this.xxx访问数据,可以利用 Proxy 代理对象上的 get进行代理,当访问 this.xxx 返回 setupState对应的返回值 。
在setupStatefulComponent() 时,开始进行代理,并将实现的代理 proxy 赋值到 instance 上,在调用 render() 时候 将 this的指向为这个 Proxy代理对象
- 初始化
Proxy```typescript / component.ts / export function createComponentInstance(vnode) { const component = { // 其他代码 // 初始化 proxy proxy: null, } return component }
2. 实现代理对象 `new Proxy````typescript/* component.ts */// 执行 call setup()function setupStatefulComponent(instance) {// 因为这里确定时 组件逻辑, 通过 instance.type 获取当前的组件const component = instance.type// 创建组件代理对象 Proxy, 并添加到 instance组件实例上// Proxy的第一个参数 {} -> ctx 上下文instance.proxy = new Proxy({}, {// 在render() 中调用 this.xxx 执行 get()get(target, key) {// 这里 target 就是 ctx -> 上下文, key 就是访问的 key// console.log(target, key)// 1. 实现从setupState 拿到值const { setupState } = instance// 判断 setupState 中是否有 key 属性if (key in setupState) {// 返回 setupState 中的值return setupState[key]}}})}
- 在调用
render()前, 解构出proxy代理对象, 在调用render()前把render()的this指向proxy```typescript / renderer.ts / function setupRenderEffect(instance, container) { // 解析出 proxy 代理对象,当调用 render时候,将this指向这个proxy 代理对象 const { proxy } = instance const subTree = instance.render.call(proxy) // 执行递归调用 patch patch(subTree, container) }
重新打包项目文件 :`yarn build`, 再次查看 `index.html` 就可以看到 setup() 的返回值已经出现在页面了<br />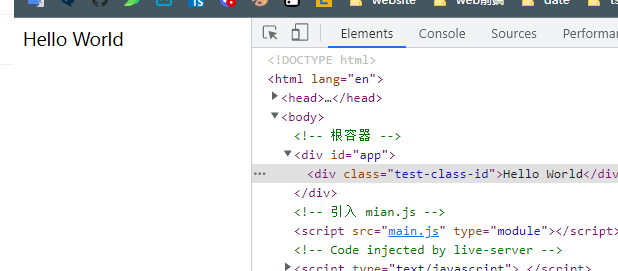实现访问到 `setup() `的返回值逻辑, 再实现组件的其他API, 比如 `$el & $data ` 这些 <br />这里实现 `$el` , `$el` 的作用: `该组件实例管理的 DOM 根节点。`在实现访问 `$el`,通过 App 组件内部设置 测试的内容```javascript// 创建APP组件// 使用 window 添加事件window.self = nullexport const App = {render() {// 增加调试 this -> windowwindow.self = this// ... 其他代码}}
实现 $el 的API
在初始化
$el, 在创建虚拟节点时 ```typescript / vnode.ts / export function createVNode(type, props?, children?) { const vnode = { type, props, children, // 初始化 el el: null }return vnode }
2. 在初始化 `Element `时, 让 给 `$el` 赋值为根节点 , 在获取 `VNode `树并递归地处理即调用`setupRenderEffect`函数时,将 `VNode `树的 `el `挂载到 `VNode `上```typescript/* renderer.ts */function mountElement(vnode, container) {// console.log(vnode)// 1. 创建 Element 对象const el = (vnode.el = document.createElement(vnode.type))// ... 其他代码}function setupRenderEffect(instance, vnode, container) {// ... 其他代码// 将 VNode 树的 el property 挂载到 VNode 上// 实现 $el 的关键时机, 在这个时候赋值 el// 当patch() 再次调用,可能是 进行Element流程// 将 subTree.el 赋值给 vnode.elvnode.el = subTree.el}
- 在代理对象中, 添加判断逻辑 , 当调用
$el时返回el根节点 ```typescript / component.ts /
function setupStatefulComponent(instance) { const Component = instance.type
instance.proxy = new Proxy( {}, { get(target, key) { // 1. 实现从setupState 拿到值 const { setupState } = instance // 判断 setupState 中是否有 key 属性 if (key in setupState) { return setupState[key] } // 2. 添加判断 实现访问 $el 的逻辑 // 若获取 $el property 则返回 VNode 的 el property if (key === ‘$el’) { // 如果是 $el , 就返回真实的 DOM 元素 // 这里instance 组件实例 上已经挂载了 vnode , 通过vnode访问 el // 因为这里的 vnode 类型是 Object , 而不是 string ,说明这个 vnode 是组件的虚拟节点,不是element的。 // 所以,通过 vnode 获取 el 元素,返回 null // 解决: 就是当 再次调用patch()后,将 调用 render() 返回的 subTree.el 赋值给 vnode.el return instance.vnode.el } } } )
/ 其他代码 / }
这个时候执行打包: `yarn build ` , 在访问 `index.html` 时, 在控制台输入 `self.$el` 就可以看到组件的根节点了<br />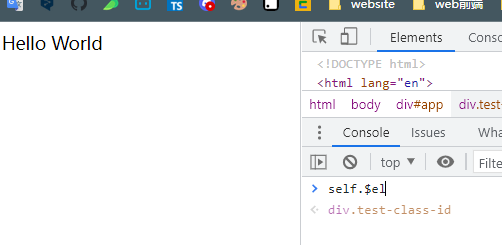4. 重构代码,参考 在 `reactive` 是使用 `Proxy` 的逻辑,把 Proxy 的 主要功能抽离代码, 实现重构创建 `componentPublicInstance.ts` 文件```typescript/* componentPublicInstance.ts */// 一个公共访问属性的逻辑const publicPropertiesMap = {// $el$el: (instance) => instance.vnode.el}export const PublicInstanceProxyHandlers = {// 使用 { _: instance } 的方式传递 instance 参数get({ _: instance }, key) {// 这里 target 就是 ctx -> 上下文, key 就是访问的 key// console.log(target, key)// 1. 实现从setupState 拿到值const { setupState } = instance// 判断 setupState 中是否有 key 属性if (key in setupState) {// 返回 setupState 中的值return setupState[key]}// // 2. 添加判断 实现访问 $el 的逻辑// if (key === "$el") {// // 直接返回 $el 属性// return instance.vnode.el// }// 重构// 实现公共访问 key 获取 对象的 valueconst publicGetter = publicPropertiesMap[key]// 判断是否具有该属性if (publicGetter) {// 执行 publicGetter 函数拿到 key 对应的 value, 将其返回return publicGetter(instance)}}}
在 component.ts 改为
/* component.ts */function setupStatefulComponent(instance) {const Component = instance.type// 利用 Proxy 对组件实例对象的 proxy property 的 get 进行代理instance.proxy = new Proxy({ _: instance }, PublicInstanceHandlers)/* 其他代码 */}
再次打包,能够获取到 $el 说明重构没有问题
// 总结// 在 render 中还需要实现 :// 1. 实现 render() 中能够 setupState -> setup 的返回值// 这里的this.msg 应该是 setup()返回出来的 msg , 怎么样能够拿到这个 setup() 中的 msg呢?// 只需要把 setup() 的返回值,绑定到 render() 的 this 上即可/*** 实现 setupState:* 因为当前的 render() 函数不仅仅需要访问到 setupState 或者 使用 $el setupState 这些* 可能还会添加一些 $data 能够让 render() 快速访问** 解决: 可以通过 Proxy 实现 ,也就是 组件代理对象 -> 代理对象* 把 stateState & $el & $data 通过 Proxy 代理, 可以让 render() 快速访问** 实现方式:* 1. 在 初始化 setupState -> 调用 setup() 时,创建 代理对象 Proxy* 2. 创建代理对象,实现 xxx 功能* 3. 把 代理对象绑定到 instace 组件实例上* 4. 当在调用 render() 函数时,通过 Proxy 访问 setupState**/// 2. 实现 this.$el 获取到当前组件的根节点 -> div// $el -> vue3 的API , $el 的目的:返回根节点 element, 也就是组件的根节点, DOM实例/*** 实现 $el:* $el 的作用: $el -> vue3 的API , $el 的目的:返回根节点 element, 也就是组件的根节点, DOM实例** 实现方式:* 1. 在初始化 Element这里,需要将根节点保存起来, 使用el -> 在创建虚拟节点时候,初始化el 为null* 2. 在初始化 Element时,让 el 保存 根节点* 3. 在代理对象中, 添加判断逻辑,当在render中调用 this.$el时, 需要返回 el,**/
4.6 实现 shapeFlag
shapleFlag 的实现主要用于在代码中 判断 VNode 虚拟节点 和 VNode.childer 的类型
在 调用 patch() 是判断 VNode是 Component || Element
在 渲染 children 时 判断 children是 Array || string
实现 shapeFlag 的逻辑
- 先完成一个最简单的
shapeFlag对象,设置它的属性值都为0表示这个属性的状态 ```typescript / shared/test-shapeFlag.ts/
// 测试 ShapeFlag const ShapeFlagObject = { // 这里使用 0 | 1 判断节点的状态 -> 0 表示不是 , 1 表示是 element: 0, stateful_component: 0, text_children: 0, array_children: 0, }
状态的变化 ,如果当前节点是 `vnode` 是 `stateful_component` , 设置它的状态为 `1````typescript/* shared/test-shapeFlag.ts*/// 如果当前节点 vnode 是 stateful_component// 设置 它的状态// 1. 可以设置修改 状态ShapeFlag.stateful_component = 1ShapeFlag.text_children = 1
状态的变化, 判断当前shapeFlag 属性的类型
/* shared/test-shapeFlag.ts*/// 需要先判断 之前的节点类型 ShapeFlag// 2. 查找if (ShapeFlag.element) {// 节点是 Element 类型时执行}if (ShapeFlag.stateful_component) {// 节点是 component 类型 时执行}
出现问题: 这种使用对象形式的判断方法,不够高效 .
而在 Vue3 中使用的位运算法更高效
- 使用
位运算法来设置shapeFlag的状态
- 与运算(&):两位都为 1,结果才为 1
- 或运算(|):两位都为 0,结果才为 0
- 左移运算符(<<):将二进制位全部左移若干位 ```typescript // 可以通过 位运算方式 提升代码性能 // 位运算-> 通过二进制 01 表示 当前节点的状态
0001 -> element 0010 -> stateful_component 0100 -> text_children 1000 -> array_children
// 表示两种状态 1010 -> stateful_component + array_children
// 实现位运算方式实现 修改和查找 的功能
可以定义 `shapeFlage````typescript/* shared/test-shapeFlag.ts*/const ShapeFlag = {element: 1, // 转为二进制 -> 0001stateful_component: 1 << 1, // 使用左移运算符 1 左移1位 -> 10 -> 转为二进制 -> 0010text_children: 1 << 2, // 1 左移 2 位 -> 100 -> 转为二进制 -> 0100array_children: 1 << 3, // 1 左移 3 位 -> 1000 -> 转为二进制 -> 1000}
实现修改的 | 逻辑
// 1. 修改 : | -> 两位都为 0 ,才为 00000 -> | 进行或运算0001----0001// 修改 0000 为 0001 得到 0001 -> 修改初始时的0状态 为 element0001 -> | 进行或运算0100----0101// 修改 0001 为 0001 得到 0101 -> 修改 element 状态为 element + text_children
实现 查找的 & 逻辑
// 2. 查找 : & -> 两位都为 0 , 才为 1// &0001 -> & 进行 & 运算0001----0001// 查找0001是不是0001类型 -> 得到 0001 表示是0010 -> & 进行 & 运算 ->0001----0000// 查找0010是不是0001 类型 -> 得到 0000 表示不是
确定逻辑 ,实现shapeFlag 的代码
- 在
shared/shapeFlags.ts实现 逻辑代码 ```typescript / shared/shapeFlags.ts /
// 实现 ShapeFlag
// 1. 声明 ShapeFlag 状态 , 使用枚举 并导出 ShapeFlags export const enum ShapeFlags { ELEMENT = 1, // 转为二进制 -> 0001 STATEFUL_COMPONENT = 1 << 1, // 使用左移运算符 1 左移1位 -> 10 -> 转为二进制 -> 0010 TEXT_CHILDREN = 1 << 2, // 1 左移 2 位 -> 100 -> 转为二进制 -> 0100 ARRAY_CHILDREN = 1 << 3, // 1 左移 3 位 -> 1000 -> 转为二进制 -> 1000 }
// 2. 在初始化 vnode 时,声明 ShapeFlags, 给赋值类型 ——> vnode.ts // 3. 在 renderer 中使用 ShapeFlags // 位运算的方式 -> 提高性能 -> 但是可读性不高
4. 在初始化 `vnode `时,声明 `ShapeFlags`, 给赋值类型 ,` vnode.ts````typescript/* vnode.ts */export function createVNode(type, props?, children?) {const vnode = {type, // 组件类型props,children,el: null// 1. 初始化 ShapeFlagsshapeFlag: getShapeFlag(type)}// 2. 处理 childrenif (typeof children === 'string') {// 如果 children 是 string , 给 vnode.ShapeFlag 进行赋值// vnode.ShapeFlag | ShapeFlags.text_children 进行一个 或 | 运算// vnode.ShapeFlag = vnode.ShapeFlag | ShapeFlags.text_children// 简化vnode.shapeFlag |= ShapeFlags.TEXT_CHILDREN} else if (Array.isArray(children)) {// 如果 children 是数组,赋值 ShapeFlag 为 数组vnode.shapeFlag |= ShapeFlags.ARRAY_CHILDREN}return vnode}// 这里判断类型function getShapeFlag(type) {// 设置返回类型// 这里初始化时,先判断VNode的类型, Element || Componentreturn typeof type === 'string' ? ShapeFlags.ELEMENT : ShapeFlags.STATEFUL_COMPONENT}
- 在
renderer.ts代码逻辑中, 使用shapeFlags, 判断类型 ```typescript / renderer.ts /
function patch(vnode, container) { // 实现 shapeFlag - vue // shapeFlag 的作用是, 描述当前节点的类型,是一个 Element 还是一个组件 | children 是一个字符串 还是一个数组
// 使用 ShapeFlags -> 进行判断 类型 const { shapeFlag } = vnode // 这里判断 vnode.type 类型 -> ELEMENT if (shapeFlag & ShapeFlags.ELEMENT) { processElement(vnode, container) // 这里判断是否组件类型 -> STATEFUL_COMPONENT } else if (shapeFlag & ShapeFlags.STATEFUL_COMPONENT) { // 如果 vnode.type 是 object 类型 , 表示它是 组件类型 processComponent(vnode, container) } }
// 实现判断 children function mountElement(vnode: any, container: any) { // 3. children, 解析然后赋值 // children 有两种情况, 是一个数组, 或者是一个字符串
// 解构出 shapeFlag const { children, shapeFlag } = vnode // 这里也是用 shapeFlag 判断 children 的类型 -> 可能是数组,可能是字符串 // 如果是一个字符串 -> TEXT_CHILDREN if (shapeFlag & ShapeFlags.TEXT_CHILDREN) { // 直接设置 el 的文本内容 el.textContent = children // 如果是一个数组 -> ARRAY_CHILDREN } else if (shapeFlag & ShapeFlags.ARRAY_CHILDREN) { // 使用 mountChildren 重构 children - Array 的渲染 mountChildren(vnode, el) } }
打包项目 `yarn build`打包,检测 `index.html`没有报错说明实现了 `shapeFlags`<a name="qv4em"></a># 4.8 **实现注册事件功能**实现注册事件功能1. 写测试的逻辑 , 再测试组件`App` 中添加测试的事件```typescript/* App.js */window.self = nullexport const App = {render() {window.self = thisreturn h("div", {id: 'test1-id',class: 'test2-class',// 添加事件onClick() {console.log('click')},}, "hello " + this.msg)},setup() {return {msg: 'Hello World'};}}
实现注册事件的主要逻辑和流程: 在初始化 Element 的主流程时,在 mountElement 中处理 props 时,循环key 拿到 props 对应的属性值 。
只需要判断这个属性值是否为 props一个事件名,再使用 addEventListener() 方法设置对应的事件挂载到元素上即可
- 在处理
props属性中,判断 key 是否为click事件renderer.ts```typescript
/ renderer.ts /
function mountElement(vnode, container) { / 其他代码 /
// 2. 设置属性 props // 处理 组件 注册事件 const { props } = vnode if (props) { for (const key in props) { // 先实现判断 click 的逻辑 // 具体的 针对于 click -> 通用 (小步骤的开发思想) if (key === ‘onClick’) { // 如果key时click -> 将click 添加到 el上 el.addEventListener(‘click’, props[key]) } else { // 设置属性值 el.setAttribute(key, props[key]) } } } }
实现`click`<br />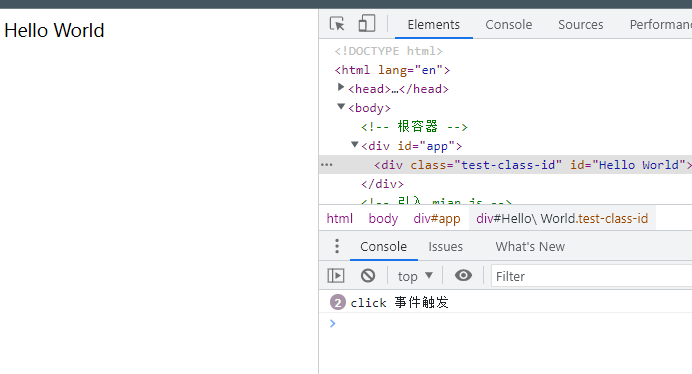3. 重构代码,实现通过的注册事件因为是事件名称都是 `on + 事件名`的起名方式, `click -> onClick & onMouseDown -> MouseDown````typescript/* renderer.ts*/// 重构-> 实现通用注册事件function mountElement(vnode, container) {/* 其他代码 */// 2. 设置属性 props// 处理 组件 注册事件const { props } = vnodeif (props) {for (const key in props) {// 实现通用的,可以根据 组件的命名规范,来实现,// 因为 on + 事件名称 : click -> onClick , onMouseDown -> MouseDown// 可以使用正则方式,匹配 on 之后的事件名,来注册不同事件// 封装 通过注册方法 isOnconst isOn = (key) => /^on[A-Z]/.test(key);if (isOn(key)) {// 获取事件名称const event = key.slice(2).toLowerCase();el.addEventListener(event, val);}else {// 如果不是 on 之后的事件名称// 设置 el 的属性值el.setAttribute(key, val);}}}}
在App 中添加其他事件
/* App.js */window.self = nullexport const App = {render() {window.self = this// ui 逻辑return h('div', {class: 'test-class-id',onClick: () => {console.log('click 事件触发')},onMouseDown: () => {console.log('mouse down 事件触发')},id: this.msg}, this.msg)}}
测试功能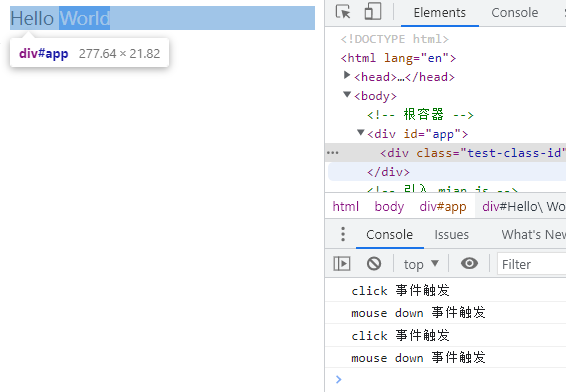
执行打包命令 yarn build 重新打包, 在 index.html 中 点击标签, 检测是否初始事件 , 没有出现问题说明是西安注册事件功能
// 实现 props 属性中 注册事件的功能// 实现逻辑/*** 1. 在处理 props 的逻辑中, 判断 key 是否是特殊的方法* 2. 在对 key 对应的值,绑定对应的事件*/
4.9 实现 Props
props是 setup 的第一个参数,用于在 父组件 & 子组件中传参
初始化实现 Props 的文件 , 创建 ./example/componentProps文件夹。 赋值HelloWorld的内容到里面 , 添加 Foo.js文件,相当于一个组件
App.js 的逻辑
import { Foo } from './Foo.js'/* App.js */window.self = nullexport const App = {render() {window.self = this// ui 逻辑return h('div', {class: 'test-class-id',onClick: () => {console.log('click 事件触发')},onMouseDown: () => {console.log('mouse down 事件触发')},id: this.msg}, [h('div', {}, "hello + Foo + " + this.msg),// 添加渲染 Foo 组件h(Foo,// 传入 props 参数{count: this.count})])},setup() {let count = 0return {msg: 'Hello World',count};}}
Foo.js 的逻辑
/* Foo.js */export const Foo = {// 1. setup 接收 App组件传入的propssetup(props) {// 1.1 实现 setup 访问 props// 分析:只需要在调用setup时候把 props 传入 setup 函数即可// 实现:// 1. 在初始化setup 时候, 声明 initProps(), 把 instance 和 instance.vnode.props 传递进去// 2. initProps() 的逻辑-> 把props 挂载到 instance 上// 3. 在调用 setup() 时候传入 instance.props 作为参数console.log(props)// 3. props 是 只读的 Shallow readonly 的// 实现:// 1. 只需要在调用setup(props) 是否 设置 props 是 shallowReadonly 就行// 注意:// - props 在初始化时候位 null -> 在执行shallowReadonly 是 target 必须是一个对象,// 所以在initProps时候 初始化 props 时,如果为null, 设置props 为一个 空对象 {}props.count++ // 修改 count 会报错console.log(props)},render() {// 2. 在 render 中 通过 this.count 能够访问 props.count 的值// 分析:需要在 render() 中 this 调用 xxx,// 也就是之间实现 this.xxx = xxx -> 创建的代理对象中, 访问key, 然后拿到它的返回值, props 也可以通过这样的方式实现// 实现:// 1. 在实现代理对象Proxy的中的 PublicInstanceProxyHandlers 中 处理 props 的返回值// 2. PublicInstanceProxyHandlers 重构 通过key拿到返回值的方法, 通过 hasOwn(obj, key) 来判断对象具有的属性值// 3. 通过解构的方法 拿到 props 对象 , 再使用 hasOwn(props, key) 判断, 返回 props[key] 的值return h("div", {}, "这里是Foo 组件" + this.count)}}
在访问 index.html 页面结果 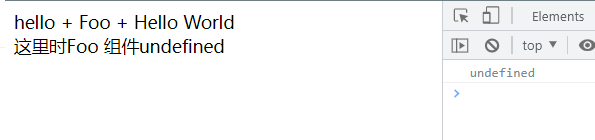
- 实现
setup访问props, 分析:只需要在调用setup时候把props传入setup函数即可 ,
实现:
1. 在初始化setup时候, 声明过initProps() instance和 instance.vnode.props 传递进去
2.initProps()的逻辑-> 把props挂载到 instance上
3. 在调用 setup() 时候传入 instance.props 作为参数
4 实现 props 只读的, 在实现响应式时, 使用过 shallowReadonly,把instance.props变为可读就行
在创建component是,初始化 prop, 设置为一个空对象
/* component.ts*/export function createComponentInstance(vnode) {// 创建组件的实例const component = {// 其他代码// 初始化 props 为一个对象props: {},}return component}
在setupComponent中, 也就是在执行 setup() 函数前,实现 initProps
/* component.ts*/// 执行 组件 setup() 逻辑export function setupComponent(instance) {// 1. initProps// 传入 instance 当前组件的实例 & 当前组件的propsinitProps(instance, instance.vnode.props)}function setupStatefulComponent(instance) {// ... 其他代码if (setup) {// 执行 setup()// 传入 instance.props 参数// 使用 shallowReadonly 包裹起来, props 是可读的const setupResult = setup(shallowReadonly(instance.props))}}
创建 runderer-core/componentProps.ts , 实现 props的逻辑
/* componentProps.ts*/// initProps 的逻辑// 两个参数 -> instance 组件的实例 , rawProps -> 没有经过初始化的 propsexport function initProps(instance, rawProps) {// 逻辑: 只需要把 props 挂载到 instance 上,// 然后在调用 setup() 时候传输 props 给到就行了// 需要props 在创建 instance 时 初始化 init// 如果 rawProps 为空 ,则设置为 {}instance.props = rawProps || {}}
此时在 Foo.js 组件里, 已经能够看到 props输出的结果了 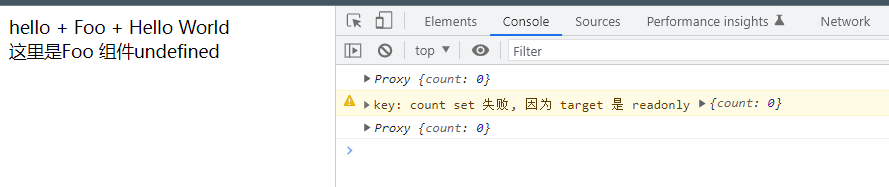
- 实现在组件中的
render()函数中,通过this.count能够访问到props.count
分析:需要在 render() 中 this 调用 xxx, 也就是之间实现 this.xxx = xxx -> 创建的代理对象中, 访问key, 然后拿到它的返回值, props 也可以通过这样的方式实现
实现:
1. 在实现代理对象Proxy的中的 PublicInstanceProxyHandlers中 处理 props的返回值
2. PublicInstanceProxyHandlers重构 通过key拿到返回值的方法, 通过 hasOwn(obj, key) 来判断对象具有的属性值
3. 通过解构的方法 拿到 props 对象 , 再使用hasOwn(props, key) 判断, 返回 props[key]的值
因为在render()中通过 this.xxx 访问值,由代理对象返回值的。 可以代理对象中设置在访问 props 属性时,返回的数据
/* componentPublicInstance.ts */export const PublicInstanceProxyHandlers = {// 使用 { _: instance } 的方式传递 instance 参数get({ _: instance }, key) {// 1. 实现从setupState 拿到值// const { setupState } = instance// // 判断 setupState 中是否有 key 属性// if (key in setupState) {// // 返回 setupState 中的值// return setupState[key]// }// 实现一个公共方法 hasOwn() 判断 object 是否具有 key 属性const hasOwn = (val, key) => Object.prototype.hasOwnProperty.call(val, key)// 因为 setup的返回值 setupState ,可以使用判断 object 是否具有 key 属性// 具有相同的逻辑// 解构出 propsconst { setupState, props } = instanceif (hasOwn(setupState, key)) {return setupState[key]} else if (hasOwn(props, key)) {// 返回 props 中的值return props[key]}}}
这样在 render() 中就能访问到 props.count 了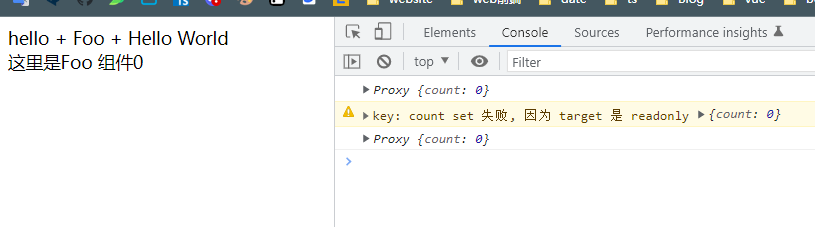
重构 : 把hasOwn() 的代码抽离出去到公共的方法
/* shared/index.ts */// 实现一个公共方法 hasOwn() 判断 object 是否具有 key 属性export const hasOwn = (val, key) => Object.prototype.hasOwnProperty.call(val, key)
重新打包yarn build,检查 index.html 页面内容,没有出现问题; 实现了 Props
4.10 实现 Emit
setup 的第二个参数是 context , context 是一个普通的对象,暴露给 setup 中的值,主要有 attrs & slots & emit 这些。 其中 emit主要用于触发 使用该组件在 props 对象中声明的方法。
例如 : 在声明Foo 组件的props 对象声明了 onAdd 方法, 则在 Foo 中的 setup 中通过 emit('add') 触发定义在 props 的onAdd方法
实现 Emit 功能之前,初始化, 创建 example/componentEmit 文件夹。 复制App.js & Foo.js & index.html & main.js 文件
在App组件中 Emit功能需求
/* App.js*/export const App = {name: 'App', // 组件name -> 根组件// 实现 emit 功能render() {return h('div', {}, [h('div', {}, "App"),h(Foo,// Foo 组件的 props{// 接收 emit 事件// 这里接收的 onAdd 和 在 Foo 组件调用的 emit('add') 名字不同// 在这里注册事件都是 on + 时间名 -> on + AddonAdd(a, b) {// 获取到参数 a ,b -> emit()传入参数console.log('onAdd -> emit触发 add 事件 回调函数', a, b)},onAddFoo(a, b) {console.log('onAddFoo -> ', a, b)}})])},}
在Foo.js 组件中使用 Emit能够调用在 App.js定义的 Foo的 prosp内 方法
/* Foo.js */// 实现 Emit 功能export const Foo = {// 1. 实现Emit// setup 接收的第二个参数 {}, 导出 Emit// 这里注意: 第二个参数是一个对象 , 而对象里面有一个emit// 实现:// - 在调用 setup() 时候传入第二个参数, 是一个对象, 对象中有一个emit 方法// - 这个emit是一个函数,需要在组件实例中进行初始化 -> emit: instance.emit -> 初始化emit: () => {}// - 定义 emit 方法,将他挂载到 component.emit 上面// 关系: Foo组件 emit('事件名') -> instance.emit这里只是函数名 -> component.emit 初始化的 emit = 创建的 emit("事件名") 函数// - 接下来的逻辑在 componetntEmit.ts 中setup(props, { emit }) {const emitAdd = () => {console.log('emit add —— 在setup() 中被调用')// 2. 当调用 emit 时,传入一个事件名,// - 在找事件时候,需要找当前组件 props 中有没有这个事件函数// - 实现: 匹配 on + 事件名 -> 需要首事件字母大写// 当执行 emitAdd 时,会触发 App 组件的 emit 事件// emit('add')// 实现emit 传参功能,// 1, 2 能够在 App 组件中获取到传入的参数// 实现逻辑// - 在实现emit逻辑中,使用解构 ...args 获取传入的参数, 然后调用 handler(...args) 是传入接收的参数就行emit('add', 1, 2)// 实现事件的命名方式 on-add// 实现逻辑-> add-foo 在实现emit 时候转为 AddFoo 命名// 只需要把 - 去掉, 首字符变为大写emit('add-foo', 1, 2)}// 返回 emitAdd 函数return {emitAdd}},render() {// 声明一个点击事件, 当点击这个按钮时, 触发 emit -> 调用App中的xxx方法const btn = h('button', {// 声明click 为 this.emitAddonClick: this.emitAdd}, 'emitAdd')const foo = h('p', {}, 'Foo组件')// 返回Element逻辑return h('div', {}, [foo, btn])}}
此时的页面 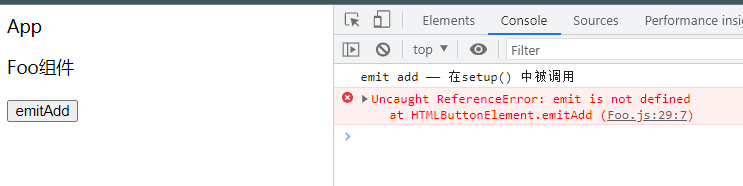
- 实现
Emitsetup接收的第二个参数 {}, 导出Emit
这里注意: 第二个参数是一个对象 , 而对象里面有一个emit
实现:
- 在调用 setup() 时候传入第二个参数, 是一个对象, 对象中有一个emit方法
- 这个emit是一个函数,需要在组件实例中进行初始化 -> emit: instance.emit -> 初始化emit: () => {}
- 定义 emit方法,将他挂载到 component.emit 上面 ->component.emit = emit as any
关系: Foo组件 emit('事件名') == instance.emit (这里只是函数名) == component.emit 初始化的emit = 创建的 emit("事件名") 函数
在初始化component时,在组件实例中添加 emit方法 -> 初始化
并且在调用 setup时传入 { emit: instance.emit } 参数
/* component.ts */export function createComponentInstance(vnode) {const component = {// 其他代码 ...// 初始化 emit -> 是一个函数emit: () => {}}return component}// 调用 setup 时,传入 emit 参数function setupStatefulComponent(instance: any) {// 其他代码 ...if (setup) {// 实现emit -> 第二个参数{} -> 对象中有 emit// 将 emit 默认赋值给 instance.emitconst stupResult = setup(shallowReadonly(instance.proxy), { emit: instance.emit })}}
在创建创建组件时,对 emit方法进行一个接收函数 emit
创建 componentEmit.ts 导出 emit方法
/* componentEmit.ts */// 导出 emit 函数// 接收 Foo组件 中 emit('事件名') -> 中事件名 参数export function emit(event) {// 检测 emit 的传参console.log('emit', event, '在 emit实现逻辑中调用')}
/* component.ts */export function createComponentInstance(vnode) {const component = {// 其他代码 ...// 初始化 emit -> 是一个函数emit: () => {}}// 导入 emit, 并使用component.emit = emit as anyreturn component}
这里就建立了 组件中 emit 的关系
关系: Foo组件的emit('事件名') == instance.emit (这里只是函数名) == component.emit 初始化的emit = 创建的 emit("事件名") 函数
此时页面内容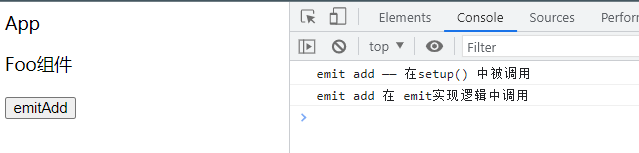
实现 componentEmit.ts逻辑
1. 找到 instance.props 中有没有这个 event 对应的 函数名和回调函数
-> 实现: 传入 instance 拿到 props
-> 因为在Foo组件的emit 只会传入一个事件名的参数, 不是两个参数
-> 可以在componet.emit 调用 emit()时候 使用 bind() -> emit.bind(null, component), 代表传入第一个函数是this,第 二个参数是 emit接收的第一个参数instance 这是一个代码技巧
实现在componentEmit 中能够拿到 instance 才能做到返回 emit对应的函数内容
/* component.ts */export function createComponentInstance(vnode) {const component = {// 其他代码 ...// 初始化 emit -> 是一个函数emit: () => {}}/* 可以在componet.emit 调用 emit()时候使用 bind() -> emit.bind(null, component), 代表传入第一个函数是this,第二个参数是 emit接收的第一个参数instance 这是一个代码技巧*/component.emit = emit.bind(null, component) as anyreturn component}
在 emit 中接收到 instance 组件实例
/* componentEmit.ts */// 导出 emit 函数// 接收 Foo组件 中 emit('事件名') -> 中事件名 参数export function emit(instance, event) { // 接收到 instance 组件实例// 检测 emit 的传参console.log('emit', event, '在 emit实现逻辑中调用')}
- 由
instance取到props, 根据key拿到对应的事件函数 ```typescript / componentEmit.ts /
// 导出 emit 函数 // 接收 Foo组件 中 emit(‘事件名’) -> 中事件名 参数 export function emit(instance, event) { // 接收到 instance 组件实例 console.log(‘emit’, event, ‘在 emit实现逻辑中调用’)
// TPP 开发技巧 :先去写一个特定的行为,再去重构为通过的行为 const { props } = instance; // 判断传入过来的参数事件名是不是一个 add const handler = props[‘onAdd’] // 判断 handler 有没有, 有就调用, 也就是执行 App中的Foo组件的props 定义的事件 handler && handler() }
重构 -> 处理字符串 -> `add` 首字母大写 -> `on + 事件````typescript/* componentEmit.ts */export function emit(instance, event) { // 接收到 instance 组件实例// TPP 开发技巧 :先去写一个特定的行为,再去重构为通过的行为const { props } = instance;// 将 event -> add 变为 Add -> 首字符大写const capitalize = (str: string) => {// 将首字符获取到,并转换为大写,然后拼接后面的字符串return str.charAt(0).toUpperCase() + str.slice(1);}// 处理 on + 事件 的行为const toHandlerKey = (str: string) => {// 如果 str 有值,执行首字符大写,没有返回空字符串return str ? "on" + capitalize(str) : ""}const handlerName = toHandlerKey(event)// 根据props中的key, 找到对应的回调函数, 然后执行const handler = props[handlerName]handler && handler()}
重构, 让事件名能够以 add-foo 的形式命名
/* componentEmit.ts */export function emit(instance, event) { // 接收到 instance 组件实例// TPP 开发技巧 :先去写一个特定的行为,再去重构为通过的行为const { props } = instance;// 实现 add-foo 变为 AddFooconst camelize = (str: string) => {// 返回一个正则替换return str.replace(/-(\w)/g, (_, c: string) => {return c ? c.toUpperCase() : ""})}// 将 event -> add 变为 Add -> 首字符大写const capitalize = (str: string) => {// 将首字符获取到,并转换为大写,然后拼接后面的字符串return str.charAt(0).toUpperCase() + str.slice(1);}// 处理 on + 事件 的行为const toHandlerKey = (str: string) => {// 如果 str 有值,执行首字符大写,没有返回空字符串return str ? "on" + capitalize(str) : ""}// 在这里使用 - 转为 驼峰命名 的函数 camelize()const handlerName = toHandlerKey(camelize(event))// 根据props中的key, 找到对应的回调函数, 然后执行const handler = props[handlerName]handler && handler()}
- 实现
event事件能够传递参数;达到Foo组件,传递参数emit('add', 1,2)在App->Foo->props->event能够接收参数 ```typescript / Foo.js/
// - 接下来的逻辑在 componetntEmit.ts 中 setup(props, { emit }) { const emitAdd = () => { console.log(‘emit add —— 在setup() 中被调用’)
// 实现emit 传参功能,// 1, 2 能够在 App 组件中获取到传入的参数// 实现逻辑// - 在实现emit逻辑中,使用解构 ...args 获取传入的参数,// 然后调用 handler(...args) 是传入接收的参数就行emit('add', 1, 2)// 实现事件的命名方式 on-add// 实现逻辑-> add-foo 在实现emit 时候转为 AddFoo 命名// 只需要把 - 去掉, 首字符变为大写emit('add-foo', 1, 2)
} // 返回 emitAdd 函数 return { emitAdd } },
在实现emit逻辑中,使用解构 ...args 获取传入的参数 , 然后调用 handler(...args) 是传入接收的参数就行```typescript/* componentEmit.ts */export function emit(instance, event, ...args) { // ...args 是Foo组件传入过来的参数//... 其他代码// 将 args 传入 handler 函数中,然后在APP组件上 emit(a,b)接收参数handler && handler(...args)}
查看控制台, 输出参数 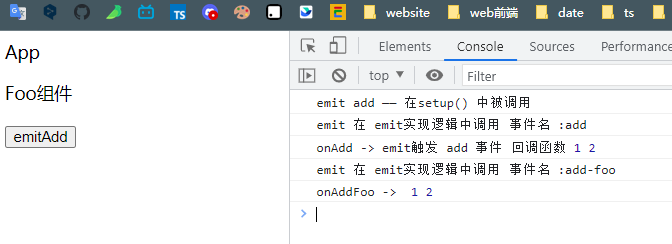
- 重构把
componentEmit中可能复用的代码抽离到shared中 ```typescript / componentEmit.ts /
export function emit(instance, event, …args) { const { props } = instance; // 使用重构 const handlerName = toHandlerKey(camelize(event)) const handler = props[handlerName] handler && handler(…args) }
```typescript/* shared/index.ts */// 实现 add-foo 变为 AddFooexport const camelize = (str: string) => {// 返回一个正则替换return str.replace(/-(\w)/g, (_, c: string) => {return c ? c.toUpperCase() : ""})}// 将 event 的 add 变为 Add -> 首字符大写const capitalize = (str: string) => {// 将首字符获取到,并转换为大写,然后拼接后面的字符串return str.charAt(0).toUpperCase() + str.slice(1);}// 处理 on + 事件 的行为export const toHandlerKey = (str: string) => {// 如果 str 有值,执行首字符大写,没有返回空字符串return str ? "on" + capitalize(str) : ""}
重新执行打包命令 yarn build 检查index.html, 没有出现问题, 表示实现了 Emit 功能
4.11 实现 slots 功能
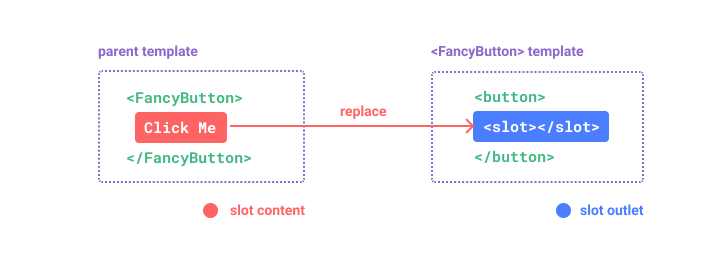
插槽的功能:父组件需要传递一些模板片段给子组件,子组件通过 插槽,让传递过来的内容渲染到这些片段
例如
// FancyButton 父组件<FancyButton>Click me! <!-- 插槽内容 --></FancyButton>// FancyButto<button class="fancy-btn"><slot></slot> <!-- 插槽插口 --></button>// 最终渲染的 DOM<button class="fancy-btn">Click me!</button>
1. 初始化slots&& this.$slots 基本的实现
在 example/componentSlots/ 创建 App & Foo & main & index.html
/* App.js */export const App = {name: 'App',// 根组件// 实现 Slot 功能render() {// 定义组件const app = h('div', {}, "这是App 组件")// 在父组件的 Foo中, 指定 Slot 的内容const foo = h(Foo, {},// 在Foo 组件中能够渲染出来这里的内容// 1. 事件slot的基本需求,-> 在Foo中展示h('p', {}, "这是在父组件中slot, 传入Foo的内容"), // children 内容)// 实现 slot 的目标就是:将h() 渲染出来的节点,添加到 Foo 组件内部return h('div', {}, [app, foo])},}
因为 slots 标签内容是在 父组件中定义, 在子组件通过拿到 父组件的 VNode.children 属性, 也就是拿到的children中的VNode, 在子组件渲染出来就行
关系过程: Foo -> App.children -> render.slots
// 实现 Slot 功能export const Foo = {// 实现 Slot 的功能// 因为 slot标签内容是在父组件中,在 Foo 组件 通过拿到 App 的 VNode .children 属性,// 也就拿到 childlen 中的 VNode。// 在 Foo 组件中 渲染出来就行// 关系过程 -> Foo -> App.children -> render slot 在Foo中渲染 slots// 1. 通过使用 this.$slots 渲染 App.children 的内容// 实现 :// 1. 初始化 $slots API -> component 初始化 slots -> componentPublicInstance 实现访问 $slots 返回内容// 2. initSlots -> 逻辑:将 vnode.children 赋值给 instance.slots// 3. 此时已经可以通过 this.$slots 拿到 App 需要渲染在Foo 中的 节点内容了render() {console.log(this.$slots)// 定义 Foo 组件const foo = h('p', {}, "这是Foo组件")// 在这里渲染 this.$slots// 1. 基本的功能return h('div', {}, [foo, this.$slots])}}
实现通过 this.$slots 访问App.children 的内容 , 也就拿到了父组件定义插槽的内容
初始页面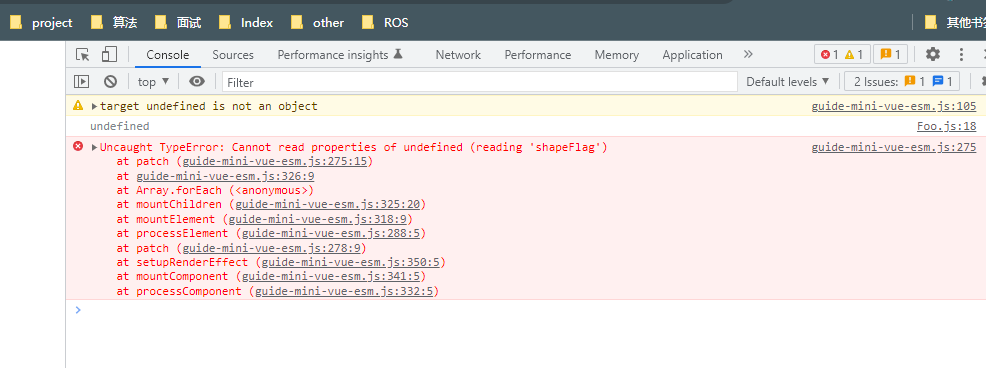
实现 this.$slots
1. 通过使用 this.$slots 渲染 App.children 的内容实现 :1. 初始化 $slots API -> component 初始化 slots -> componentPublicInstance 实现访问 $slots 返回内容2. initSlots -> 逻辑:将 vnode.children 赋值给 instance.slots3. 此时已经可以通过 this.$slots 拿到 App 需要渲染在Foo 中的 节点内容了
初始化
$slotsAPI/* component.ts */// 返回一个component对象const component = {// 其他代码// 初始化 slotsslots: {},}
```typescript / src/runtime-core/componentPublicInstance.ts / // 定义 $slots API
const publicPropertiesMap = { $el: (instance) => instance.vnode.el // 初始化 $slots ,返回 instance.slots 的内容 -> App.children $slots: (instance) => instance.slots }
- initSlots 的实现```typescript/* src/runtime-core/component.ts */// 对组件初始化的逻辑函数export function setupComponent(instance) {// 解析处理组件的其他内置属性 比如: props , slots 这些// 2. 初始化 slots// initSlots()//初始化 initSlots 给定两个参数, instance, 和 childreninitSlots(instance, instance.vnode.children)}
/* src/runtime-core/componentSlots.ts */// initSlots// 初始化 Slotsexport function initSlots(instance, children) {// 将 children 赋值给 instance.slotsinstance.slots = children}
完成 $slots 的基本功能 , 内容就是 App 传入的 虚拟节点
当slots 是一个数组时
基本的slots 只能实现单个虚拟节点的展示, 当多个时 slots 变为了 Array
/* App.js*/export const App = {render() {const foo = h(Foo,{},// 在Foo 组件中能够渲染出来这里的内容// 1. 事件slot的基本需求,-> 在Foo中展示// h('p', {}, "这是在父组件中slot, 传入Foo的内容"),// 2. 展示多个内容时 -> 在Foo中展示[h('p', {}, "这是在父组件中slot, 传入Foo的内容"),h('p', {}, "这是让slots实现 Array功能")])return h('div', {}, [app, foo])},}
此时的 slots 
解决:
在App中,目前只能支持 h(), 让 App 能够实现 [h(), h()] 多个内容2. 当传入过来的 this.$solts 是一个 Array的 VNode,而不是一个 VNodechildren -> Array VNode处理逻辑:把内部的 this.$slots 转为虚拟节点 Array VNode-> VNode解决: 把 $slots 直接再次包裹 h()实现:1. 这里通俗使用h("div", {}, [foo, this.$slots])) -> 进行一个重构, 使用 renderSlots函数,来渲染,2. 传入 this.$slots, 让它创建对应的虚拟节点3. 导入 renderSlot() 进行使用主要就是为了简化 h()
把 $slots 直接再次包裹 h()
/* Foo.js */export const Foo = {render() {console.log(this.$slots) // slots 本质就是一个 Element 的虚拟节点const foo = h("p", {}, "这是Foo组件")// 1. 基本的功能// return h('div', {}, [foo, this.$slots])// 2. App 中渲染多个内容return h('div', {}, [foo, h('div', {}, this.$slots)]) // 用 h 包裹 this.slots()}}
重构: 使用 renderSlots函数,封装 h() , 主要用于渲染 Array 的 slots
/* Foo.js */export const Foo = {render() {console.log(this.$slots) // slots 本质就是一个 Element 的虚拟节点const foo = h("p", {}, "这是Foo组件")// 1. 基本的功能// return h('div', {}, [foo, this.$slots])// 2. App 中渲染多个内容// return h('div', {}, [foo, h('div', {}, this.$slots)]) // 用 h 包裹 this.slots()// 导入 renderSlotsreturn h('div', {}, [foo, renderSlots(this.$slots)])}}
在 src/runtime-core/helper/renderSlot.ts 定义
/* src/runtime-core/helper/renderSlot.ts */export function renderSlots(slots) {// 使用 createVNode() 代替 h(xxx, {} xxx)// createVNode() 接收的参数,前两位 div {}// 这里只是实现了 Array -> 没有实现 slots 是单个组件的情况return createVNode('div', {}, slots)}
导入 renderSlot
/* index.ts */export { renderSlots } from './helpers/renderSlots'
重构完成
出现问题: 在检查 实现1 , 发现之前实现的单组件已经渲染不行了, 因为单个虚拟节点,会转为Object, 而不是Array,使用renderSlot 渲染不出来, 修改 renderSlots的逻辑
解决: 判断 slots VNode, 如果是 Array 就使用 createVNode() 代替 h(xxx, {} xxx) , 如果不是 表示单个虚拟节点,直接返回就行
/* src/runtime-core/helper/renderSlot.ts */export function renderSlots(slots) {// 这里的逻辑,就是当 this.$slots 是一个数组时// 转到 initSlots() 中进行判断// 需要对 slots 进行判断return Array.isArray(slots) ? createVNode('div', {}, slots) : slots}
这样就完成了针对第二种情况的实现,但是此时第一种情况就无法正常渲染,为了同时包括两种情况,可以在初始化 slots 时进行处理,若 children 是一个 VNode 则将其转为数组,完善src/runtime-core目录下的componentSlots.ts文件中的initSlots函数:
/* componentSlots.ts */export function initSlots(instance, children) {instance.slots = Array.isArray(children) ? children : [children]}
2. 实现具名插槽
具名插槽指的是,在由父组件向子组件传入插槽时传入一个对象,其中 key 为插槽的 name,用于指定插槽的位置,value 为插槽,而在子组件中将插槽的 name 作为第二个参数传入renderSlots函数来指定该位置要渲染的插槽。
/*App.js*/export const App = {render() {const foo = h(Foo,{},// 在Foo 组件中能够渲染出来这里的内容// 1. 事件slot的基本需求,-> 在Foo中展示// h('p', {}, "这是在父组件中slot, 传入Foo的内容"),// 2. 展示多个内容时 -> 在Foo中展示// [// h('p', {}, "这是在父组件中slot, 传入Foo的内容"),// h('p', {}, "这是让slots实现 Array功能")// ]// 3. 实现具名插槽// 将 children 转为 Object; 实现具名插槽 key -> value{header: h('p', {}, "这个具名插槽的内容 hander"),footer: h('p', {}, "这个具名插槽的内容 footer")})return h('div', {}, [app, foo])},}
/* Foo.js */export const Foo = {render() {console.log(this.$slots) // slots 本质就是一个 Element 的虚拟节点const foo = h("p", {}, "这是Foo组件")// 1. 基本的功能// return h('div', {}, [foo, this.$slots])// 2. App 中渲染多个内容// return h('div', {}, [foo, h('div', {}, this.$slots)]) // 用 h 包裹 this.slots()// 导入 renderSlots// return h('div', {}, [foo, renderSlots(this.$slots)])// 3. 实现具名插槽// 1. 获取要渲染的元素// 2. 获取到渲染的位置return h('div', {}, [renderSlots(this.$slots, "header"),foo, // 定义的 foo 组件// slot 的内容renderSlots(this.$slots, "footer")])}}
实现逻辑
- 获取到要渲染的
虚拟节点 - 获取到要渲染的
位置```typescript / src/runtime-core/componentSlots.ts / // 处理 Slots 的逻辑中
export function initSlot(instance, children) {
const slots = {} // 循环 children 数组 for (const key in children) { // 取到值 const value = children[key]
// 赋值给 slotsslots[key] = Array.isArray(value) ? value : [value];
}
// 最后赋值给 instance.slots instance.slots = slots }
完善 `renderSlots()` 函数```typescript/* helpers/renderSlots.ts */// 导出export function renderSlots(slots, name) { // 增加参数 name// 传入参数 name 实现具名插槽// slots[name] 通过 key 获取值const slot = slots[name];if (slot) { // 判断是否具有// 具有 slot, 直接渲染return createVNode('div', {}, slot)}}
此时页面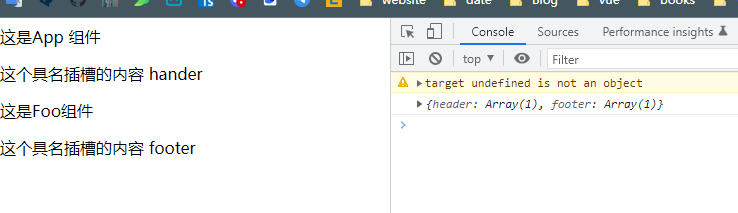
重构 componentSlots
export function initSlots(instance, children) {// 重构normalizeObjectSlots(children, instance.slots)}// 实现赋值function normalizeObjectSlots(children, slots) {for (const key in children) {const value = children[key];// 实现作用域插槽逻辑// 这里拿到 value 是一个函数// 需要进行调用, 实现传参slots[key] = normalizeSlotValue(value)}function normalizeSlotValue(value) {return Array.isArray(value) ? value : [value]}
3. 实现作用域插槽
在官网上定义的作用域插槽 : 同时使用父组件域内和子组件域内的数据, 要做到这一点,我们需要一种方法来让子组件在渲染时将一部分数据提供给插槽。
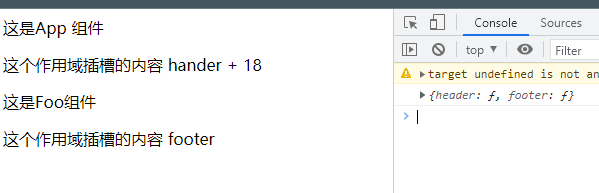
/*App.js*/export const App = {render() {const foo = h(Foo,{},// 在Foo 组件中能够渲染出来这里的内容// 1. 事件slot的基本需求,-> 在Foo中展示// h('p', {}, "这是在父组件中slot, 传入Foo的内容"),// 2. 展示多个内容时 -> 在Foo中展示// [// h('p', {}, "这是在父组件中slot, 传入Foo的内容"),// h('p', {}, "这是让slots实现 Array功能")// ]// 3. 实现具名插槽// 将 children 转为 Object; 实现具名插槽 key -> value// {// header: h('p', {}, "这个具名插槽的内容 hander"),// footer: h('p', {}, "这个具名插槽的内容 footer")// }// )// 4. 实现作用域插槽{// value 改为 函数// age 作为参数, 由子组件传入header: ({ age }) => h('p', {}, "这个作用域插槽的内容 hander + " + age),footer: () => h('p', {}, "这个作用域插槽的内容 footer")})return h('div', {}, [app, foo])},}
/* Foo.js */export const Foo = {render() {console.log(this.$slots) // slots 本质就是一个 Element 的虚拟节点const foo = h("p", {}, "这是Foo组件")// 1. 基本的功能// return h('div', {}, [foo, this.$slots])// 2. App 中渲染多个内容// return h('div', {}, [foo, h('div', {}, this.$slots)]) // 用 h 包裹 this.slots()// 导入 renderSlots// return h('div', {}, [foo, renderSlots(this.$slots)])// 3. 实现具名插槽// 1. 获取要渲染的元素// 2. 获取到渲染的位置// return h('div', {}, [// renderSlots(this.$slots, "header"),// foo,// // slot 的内容// renderSlots(this.$slots, "footer")// ]// )// 4. 实现作用域插槽// 定义一个变量,在子组件中传入,让父组件能够访问到// 父组件使用作用域插槽需要变为 函数式: header: ({age}) => h('p', {}, "这个具名插槽的内容 hander" + age),// 实现// 1. 使用子组件传入 { age } 参数// 2. 在 renderSlots 中,改变 slot, 因为 slot 已经是一个函数了// 3. 在 initSlots 中,修改代码, 此时的 value 已经是一个函数, 需要调用才能获取到返回值, 并且实现函数的传参const age = 18return h('div', {}, [// 传入 age 参数 -> { age }, renderSlots 的第三个参数renderSlots(this.$slots, "header", { age }),foo,// slot 的内容renderSlots(this.$slots, "footer")])}}
在 renderSlots 处理传入的参数
// 导出export function renderSlots(slots, name, props) { // 增加参数 name props// 传入参数 name 实现具名插槽// slots[name] 通过 key 获取值const slot = slots[name];if (slot) { // 判断是否具有// 具有 slot, 直接渲染// 实现 作用域插槽时 slot 是一个函数if (typeof slot === "function") {return createVNode('div', {}, slot(props)) // 执行函数 并传入参数}}}
在 initSlots 中调用 value , 并传入参数
export function initSlots(instance, children) {// 重构normalizeObjectSlots(children, instance.slots)}// 实现赋值function normalizeObjectSlots(children, slots) {for (const key in children) {const value = children[key];// 实现作用域插槽逻辑// 这里拿到 value 是一个函数// 需要进行调用, 实现传参slots[key] = (props) => normalizeSlotValue(value(props))}function normalizeSlotValue(value) {return Array.isArray(value) ? value : [value]}
4. 完善 slots 功能
在创建 VNode 时,判断当前的节点是否是 slot 类型的节点 , 新增
/* src/runtime-core/vnode.ts */// 添加处理当children是一个 object 时 -> 也就是具有 slots// 判定条件 : 是一个组件 + 具有children 是一个 objectif (vnode.shapeFlag & ShapeFlags.STATEFUL_COMPONENT) { // 如果当前节点是一个组件if (typeof children === "object") { // 并且 children 是一个 object -> slots// 也就说明当前节点是一个 具有 slot 的逻辑// 给当前节点 赋值为具有 slot 的状态vnode.shapeFlag |= ShapeFlags.SLOT_CHILDREN}}// 返回创建组件的虚拟节点return vnode
/* src/shared/ShapeFlags.ts */{// 添加 当前节点的 slots 的状态SLOT_CHILDREN = 1 << 4 // 1 左移 4 位 -> 10000 -> 转为二进制 -> 10000}
在初始化 initSlots 时增加判断
/* src/runtime-core/componentSlots.ts */// 初始化 Slotsexport function initSlots(instance, children) {// 重构// 并不是所有的节点都是具有 slots 的// 所以需要一个 判断逻辑 和 ShapeFlags 进行的判断一样// 1. 在初始化 ShapeFlags 时, 添加判断 slots 是否存在 的逻辑// 2. 添加 Slots 的状态 到 ShapeFlags 中// 3. 判断当前节点是否具有 slotsconst { vnode } = instanceif (vnode.shapeFlag & ShapeFlags.SLOT_CHILDREN) {// 执行 slot 的逻辑// 再次重构normalizeObjectSlots(children, instance.slots)}}/* 其他代码 */
打包yarn build , 测试 页面, 没有出现报错, 则实现Slots
4.12 实现 Fragment 功能
在实现插槽中, 使用 createVNode() 方法使用了 div 包裹 slots 的内容 , 这样处理不太合理。 多增加一层 div
可以使用 Fragment 对插槽进行包裹, 而处理 Fragment时直接调用 mountChildren 函数,对VNode 进行渲染
- 定义
Fragment```typescript / shared/index.ts /
// 定义 Fragment export const Fragment = Symble(“Fragment”)
- 给 `renderSlots.ts` 使用 `Fragment`标签```typescript/* helpers/renderSlots.ts */// 用于利用 Fragment 对插槽进行包裹export function renderSlots(slots, name, props) {// 通过 name 获取创建相应插槽的方法const slot = slots[name]if (slot) {if (typeof slot === 'function') {// 将创建插槽方法的执行结果作为 children 传入return createVNode(Fragment, {}, slot(props))}}}
在 renderer.ts 中添加判断逻辑
/* renderer.ts*/function patch(vnode, container) {// 实现Fragment的判断逻辑const { type } = vnode // type 组件的类型switch (type) {// 如果是 Fragment 包裹的标签case Fragment:// 就调用 processFragment 函数processFragment(vnode, container)break;// 如果不是,则走 默认的逻辑default:// 判断 vnode 是否是一个组件 还是 Elementif (vnode.shapeFlag & ShapeFlags.ELEMENT) {// if (typeof vnode.type === 'string') {// 如果是一个 ElementprocessElement(vnode, container)} else if (vnode.shapeFlag & ShapeFlags.STATIC_COMPONENT) {// } else if (isObject(vnode.type)) {// 如果是一个组件processComponent(vnode, container)}break}}// 处理 Fragment 包裹的标签function processFragment(vnode, container) {// 调用 mountChildrenmountChildren(vnode, container)}
此时页面 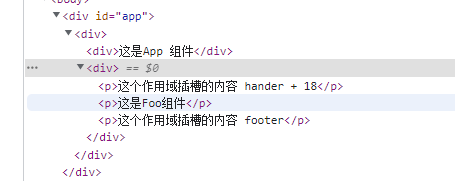
4.13 实现 TextNode 功能
在作用域插槽中添加测试,在实现插槽的函数中,返回一个数组,第二项是一个文本字符串, 表示要渲染到页面的文本内容
/* App.js */const foo = h(Foo,{},// 4. 实现作用域插槽{// 添加数组第二项,文本内容header: ({ age }) => [h('p', {}, "这个作用域插槽的内容 hander + " + age), "这是文本内容"],footer: () => h('p', {}, "这个作用域插槽的内容 footer")})return h('div', {}, [app, foo])},
实现文本节点的渲染与 Fragment类似
/*** 实现TextNode 逻辑* 因为在实际的 Vue3 中,这些text 都是直接写的; 这里使用了 render() 逻辑; 写text节点,使用到 createTextNode()方法,* 把 text 节点创建 VNode , 然后渲染到页面** 实现* 1. 在 VNode 中创建 createTextNode() 函数 ; 返回返回一个 createVNode(Text, {}, text);* 创建Text类型的 虚拟节点, 并且把 text 内容传入children 属性; Text需要初始化定义 与 Fragment 实现相同,不需要实际的 标签包裹** 2. 在 patch()函数中,判断是否Text 类型的节点, 如果是 进行 Text 的渲染* - 节点的创建 -> 添加节点到页面*/
- 创建文本节点
```typescript / vnode.ts //* shared/index.ts */// 定义 Textexport const Text = Symbol("Text")
// 创建 createTextNode // 实现 渲染 文本的逻辑 export function createTextNode(text: string) { // 创建按 Text 类型的 虚拟节点 -> VNode // 在到 patch() 中处理 Text 的 渲染 return createVNode(Text, {}, text) }
导出`createTextNode````typescript// src/runtime-core/index.tsexport { createTextNode } from "./vnode"
在组件中使用 creatTextNode
/* App.js */const foo = h(Foo,{},// 4. 实现作用域插槽{// 添加数组第二项,文本内容// 直接封装是 对TextNode 进行 包裹// createTextNode("text")header: ({ age }) => [h('p', {}, "这个作用域插槽的内容 hander + " + age), createTextNode("这是文本内容")],footer: () => h('p', {}, "这个作用域插槽的内容 footer")})return h('div', {}, [app, foo])},
- 渲染文本节点
在render.ts 中,与 Fragment 的实现一样,Text 文本节点的渲染也是单独处理
/* renderer.ts*/function patch(vnode, container) {const { type } = vnodeswitch (type) {case Fragment:processFragment(vnode, container)break;// 用于处理 Textcase Text:processText(vnode, container)break// 如果不是,则走 默认的逻辑default:// 其他代码...}}// 用于处理 Text 文本节点function processText(vnode, container) {// 渲染 Text 的虚拟节点的 Vnode 的逻辑// 通过解构赋值获取 Text 对应 VNode 的 children,即文本内容const { children } = vnode// 2. 创建一个 TextNode// 记得使用 vnode.el 赋值const textNode = (vnode.el = document.createTextNode(children))// 3. 添加到 container 内容container.appendChild(textNode)}
此时页面 内容 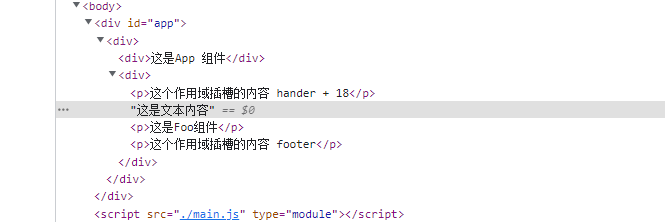
重新打包 yarn build , 检查页面, 没有报错说明 实现 TextNode 功能
4.14 实现 getCurrentInstance 方法
getCurrentInstance 方法是获取到当前组件的实例对象
getCurrentInstance 只能在 setup 或生命周期钩子中调用
组件定义
/*App.js*/export const App = {name: "App",render() {// render中渲染了 App , 还渲染了 Fooreturn h('div', {}, [h('p', {}, 'currentInstance demo'), h(Foo)])},// getCurrentInstance 方法的实现setup() {// getCurrentInstance 的作用: https://v3.cn.vuejs.org/api/composition-api.html#getcurrentinstance// getCurrentInstance -> 获取当前组件的实例对象// getCurrentInstance 必须要在 setup() 中使用const instance = getCurrentInstance()console.log("这是getCurrentInstance 获取的App组件实例:", instance)}}
/* Foo.js */// Foo 组件export const Foo = {name: "Foo",setup() {// 与App组件实现的逻辑一样 调用 getCurrentInstance 方法 查看当前的组件实例对象const instance = getCurrentInstance()console.log("Foo组件实例:", instance)},render() {return h("div", {}, "这是Foo组件")}}
实现getCurrentInstance
1. 在component中实现 getCurrentInstance 方法2. 定义一个全局变量,在 setup() 调用时 给全局变量赋值为当前组件实例3. getCurrentInstance 返回 这个全局变量4. 导出 getCurrentInstance 方法
/* component */// 定义currentInstance 用于记录当前的组件实例let currentInstance = nullfunction setupStatefulComponent(instance) {// 其他代码// call setup()const { setup } = componentif (setup) {// 给currentInstance 赋值// currentInstance = instance// 重构setCurrentInstance(instance)// 这里调用 setupconst setupResult = setup(shallowReadonly(instance.props), { emit: instance.emit })// 其他代码}}// 给currentInstance赋值function setCurrentInstance(instance) {// 改为在此处赋值, 可以达到一个中间层的位置// 方便调式代码currentInstance = instance}// 导出这个函数APIexport function getCurrentInstance() {// 返回全局变量; 也就是 instancereturn currentInstance}
导出 getCurrentInstance
/* index.ts */export { getCurrentInstance } from "./component"
打印输出 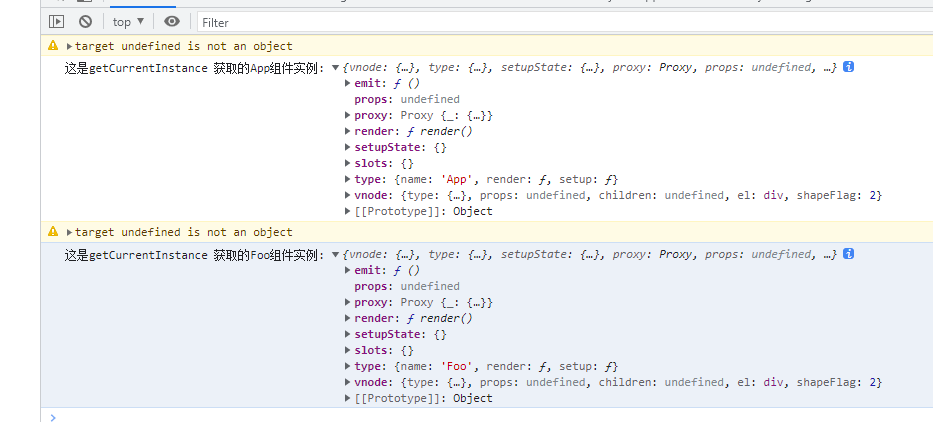
完成 getCurrentInstance() 方法的实现,重新打包, 检查运行
4.15 使用 inject & provide 方法
provide & inject 的介绍
无论组件层次解构有多深, 父组件都可以作为其所有子组件的依赖提供者。
这个特性有两个部分:父组件有一个 provide 选项来提供数据,子组件有一个 inject 选项来开始使用这些数据。
实现基本的 provide & inject
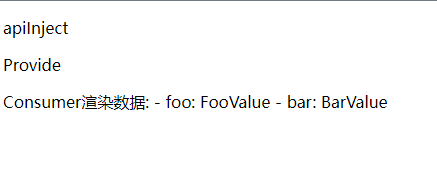
/* example/ApiInject&Provide/App.js */// Provider 组件const Provider = {name: 'Provider',setup() {// 使用 provide 方法提供数据provide('foo', '这是Provider提供的数据 fooValue')provide('bar', '这是Provider提供的数据 barValue')},render() {// children -> [] ; 渲染 Consumerreturn h('div', {}, [h('p', {}, "Provider"), h(Consumer)])}}/*** 介绍 Provider & Inject Api : https://v3.cn.vuejs.org/guide/component-provide-inject.html#%E5%A4%84%E7%90%86%E5%93%8D%E5%BA%94%E6%80%A7* provider 提供数据,inject 注入数据, 用在父组件和更深层级的组件之间的数据传输** 无论组件层次结构有多深,父组件都可以作为其所有子组件的依赖提供者。* 父组件有一个 provide 选项来提供数据,子组件有一个 inject 选项来开始使用这些数据。** Provider & Inject 只能在 setup 中使用*/// Consumer 组件 -> 子组件const Consumer = {name: 'Consumer',setup() {// 取到 Provider 组件传输的数据// 使用 inject 方法取数据 -> 根据 key 来取const foo = inject('foo')const bar = inject('bar')return {foo,bar}},// 渲染数据render() {return h('div', {}, `Consumer渲染数据: - foo: ${this.foo} - bar: ${this.bar}`)}}export default {name: 'App',setup() { },render() {// App 组件 -children 使用 Provider 组件return h('div', {}, [h("p", {}, "apiInject"), h(Provider)])}}
在 src/runtime-core/ 创建 apiInject.ts 实现的逻辑
/* apiInject.ts */export function provide(key, value) {// 存数据// 1. 存到当前组件的 provides 中// 需要在 component 初始化 provides// 2. 获取到当前组件的实例 instanceconst currentInstance: any = getCurrentInstance()// 3. 将 key 和 value 存入 currentInstance.provides 中if (currentInstance) {const { provides } = currentInstanceprovides[key] = value}}export function inject(key) {// 取数据// 1. 取到当前组件的实例 instanceconst currentInstance: any = getCurrentInstance()// 2. 根据key 取到 当前组件的 父级的 provides// parent.providesif (currentInstance) {// 取它父级里 存储数据的 parent// 通过 parent 取到 provides 对象const parentProvides = currentInstance.parent.provides// 需要在renderer 中传入 parent// 返回取到的数据return parentProvides[key]}}
初始化 provides & parent
/*component.ts*/export function createComponentInstance(vnode, parent) { // 这里传入parent, 当前组件的 父组件// 返回 vnode 这个组件const component = {// 其他代码// 初始化 provides, 用于存储provide传入的数据provides: {},// 初始化 parent, 用于存储父组件, 方便取到 父组件的 parentparent,}}
在 renderer.ts 中 给parent 赋值
/* renderer.ts */export function render(vnode, container) {// 调用 path// 初始化时,patch() 接收第三个参数,也就是之后赋值的 parent -> 赋值父组件的实例// 但是这里是初始化 patch() parent 为nullpatch(vnode, container, null)}// 接下来的函数都需要添加这个第三个参数function patch(vnode, container, parentComponent) {const { type } = vnodeswitch (type) {case Fragment:processFragment(vnode, container, parentComponent)break;case Text:processText(vnode, container)breakdefault:if (vnode.shapeFlag & ShapeFlags.ELEMENT) {processElement(vnode, container, parentComponent)} else if (vnode.shapeFlag & ShapeFlags.STATIC_COMPONENT) {processComponent(vnode, container, parentComponent)}break}}// 之后需要函数方法都需要添加 parentComponent 父组件这个参数// 这里给 parentComponent 赋值 为当前组件的实例function setupRenderEffect(instance, vnode, container) {const { proxy } = instanceconst subTree = instance.render.call(proxy) // 将proxy 注入到 render() 中// 这里 parent 赋值为 instance, 也就是父级组件patch(subTree, container, instance)vnode.el = subTree.el}
导出 provode & inject
/* index.ts */export { provide, inject } from "./apiInject"
实现跨层级传输
在App 组件中实现一个中间层组件
const Provide = {name: 'Provide',setup() {provide('foo', "FooValue")provide('bar', "BarValue")},render() {return h('div', {}, [h('p', {}, 'Provide'),// 这里改为渲染中间层组件h(ProviderTwo)])}}// 增加中间层 组件// 加上另一种情况// 在中间层使用 provide() 时// 在中间层使用 inject 时const ProviderTwo = {name: 'ProviderTwo',setup() {// 往子组件传输数据provide("foo", "这是ProviderTwo提供的数据 fooValueTow")// 往父组件获取数据const foo = inject('foo')return {foo}},render() {// 渲染中间层 组件的数据return h('div', {}, [h('p', {}, 'ProviderTwo 获取到它父级组件的数据 --' + this.foo),// 这里渲染 Consumerh(Consumer)])}}const Consumer = {name: 'Consumer',// ...}export default {// ...}
处理 provides 初始时 & 后台组件时的指向
/* component.ts */export function createComponentInstance(vnode, parent) {// 返回 vnode 这个组件const component = {// 初始化 provides, 用于存储provide传入的数据// provides: {},// 处理 provides 的指向,// 当 parent 没有值时-> 初始,provides 为 空 ,// 当 parent 有值时 -> 说明当前组件是一个子组件,provides 指向 parent 的 providesprovides: parent ? parent.provides : {},// 初始化 parent, 用于存储父组件的 provideparent,}}
当前页面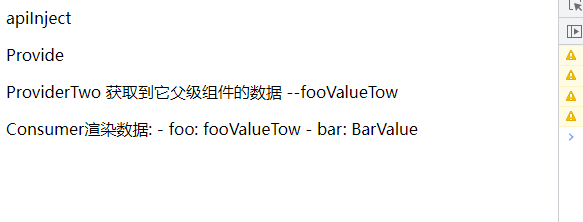
出现问题: 当前组件使用 provide存储数据,与父组件 key 相同时, 会取当前组件provide 存储的值, 而不是取父级组件的
解决: 本质是通过原型链的方式查找 provides , 重点: 把中间层 provides指向父级组件的 provides, 这样就形成了一条基于原型链的方式取数据
子组件具有自己的 provide和 inject的值 当子组件没有 后代组件需求的 inject值数据时,会从父组件的 provide中查找 (找原型链)
/* apiInject.ts */export function provide(key, value) {// 存数据// 1. 存到当前组件的 provides 中// 需要在 component 初始化 provides// 2. 获取到当前组件的实例 instanceconst currentInstance: any = getCurrentInstance()// 3. 将 key 和 value 存入 currentInstance.provides 中if (currentInstance) {let { provides } = currentInstance// provides[key] = value// 处理 procvide 的指向// 1. 获取 父级 provides 对象const parentProvides = currentInstance.parent && currentInstance.parent.provides// 注意点:这里可能是 init 初始化// 2. 判断初始化: 当 provides 等于它 父级的 provides 对象时,说明是初始化if (provides === parentProvides) {// 初始化时,给 provides 对象赋值 -> 形成原型链// 改写 provides 指向 parent的 provides : 形成原型链provides = currentInstance.provides = Object.create(parentProvides)// currentInstance.provides 当前组件的 provides}// 这里赋值provides[key] = value}}
此时页面, 完成原型链的逻辑 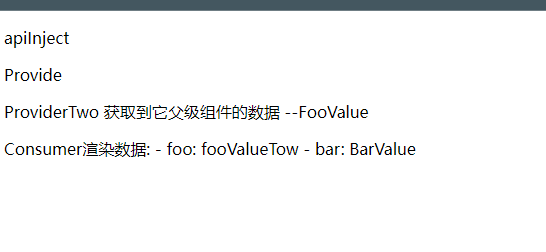
添加 inject 方法的两个功能点
- 添加 inject 的默认值
- 默认值可以是一个函数
添加默认值
/* App.js */// Consumber 组件const Consumer = {name: 'Consumer',setup() {// 获取 provider 传输过来的数据const foo = inject('foo')const bar = inject('bar')// 添加功能// 1. 实现默认值const baz = inject('baz', "默认值Baz")// 2. 默认值是一个函数return {foo,bar,baz}},render() {// 这里渲染 foo 和 bar// 展示默认值 bazreturn h('div', {}, `Consumer渲染数据: - foo: ${this.foo} - bar: ${this.bar} --- baz: ${this.baz}`)}}
实现两个功能
/* src/runtime-core/apiInject.ts */export function inject(key, defaultValue) { // 添加默认值// 取数据// 1. 取到当前组件的实例 instanceconst currentInstance: any = getCurrentInstance()// 2. 根据key 取到 当前组件的 父级的 provides// parent.providesif (currentInstance) {// 取它父级里 存储数据的 parent// 通过 parent 取到 provides 对象const parentProvides = currentInstance.parent.provides// 需要在renderer 中传入 parentif (key in parentProvides) {// 如果有 key 时// 返回取到的数据return parentProvides[key]} else if (defaultValue) {// 如果有 defaultValue 默认值时// return defaultValue// 如果默认值是 function 时if (typeof defaultValue === 'function') {return defaultValue()}return defaultValue}}}
展示页面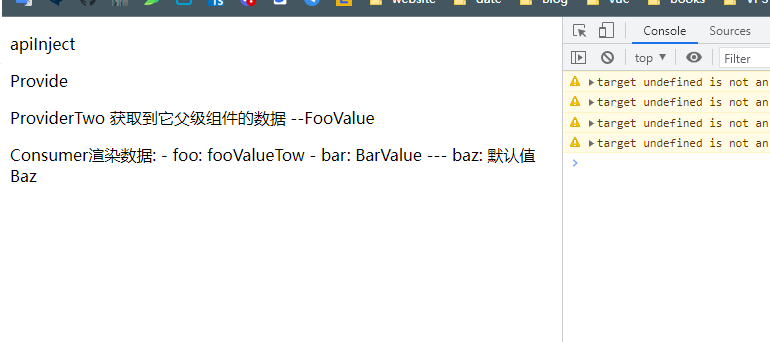
打包yarn build 检查页面 , 完成 inject & provide
4.16 实现自定义渲染器 custom renderer
自定义渲染器的定义
因为使用到的Vue模板不止是DOM平台,还可以自定义渲染其他平台
createRenderer函数接受两个泛型参数: HostNode 和 HostElement,对应于宿主环境中的 Node 和 Element 类型。例如,对于 runtime-dom,HostNode 将是 DOM Node 接口,HostElement 将是 DOM Element 接口。
// 实现 渲染 Canvas 平台的API/*** 为了让渲染器 能够实现多个 平台接口,不仅能够实现 Element 还能够渲染 Canvas , 所以修改代码让它不单单支持Element* 而是通过稳定的接口函数来 渲染 Element & Canvas** 需要3接口:* createElement : 创建 Element* patchProp : 给Element 添加属性* insert : 添加标签到 container 容器*** 实现方式* 1. 定义一个 createRender({}) 函数 -> 渲染器,传入对应的接口过来* 2. 把具体的实现函数传入给createRender()*/
定义自定义渲染器函数createRender()
/* renderer.ts*/// 导出 自定义渲染函数 createRender// 参数: options -> 传入对应的接口函数export function createRender(options) {// 这里内部的 render() 函数function render(vnode, container) {// export function render(vnode, container) {// 调用 pathpatch(vnode, container, null)}/* 省略所有代码*/}
导出 createRender
/* runtime-core*/export { createRenderer } from "./renderer"
传入 options 对应的接口方法 , vue模板默认渲染 DOM平台,把DOM平台的接口封装到 runtime-dom/index.ts
/* src/runtime-dom/index.ts */// 导入createRendererimport { createRenderer } from '../runtime-core'// 需要3接口:// createElement : 创建 Element// patchProp : 给Element 添加属性// insert : 添加标签到 container 容器// 定义 createElement -> 与在render中 createElement 逻辑相同相同function createElement(type) {// 返回创建的 Element 标签return document.createElement(type)}// 给Element 添加属性function patchProp(el, key, value) {const isOn = () => /^on[A-Z]/.test(key)if (isOn()) {// 这里实现注册事件el.addEventListener(key.slice(2).toLowerCase(), value)} else {el.setAttribute(key, value)}}// 添加标签到 parent 容器function insert(el, parent) {parent.append(el)}// 调用函数 传入 实现Element 渲染的接口createRender({ // 用一个 {} 包裹createElement,patchProp,insert})
renderer 逻辑中,使用传入的接口
/* src/runtime-core/renderer.ts */export function createRender(options) {// 需要3接口:// createElement : 创建 Element// patchProp : 给Element 添加属性// insert : 添加标签到 container 容器const {createElement,patchProp,insert,} = options/* 省略所有代码*/// 在 挂载 Element时,使用定义的接口function mountElement(vnode, container, parentComponent) {// 1. 创建 element// 改为使用 createElement 接口const el = (vnode.el = createElement(vnode.type))// const el = (vnode.el = document.createElement(vnode.type)) // 这里给 el 赋值// 2. propsconst { props } = vnodeif (props) {for (const key in props) {// console.log(key)const value = props[key]// 把赋值的逻辑写道 patchProp 方法中// 这里使用 patchProp 接口patchProp(el, key, value)}}// 3. children// 省略代码// 4. append// container.appendChild(el)// 使用 insert 接口insert(el, container)}}
因为在 runtime-core 中实现的 createApp.ts 使用到 render() 函数,而当前封装了createRender() 自定义渲染器, render 函数的逻辑被包裹起来了,访问不到 。
设置creatApp访问render() 函数的逻辑
createRender()的返回值
/* src/runtime-core/renderer.ts */export function createRender(options) {// createRenderer 自定义渲染器导出的方法return {// createAppAPI(render) 传入 render 方法// 并且拿到 createAppAPI 的返回值, createApp() 函数// 使用 createApp 命名接收的 createAppcreateApp: createAppAPI(render)}}
createApp.ts 封装 createApp 方法
/* src/runtime-core/createApp.ts */// 创建 createAppAPI () 接收 render 函数,export function createAppAPI(render) {// 并返回 createApp() 函数 -> 真实的 createApp 函数return function createApp(rootComponent) {return {mount(rootContainer) {const vnode = createVNode(rootComponent);render(vnode, rootContainer)}}}}
在 runtime-dom/index.ts 下接收 createRender.ts 的返回值 ,对createApp 再进一步封装
/* src/runtime-dom/index.ts *//* 其他代码 */// 调用createRender函数传入实现Element渲染的接口// 使用 renderer 接收 createRender 的返回值const renderer: any = createRender({createElement,patchProp,insert})// 这里封装一个 createApp 函数, 直接调用的是 renderer.createApp()// 这个就是 给用户调用 createApp 接口的函数export function createApp(...args) {// 这里是封装的 createApp()return renderer.createApp(...args)}
导出 runtime-dom
/* src/index.ts */// 整体出口export * from './runtime-dom'// export * from "./runtime-core"
因为 runtime-dom 作为 runtime-core 的上一层,把 导出runtime-core 放到 runtime-dom 中
/* src/runtime-dom/index.ts */// 这里导出 runtime-coreexport * from "../runtime-core"
重新打包 yarn build, 检查所有 example 下的页面,没有出现问题说明 实现 runtime-dom 的逻辑
使用 PIXIJS 自定义渲染
让实现vue能够支持 Canvas 平台, 而 PixiJS 就是基于Canvas 的
// 引入PIXIJS<script src="https://cdn.jsdelivr.net/npm/pixi.js@6.5.1/dist/browser/pixi.js"></script>
// 导入 createRender -> 自定义渲染器import { createRenderer } from '../../lib/guide-mini-vue.esm.js'import { App } from "./App.js"// 打印 PIXI// console.log(PIXI)// 创建 PIXI 实例const game = new PIXI.Application({width: 800,height: 600,})// 添加实例document.body.append(game.view)// 实现使用自定义渲染器 渲染 Canvasconst renderer = createRenderer({createElement(type) {if (type === 'rect') {const rect = new PIXI.Graphics()rect.beginFill(0xFF0000)rect.drawRect(0, 0, 100, 100)rect.endFill()return rect}},patchProp(el, key, val) {el[key] = val},insert(el, parent) {// appendparent.addChild(el)}})// 渲染renderer.createApp(App).mount(game.stage)
import { h } from "../../lib/guide-mini-vue.esm.js"export const App = {setup() {return {x: 100,y: 100,}},render() {// console.log(this.x, this.y)return h("rect", { x: this.x, y: this.y })}}
页面展示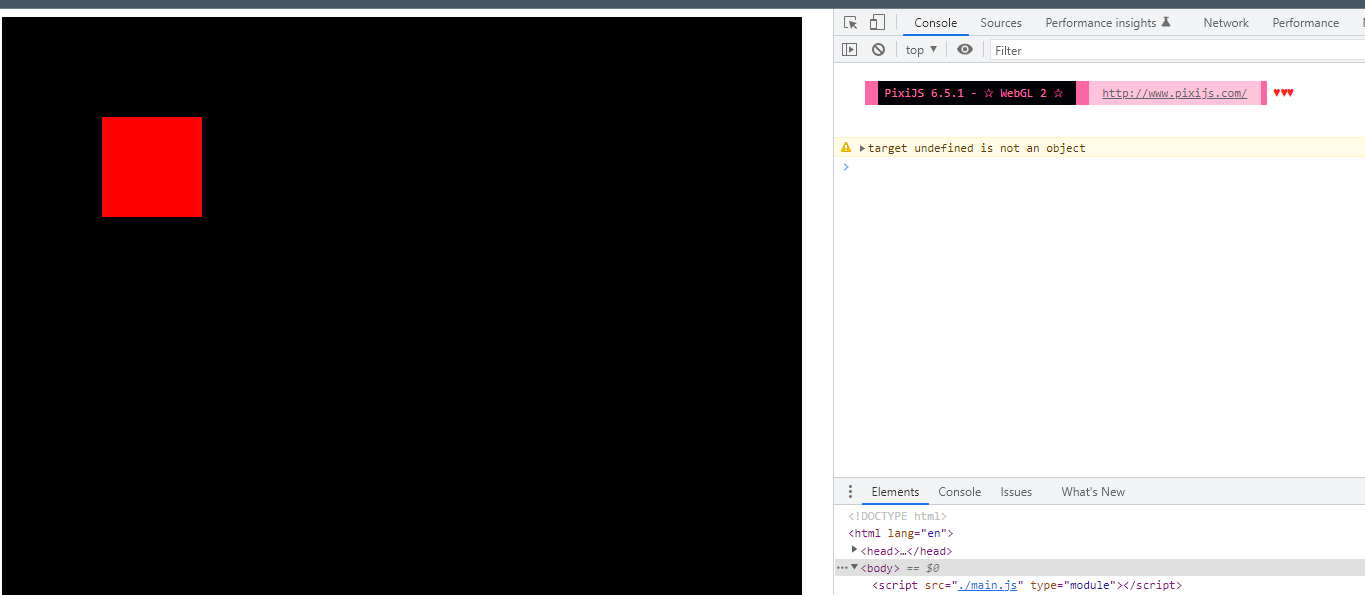
总结
runtime-core 的内容完成

若有收获,就点个赞吧
0 人点赞
