1.搭建SpringSecurityOauth2项目
使用idea就非常容易了 选择spring-security勾选oauth2依赖即可,需要注意的是版本兼容性是springboot2.3.10RELEASE,idea在选择的时候会给出相应的提示,版本选对后我们来启动一下项目,确保项目能正常访问。项目启动时日志底下会输出密码,我们在浏览器上访问项目资源,我的是127.0.0.1:1213 会弹出一个login网页要求我们输入密码,默认用户是user,输入密码正确后我们的基础项目搭建就没有问题了。<br />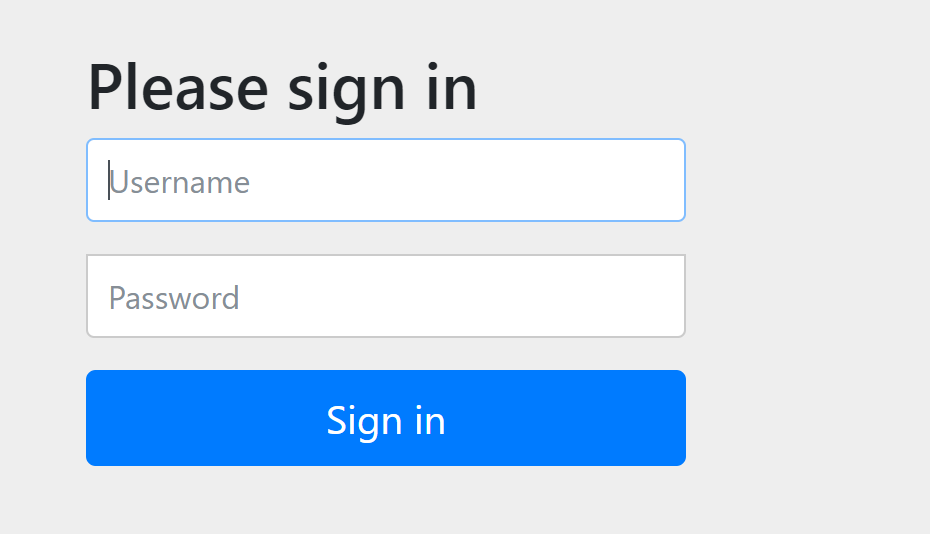<br />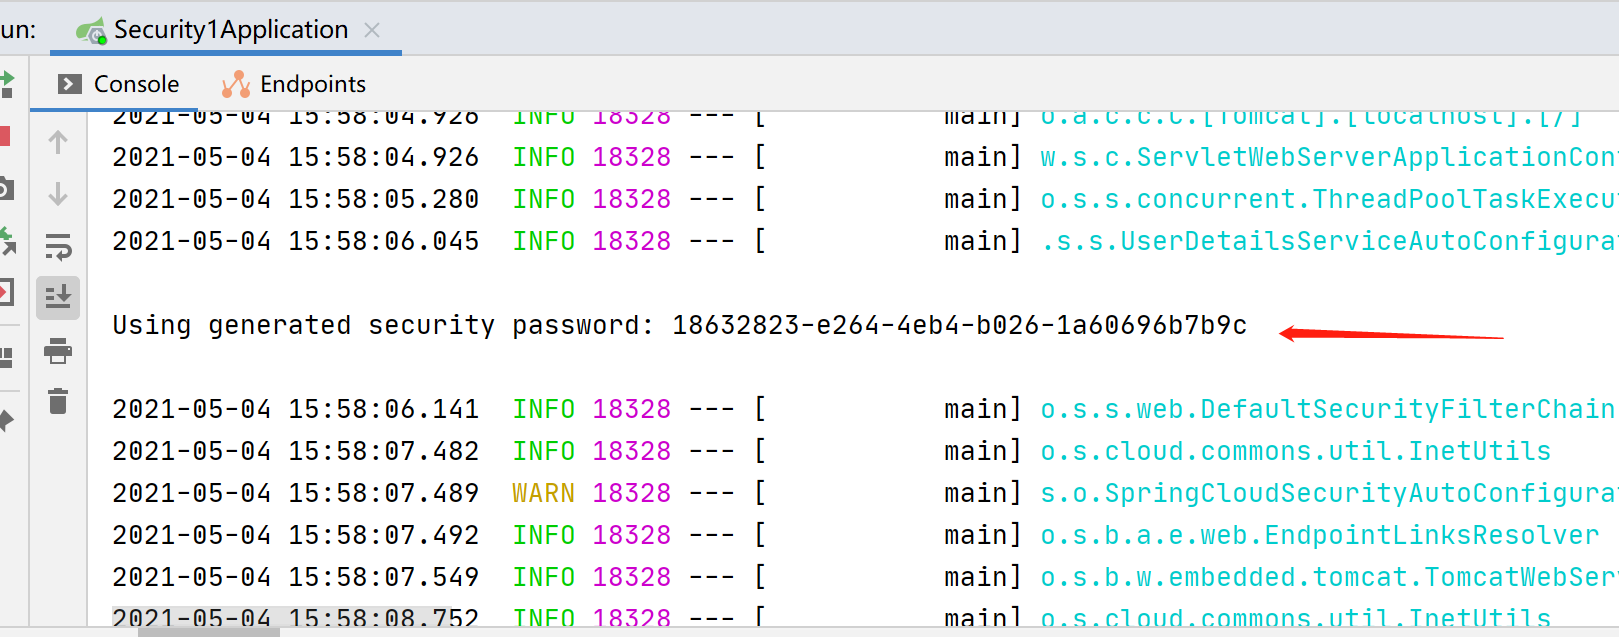
2. UserDetailsService
自定义登录逻辑后重启项目,输入密码时错误提示java.lang.IllegalArgumentException: There is no PasswordEncoder mapped for the id “null”,在Spring Security中密码的存储格式是“{id}…………”。前面的id是加密方式,id可以是bcrypt、sha256等,后面跟着的是加密后的密码。也就是说,程序拿到传过来的密码的时候,会首先查找被“{”和“}”包括起来的id,来确定后面的密码是被怎么样加密的,如果找不到就认为id是null。这也就是为什么我们的程序会报错:There is no PasswordEncoder mapped for the id “null”。官方文档举的例子中是各种加密方式针对同一密码加密后的存储形式,原始密码都是“password”。
{bcrypt}$2a$10$dXJ3SW6G7P50lGmMkkmwe.20cQQubK3.HZWzG3YB1tlRy.fqvM/BG{noop}password{pbkdf2}5d923b44a6d129f3ddf3e3c8d29412723dcbde72445e8ef6bf3b508fbf17fa4ed4d6b99ca763d8dc{scrypt}$e0801$8bWJaSu2IKSn9Z9kM+TPXfOc/9bdYSrN1oD9qfVThWEwdRTnO7re7Ei+fUZRJ68k9lTyuTeUp4of4g24hHnazw==$OAOec05+bXxvuu/1qZ6NUR+xQYvYv7BeL1QxwRpY5Pc={sha256}97cde38028ad898ebc02e690819fa220e88c62e0699403e94fff291cfffaf8410849f27605abcbc0
/*** @author 杨胖胖*/@Component@RequiredArgsConstructor(onConstructor = @__(@Autowired))public class UserDetailsServiceImpl implements UserDetailsService {@Overridepublic UserDetails loadUserByUsername(String username) throws UsernameNotFoundException {// todo 实际项目中这些内容需要从数据库表中查询到return new User(username, "{noop}123456", AuthorityUtils.commaSeparatedStringToAuthorityList("admin"));}}
如果不想用这种硬编码的方式我们也可以配置一个PasswordEncoder
/*** @author 杨胖胖*/@Configurationpublic class WebSecurityConfigurer{@Beanpublic PasswordEncoder passwordEncoder() {return new BCryptPasswordEncoder();}}
UserDetailsServiceImpl改成这样启动项目
/*** @author 杨胖胖*/@Component@RequiredArgsConstructor(onConstructor = @__(@Autowired))public class UserDetailsServiceImpl implements UserDetailsService {private final PasswordEncoder passwordEncoder;@Overridepublic UserDetails loadUserByUsername(String username) throws UsernameNotFoundException {// todo 实际项目中这些内容需要从数据库表中查询到return new User(username, passwordEncoder.encode("123456"), AuthorityUtils.commaSeparatedStringToAuthorityList("admin"));}}
3.AuthorizationServerConfigurerAdapter
1.配置密码模式与刷新令牌,我们将WebSecurityConfigurer继承WebSecurityConfigurerAdapter,密码模式需要authenticationManagerBean。
WebSecurityConfigurerAdapter
@EnableWebSecuritypublic class WebSecurityConfigurer extends WebSecurityConfigurerAdapter {@Beanpublic PasswordEncoder passwordEncoder() {return new BCryptPasswordEncoder();}@Bean@Overridepublic AuthenticationManager authenticationManagerBean() throws Exception {return super.authenticationManagerBean();}}
2.继承AuthorizationServerConfigurerAdapter,以下是密码模式标配
/*** @author 杨胖胖*/@Configuration@EnableAuthorizationServer@RequiredArgsConstructor(onConstructor = @__(@Autowired))public class AuthorizationServerConfigurer extends AuthorizationServerConfigurerAdapter {private final PasswordEncoder passwordEncoder;private final AuthenticationManager authenticationManager;@Overridepublic void configure(ClientDetailsServiceConfigurer clients) throws Exception {clients// 使用内存存储.inMemory()//标记客户端id.withClient("cms")//客户端安全码.secret(passwordEncoder.encode("secret"))//允许授权范围.scopes("all")//token 时间秒.accessTokenValiditySeconds(7200)//刷新token 时间 秒.refreshTokenValiditySeconds(7200)//允许授权类型.authorizedGrantTypes("refresh_token", "password");}@Overridepublic void configure(AuthorizationServerEndpointsConfigurer endpoints) {endpoints.authenticationManager(authenticationManager);}}
我使用的是postman来测试

新建资源来访问试试
/*** @author 杨胖胖*/@RestControllerpublic class CaptchaController {@GetMapping("captcha")public String captcha() {return "success";}}
- 没有添加token直接访问

4.ResourceServerConfigurerAdapter
配置资源服务器
/*** @author 杨胖胖*/@Configuration@EnableResourceServerpublic class ResourceServerConfigurer extends ResourceServerConfigurerAdapter {@Overridepublic void configure(HttpSecurity http) throws Exception {http.sessionManagement().sessionCreationPolicy(SessionCreationPolicy.IF_REQUIRED).and()//请求权限配置.authorizeRequests()//下边的路径放行,不需要经过认证.antMatchers(PathsEnum.NOT_NEED_AUTHENTICATE.getPaths()).permitAll()//用户的增删改接口只允许管理员访问.antMatchers("/admin/*").hasAnyAuthority("admin").anyRequest().authenticated();}}
加入token后访问资源

- 关于WebSecurityConfigurer这段代码:
解释一下优先级 ResourceServerConfigurerAdapter的HttpSecurity是高于WebSecurityConfigurerAdapterHttpSecurity的,所以理论上配置ResourceServerConfigurerAdapter的HttpSecurity就可以实现鉴权认证了
@Overrideprotected void configure(HttpSecurity http) throws Exception {http// 配置允许访问的链接.authorizeRequests().antMatchers("/oauth/**").permitAll()// 其余所有请求全部需要鉴权认证.anyRequest().authenticated()// 关闭跨域保护;.and().csrf().disable();}
5.使用redis存储token信息
```java /**
@author 杨胖胖 */ @Configuration @RequiredArgsConstructor(onConstructor = @__(@Autowired)) public class TokenStoreConfig {
private final RedisConnectionFactory redisConnectionFactory;
@Bean public TokenStore redisTokenStore() {
return new RedisTokenStore(redisConnectionFactory);
}
}
- AuthorizationServerConfigurer添加这行代码```java@Overridepublic void configure(AuthorizationServerEndpointsConfigurer endpoints) {endpoints// 配置密码模式.authenticationManager(authenticationManager)// redis存储token.tokenStore(tokenStoreConfig.redisTokenStore());}
6.JWT替换默认令牌
需要将redisTokenStore的Bean先注解掉否则会出现如下错误:
Field tokenStore in org.springframework.security.oauth2.config.annotation.web.configuration.ResourceServerConfiguration required a single bean, but 2 were found:- redisTokenStore: defined by method 'redisTokenStore' in class path resource [com/example/security/config/TokenStoreConfig.class]- jwtTokenStore: defined by method 'jwtTokenStore' in class path resource [com/example/security/config/TokenStoreConfig.class]
TokenStoreConfig添加如下代码:
@Beanpublic JwtTokenStore jwtTokenStore() {return new JwtTokenStore(accessTokenConverter());}@Beanpublic JwtAccessTokenConverter accessTokenConverter() {JwtAccessTokenConverter converter = new JwtAccessTokenConverter();converter.setSigningKey("one eternity later");return converter;}
AuthorizationServerConfigurer替换成如下代码:
public void configure(AuthorizationServerEndpointsConfigurer endpoints) {endpoints// 配置密码模式.authenticationManager(authenticationManager)// 使用jwt签发token.tokenStore(tokenStoreConfig.jwtTokenStore())// token加签.accessTokenConverter(tokenStoreConfig.accessTokenConverter());}
- 看一下效果:

7.JWT自定义内容
/*** @author 杨胖胖*/@Componentpublic class TokenJwtEnhancer implements TokenEnhancer {@Overridepublic OAuth2AccessToken enhance(OAuth2AccessToken accessToken, OAuth2Authentication authentication) {Map<String, Object> info = new HashMap<>();info.put("userId", "JayCou");((DefaultOAuth2AccessToken) accessToken).setAdditionalInformation(info);return accessToken;}}
AuthorizationServerConfigurer修改成如下代码:
public void configure(AuthorizationServerEndpointsConfigurer endpoints) {endpoints// 配置密码模式.authenticationManager(authenticationManager);// 配置自定义jwtTokenEnhancerChain enhancerChain = new TokenEnhancerChain();List<TokenEnhancer> enhancers = new ArrayList<>();enhancers.add(tokenJwtEnhancer);enhancers.add(tokenStoreConfig.accessTokenConverter());enhancerChain.setTokenEnhancers(enhancers);endpoints.tokenEnhancer(enhancerChain).accessTokenConverter(tokenStoreConfig.accessTokenConverter());}
效果如下:

- 本来是想讲讲如何解析token的内容拿到自定义信息的,但是springSecurity2.3以上的版本默认加密非对称加密,翻阅了文献比较难解决这个所以就没整了,但是代码我贴出来了,以后有能力的话可以解决一下。
- 解析自定义token所需要的依赖和代码
<dependency><groupId>org.apache.commons</groupId><artifactId>commons-lang3</artifactId><version>3.11</version></dependency><dependency><groupId>io.jsonwebtoken</groupId><artifactId>jjwt</artifactId><version>0.7.0</version></dependency>
后续将更新:其它授权模式、拥有指定权限才能访问资源、接入数据库使用密码登录public Authentication get(Authentication authentication, HttpServletRequest request) {String header = request.getHeader("Authentication");String token = StringUtils.substringAfter(header, "bearer");Claims claims = Jwts.parser().setSigningKey("one eternity later".getBytes(StandardCharsets.UTF_8)).parseClaimsJws(token).getBody();Object userId = claims.get("userId");return authentication;}

若有收获,就点个赞吧
0 人点赞
