 ">
">
前置知识
后台启动容器:docker-compose up -d查看容器运行情况:docker-compose ps停止容器:docker-compose stop启动容器:docker-compose start停止并删除容器:docker-compose down停止并删除容器并删除volume:docker-compose down --volumes
0、给应用宿主机eth0网卡共新增3个内网IP
参考:https://cloud.tencent.com/document/product/1199/4386610.0.0.1010.0.0.410.0.0.14设置完之后,一定要重启服务器!验证是否设置成功:ping ip1/ip2/ip3 or ip address设置多内网IP的原因:每个应用都会启动多个实例,每个实例注册到eureka上的IP使用内网IP,否则默认注册的IP是docker分配的IP!
1、创建应用集群专用docker网段
docker network create --driver bridge --subnet 172.18.0.0/16 --gateway 172.18.0.1 app-net
2、apollo环境配置,及应用配置
1、apollo环境配置首先在宿主机上创建apollo的环境配置文件:vim /opt/settings/server.properties内容:env=DEV编写docker-compose.yml时,将宿主机该文件所在目录映射docker容器中相同目录:- /opt/settings:/opt/settings注:apollo客户端启动时默认会去读/opt/settings/server.properties中的环境配置2、各个应用的配置文件内容https://github.com/xlvchao/spartacus/tree/main/docs/config/article-application.propertieshttps://github.com/xlvchao/spartacus/tree/main/docs/config/auth-application.propertieshttps://github.com/xlvchao/spartacus/tree/main/docs/config/chat-application.propertieshttps://github.com/xlvchao/spartacus/tree/main/docs/config/comment-application.propertieshttps://github.com/xlvchao/spartacus/tree/main/docs/config/datasyner-application.propertieshttps://github.com/xlvchao/spartacus/tree/main/docs/config/discovery-application.propertieshttps://github.com/xlvchao/spartacus/tree/main/docs/config/friday-application.propertieshttps://github.com/xlvchao/spartacus/tree/main/docs/config/gateway-application.propertieshttps://github.com/xlvchao/spartacus/tree/main/docs/config/gateway-resourceRoles.propertieshttps://github.com/xlvchao/spartacus/tree/main/docs/config/monitor-application.propertieshttps://github.com/xlvchao/spartacus/tree/main/docs/config/resource-application.propertieshttps://github.com/xlvchao/spartacus/tree/main/docs/config/sunday-application.propertieshttps://github.com/xlvchao/spartacus/tree/main/docs/config/system-application.properties#举个栗子,article-application.properties对应apollo上的应用名称是spartacus-article,对应的namespace是application

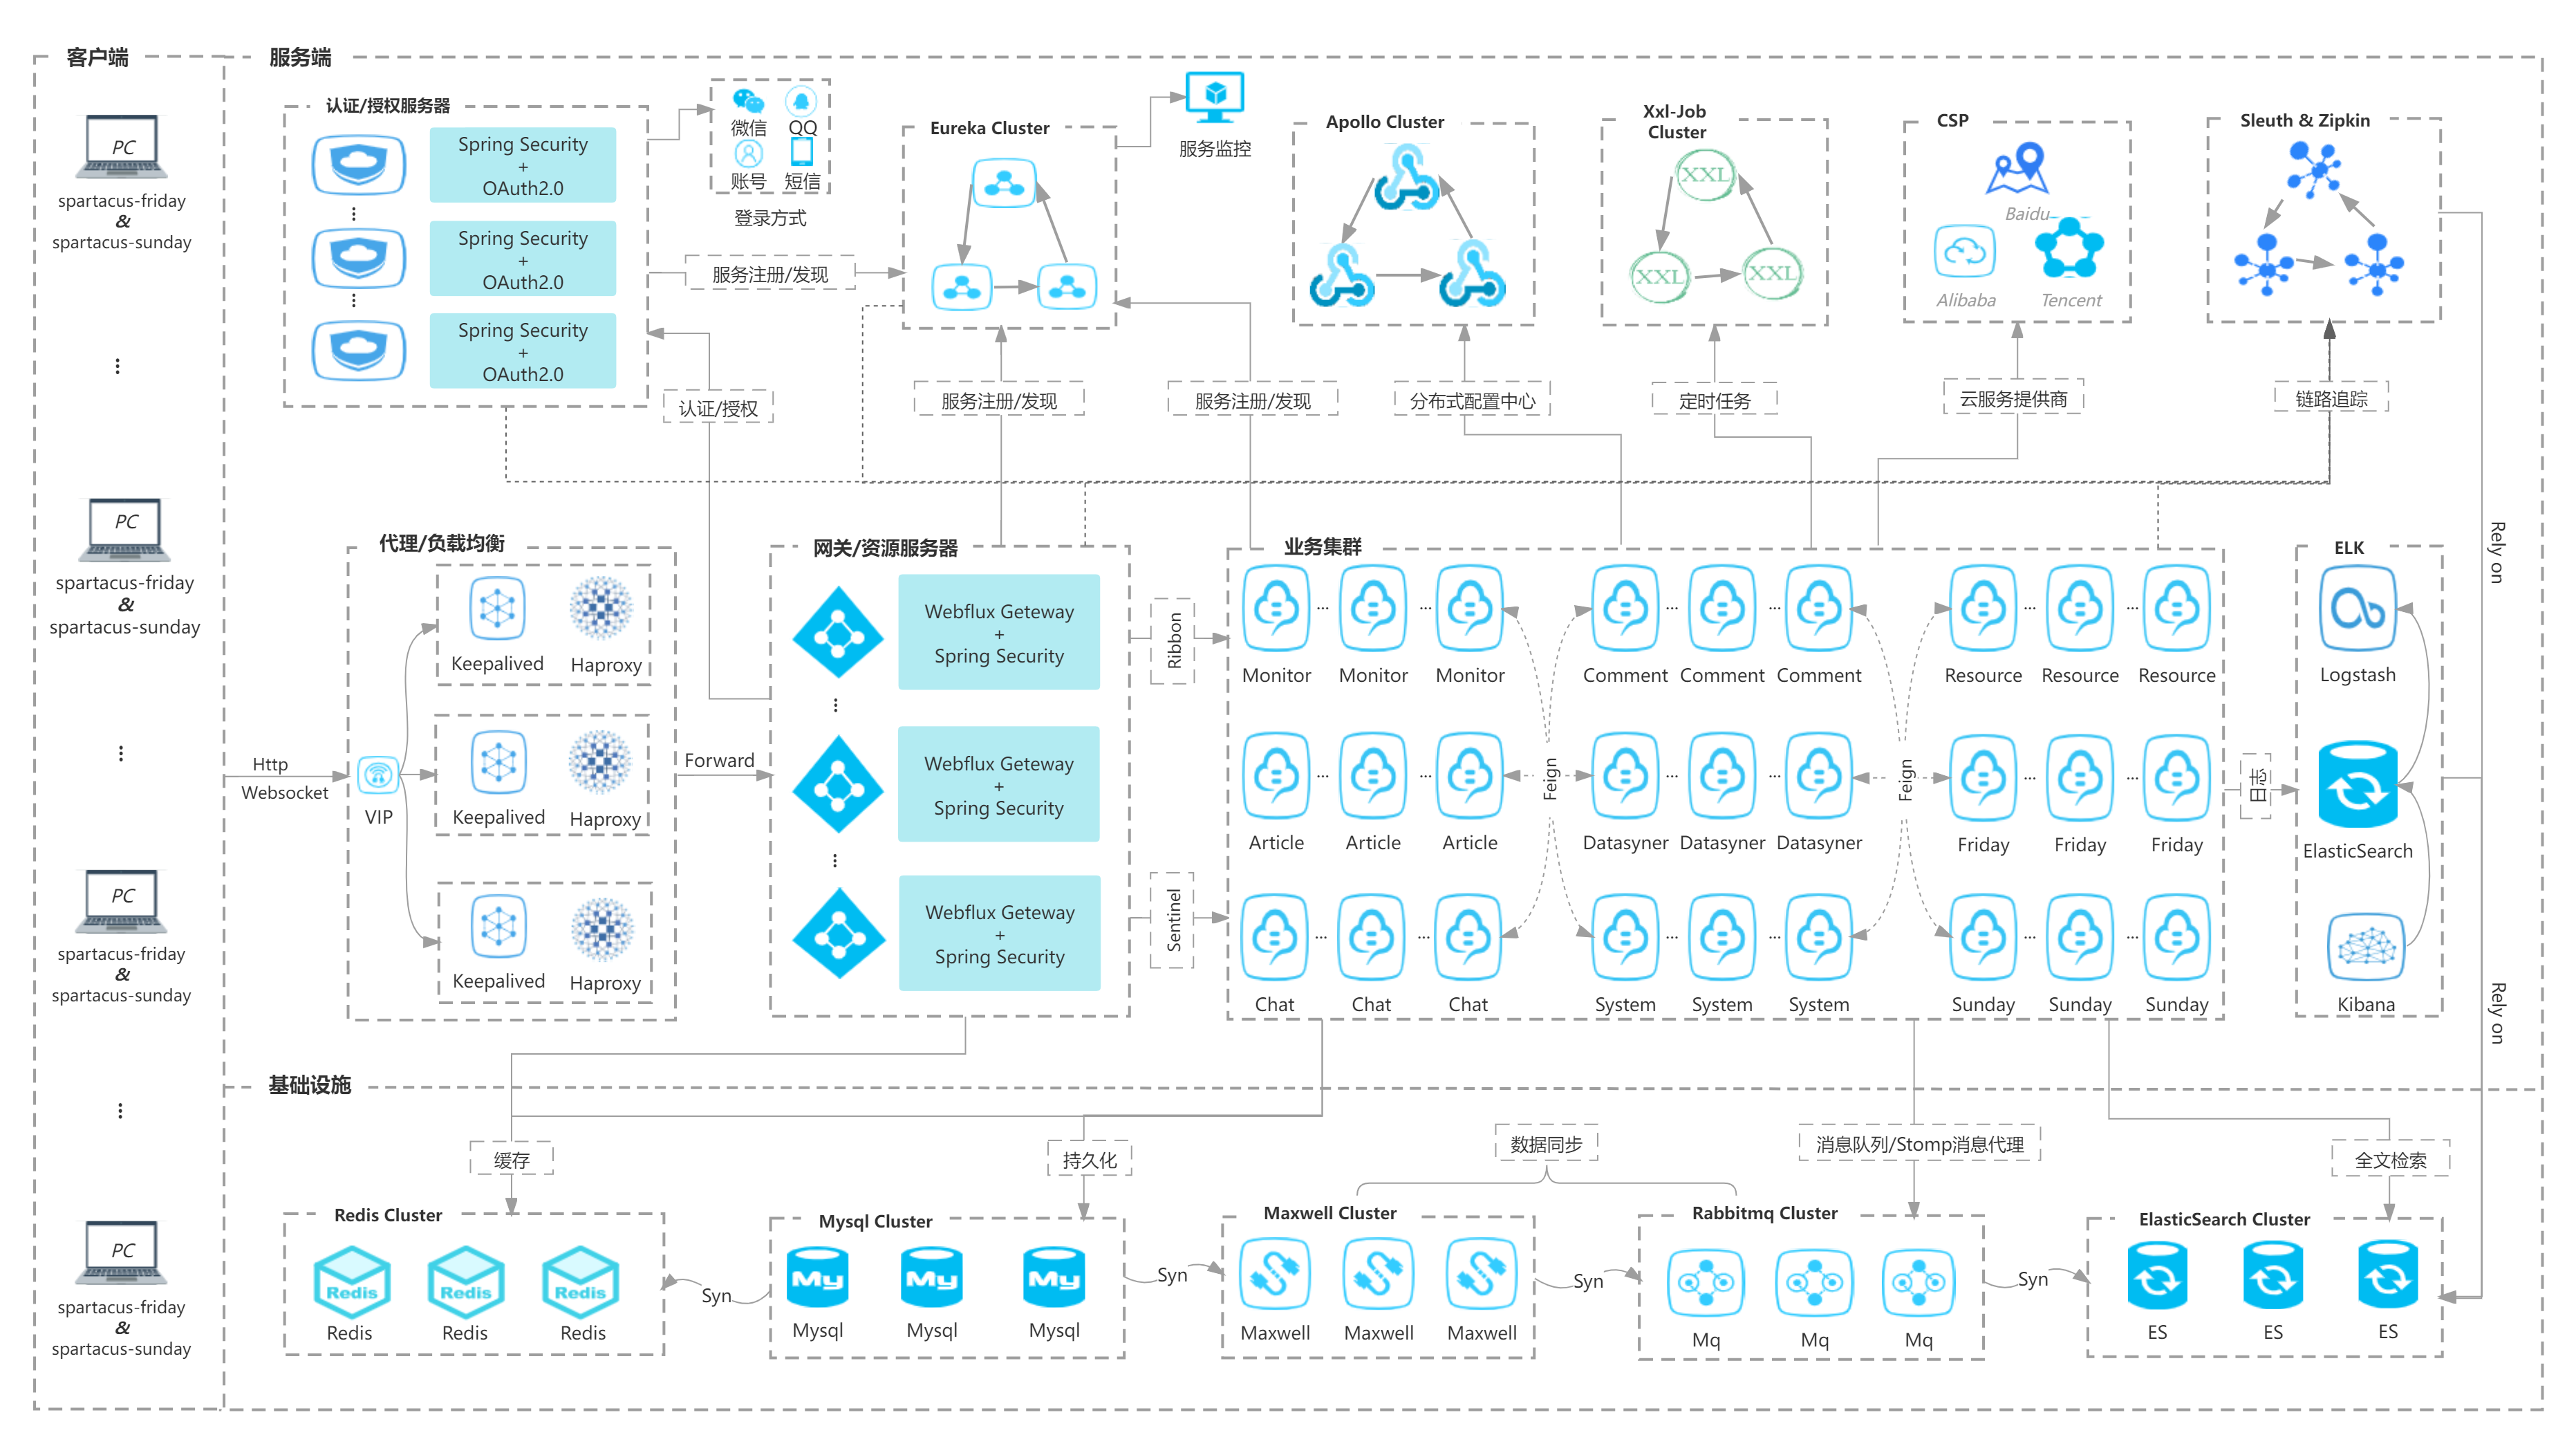
所有应用的截图
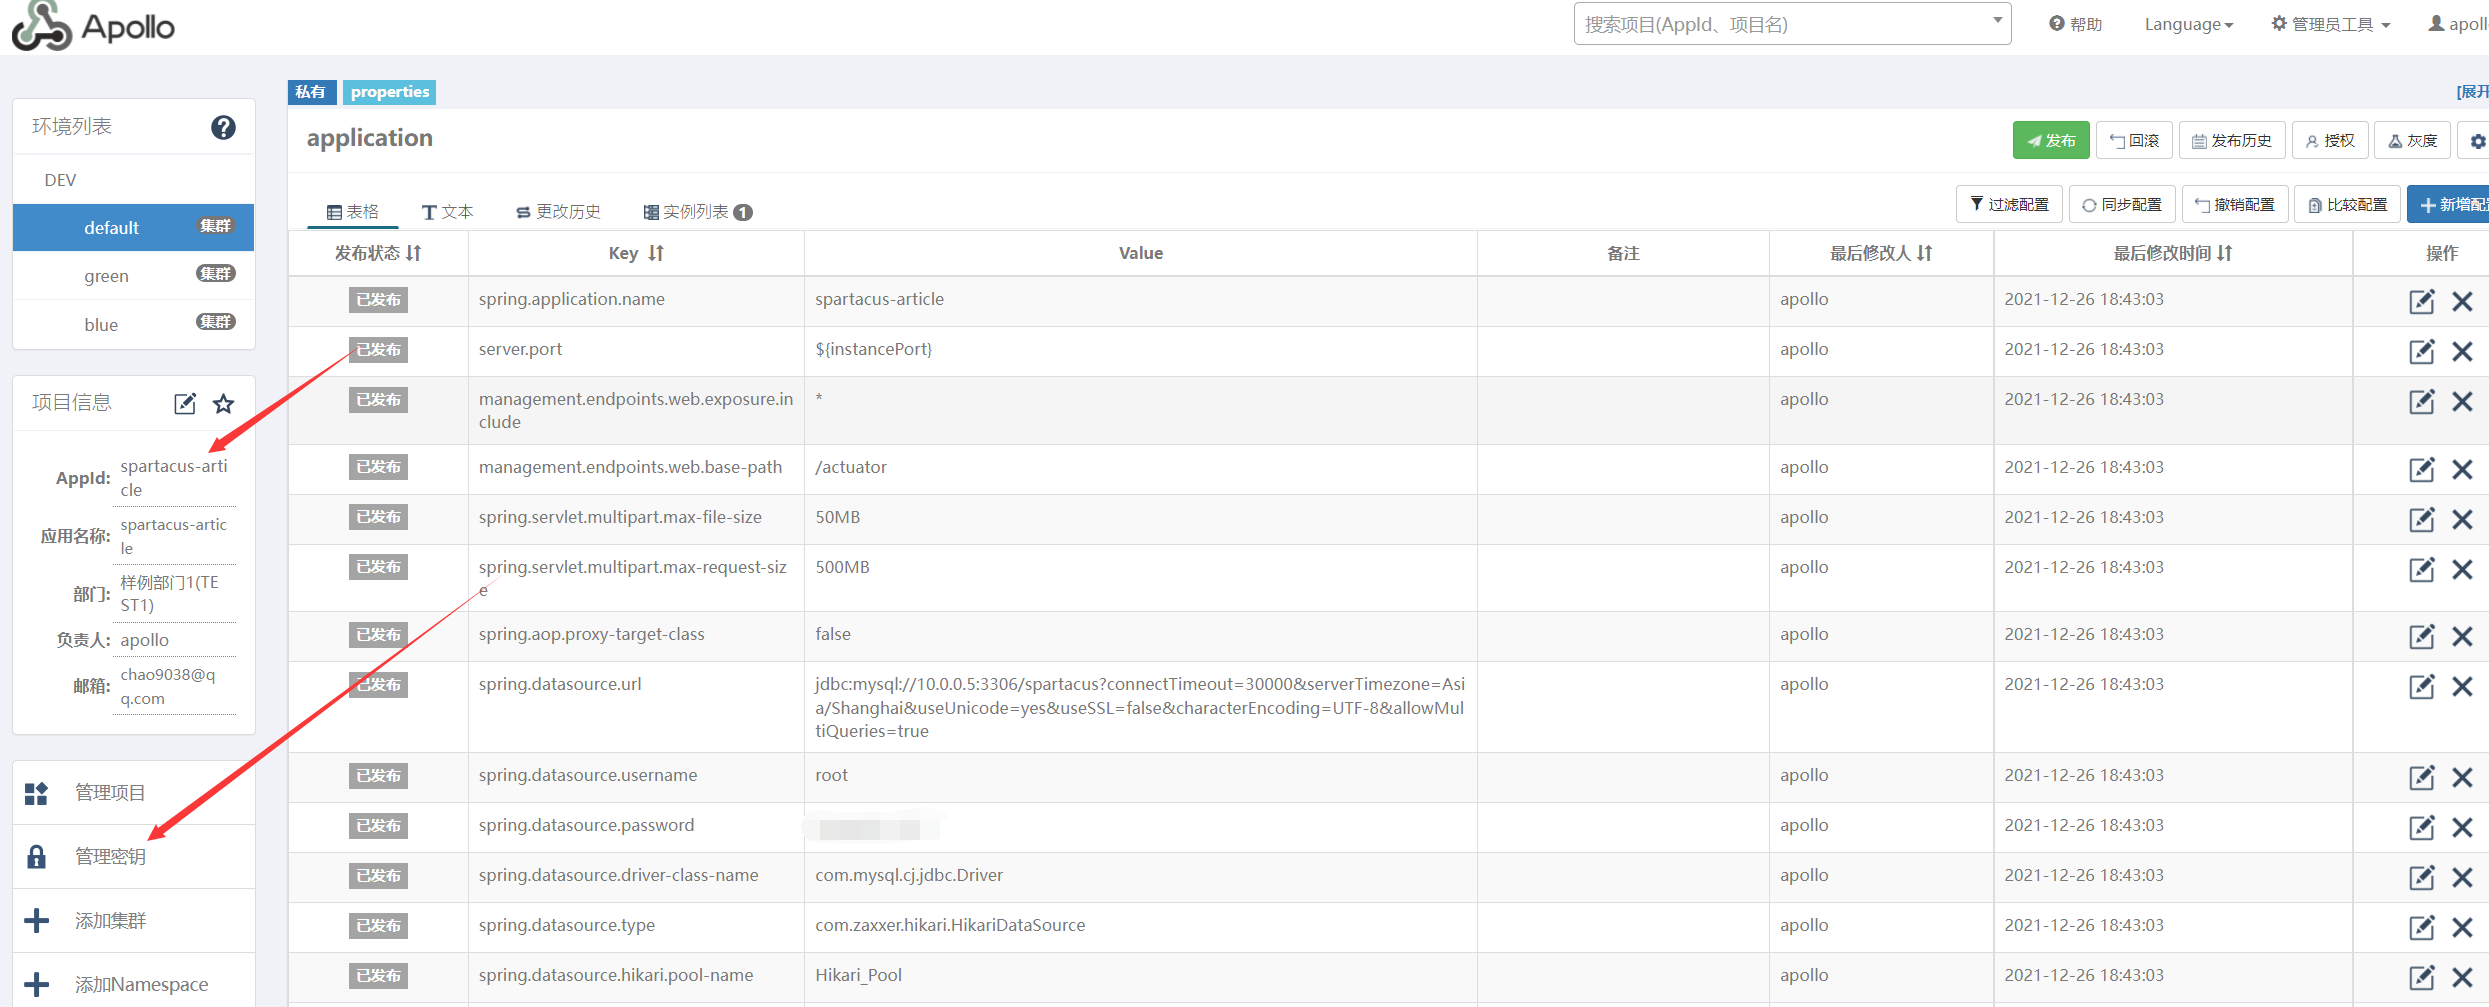
记得给各个应用创建秘钥,并启用!
3、部署sentinel-dashboard
重要说明:这里使用的是我自己构建的镜像,因为官方没有提供docker镜像!docker run -d --net app-net -p 8848:8848 --name sentinel-dashboard -e PARAMS='-Dserver.port=8848 -Dcsp.sentinel.dashboard.server=10.0.0.10:8848 -Dproject.name=sentinel-dashboard -Dsentinel.dashboard.auth.username=root -Dsentinel.dashboard.auth.password=Pwd@123' xlvchao/sentinel-dashboard:1.8.1#sentinel-dashboard的服务端口(记得云主机要开放该端口,才远程能访问sentinel控制台)-Dserver.port=8848#向客户端指定控制台的地址(这里sentinel本身也作为客户端)-Dcsp.sentinel.dashboard.server=10.0.0.10:8848#客户端的应用名称-Dproject.name=sentinel-dashboard#sentinel-dashboard登录用户名-Dsentinel.dashboard.auth.username=root#sentinel-dashboard登录密码-Dsentinel.dashboard.auth.password=Pwd@123注意:--net app-net,所有应用必须也要使用该网段,必须保证应用、sentinel.dashboard都在同一网段!
开放sentinel-dashboard节点所在云主机的端口8848: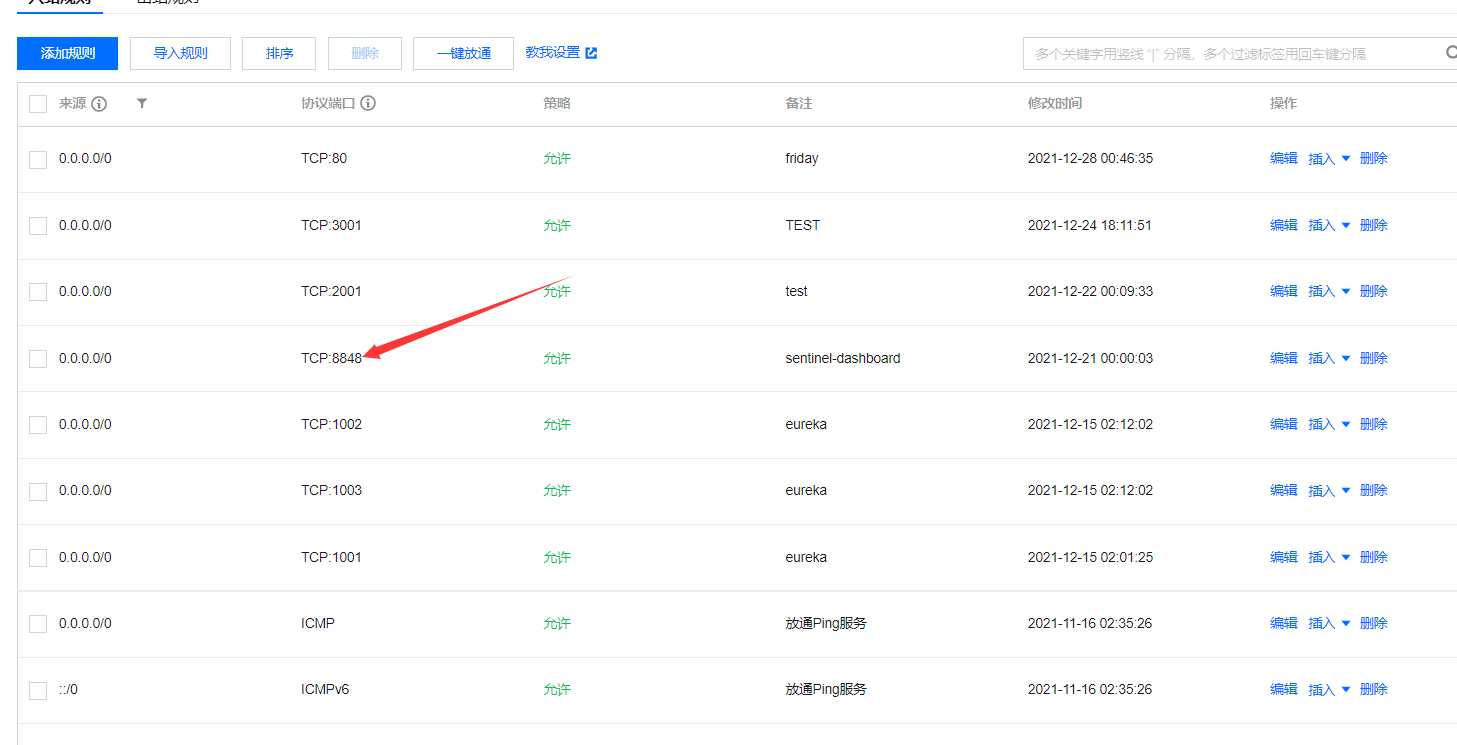
登陆验证:http://云主机公网IP:8848/#/login
账号密码:即是上面配置的账号密码
4、初始化系统数据库
先执行:https://github.com/xlvchao/spartacus/tree/main/db/spartacus.sql
再执行:https://github.com/xlvchao/spartacus/tree/main/db/init_data.sql
如果搞不定,请加群讨论,扫码关注,发送“加群”

若有收获,就点个赞吧
0 人点赞
