什么是 Nexus
Nexus 是一个强大的 Maven 仓库管理器,极大地简化了内部仓库的维护和外部仓库的访问。2016 年 4 月 6 日 Nexus 3.0 版本发布,相较 2.x 版本有了很大的改变
- 对低层代码进行了大规模重构,提升性能,增加可扩展性以及改善用户体验。
- 升级界面,极大的简化了用户界面的操作和管理。
- 提供新的安装包,让部署更加简单。
- 增加对 Docker, NeGet, npm, Bower 的支持。
- 提供新的管理接口,以及增强对自动任务的管理。
部署 Nexus
我们使用 Docker 来安装和运行 Nexus,docker-compose.yml 配置如下:
注意: 启动时如果出现权限问题可以使用 chmod 777 /usr/local/docker/nexus/data 赋予数据卷目录可读可写的权限version: '3.1'services:nexus:restart: alwaysimage: sonatype/nexus3container_name: nexusports:- 8081:8081volumes:- ./data:/nexus-data
如果部署报错就采用下面的第二种部署方式: ```yaml version: ‘3.1’ services: nexus: restart: always image: sonatype/nexus3 container_name: nexus ports:
volumes:- 8081:8081
- nexus-data:/nexus-data
volumes: nexus-data:
这种方式挂载的目录在 /var/lib/docker/volumes 目录下<br /><br />nexus_nexus-data 目录的由来- nexus_nexus-data,第一个 nexus 是你创建的目录- nexus-data 是 docker-compose.yml 文件里设置的挂载目录名 nexus-data两者组合而成的文件名:nexus_nexus-data<a name="V3Kud"></a># 验证安装是否成功- **地址:** [http://ip:port/](https://links.jianshu.com/go?to=http%3A%2F%2Fip%3Aport%2F)- **用户名:** admin- **密码:** admin123**注意:** 新版本密码在 cat /var/lib/docker/volumes/nexus_data/_data/admin.password<br /><a name="zlhUx"></a># Maven 仓库介绍<a name="Wdlg5"></a>## 代理仓库(Proxy Repository)- 第三方仓库- **maven-central**- **nuget.org-proxy**- 版本策略(Version Policy)- **Release:** 正式版本- **Snapshot:** 快照版本- **Mixed:** 混合模式- 布局策略(Layout Policy)- **Strict:** 严格- **Permissive:** 宽松<a name="ubi0S"></a>## 宿主仓库(Hosted Repository)- 存储本地上传的组件和资源的- **maven-releases**- **maven-snapshots**- **nuget-hosted**- 部署策略(Deployment Policy)- **Allow Redeploy:** 允许重新部署- **Disable Redeploy:** 禁止重新部署- **Read-Only:** 只读<a name="l4PFT"></a>## 仓库组(Repository Group)通常包含了多个代理仓库和宿主仓库,在项目中只要引入仓库组就可以下载到代理仓库和宿主仓库中的包- **maven-public**- **nuget-group**<a name="X5t9B"></a># 在项目中使用 Nexus<a name="semhD"></a>## 配置认证信息在 Maven settings.xml 中添加 Nexus 认证信息 (**servers** 节点下)```xml<server><id>nexus-releases</id><username>admin</username><password>admin123</password></server><server><id>nexus-snapshots</id><username>admin</username><password>admin123</password></server>
Snapshots 与 Releases 的区别
- nexus-releases: 用于发布 Release 版本
- nexus-snapshots: 用于发布 Snapshot 版本(快照版)
Release 版本与 Snapshot 定义
Release: 1.0.0/1.0.0-RELEASESnapshot: 1.0.0-SNAPSHOT
- 在项目 pom.xml 中设置的版本号添加 SNAPSHOT 标识的都会发布为 SNAPSHOT 版本,没有 SNAPSHOT 标识的都会发布为 RELEASE 版本。
SNAPSHOT 版本会自动加一个时间作为标识,如:1.0.0-SNAPSHOT 发布后为变成 1.0.0-SNAPSHOT-20180522.123456-1.jar
配置自动化部署
在 pom.xml 中添加如下代码
<distributionManagement><repository><id>nexus-releases</id><name>Nexus Release Repository</name><url>http://127.0.0.1:8081/repository/maven-releases/</url></repository><snapshotRepository><id>nexus-snapshots</id><name>Nexus Snapshot Repository</name><url>http://127.0.0.1:8081/repository/maven-snapshots/</url></snapshotRepository></distributionManagement>
注意事项
ID 名称必须要与 settings.xml 中 Servers 配置的 ID 名称保持一致
项目版本号中有 SNAPSHOT 标识的,会发布到 Nexus Snapshots Repository, 否则发布到 Nexus Release Repository,并根据 ID 去匹配授权账号
部署到仓库
配置代理仓库
<repositories>
  <repository>
      <id>nexus</id>
      <name>Nexus Repository</name>
      <url>http://127.0.0.1:8081/repository/maven-public/</url>
      <snapshots>
          <enabled>true</enabled>
      </snapshots>
      <releases>
          <enabled>true</enabled>
      </releases>
  </repository>
</repositories>
<pluginRepositories>
  <pluginRepository>
      <id>nexus</id>
      <name>Nexus Plugin Repository</name>
      <url>http://127.0.0.1:8081/repository/maven-public/</url>
      <snapshots>
          <enabled>true</enabled>
      </snapshots>
      <releases>
          <enabled>true</enabled>
      </releases>
  </pluginRepository>
</pluginRepositories>
MAVEN 手动上传第三方依赖
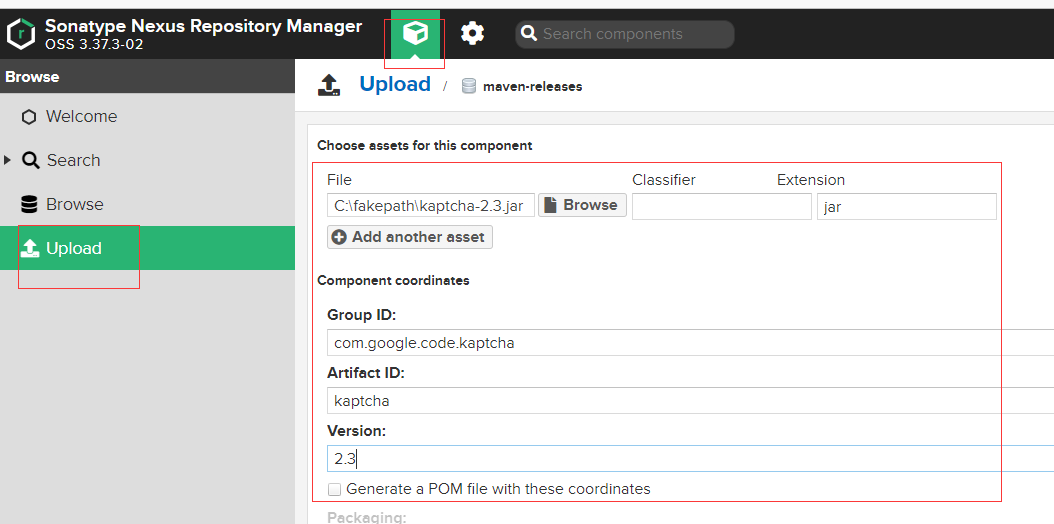
Nexus 3.1.x开始支持页面上传第三方依赖功能,以下为手动上传命令
# 如第三方JAR包:aliyun-sdk-oss-2.2.3.jar
mvn deploy:deploy-file
-DgroupId=com.aliyun.oss
-DartifactId=aliyun-sdk-oss
-Dversion=2.2.3
-Dpackaging=jar
-Dfile=D:\\aliyun-sdk-oss-2.2.3.jar
-Durl=http://127.0.0.1:8082/repository/maven-3rd/
-DrepositoryId=nexus-releases
这个nexus-releases 指的就是server的id, 会带着这个server的账号密码去deploy.
注意事项:建议在上传第三方JAR包时,创建单独的第三方JAR包管理仓库,便于管理有维护。(maven-3rd)
-DrepositoryId=nexus-releases对应的是 settings .xml中 Servers 配置的ID名称。(授权)也可以直接在 Nexus 中上传
删除多余的快照版本
每次打包都会上传 Nexus 形成一般版本,这样会比较占据容量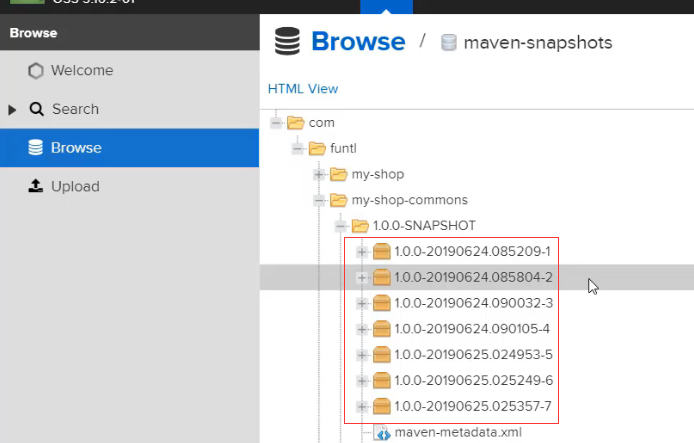
可以在设置中设置定时任务,定时删除多余的快照版本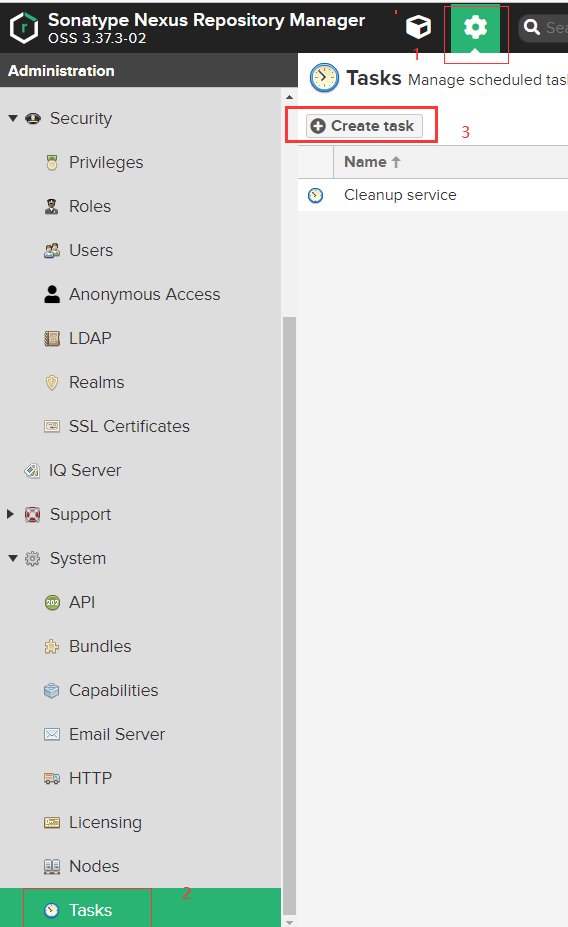
选择 Mavne-Delete SNAPSHOT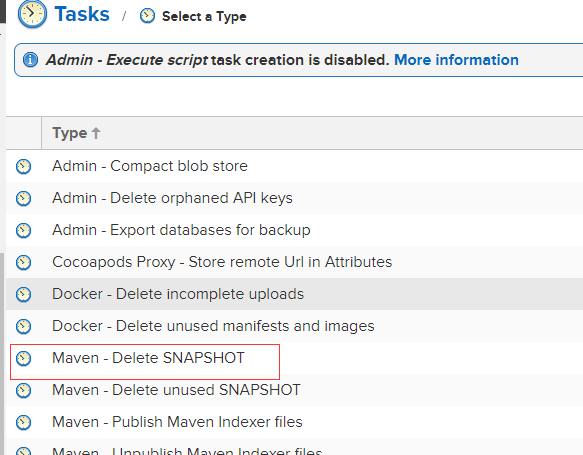
做如下设置
点击运行测试
多余的已经清理掉了

若有收获,就点个赞吧
0 人点赞
