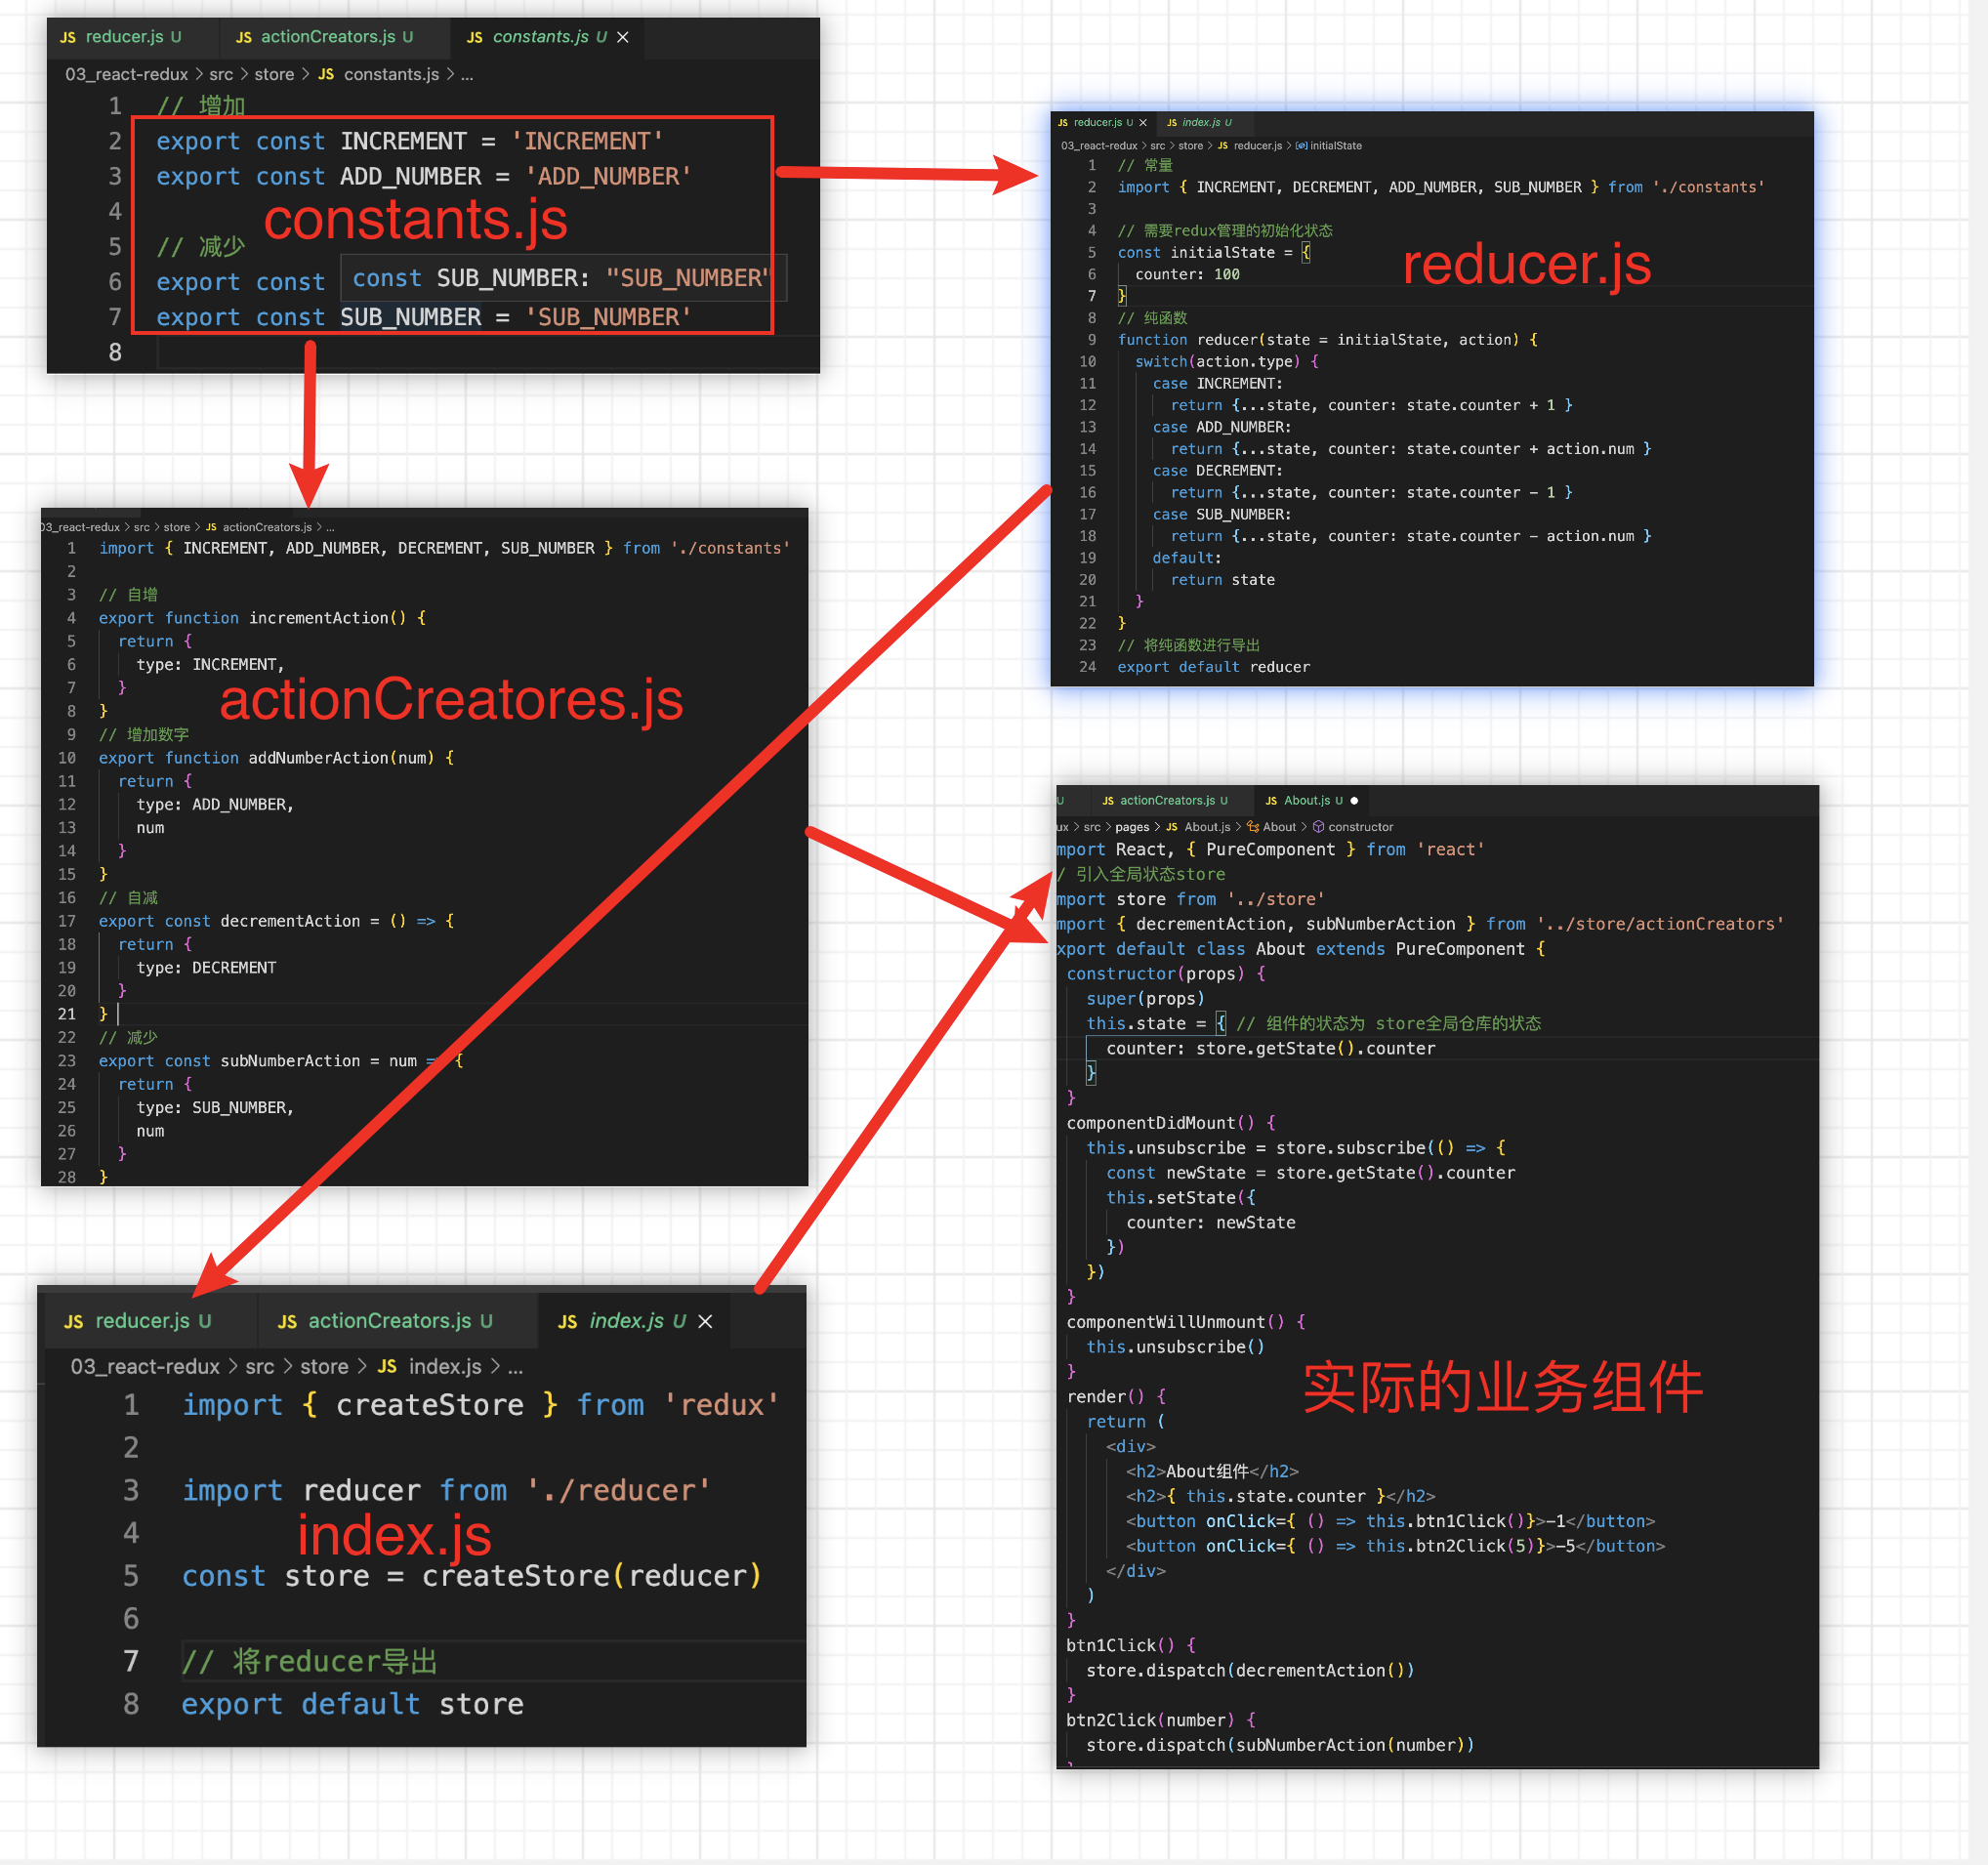
1、Redux在组件中的使用
redux的最终目标是在实际的业务中使用redux提供的状态,并且在某一个组件中修改了状态,其余使用了该状态的组件也会随之更新和修改。store文件中的逻辑就是向外提供store以及修改store中状态的action,我们在实际的业务组件中可直接进行使用。
1.1 计数器案例
原理:数据的原始状态保存在redux中,创建store状态仓库,向外暴露store,那么我们的组件就可以根据store来获取最新的状态。同时,在组件挂载完毕以后,组件可以订阅subscribe全局仓库store书记的变化,一旦数据发生变化,我们使用setState来修改状态,组件就会重新进行渲染。我们就可以获取到最新的状态。同时在组件中我们可以进行dom元素的监听,可以利用stote来派发相应事件,修改redux中的状态。
// About组件的使用import React, { PureComponent } from 'react'// 引入全局状态storeimport store from '../store'import { addAction, subAction } from '../store/actionCreators'export default class About extends PureComponent {constructor(props) {super(props)this.state = {// 组件的状态为 store全局仓库的状态counter: store.getState().counter}}componentDidMount() {this.unsubscribe = store.subscribe(() => {const newState = store.getState().counterthis.setState({counter: newState})})}componentWillUnmount() {this.unsubscribe()}render() {return (<div><h2>About组件</h2><h2>{ this.state.counter }</h2><button onClick={ () => this.btn1Click()}>增加增加</button><button onClick={ () => this.btn2Click()}>降低降低</button></div>)}btn1Click() {store.dispatch(addAction())}btn2Click() {store.dispatch(subAction())}}
// 在Home组件中的使用import React, { PureComponent } from 'react'// 引用全局状态import store from '../store'import { addAction, subAction } from '../store/actionCreators'export default class Home extends PureComponent {constructor(props) {super(props)this.state = {// 将全局的状态分发到组件中 在组件中可直接进行展示counter: store.getState().counter}}componentDidMount() {// 订阅事件 调用渲染函数 更新页面的数据this.unsubscribe = store.subscribe(() => {const newState = store.getState().counter// 修改页面 获取最新的状态数据this.setState({counter: newState})})}componentWillUnmount() {// 组件卸载的时候 取消订阅事件this.unsubscribe()}render() {return (<div><h2>Home组件</h2><h2>{ this.state.counter }</h2><button onClick={ () => this.btn1Click() }>数据增加</button><button onClick={ () => this.btn2Click() }>数据降低</button></div>)}btn1Click() {// 派发事件store.dispatch(addAction())}btn2Click() {store.dispatch(subAction())}}
1.2 Redux工作整体的业务流程:

1.3 计数器案例-自己封装的connect高阶函数
原理:在我们实际的业务组件中,组件A和组件B都有相同的逻辑,这个逻辑是,实际的业务组件先引入我们的状态仓库store,因为在这个仓库中我们可以获取我们最新的状态,我们可以监听、订阅我们状态发生变化的时机,订阅后数据发生变化的时候,我们可以更新页面数据,那么我们页面的数据就是最新的数据。在组件将要卸载的时候,我们可以取消订阅的事件。在DOM的事件中,我们事件的监听都有自己的回调函数,那么在监听后我们可以dispatch来派发action, 派发action, 就意味这可以修改相应的数据。一旦我们的数据发生了变化,订阅事件就会重新被激活,页面就会重新进行渲染,这就是内部的逻辑。 存在的问题:在上述的逻辑中,我们可以看出,我们实际的每个业务组件都需要相同的操作逻辑,获取store中的状态,将store中的状态保存为组件自身的状态,然后监听、订阅store发生的变化,然后修改组件自身的状态,更新页面,在组件卸载的时候,取消订阅,在操作DOM的时候,使用store来派发事件,修改store中的状态,页面重新进行渲染。所有的组件,都是这一套的逻辑,缺点是代码的重复率太高了,相同的代码有多个地方。而且整个流程操作比较复杂。 解决方案:抽象出一个高阶组件(实际上是一个函数),将我们业务组件需要做的事情,全部抽取到高阶组件中,业务组件实际需要完成的事情,都在高阶组件中完成,高阶组件将新的状态和修改状态的方法全部通过props传递到实际的业务组件中,我们的业务组件就可以直接使用。实际上,我们的第三方插件就是react-redux就是用来干这件事情的。
// 自己封装的connect函数import { PureComponent } from "react";import store from '../store'function connect(mapStateToProps, mapDispatchToProps) {return function enhanceHOC(WrappedComponent) {return class extends PureComponent {constructor(props) {super(props)this.staste = {storeState: mapStateToProps(store.getState())}}componentDidMount() {// 订阅store发生的变化并更新数据this.unsubscribe = store.subscribe(() => {this.setState({storeState: mapStateToProps(store.getState())})})}componentWillUnmount() {this.unsubscribe()}storerender() {return <WrappedComponent {...this.props}{...mapStateToProps(store.getState())}{...mapDispatchToProps(store.dispatch)} />}}}}// 将connect函数进行导出export default connect;
在组件中使用,重复的代码和逻辑是相同的,我们需要将公用的代码抽离出去没使用高阶函数来完成,高阶函数返回高阶组件,那么在这个高阶组件中就可以完成实际业务组件的重读性工作。
// About组件import React, { PureComponent } from 'react'import connect from '../utils/connect'import {incrementAction, addNumberAction} from '../store/actionCreators'class About extends PureComponent {render() {return (<div><h2>about组件</h2><h2>当前技术:{this.props.counter}</h2><button onClick={() => this.props.btn1Click() }>+1</button><button onClick={() => this.props.btn2Click(5) }>+5</button></div>)}}const mapStateToProps = state => {return {counter: state.counter}}const mapDispatchToProps = dispatch => {return {btn1Click() {dispatch(incrementAction())},btn2Click(num) {dispatch(addNumberAction(num))}}}export default connect(mapStateToProps, mapDispatchToProps)(About)
Home业务组件代码的组织方式:
import React, { PureComponent } from 'react'// 引入connect函数import connect from '../utils/connect'import {decrementAction, subNumberAction} from '../store/actionCreators'class About extends PureComponent {render() {return (<div><h2>Home组件</h2><h2>当前技术:{this.props.counter}</h2><button onClick={() => this.props.increment() }>-1</button><button onClick={() => this.props.addNumber(5) }>-5</button></div>)}}const mapStateToProps = state => {return {counter: state.counter}}const mapDispatchToProps = dispatch => {return {increment() {dispatch(decrementAction())},addNumber(num) {dispatch(subNumberAction(num))}}}// 函数柯里化export default connect(mapStateToProps, mapDispatchToProps)(About)
1.4 计数器案例-抽取store(创建StoreContext)
上述代码的缺点:在我们自己封装的高阶函数中,还是存在对store的依赖,当把它看成是一个工具函数的时候,我们就不应该直接使用实际的业务数据,我们需要在使用的时候,应该从他的上一级组件进行传入,而不是直接对业务数据进行直接的引入。所以我们引入context函数。
context作用:创建一个context上下文对象,对使用store的组件进行包裹,然后通过组件标签的props属性来传递store,在实际的业务组件中就可以使用this.context来直接获取store的值,然后对这个store的值进行订阅,转发到实际的业务组件中去。这就是原理。
import React from 'react';// 创建context上下文对象const StoreContext = React.createContext()export default StoreContext;
1.5 计数器案例-修改context函数的用法
import { PureComponent } from "react";// 这里就不需要了// import store from '../store'// 引入contextimport StoreContext from './context'# 在这个高阶函数中 就不需要使用store 而是通过context来接收值 我们会在组件的外面的包裹一层context的高阶函数 context作为生产者 为我们提供状态数据 那么我们的业务组件也就是我们的消费者直接通过this。context来获取最新的状态即可。function connect(mapStateToProps, mapDispatchToProps) {return function enhanceHOC(WrappedComponent) {class EnhanceComponent extends PureComponent {constructor(props, context) {super(props, context)this.staste = {storeState: mapStateToProps(context.getState())}}componentDidMount() {// 订阅store发生的变化并更新数据this.unsubscribe = this.context.subscribe(() => {this.setState({storeState: mapStateToProps(this.context.getState())})})}componentWillUnmount() {this.unsubscribe()}render() {return <WrappedComponent {...this.props}{...mapStateToProps(this.context.getState())}{...mapDispatchToProps(this.context.dispatch)} />}}# 接收context传递的参数EnhanceComponent.contextType = StoreContext// 将组件返回return EnhanceComponent}}// 将connect函数进行导出export default connect;
1.6 在组件中使用context
import React, { PureComponent } from 'react'import About from './16_react-redux/pages/About'import Home from './16_react-redux/pages/Home'// 引入StoreContextimport StoreContext from './16_react-redux/utils/context'// 引入storeimport store from './16_react-redux/store'export default class App extends PureComponent {render() {return (<div>{/* 为组件提供context */}<StoreContext.Provider value={store}><About /><hr/><Home /></StoreContext.Provider></div>)}}# 注意 在这里使用的是StoreContext组件 传递的是一个value的值,那么在我们的子组件中,直接就可以使用this.context使用就可以 不需要使用 this.context.store 非常重要
上述代码的封装过程其实上就是react-redux内部的原理了。redux提供connect函数,将我们的实际的业务组件与全局共享的状态store进行连接起来了。在业务组件中只需要使用connect函数将我们的组件作为参数传进去以及我们需要使用的状态和修改状态的方法传进去,然后react-redux会将状态映射为实际业务组件的属性来使用,将修改状态的方法映射为组件的方法。我们在组件中直接可进行使用。 但是connect函数还依赖于store,这在方法的封装中是不合理的,我们需要使用context将store这个状态仓库从更组件向下进行传递,那么我们在整个的组件就可以使用这个store的状态了。以上就是我们整个封装的connect方法的整体思想,实际上我们的第三方库react-redux也确实是这样做的。

