Usage with Visual Studio
For users of Visual Studio 2015, there’s an extension available for Task Runner Explorer here. For older versions of Visual Studio, it is a simple task to integrate Visual Studio with Webpack. All you need to do is use the external tool feature. After following the instructions below, you’ll see a new command button on the ribbon within the IDE. Clicking the button will toggle Webpack’s watch mode on and off. When turned on, a change to any bundle dependencies will trigger the Webpack build process. The output will appear within Visual Studio’s Output window.
You can add an external tool to the Tools menu.
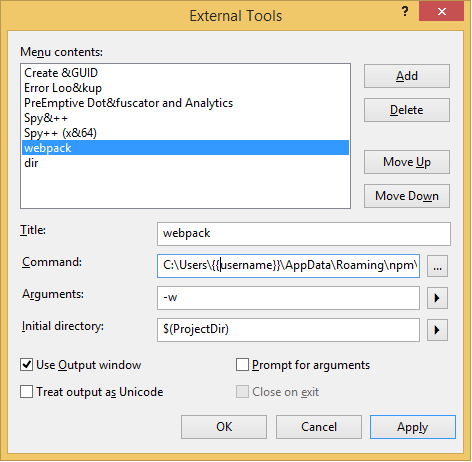
- Open the External Tools dialog box and click Add.
- Title: webpack
- Command: The path to the
webpack.cmdfile. Assuming Webpack was installed globally with npm, the path is:C:\Users\{{username}}\AppData\Roaming\npm\webpack.cmd - Arguments:
-w(can also specify other CLI options, such as--display-modules) - Check
Use Output window
Now add to your toolbar
- On the menu bar, right click and select
Customize.... - Click on the
Commandstab and click onToolBarradio button to select the newly created external tool.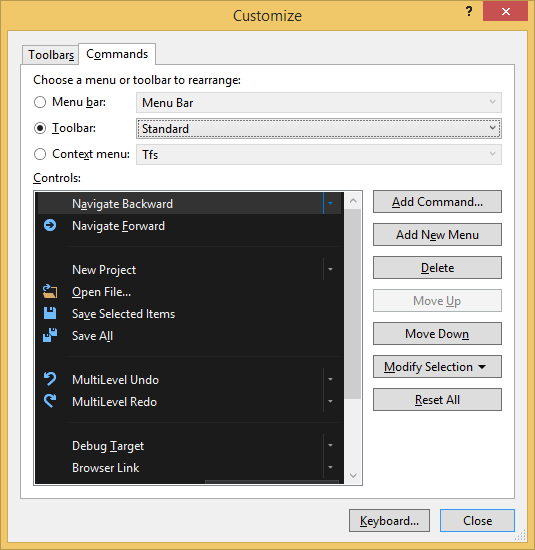
- Select Standard and click on
Add Command ...button. - On the left lit item, select
Toolsand than select theExternal Command Xitem where X is the index of your tool that appears in theToolsmenu (starting index => 1). In my exampleExternal Command 6.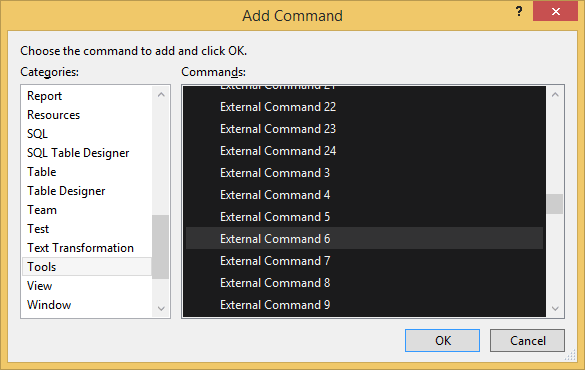
- Click
Okand thenClose.

若有收获,就点个赞吧
0 人点赞
