背景:大数据新老机房交替,原有集群现需要从老机房迁移到新机房,在数据量比较大的集群中reindex耗时太久,故选择快照的方式进行迁移和恢复。其中利用到hdfs存储作为快照仓库,同时需要将es集群中各机器节点加到HdfsClient白名单中。
环境准备
分发包salt -N 'bdp-cloud-pri-log-01' cp.get_file salt://plugins.tar.gz /app/es-1/plugins/plugins.tar.gz解压salt -N 'bdp-cloud-pri-log-01' cmd.run "cd /app/es-1/plugins && tar xf plugins.tar.gz"删除压缩包salt -N 'bdp-cloud-pri-log-01' cmd.run "cd /app/es-1/plugins && rm -f plugins.tar.gz"
# 关闭集群重新分配分片功能curl -XPUT -u elastic:Bdp1@elastic -H "Content-Type:application/json" "http://10.117.106.73:9200/_cluster/settings" -d '{"transient" : {"cluster.routing.allocation.enable" : "none"}}'
重启集群节点,使插件生效
开启集群重平衡curl -XPUT -u elastic:Bdp1@elastic -H "Content-Type:application/json" "http://10.117.106.73:9200/_cluster/settings" -d '{"transient" : {"cluster.routing.allocation.enable" : "all"}}'
1、创建以集群为单位的快照仓库
curl -s -XPUT -uelastic:Bdp1@elastic http://10.150.92.6:9200/_snapshot/ccr_bdp-pst76-ssd?pretty -H 'Content-Type: application/json' -d'{"type": "hdfs","settings": {"uri" : "hdfs://10.116.100.2:8020/","path": "/elasticsearch/repositories/ccr_bdp-pst76-ssd"}}'
2、查询创建仓库状态
curl -s -u elastic:Bdp1@elastic 10.150.92.6:9200/_snapshot/ccr_bdp-pst76-ssd?pretty{"ccr_bdp-pst76-ssd" : {"type" : "hdfs","settings" : {"path" : "/elasticsearch/repositories/ccr_bdp-pst76-ssd","uri" : "hdfs://10.116.100.2:8020/"}}}
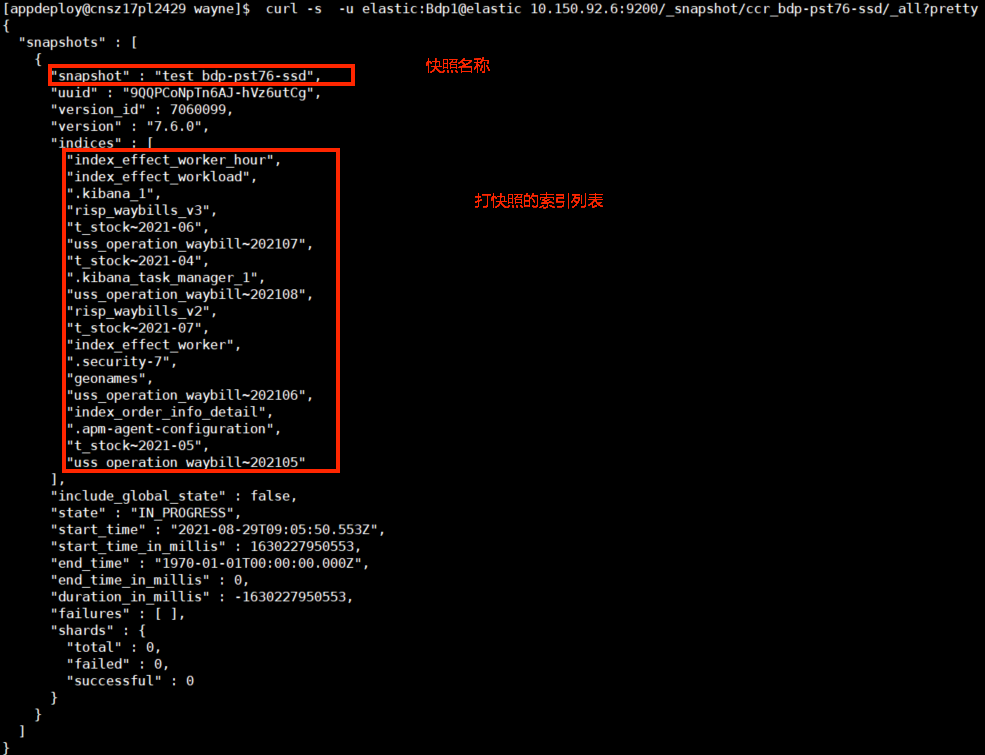
查询仓库内的快照情况
curl -s -u elastic:Bdp1@elastic 10.150.92.6:9200/_snapshot/ccr_bdp-pst76-ssd/_all?pretty

可登陆namenode节点 10.116.100.2去查看仓库
hdfs dfs -ls /elasticsearch/repositories/ccr_bdp-pst76-ssd

[
](http://10.150.92.11:9200/_snapshot/ccr_bdp-pst76-ssd/_all?pretty)
3、在仓库中创建快照
全部索引都打快照
curl -XPUT -u elastic:Bdp1@elastic 'http://10.150.92.6:9200/_snapshot/ccr_bdp-pst76-ssd/test_bdp-pst76-ssd?wait_for_completion=true&pretty' -H 'Content-Type: application/json' -d '{"ignore_unavailable":true,"include_global_state":false}'ps:ccr_bdp-pst76-ssd为仓库名,test_bdp-pst76-ssd为快照名称
部分索引打快照
curl -X PUT -u elastic:Bdp1@elastic "10.116.106.155:9200/_snapshot/ccr_bdp-fns-scan-core-ssd/es_dispatch_order?wait_for_completion=true&pretty" -H 'Content-Type: application/json' -d'{"indices": ["es_dispatch_order~2021-07","es_dispatch_order~2021-08"],"ignore_unavailable": true}'
还原索引(跨集群):
1.在跨集群还原索引快照的时候,需要在目标集群中创建与原始集群具体相同名称的存储库
2.两个集群的节点配置一定要相同,如果原始集群在节点中使用node.attr.rack划分了hot和warm属性,那么在目标集群也需要划分对应的属性,否则会还原失败
4、目标集群创建相同名称存储库
curl -s -XPUT -uelastic:Bdp1@elastic http://10.150.92.11:9200/_snapshot/ccr_bdp-pst76-ssd?pretty -H 'Content-Type: application/json' -d'{"type": "hdfs","settings": {"uri" : "hdfs://10.116.100.2:8020/","path": "/elasticsearch/repositories/ccr_bdp-pst76-ssd"}}'
5、在目标集群恢复数据
curl -X POST -u elastic:Bdp1@elastic "10.150.92.11:9200/_snapshot/ccr_bdp-pst76-ssd/test_bdp-pst76-ssd/_restore?wait_for_completion=true"

