一、环境准备
1.配置基础环境
2.配置yum源、epel源
cd /etc/yum.repos.d/mkdir bakmv CentOS* bakwget -O /etc/yum.repos.d/CentOS-Base.repo https://mirrors.aliyun.com/repo/Centos-7.reposleep 2wget -O /etc/yum.repos.d/epel.repo http://mirrors.aliyun.com/repo/epel-7.reposleep 2cat > /etc/yum.repos.d/MariaDB.repo << eof[mariadb]name = MariaDBbaseurl = https://mirrors.aliyun.com/mariadb/yummodule_hotfixes=1gpgkey=https://mirrors.aliyun.com/mariadb/yum/RPM-GPG-KEY-MariaDBgpgcheck=1eof
3.关闭firewalld和selinux
4.部署 LNMP 架构需要安装依赖包yum -y install make gcc gcc-c++ flex bison file libtool libtool-libs autoconf kernel-devel libjpeg libjpeg-devel libpng libpng-devel gd freetype freetype-devel libxml2 libxml2-devel zlib zlib-devel glib2 glib2-devel bzip2 bzip2-devel libevent ncurses ncurses-devel curl curl-devel e2fsprogs e2fsprogs-devel krb5-devel libidn libidn-devel openssl openssl-devel gettext gettext-devel ncurses-devel gmp-devel unzip libcap lsof
二、安装 Nginx
2.1.下载源码包:
在 Nginx 官方下载网站即可下载程序包:www.nginx.org
本次实验,我们采用 nginx-1.18.0 版本。
上传 nginx-1.18.0.tar.gz 到 linux 系统上。
或:
手动下载:wget [http://nginx.org/download/nginx-1.21.0.tar.gz](http://nginx.org/download/nginx-1.18.0.tar.gz)
2.2.安装 nginx 所需依赖包:
yum -y install gcc gcc-c++ autoconf automake zlib zlib-devel openssl openssl-devel pcre pcre-devel
:::info
软件包说明:
gcc c 语言编译器。
gcc-c++ c++ 语言编译器。
autoconf automake 用于 configure 和 make 编译的工具。
zlib :nginx 提供 gzip 模块,需要 zlib 库支持。
openssl :nginx 提供 ssl 功能。
pcre :支持地址重写 rewrite 功能。
:::
2.3.创建 Nginx 运行用户
用于后期启动 nginx 进程使用,比你直接使用 root 用户启动 nginx 更安全useradd -s /sbin/nologin -M -u 2000 nginx
-s #指定登录 shell
-M #不创建家目录
-u #指定用户 ID 为 2000,这样方便后期不同服务器之间同步数据时,用户 ID 保持一致。linux 默认用户 ID 从 1000 开始
2.4.编译安装 Nginx
tar zvxf nginx-1.21.0.tar.gz -C /usr/local/cd /usr/local/nginx-1.18.0./configure --prefix=/usr/local/nginx --user=nginx --group=nginx --with-http_ssl_module --with-http_realip_module --with-http_gzip_static_module --with-http_dav_module --with-http_stub_status_module --with-http_addition_module --with-http_sub_module --with-http_flv_module --with-http_mp4_module --with-pcre && make -j 4 && make install
2.5.查看配置文件
ll /usr/local/nginx/
drwxr-xr-x. 2 root root 4096 Apr 14 20:39 conf #Nginx相关配置文件
drwxr-xr-x. 2 root root 4096 Apr 14 20:39 html #网站根目录
drwxr-xr-x. 2 root root 4096 Apr 14 20:39 logs #日志文件
drwxr-xr-x. 2 root root 4096 Apr 14 20:39 sbin #Nginx启动脚本
三、Nginx配置
3.1、配置 Nginx 支持解析 php 文件
先备份再修改配置文件
[root@n41 nginx-1.18.0]# vim /usr/local/nginx/conf/nginx.conf #修改 nginx 主配置文件
修改用户为 nginx:
改 :2 #user nobody;
为:2 user nginx;
启用 PHP 支持
取消第 65 行至第 71 行的注释并修改第 69 行内容修改前:
改 :fastcgi_param SCRIPT_FILENAME /scripts$fastcgi_script_name;
为 :fastcgi_param SCRIPT_FILENAME /usr/local/nginx/html$fastcgi_script_name;
修改后效果如下:
3.2、启动 Nginx 服务
[root@xuegod63 nginx-1.18.0]# /usr/local/nginx/sbin/nginx
3.3、编辑 Nginx 配置环境变量
[root@n41 nginx-1.21.0]# vim /etc/profile.d/nginx.sh
export PATH=/usr/local/nginx/sbin:$PATH
[root@n41 ~]# source /etc/profile #读取变量
3.4、创建 Nginx 启动脚本
脚本一
[root@xuegod63 nginx-1.18.0]# vim /etc/init.d/nginx
#!/bin/bash# chkconfig: - 99 2# description: Nginx Service Control ScriptPROG="/usr/local/nginx/sbin/nginx"PIDF="/usr/local/nginx/logs/nginx.pid"case "$1" instart)$PROG;;stop)kill -3 $(cat $PIDF);;restart)$0 stop &> /dev/nullif [ $? -ne 0 ] ; then continue ; fi$0 start;;reload)kill -1 $(cat $PIDF);;*)echo "Userage: $0 { start | stop | restart | reload }"exit 1esacexit 0
脚本二
vim /usr/lib/systemd/system/nginx.service
[Unit]Description=nginxAfter=network.target[Service]Type=forkingExecStart=/usr/local/nginx/sbin/nginxExecReload=/usr/local/nginx/sbin/nginx -s reloadExecStop=/usr/local/nginx/sbin/nginx -s quitPrivateTmp=true[Install]WantedBy=multi-user.target
:::warning
nginx 重新加载命令或者stop,出现
nginx: [error] invalid PID number “” in “/usr/local/nginx/logs/nginx.pid”问题。
解决办法:
第一步:执行命令 killall -9 nginx 杀掉nginx 进程
第二步:执行命令 /usr/local/nginx/sbin/nginx -c /usr/local/nginx/conf/nginx.conf 重新加载配置文件
:::
3.5、配置服务开机自动启动
脚本一需要执行:
chmod +x /etc/init.d/nginx
chkconfig —add nginx
chkconfig nginx on
systemctl restart nginx && systemctl enable nginx
netstat -anput | grep nginx
四、安装并配置 MySQL
官方下载 MySQL 数据库
下载地址: https://dev.mysql.com/downloads/mysql/
4.0、选择 tar 包存档的二进制版本wget [https://dev.mysql.com/get/Downloads/MySQL-8.0/mysql-8.0.29-el7-x86_64.tar](https://dev.mysql.com/get/Downloads/MySQL-8.0/mysql-8.0.29-el7-x86_64.tar)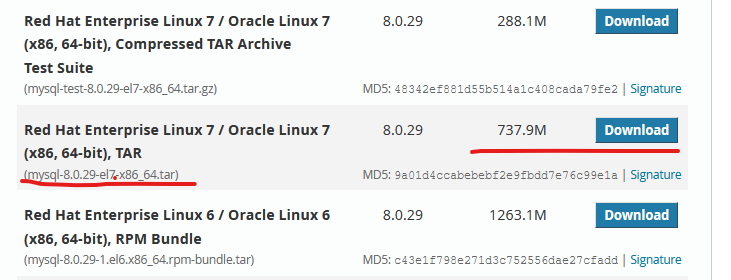
4.1、卸载系统自带的 mysql
yum -y remove mysql mariadb-
4.2、添加 mysql 用户useradd -M -s /sbin/nologin -u 3000 mysql
*4.3、解压 mysql
tar xf mysql-5.7.30-el7-x86_64.tar.gz
mv mysql-5.7.30-el7-x86_64 /usr/local/mysql
创建 mysql 用于存放数据的目录
mkdir -p /data/mysql
创建日志文件
touch /var/log/mysqld.log
更改目录权限为 mysql
chown -R mysql:mysql /usr/local/mysql/
chown -R mysql:mysql /data/mysql/
chown -R mysql:mysql /var/log/mysqld.log
创建 mysql 配置文件
[root@xuegod63 ~]# vim /etc/my.cnf
[client]port = 3306socket = /data/mysql/mysql.sock[mysqld]port = 3306user = mysqlsocket = /data/mysql/mysql.sockbasedir = /usr/local/mysqldatadir = /data/mysqllog-error=/var/log/mysqld.log
添加环境变量
vim /etc/profile.d/mysql.sh

MYSQL_HOME=/usr/local/mysql
export PATH=$PATH:$MYSQL_HOME/bin
使环境变量生效
# source /etc/profile
初始化数据库
方式一
# cd /usr/local/mysql/
# ./bin/mysqld —initialize —user=mysql —basedir=/usr/local/mysql —datadir=/data/mysql
注:执行完成后 mysql 会生成临时随机密码
mysql]# cat /var/log/mysqld.log |grep password
2020-06-28T08:25:49.140713Z 1 [Note] A temporary password is generated for root@localhost: Wrp2#tTSqtGQ
配置 mysql 开机自启动
mysql]# cp support-files/mysql.server /etc/init.d/mysqld
mysql]# chmod 755 /etc/init.d/mysqld
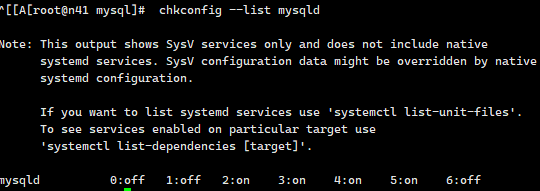
mysql]# chkconfig --add mysqld
mysql]# chkconfig --list mysqld
启动 mysql 数据库
[root@xuegod63 mysql]# /etc/init.d/mysqld start
修改 root 密码
注:登录密码是初始化数据库时生成的临时密码,因为是随机密码包含特殊字符,推荐使用单引号进行引用。
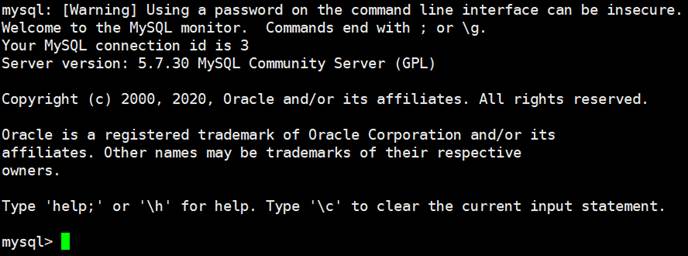
mysql]# mysql -uroot -p’Wrp2#tTSqtGQ’
修改 root 用户密码为 123456
mysql> set password for root@localhost = password(‘123456’);
刷新权限表
mysql> flush privileges;
退出数据库
mysql> exit
运行安全初始化脚本
[root@xuegod63 mysql]# mysql_secure_installation
输入 root 用户密码
Enter password for user root: 123456
VALIDATE PASSWORD PLUGIN can be used to test passwords and improve security. It checks the strength of password
and allows the users to set only those passwords which are
secure enough. Would you like to setup VALIDATE PASSWORD plugin? 注:这段英文的含意是 是否安装密码强度验证插件,该插件用于检查密码强度。
Press y|Y for Yes, any other key for No:y
选择密码强度
There are three levels of password validation policy:
LOW Length >= 8
MEDIUM Length >= 8, numeric, mixed case, and special characters
STRONG Length >= 8, numeric, mixed case, special characters and dictionary
0=低、1=中级别、2=强密码
Please enter 0 = LOW, 1 = MEDIUM and 2 = STRONG: 2
Using existing password for root.
Estimated strength of the password: 25
修改当前 root 用户密码,注:最高级别需要满足大小写、特殊字符、数字三个要求。
Change the password for root ? ((Press y|Y for Yes, any other key for No) : y New password: XueGod!@#123
Re-enter new password: XueGod!@#123 Estimated strength of the password: 100
Do you wish to continue with the password provided?(Press y|Y for Yes, any other key for No) : y
移除匿名用户
Remove anonymous users? (Press y|Y for Yes, any other key for No) :y 禁止 root 用户远程登录,如果生产环境需要远程登录我们后期可以手动授权。
Disallow root login remotely? (Press y|Y for Yes, any other key for No) :y 删除 test 数据库(test 是 mysql 自动安装的测试数据库)
Remove test database and access to it? (Press y|Y for Yes, any other key for No) : y
刷新权限表
Reload privilege tables now? (Press y|Y for Yes, any other key for No) : y Success.
All done!
安全策略配置完成
简略的看
#初始化 mariadb 并配置 root 密码
mysql_secure_installation

#直接回车,空
是否设置密码:y
输入设置密码:
再次输入密码:
是否移除anonymous用户:y
是否不允许root远程登录:n
是否移除test数据库:y
是否更新:y

#创建初始数据库
mysql -uroot -p
五、编译安装 php7.4
5.0、yum 安装依赖
注:前面已经安装了 epel 源,此处有些软件包是通过 epel 源进行下载安装的。yum -y install wget vim pcre pcre-devel openssl openssl-devel libicu-devel gcc gcc-c++ autoconf libjpeg libjpeg-devel libpng libpng-devel freetype freetype-devel libxml2 libxml2-devel zlib zlib-devel glibc glibc-devel glib2 glib2-devel ncurses ncurses-devel curl curl-devel krb5-devel libidn libidn-devel openldap openldap-devel nss_ldap jemalloc-devel cmake boost-devel bison automake libevent libevent-devel gd gd-devel libtool* libmcrypt libmcrypt-devel mcrypt mhash libxslt libxslt-devel readline readline-devel gmp gmp-devel libcurl libcurl-devel openjpeg-devel sqlite-devel
5.1、下载php文件
官网地址: http://php.net/
上传 php-7.2.31.tar.gz 到 linux 系统上。
php7.2.31 程序包下载地址 https://[www.php.net/distributions/php-7.2.31.tar.gz](http://www.php.net/distributions/php-7.2.31.tar.gz)
新版:wget [https://www.php.net/distributions/php-8.0.18.tar.gz](https://www.php.net/distributions/php-8.0.18.tar.gz)
5.2、配置 PHP
 tar zxf php-8.0.18.tar.gz -C /usr/local/
 cd /usr/local/php-8.0.18

 ./configure --prefix=/usr/local/php \
--with-config-file-path=/usr/local/php/ \
--enable-fpm \
--with-fpm-user=nginx \
--with-fpm-group=nginx \
--with-mysqli=mysqlnd \
--with-pdo-mysql=mysqlnd \
--with-iconv-dir \
--with-freetype-dir \
--with-jpeg-dir \
--with-png-dir \
--with-zlib \
--with-libxml-dir=/usr \
--enable-xml \
--disable-rpath \
--enable-bcmath \
--enable-shmop \
--enable-sysvsem \
--enable-inline-optimization \
--with-curl \
--enable-mbregex \
--enable-mbstring \
--enable-ftp \
--with-gd \
--with-openssl \
--with-mhash \
--enable-pcntl \
--enable-sockets \
--with-xmlrpc \
--enable-zip \
--enable-soap \
--without-pear \
--with-gettext \
--disable-fileinfo \
--enable-maintainer-zts \
--with-ldap

configure: WARNING: unrecognized options: --with-iconv-dir, --with-freetype-dir, --with-jpeg-dir, --with-png-dir, --with-libxml-dir, --enable-inline-optimization, --with-gd, --with-xmlrpc, --enable-zip, --enable-maintainer-zt
./configure --prefix=/usr/local/php \
--with-config-file-path=/usr/local/php/ \
--with-config-file-scan-dir=/usr/local/php/conf.d \
--enable-fpm \
--with-fpm-user=nginx \
--with-fpm-group=nginx \
--enable-mysqlnd \
--with-mysqli=mysqlnd \
--with-pdo-mysql=mysqlnd \
--with-iconv-dir=/usr/local/php \
--with-freetype \
--with-jpeg  \
--with-zlib  \
--enable-xml \
--disable-rpath \
--enable-bcmath \
--enable-shmop \
--enable-sysvsem \
--enable-inline-optimization \
--with-curl \
--enable-mbregex \
--enable-mbstring \
--enable-intl \
--enable-ftp \
--enable-gd \
--with-openssl \
--with-mhash \
--enable-pcntl \
--enable-sockets \
--with-xmlrpc \
--with-zip  \
--enable-soap \
--with-gettext \
--enable-opcache \
--with-xsl \
--with-webp \
--with-snmp \
--with-ldap
:::warning
报错:
诸如此类缺少某个依赖包的,如: sqlite3 等
解决方法:
yum search oniguruma
yum install oniguruma-devel.x86_64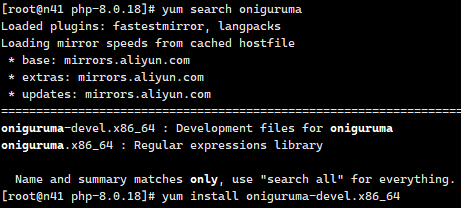 :::
:::info
参数选项可参考 http://php.net/manual/zh/configure.about.php 官方中文手册
:::
:::info
参数选项可参考 http://php.net/manual/zh/configure.about.php 官方中文手册
—with-config-file-path #设置 php.ini 的搜索路径。默认为 PREFIX/lib
—with-mysql #mysql 安装目录,对 mysql 的支持 7.0 版本没有此参数
—with-mysqli #mysqli 扩展技术不仅可以调用 MySQL 的存储过程、处理MySQL 事务,而且还可以使访问数据库工作变得更加稳定。是一个数据库驱动。
—with-mysqli=mysqlnd #使用 mysqlnd,并不需要预先安装 mysql 。
—with-iconv-dir #字符集间的转换
—with-freetype-dir #打开对 freetype 字体库的支持
—with-jpeg-dir #打开对 jpeg 图片的支持
—with-png-dir #打开对 png 图片的支持
—with-zlib #打开 zlib 库的支持,实现 GZIP 压缩输出
—with-libxml-dir=/usr #打开 libxml2 库的支持,libxml 是一个用来解析 XML 文档的函数库
—enable-xml #支持 xml 文档
—disable-rpath #关闭额外的运行库文件
—enable-bcmath #打开图片大小调整,用到 zabbix 监控的时候用到了这个模块
—enable-shmop #shmop 共享内存操作函数,可以与 c/c++通讯
—enable-sysvsem #加上上面 shmop,这样就使得你的 PHP 系统可以处理相关的IPC 函数(活动在内核级别)。
—enable-inline-optimization #优化线程
—with-curl #打开 curl 浏览工具的支持
—with-curlwrappers #运用 curl 工具打开url 流 ,新版 PHP5.6 已弃用
—enable-mbregex #支持多字节正则表达式
—enable-fpm #CGI 方式安装的启动程序,PHP-FPM 服务
—enable-mbstring #多字节,字符串的支持
—with-gd #打开 gd 库的支持,是 php 处理图形的扩展库,GD 库提供了一系列用来处理图片的 API,使用 GD 库可以处理图片,或者生成图片。
—enable-gd-native-ttf #支持 TrueType 字符串函数库
—with-openssl #打开 ssl 支持
—with-mhash #支持 mhash 算法扩展
—enable-pcntl #freeTDS 需要用到的,pcntl 扩展可以支持 php 的多线程操作
—enable-sockets #打开 sockets 支持
—with-xmlrpc #打开 xml-rpc 的 c 语言
—enable-zip #打开对 zip 的支持
—enable-soap #扩展库通过soap 协议实现了客户端与服务器端的数据交互操作
:::
5.3、编译并安装
php-8.0.18]# make -j 4 && make install
5.4、配置 php 和 php-fpm
#生成 php 自身配置文件
php-8.0.18]# cp /usr/local/src/php-8.0.18/php.ini-production /usr/local/php/php.ini
PHP-FPM 配置文件:
php-8.0.18]# cp /usr/local/php/etc/php-fpm.d/www.conf.default /usr/local/php/etc/php-fpm.conf #生成 php-fpm 配置文件
PHP-FPM 启动脚本
# cp /usr/local/php-8.0.18/sapi/fpm/init.d.php-fpm /etc/init.d/php-fpm #生成 php-fpm 启动脚本添加执行权限
# chmod +x /etc/init.d/php-fpm
配置开机自启动
# chkconfig php-fpm on
启动 php-fpm
# /etc/init.d/php-fpm start
检测 PHP-FPM 启动成功与否
netstat -antup | grep php-fpm
tcp 0 0127.0.0.1:9000 0.0.0.0:* LISTEN 122801/php-fpm
测试 LNMP 的 PHP 支持
echo “<?php phpinfo(); ?>” > /usr/local/nginx/html/index.php
浏览器访问:http://ip/index.php
php 页面已经可以解析,但是访问时还需要手工输入 index.php,我们修改默认首页就可以不用输入php 文件名称进行解析了。
vim /usr/local/nginx/conf/nginx.conf
改:
45    index index.html index.htm;
为:
45    index index.html index.htm index.php;
加载配置文件
nginx -s reload
删除 nginx 默认首页文件。
rm -rf /usr/local/nginx/html/index.html
再次访问 http://IP/

若有收获,就点个赞吧
0 人点赞
