1. 问题说明
启动Tomcat之后,我们常常是要打开Web端进行验证,其实Web端的功还有很多,但是有一些管理页面权限不足:
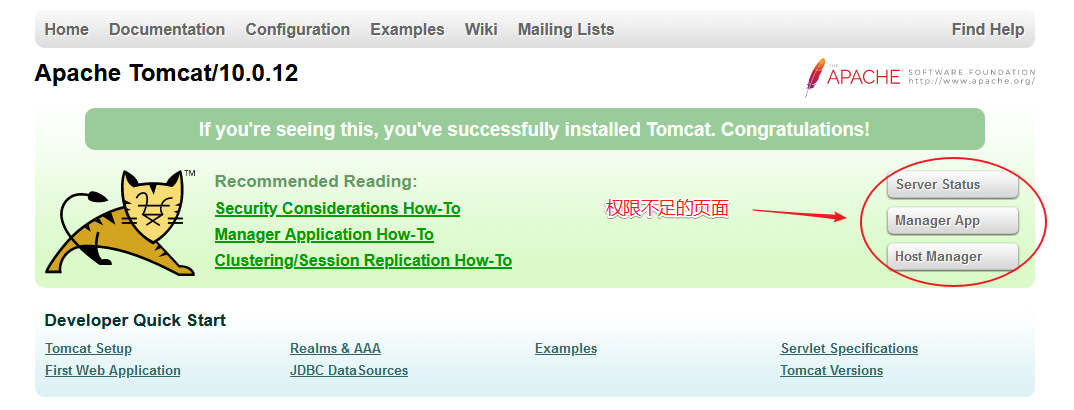
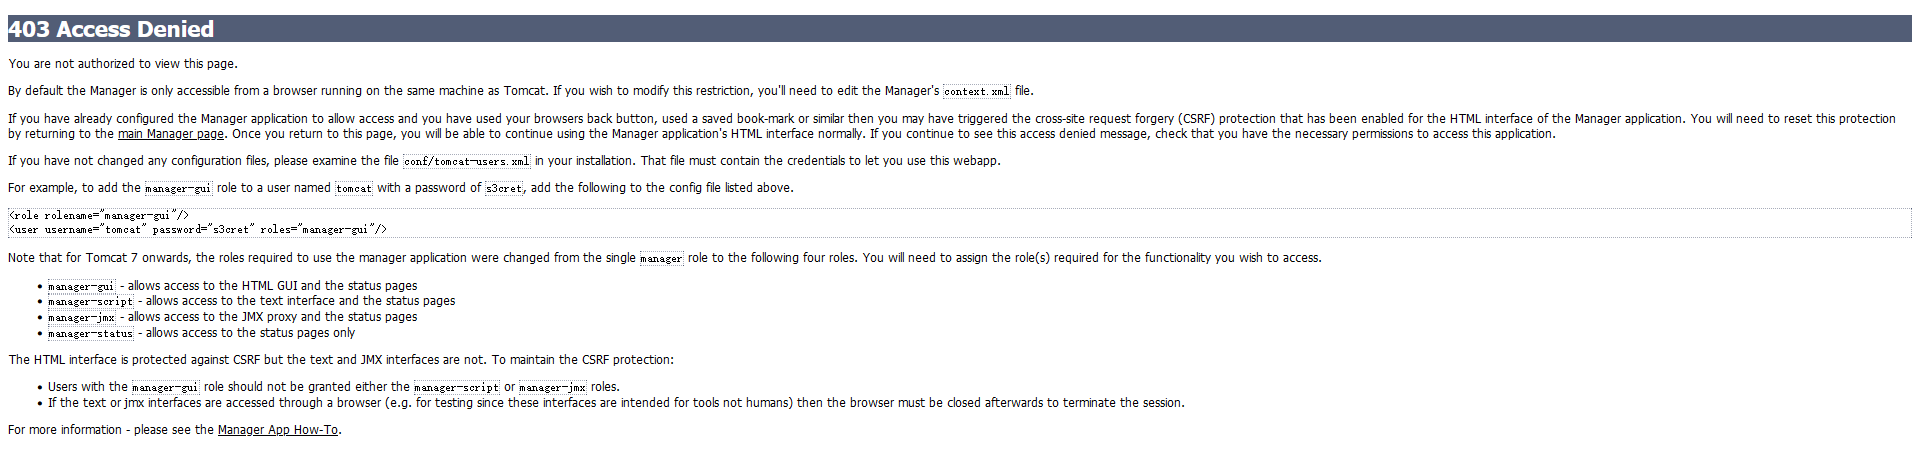
我们点击 Manager Status 或 Manager App 链接之后会报错 403 Access Denied You are not authorized to view this page :
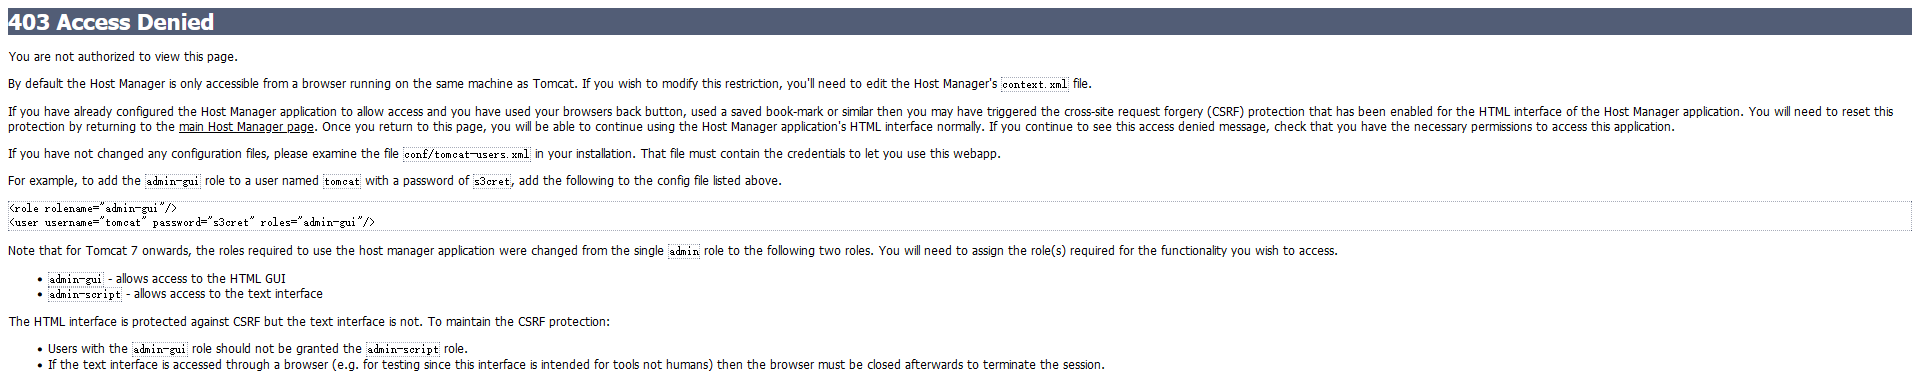
而点击 Host Manager 链接之后报错信息不同:
2. 问题解决
2.1 修改配置文件
403页面提到的第 1️⃣ 个文件:默认情况下,只能从运行在与 Tomcat 相同机器上的浏览器访问Manager。如果您希望修改此限制,则需要编辑 Manage r的 _context.xml_ 文件。查看以下:
<Context><WatchedResource>WEB-INF/web.xml</WatchedResource><WatchedResource>WEB-INF/tomcat-web.xml</WatchedResource><WatchedResource>${catalina.base}/conf/web.xml</WatchedResource></Context>
vim /usr/local/tomcat/conf/context.xml
context.xml里有两方面的描述,一个是检测资源的配置(文件修改则会重新加载),另一个是session会话的使用。似乎没有权限相关的说明,我们取消第二部分的注释以便在Tomcat重启后保持会话。
403页面提到的第 2️⃣ 个文件: _conf/tomcat-users.xml_ That file must contain the credentials to let you use this webapp. 该文件必须包含允许您使用此webapp的凭据。【满满的角色权限相关的说明】 我们按照举例修改 tomcat-users.xml 文件添加角色和用户:
vim /usr/local/tomcat/conf/tomcat-users.xml
在标签内添加以下信息:
<role rolename="manager"/>
<role rolename="manager-gui"/>
<role rolename="manager-jmx"/>
<role rolename="manager-status"/>
<role rolename="manager-script"/>
<user username="admin" password="admin" roles="manager,manager-gui,manager-jmx,manager-status,manager-script"/>
❗️❗️❗️ 注意: 重启 Tomcat 后再次访问 Manager Status 或 Manager App 页面,不出意外的话还是会报 403 Access Denied 错误的,为什么呢?我们再认真看看报错信息:
- 访问 Manager Status 或 Manager App 页面时的报错信息:
If you wish to modify this restriction, you’ll need to
edit the Manager's context.xml file.
- 访问 Host Manager 页面时的报错信息:
If you wish to modify this restriction, you’ll need to
edit the Host Manager's context.xml file.
此时才明白403页面说的 context.xml 并非 $CATALINA_HOME/conf/ 下的 context.xml 文件,而是 $CATALINA_HOME/webapps/manager/META-INF/context.xml 和$CATALINA_HOME/webapps/host-manager/META-INF/context.xml 这两个文件,全部修改 RemoteAddrValve 的值:
 <Valve className="org.apache.catalina.valves.RemoteAddrValve"
 allow="127\.\d+\.\d+\.\d+|::1|0:0:0:0:0:0:0:1" />

 <Valve className="org.apache.catalina.valves.RemoteAddrValve"
allow="\d+\.\d+\.\d+\.\d+" />
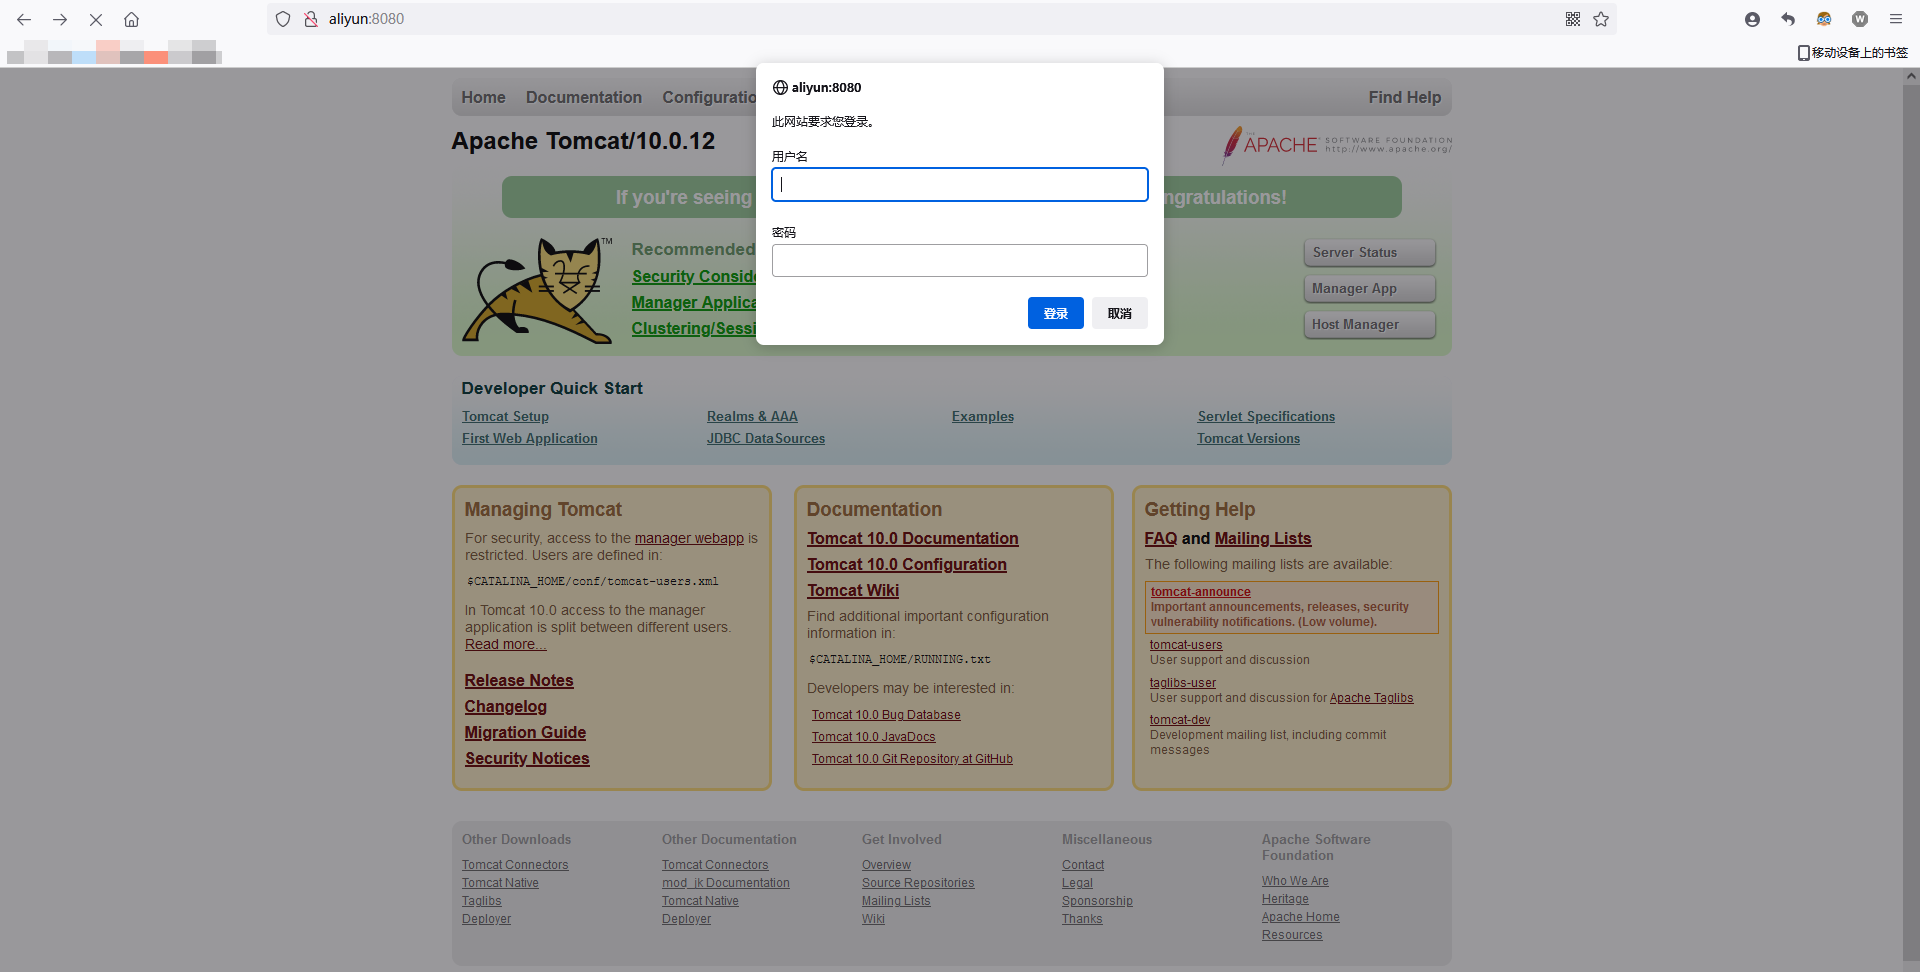
2.2 重启登录
重新启动后,点击 Server Status 或 Manager App 页面,需要登录,此时输入 tomcat-users.xml 文件设置的用户及密码:
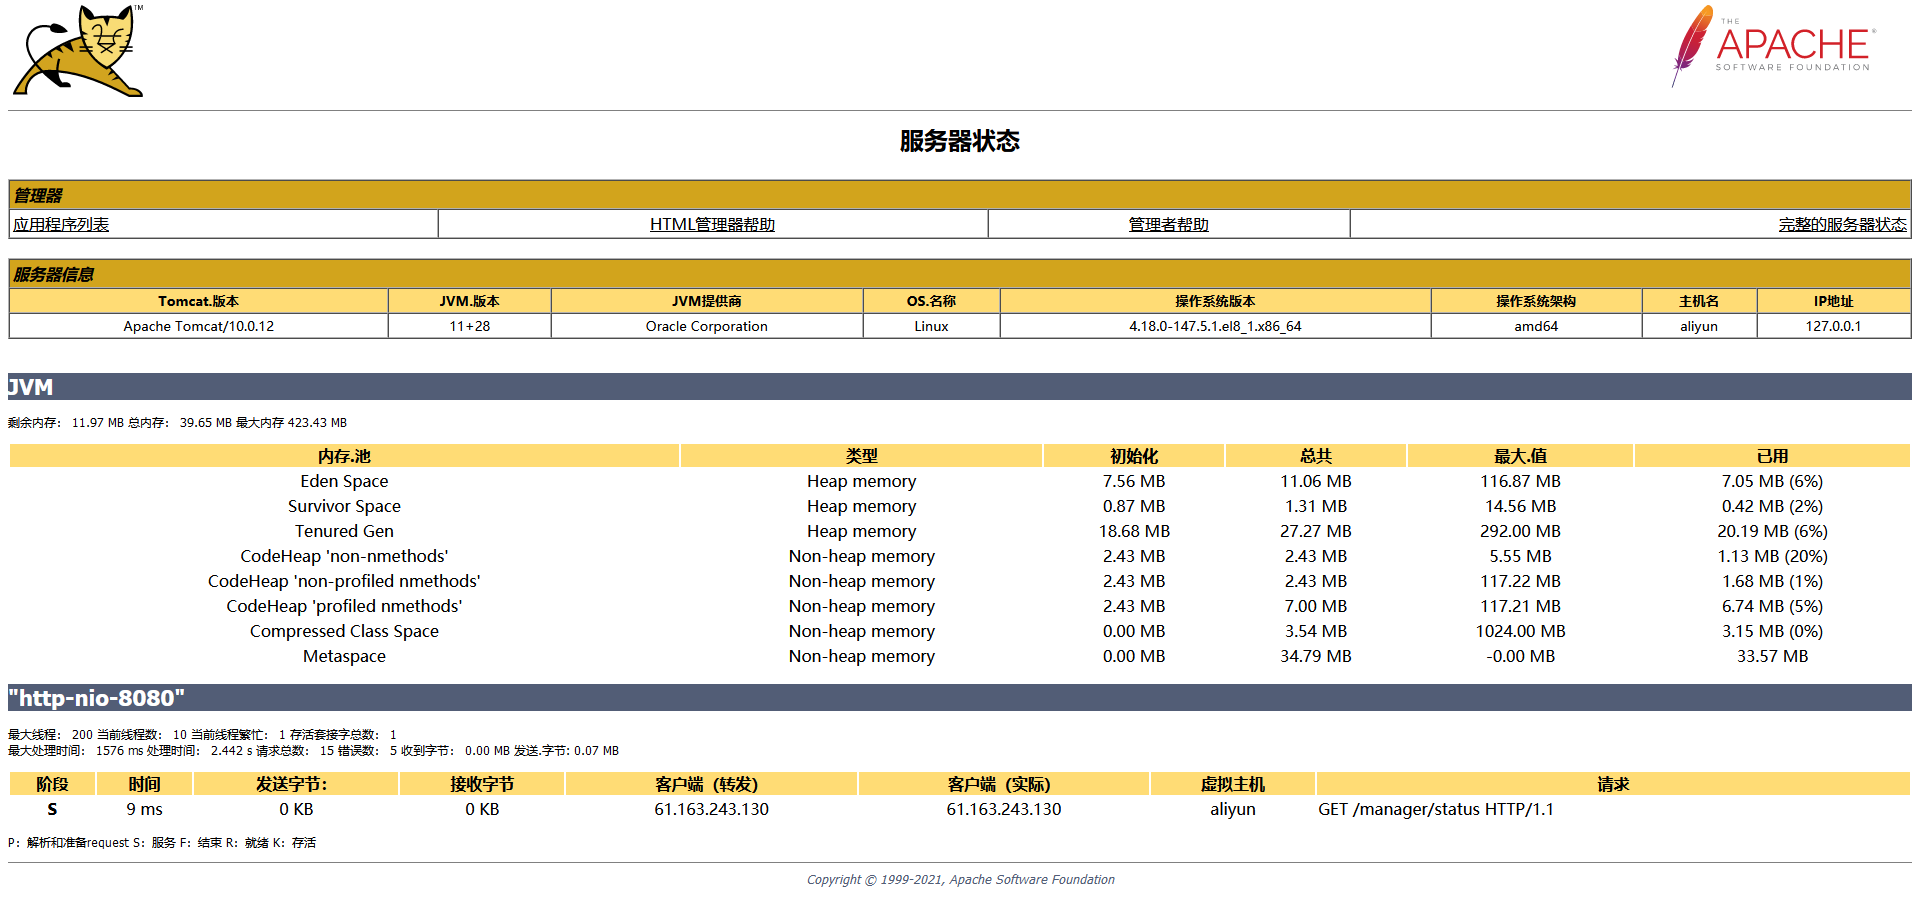
登录成功后 Server Status 可以查看服务器状态:
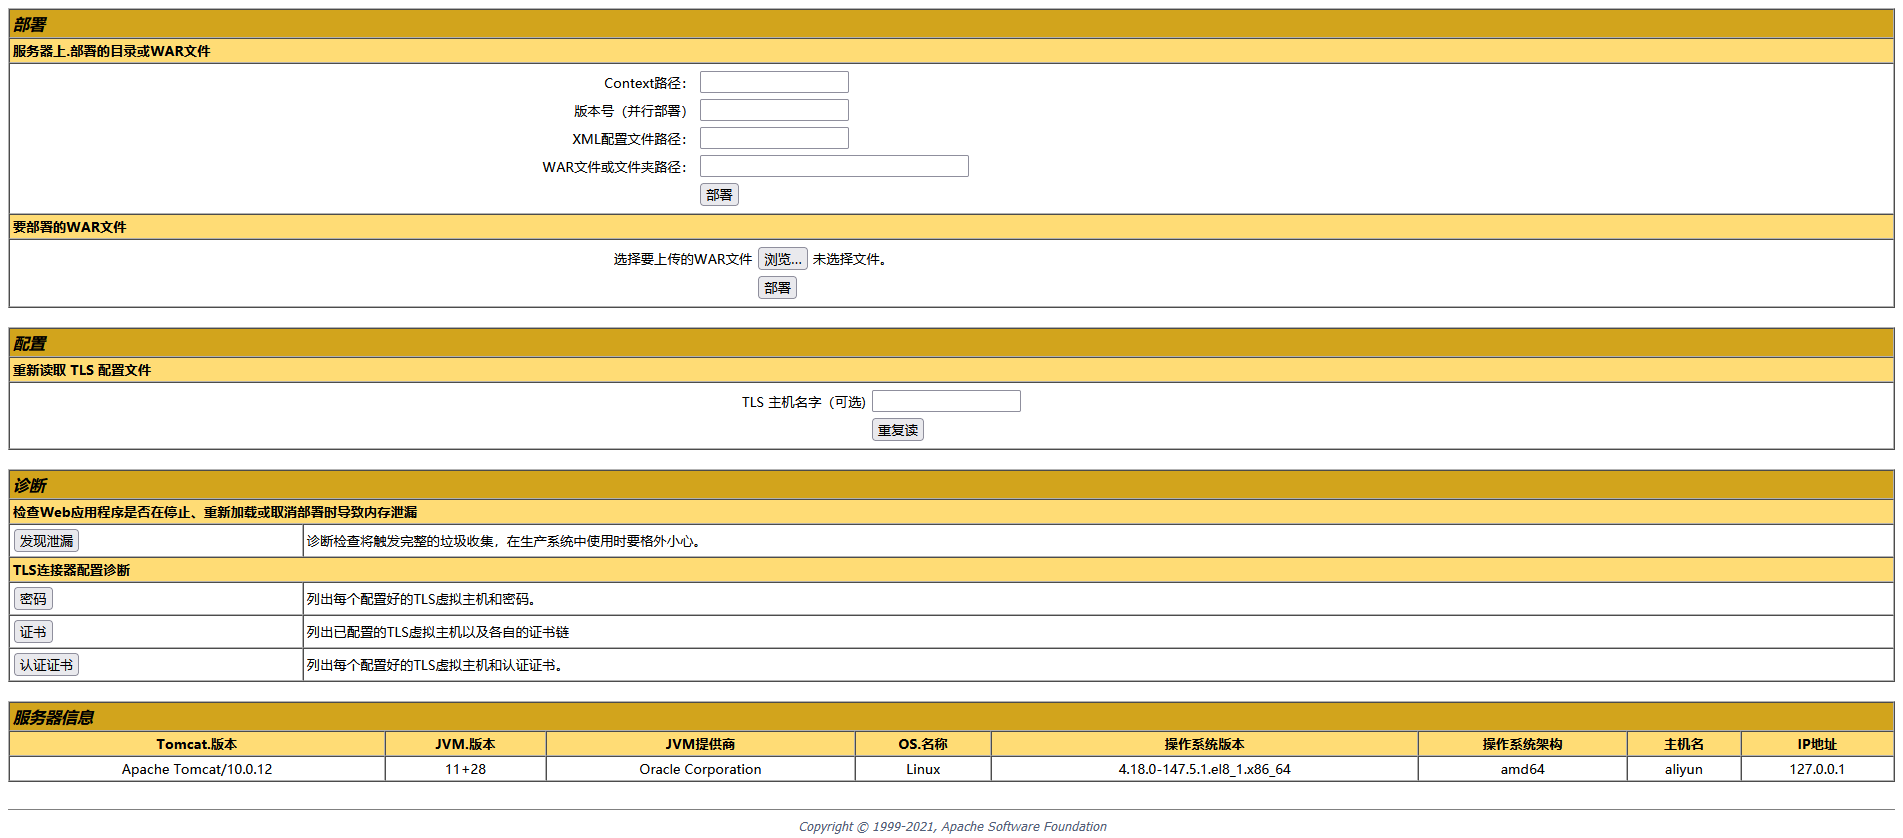
Manager App 可以在Web页面上部署项目:
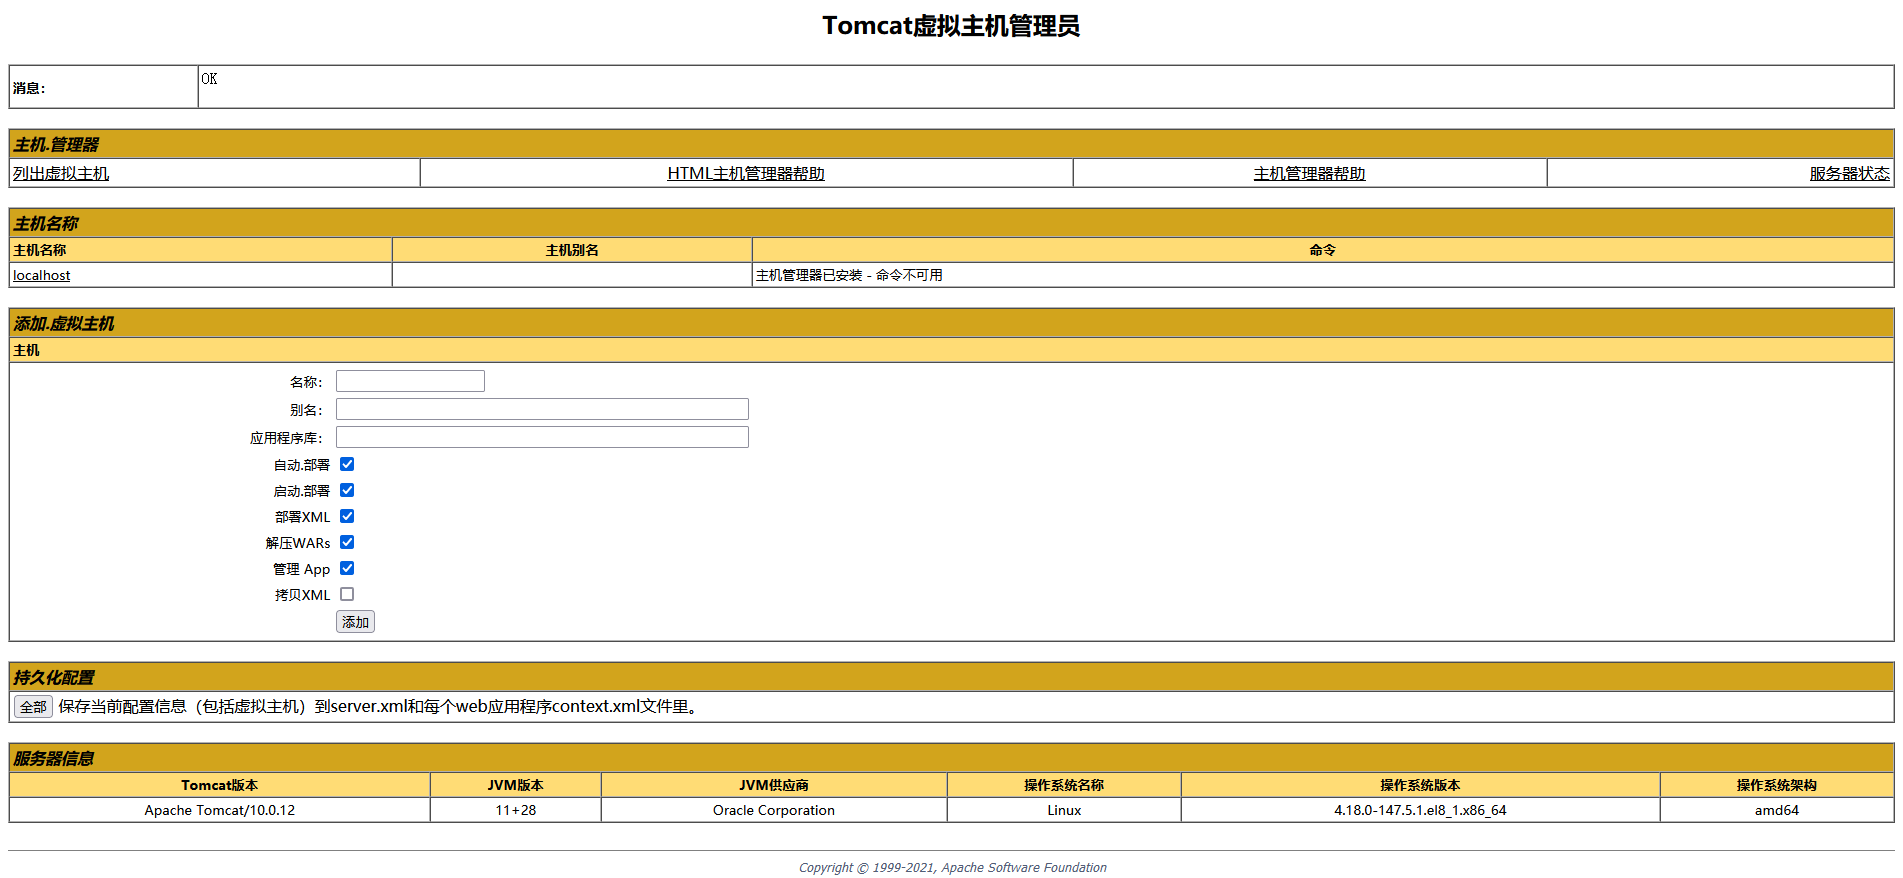
而 Host Manager 页面需要再次进行登录(密码相同)可以管理虚拟主机:
至此,全部的 Web端 403 Access Denied 问题解决~

若有收获,就点个赞吧
0 人点赞
