1.事件绑定
element.event = function(){//执行代码}只能对单个对象执行事件,不能对集合执行事件
2.通过事件更改元素内容和样式
innerHTMLelement.style.cssStyle=value;
3.用户和界面做交互
element.eventName = function(){
//执行代码
}
<button id="btn">btn</button><script>var btn = document.getElementById("btn");btn.onclick = function(){console.log("hello world");}</script>
4.innerHTML可以改变元素的内容
<button id="btn">btn</button><script>var btn = document.getElementById("btn");btn.onclick = function(){// this指向正在执行事件的当前的对象console.log(this)this.innerHTML = "change"}</script>
5.改变css的语法
element.style.cssname<br />background-color backgroundColor<br /> font-size fontSize
<style>button{background-color: orange;}</style></head><body><button id="app">发送验证码</button><script>var app = document.getElementById("app");app.onclick = function(){this.innerHTML = "60";this.style.backgroudColor = "#999";this.style.color = "pink";this.style.fontSize = "40px";}</script>
6.点击元素隐藏
只能对单个对象执行事件,不能对集合执行事件
<ul><li>html</li><li>css</li><li>js</li></ul><script>var lis = document.getElementsByTagName("li");// 只能对单个对象执行事件,不能对集合执行事件for(var i = 0; i<lis.length;i++){lis[i].onclick = function(){console.log(this);this.style.display = "none";}}</script>
7.input
获取焦点/遗失焦点
<input type="text" id="test"><script>var test = document.getElementById("test");test.onfocus = function(){this.style.backgroundColor = "red";}test.onblur = function(){this.style.backgroundColor = "#fff";}</script>
8.鼠标移动 onmouse
<p id="p">hello world</p><script>var p = document.getElementById("p");p.onmouseover = function(){ //鼠标放上去变红this.style.backgroundColor = "red";}p.onmouseout = function(){ //鼠标移开变黄this.style.backgroundColor ="yellow";}</script>
9.window.onload 页面加载完毕之后触发
10.window.onresize 窗口大小发生改变的时候触发
<script>window.onresize = function(){console.log("窗口改变了");}</script>
11.window.scrollY 获取滚动条距离顶部的高度
导航条
<style>*{margin: 0;padding: 0;}#nav{height: 50px;background-color: red;position: fixed;width: 100%;opacity: 0;}body{height: 2000px;}</style></head><body><div id="nav"></div><script>var nav = document.getElementById("nav");window.onscroll = function(){var scrollTop = window.scrollY;//当滚动条滚动到距离顶部200px的时候导航条显示if(scrollTop>200){nav.style.opacity = 1;}else{nav.style.opacity = 0;}console.log(scrollTop);}</script>
<style>*{margin: 0;padding: 0;}#nav{height: 50px;background-color: red;position: fixed;width: 100%;opacity: 0;}body{height: 2000px;}</style></head><body><div id="nav"></div><script>//当滚动条滚动到距离顶部200px的时候,导航条完全显示var nav = document.getElementById("nav");//1、对窗口执行监听window.onscroll = function(){//2、获取滚动条的高度var scrollTop = document.documentElement.scrollTop;//3、得到透明度if(opacity>1){opacity=1;}var opacity = scrollTop/200;nav.style.opacity = opacity;console.log(opacity);}</script>
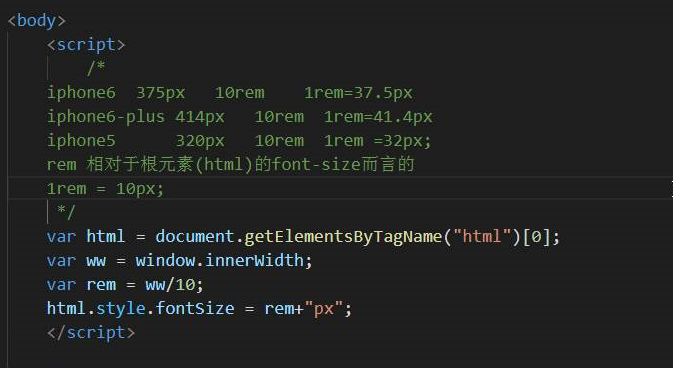
12.rem 相对于根元素(html)的font-size而言的

12.1.适配方案
<script>var html = document.getElementsByTagName("html")[0];var ww = window.innerWidth; //获取设备宽度var rem = ww/10; //得到rem单位html.style.fontSize = rem+"px";window.onresize = function(){var ww = window.innerWidth; //获取窗口的宽度html.style.fontSize = ww/10+"px";}</script>
13.onchange 只有输入框内容发生改变的时候才会触发
<input type="text" id="input"><script>var input = document.getElementById("input");input.onchange = function(){console.log("hello");}</script>
14.键盘按下松开
<input type="text" id="app"><script>//按住var app = document.getElementById("app");app.onkeypress=function(event){console.log(event);}</script><input type="text" id="app"><script>//在键盘键松开时var app = document.getElementById("app");app.onkeyup = function (event) {console.log(event);}</script>
15.内联事件
<!-- 内联事件 --><button onclick="go()">btn</button><script>function go(){console.log("hello world");}</script>
16.获取自定义属性的值 event.target.dataset
<!-- 自定义属性 data-aid="aa" 前面加上data--><div id="test" data-aid="12133">div</div><script>var test = document.getElementById("test");test.onclick = function(event){//获取自定义属性的值event.target.datasetconsole.log(event.target.dataset);}</script>
17.定时器
<script>// window的方法//间隔一定的时间触发,并且只会触发一次setTimeout(function(){console.log("hello")},1000) //1000毫秒//间隔一定的时间重复触发setInterval(function() {console.log("world");},2000)</script>
17.1清除定时器 clearInterval
clearTimeout setTimeout
clearInterval setInterval
<button id="clear">清除定时器</button><script>var timer= setInterval(function () {console.log("world");}, 2000)console.log(timer);var clear = document.getElementById("clear");clear.onclick = function(){clearInterval(timer);}</script>
17.2重复触发 setInterval
三秒计时器
<button id="btn">3</button><script>var num = 3;var btn = document.getElementById("btn");var timer = setInterval(function(){ //每间隔一秒触发num--;console.log(num);if(num>=0){btn.innerHTML = num; //修改num数字}else{clearTimeout(timer) //清除定时器}},1000)</script>
17.3单个触发 setTimeout
<button id="btn">3</button><script>var btn = document.getElementById("btn");var num = 3;function go(){setTimeout(function(){num--;if(num >=0){btn.innerHTML = num;go();}},1000)}go();</script>


