I Introduction
BitWearable Kit is designed for micro:bit beginners. It includes a BitWear, which serves as a micro:bit expansion board allowing users to make fun wearable gadgets. Simply power the BitWear with two CR2032 batteries, then you are ready to go. BitWear also has a vibration motor, a buzzer and an addressable RGB LED on board, all designed for your fun wearable projects. Program your micro:bit using Microsoft Makecode to make it display time or customized images. You can also strap your ‘BitWatch’ on your wrist like a regular watch.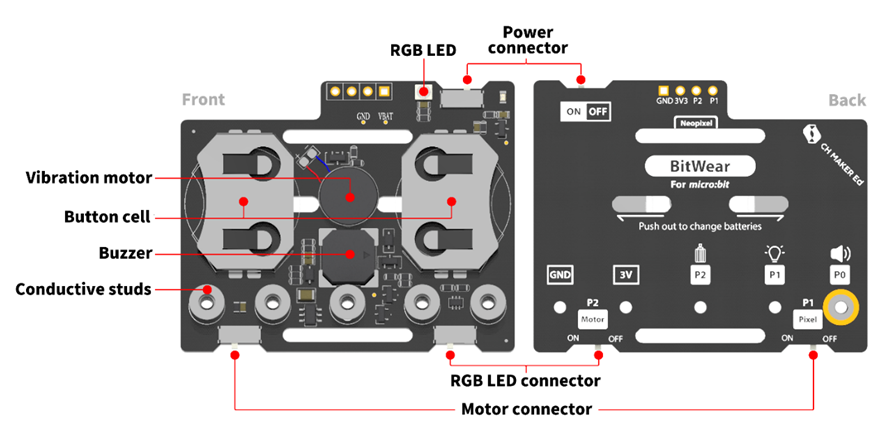
Tip: When testing a program, do not install batteries on BitWear first. Use a USB cable instead to provide power and ensure program transmission. Only install batteries when a program completes and offline implementation is required.
II Tutorials
Here are some related tutorials to help you get started with the BitWearable Kit.
1. Wake-Up Alarm
1.1 Implementation
This is a magical gadget that can wake you up! Once the project completes, use the double-sided tape to secure the gadget onto your back. Slowly bend down as if you are falling to sleep, and see if it can send out a remind.
1.2 Write a Program
First, add a forever block. Connect the block show icon inside. Keep this heart icon on it.
Next, add an IF-THEN statement. Connect a comparison block “<” into it. Inside the block, add the block acceleration (mg) from the tab Input to the box on the left; and input 800 into the box on the right.
Then, go to the tab Music and connect the block start melody (dadadum) repeating (once) underneath.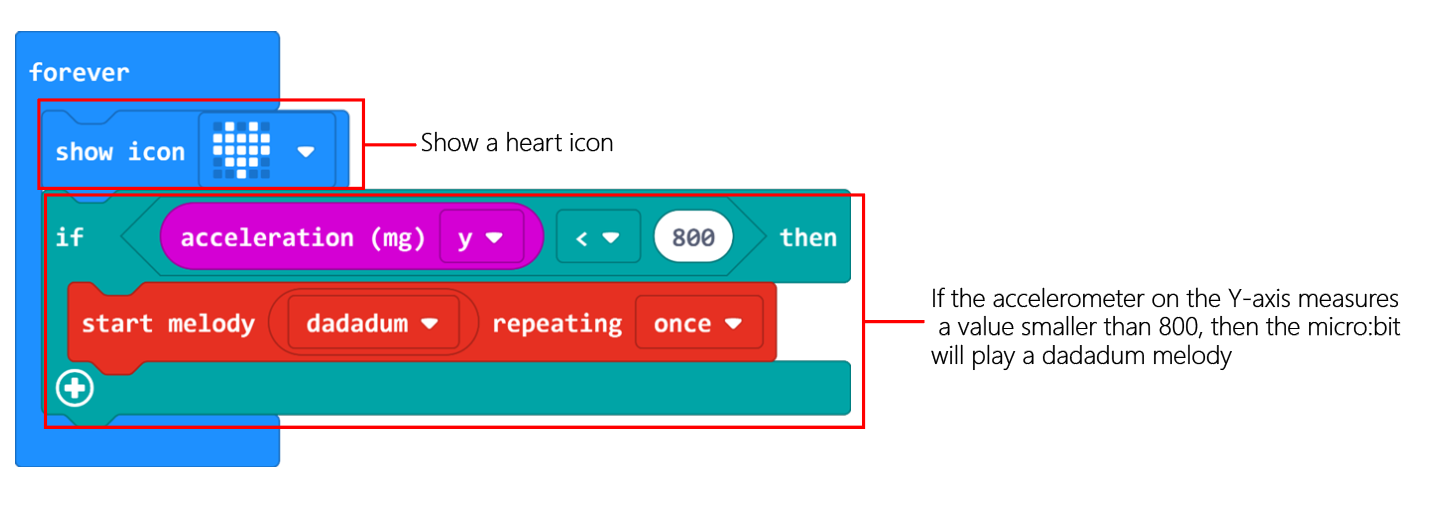
1.3 Connect a Device
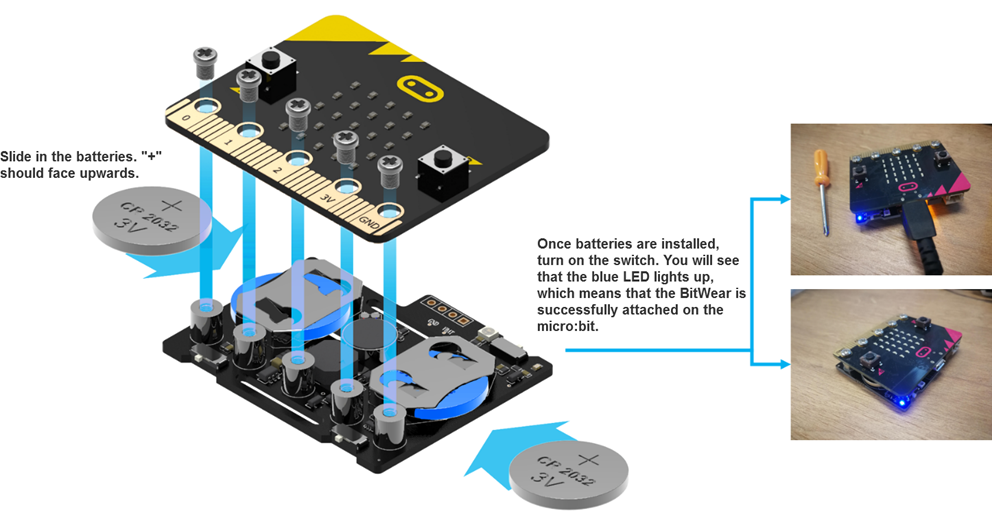
Attach the BitWear onto the micro:bit. Use a USB cable to connect the micro:bit and your PC together. Ensure that the LED indicator on the micro:bit lights up.
1.4 Download a Program
You have been introduced how to download a program in the previous tutorials, which can be simplified into steps as: rename a program, click the “Download” button and send it to the micro:bit.
1.5 Run a Program
Turn on the power switch on the micro:bit and see if the program can run normally.
2. Step Counter
2.1 Implementation
Strap the BitWear on the hand or ankle. Do some moves like shaking, jumping, walking. Then press down the button A to see how many steps you just make.
2.2 Write a Program
As usual, add an on start block. Make a variable and name it STEP. The step is initially set as 0.
Next, add a forever block and an IF-THEN statement. Follow this program logic: if the accelerometer of strength is greater than 1,500, the step will increase by 1 and pause for 0.5 seconds.
Then, drag and drop the block on button (A) pressed. Connect the block show number into it, and add the variable step.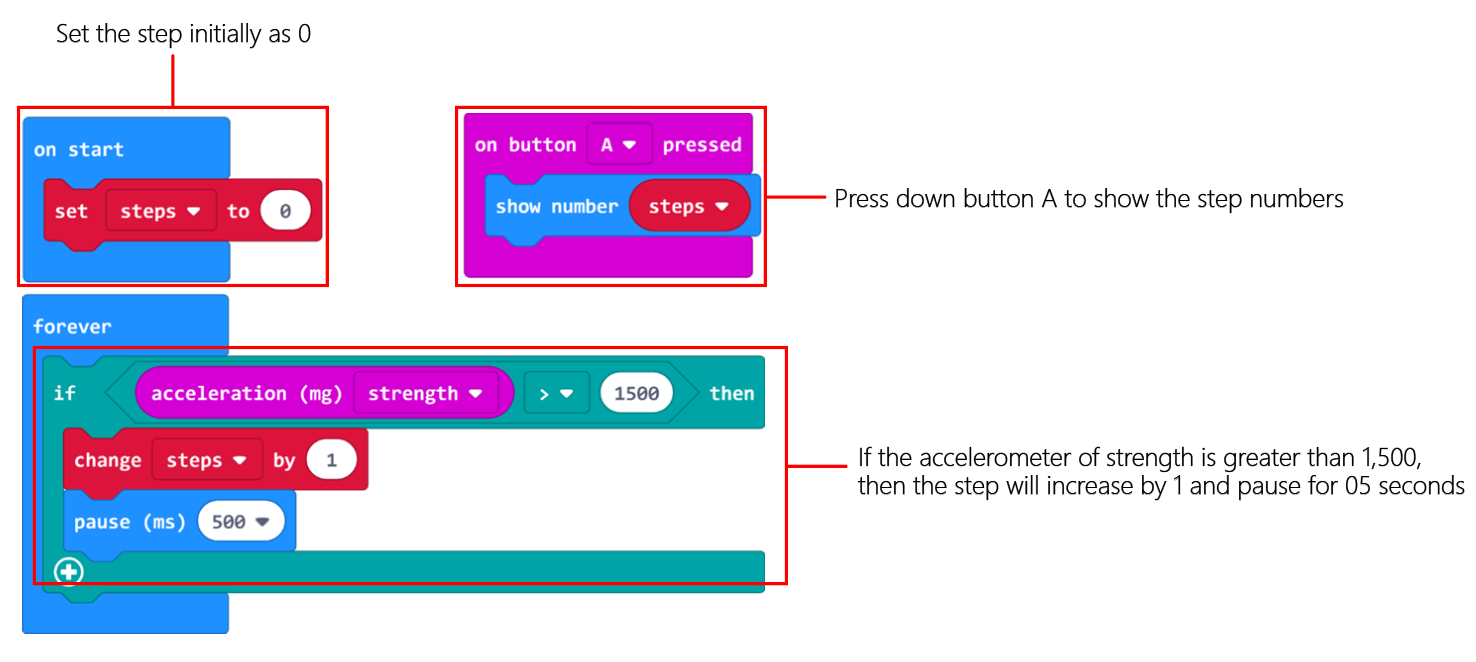
2.3 Connect a Device
Attach the BitWear onto the micro:bit. Use a USB cable to connect the micro:bit and your PC together. Ensure that the LED indicator on the micro:bit lights up.
2.4 Download a Program
You have been introduced how to download a program in the previous tutorials, which can be simplified into steps as: rename a program, click the “Download” button and send it to the micro:bit.
2.5 Run a Program
Turn on the power switch on the micro:bit and see if the program can run normally.
Note: When shaking the micro:bit, try doing it like running on the ground. It’s normal if the steps counted by the micro:bit are not exactly the same as the actual numbers.
III Course Materials
You can see related course materials about the micro:bit and BitWearable Kit on our online learning platform Make2Learn via this address: https://make2learn.tinkergen.com/
IV Attachments
Attachment: BitWearable Kit Tutorial Source Code

若有收获,就点个赞吧
0 人点赞
