- I Introduction
- II Module Details
- III Tutorials
- 2. Distance Measurement
- 2.1 Implementation
- 2.2 Write a Program
- https://github.com/TinkerGen/pxt-BitMaker">Note: Follow the above method to add the BitMaker Lite extension: https://github.com/TinkerGen/pxt-BitMaker
- 2.3 Connect a Device
- 2.4 Download a Program
- 2.5 Run a Program
- 3. Servo Controller
- 4. Flapping Wings
- III Course Materials
- IV Attachments
I Introduction
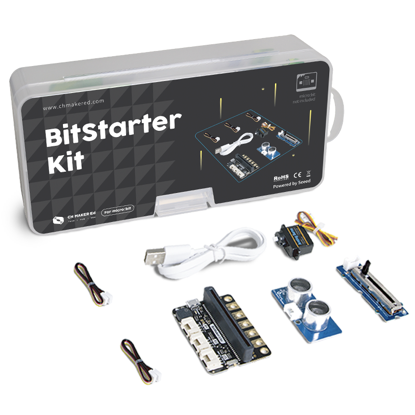
BitStarter Kit is mainly designed for users who are beginning to learn and use the micro:bit. It has 3 connection ports for Grove modules, allowing beginners to explore micro:bit projects with diverse functions. You can easily slide the micro:bit into the BitMaker Lite. The included buzzer also makes possible a lot of interesting audio projects, e.g. a fruit piano. In addition, this kit consists of a slide potentiometer, an ultrasonic sensor and a servo to implement various creative and fun ideas or designs. You’ll quickly and easily start a project with the micro:bit, BitMaker Lite and the Grove modules as all of these components are plug and play. You can use Microsoft MakeCode to program your custom code. Your projects will become both cool and easy to play with! If you need more Grove modules to enhance your projects, visit Seeed Shop to order more.
II Module Details
The kit consists of a series of items as follows: 1 BitMaker Lite, 1 micro USB cable, a pack of connection wires and up to 14 different Grove modules, including an ultrasonic sensor, slide potentiometer, servo, etc. You can refer to their specific details in the following table. Click one of the small images to see a large version of the modules, or click More Info to know more about them.
| Name | Image | Detail |
|---|---|---|
| BitMaker Lite |  |
BitMaker Lite is a compact and simplified version of BitMaker. It has only 3 Grove ports, but this is sufficient for many projects. The plug & play convenience means that you can easily implement a project using a grove module. More Info |
| Ultrasonic Sensor |  |
Ultrasonic sensor is an electronics for detecting objects within a distance range about 20-400 cm. By measuring the time between transmitting and receiving the ultrasound, it’s able to calculate the distance to a detected obstacle. More Info |
| Slide Potentiometer |  |
A slide potentiometer acts as a linear variable resistor with a maximum resistance of 10 KΩ. When the sliding contact moves from one end to another, the output voltage (Vcc) will vary from 0 to a value where the displacement takes place. More Info |
| Servo |  |
The servo is an actuator that controls the angular position of the shaft. We usually apply it to some projects that execute actions like opening, rotation, etc. The servo rotates between a range from 0 to 180 degrees and can be positioned to a specific angle through coding. More Info |
III Tutorials
Here are some related tutorials to help you quickly get started with BitStarter Kit.
1. Music Player
1.1 Implementation
The micro:bit plays a birthday song once and shows a musical note pattern when it turns on.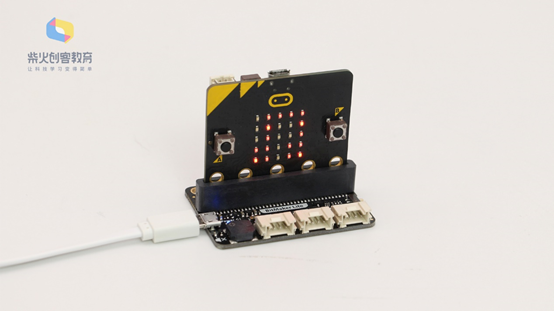
1.2 Write a Program
First, add an on start block. Next, from the tab Music, add the block start melody (dadadum) repeating (once), and select a birthday song. Then, draw a musical note pattern on the show leds block.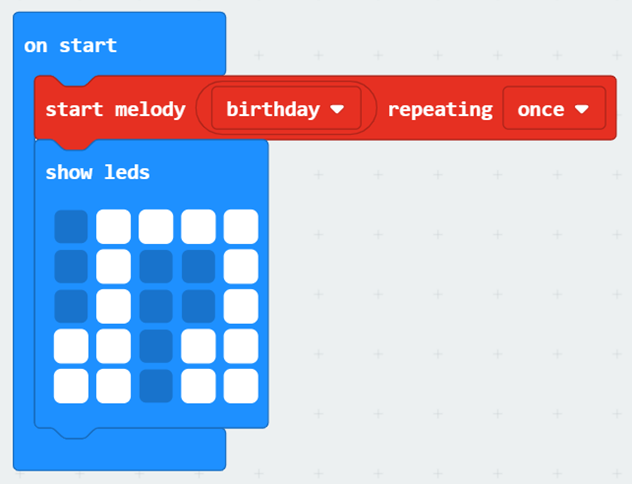
1.3 Connect a Device
Slide the micro:bit into BitMaker Lite and be careful not to reverse it. Connect the micro:bit to your PC with a USB cable. Check if the LED indicator on the micro:bit lights up. If not, the USB cable may be connected mistakenly.
1.4 Download a Program
You have been introduced how to download a program in the previous tutorials, which can be simplified into steps as: rename a program, click the “Download” button and send it to the micro:bit.
1.5 Run a Program
Turn on the switch on the BitMaker Lite and see if the micro:bit plays the birthday song and shows a musical note pattern.
2. Distance Measurement
2.1 Implementation
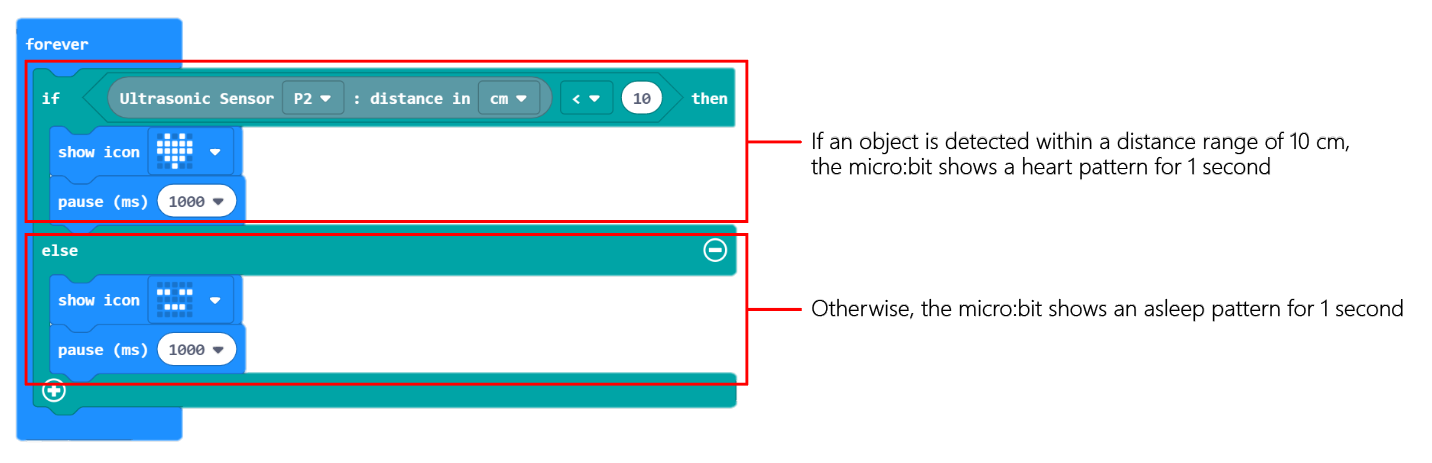
If the ultrasonic sensor detects an object within a range of 10 cm, the micro:bit will show a heart pattern and pause for 1 second; otherwise, the micro:bit will show an asleep face and pause for 1 second.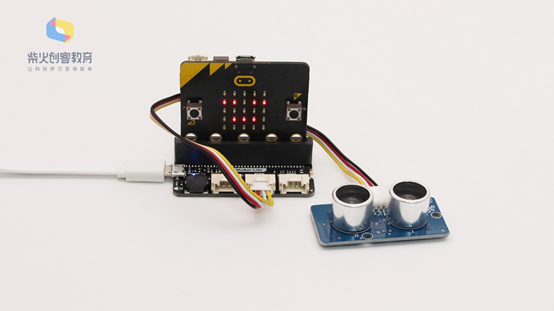
2.2 Write a Program
Note that MakeCode does not provide blocks to control the Grove modules. Therefore we need to manually add an extension in MakeCode to make sure everything goes well. Let’s learn how to do it now!
How to Add Grove Extension:
- Go to MakeCode:
https://makecode.microbit.org - Step 1 Create a new project to enter the workspace. Click the gear icon (for settings) on the blue bar.
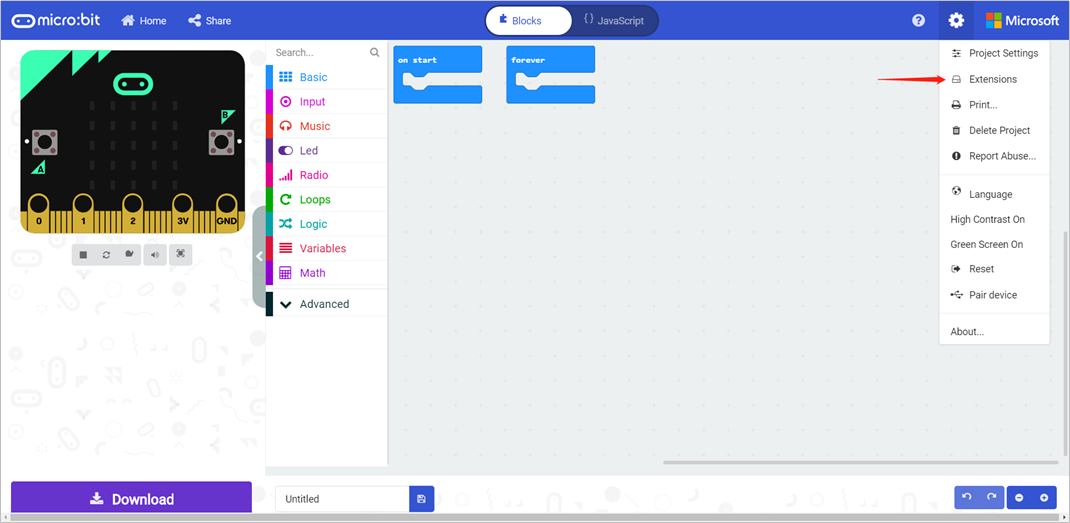
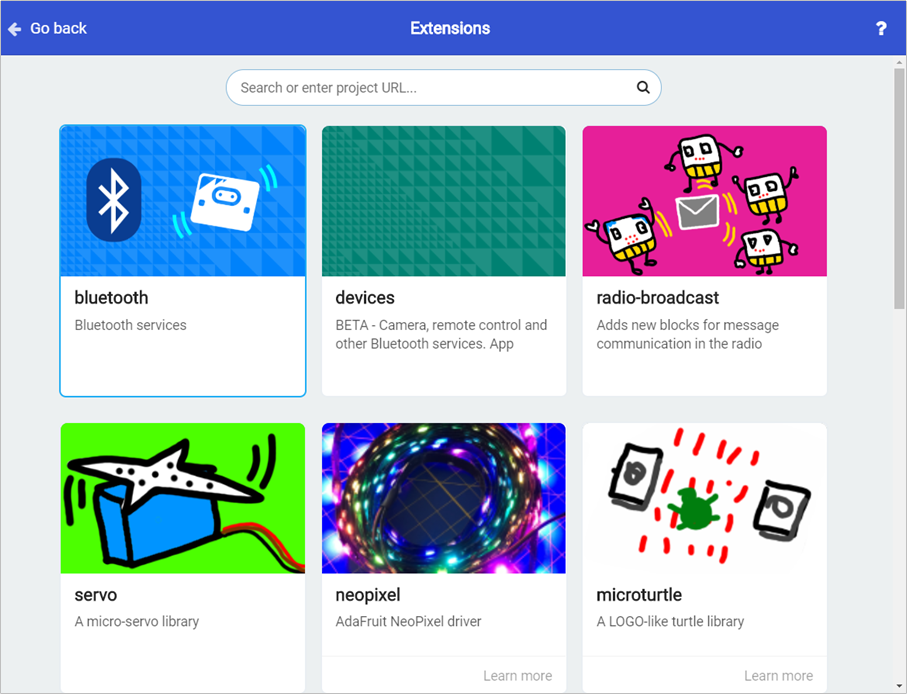
- Step 2 Select Extensions from the drop-down list which takes you to the extensions page.
Step 3 Input the address of the Grove extension into the search box: https://github.com/TinkerGen/pxt-Grove
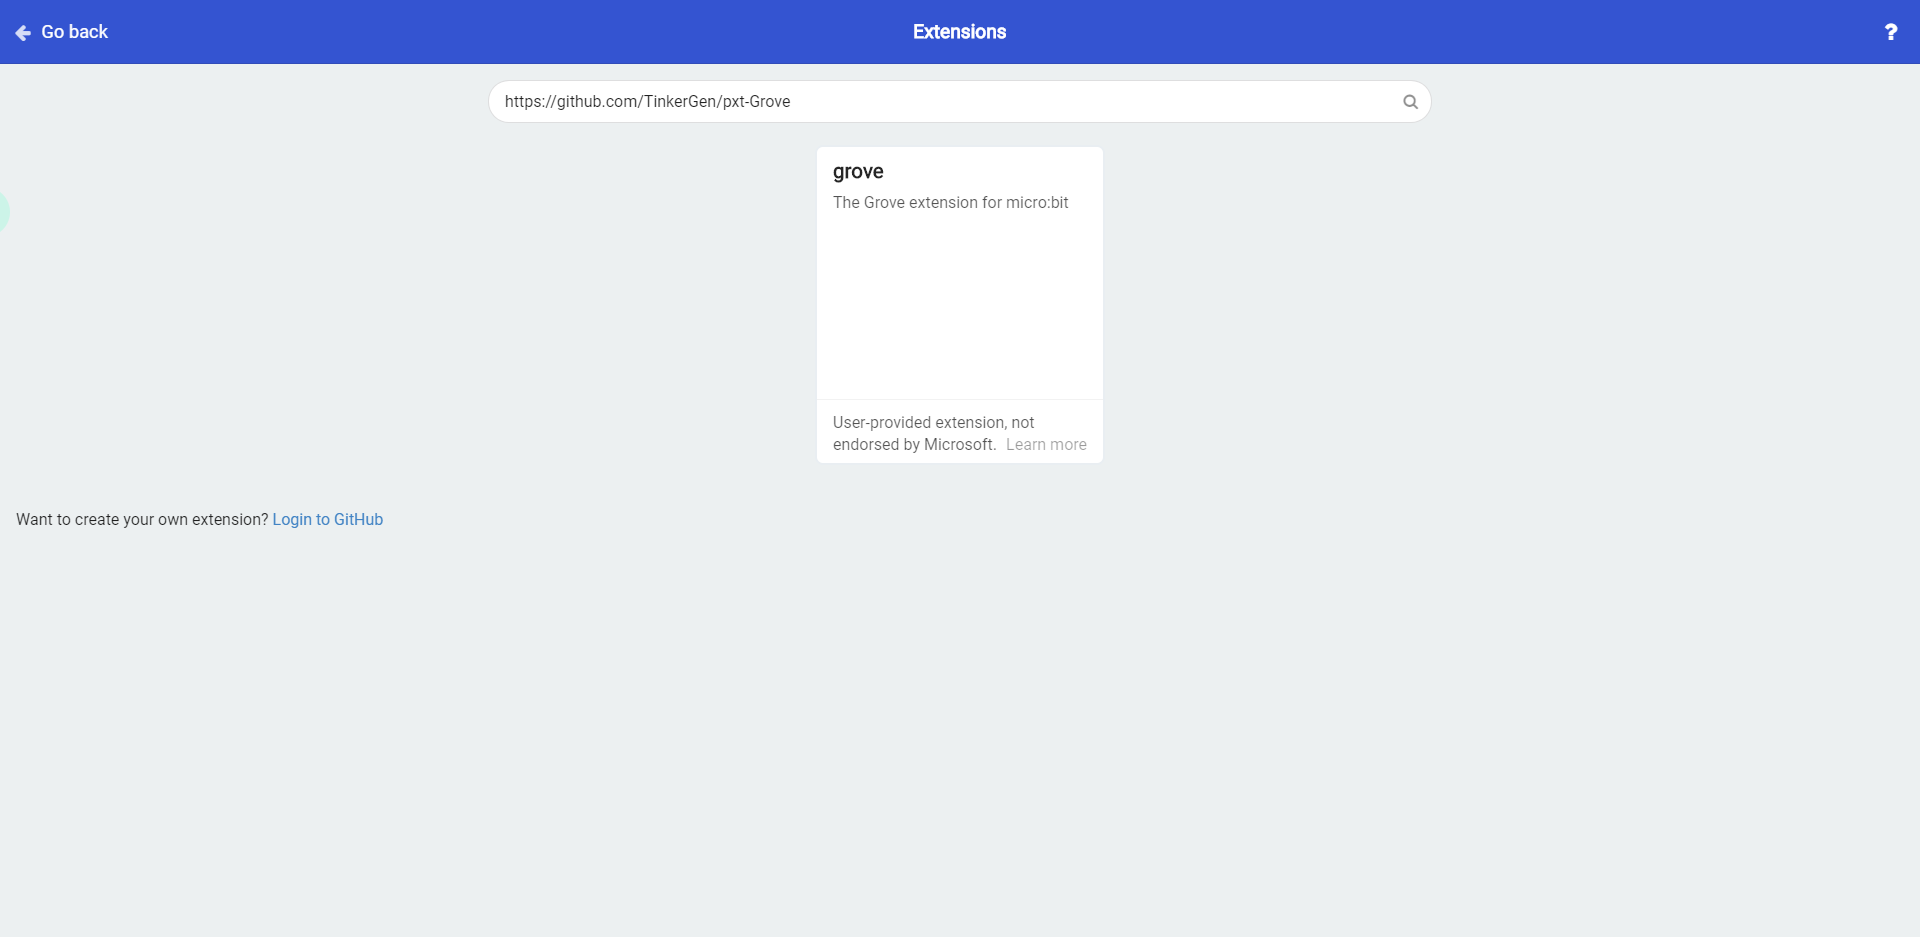
If it prompts that the extension does not exist, close the browser and enter MakeCode to try again.
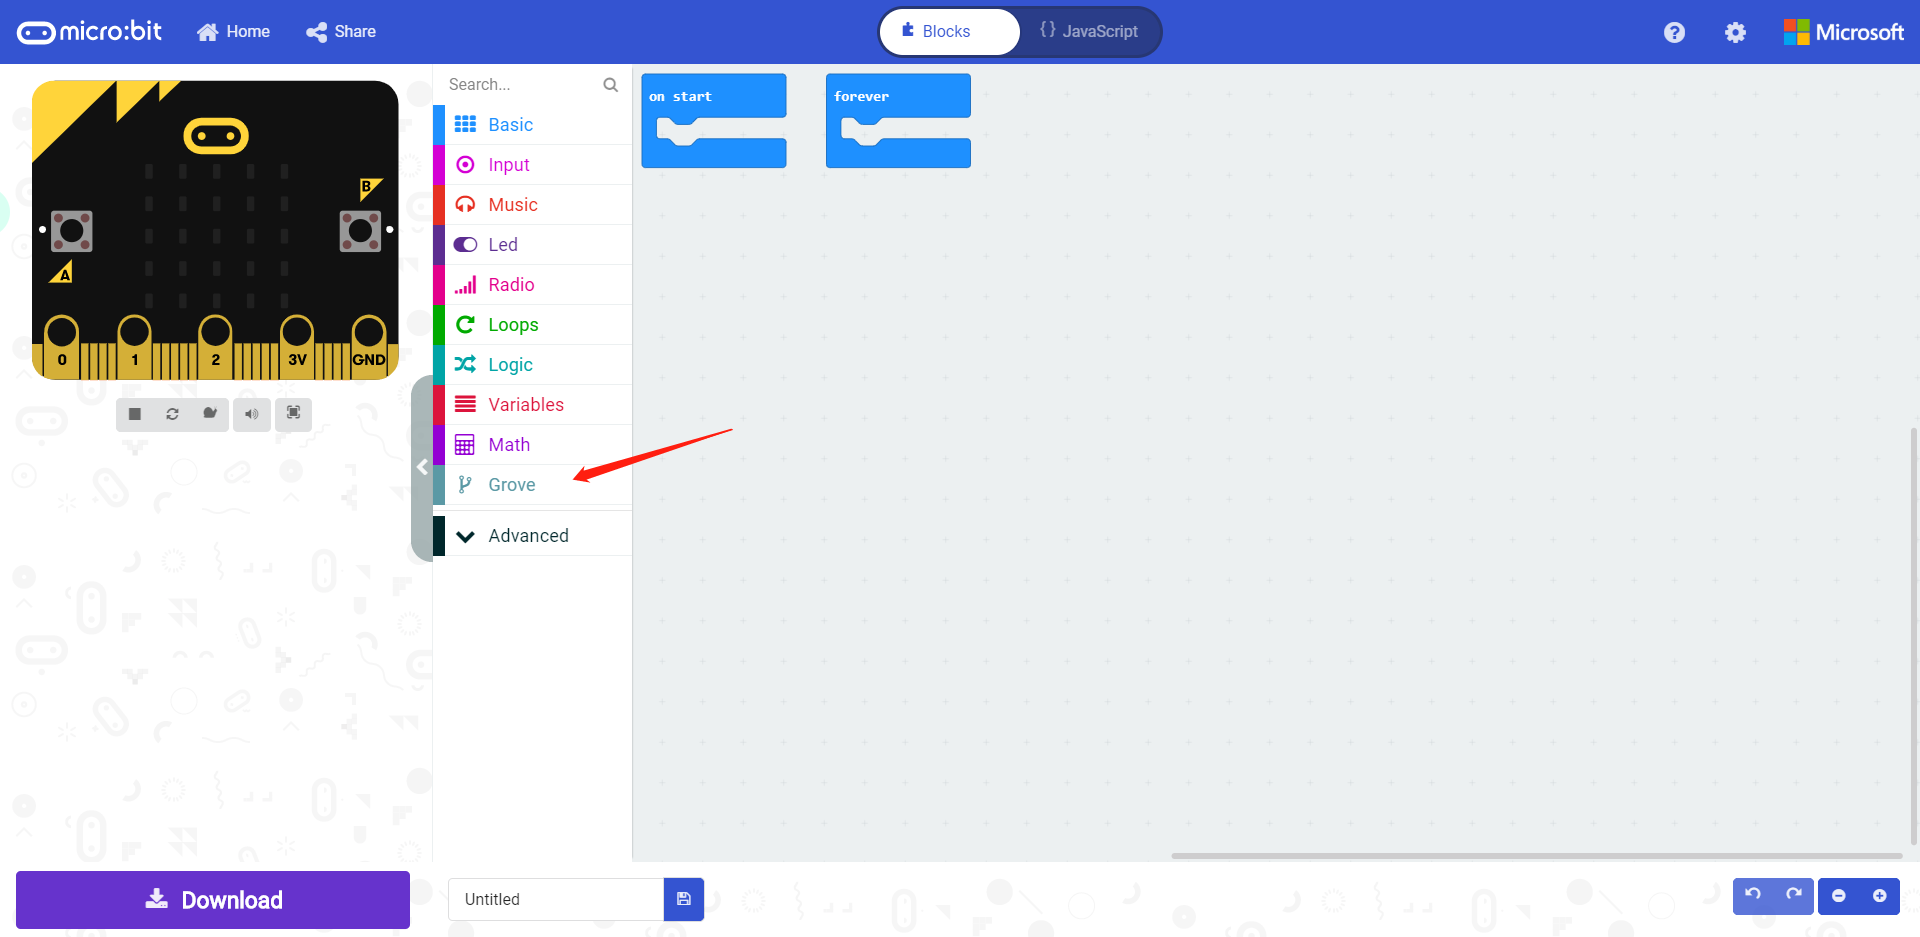
Step 4 Click the extension package which takes you back to the workspace. You will see that the Grove extension is then successfully added.
Let’s move on to the task after we added the extension.Note: Follow the above method to add the BitMaker Lite extension: https://github.com/TinkerGen/pxt-BitMaker
Let’s start coding. First, add a forever block. Connect an IF-THEN-ELSE statement inside. Then, follow this program logic and code: if the ultrasonic sensor detects an object within a range of 10 cm, the micro:bit will show a heart pattern and pause for 1 second; otherwise, the micro:bit will show an asleep face and pause for 1 second.
2.3 Connect a Device
Connect the ultrasonic sensor to the P2 connection port on the BitMaker Lite. Slide the micro:bit into BitMaker Lite and be careful not to reverse it. Then use a USB cable to connect the micro:bit and your PC together. Check if the LED indicator on the micro:bit lights up. If not, the USB cable may be connected mistakenly.
2.4 Download a Program
You have been introduced how to download a program in the previous tutorials, which can be simplified into steps as: rename a program, click the “Download” button and send it to the micro:bit.
2.5 Run a Program
Turn on the switch on the BitMaker Lite and see if the program can run normally.
3. Servo Controller
3.1 Implementation
When pressing down the buttons on the micro:bit, the servo arm will rotate accordingly and the screen will show a left/right arrow.

3.2 Write a Program
First, add a forever block. Connect an IF-THEN-ELSE statement inside. Follow this program logic and code: if the button A is pressed, the servo will rotate at 90 degrees and the screen will show a LEFT arrow; if the button B is pressed, the servo will rotate at 180 degrees and the screen will show a RIGHT arrow.

3.3 Connect a Device
Connect the servo to the P0 connection port on the BitMaker Lite. Slide the micro:bit into BitMaker Lite and be careful not to reverse it. Then use a USB cable to connect the micro:bit and your PC together. Check if the LED indicator on the micro:bit lights up. If not, the USB cable may be connected mistakenly.
3.4 Download a Program
You have been introduced how to download a program in the previous tutorials, which can be simplified into steps as: rename a program, click the “Download” button and send it to the micro:bit.
3.5 Run a Program
Turn on the switch on the BitMaker Lite and see if the program can run normally.
4. Flapping Wings
4.1 Implementation
If the slide potentiometer returns a value less than 500, the servo will rotate at 90 degrees and pause for 0.1 seconds; otherwise, the servo will rotate at 180 degrees and pause for 0.1 seconds. This program will run again and again.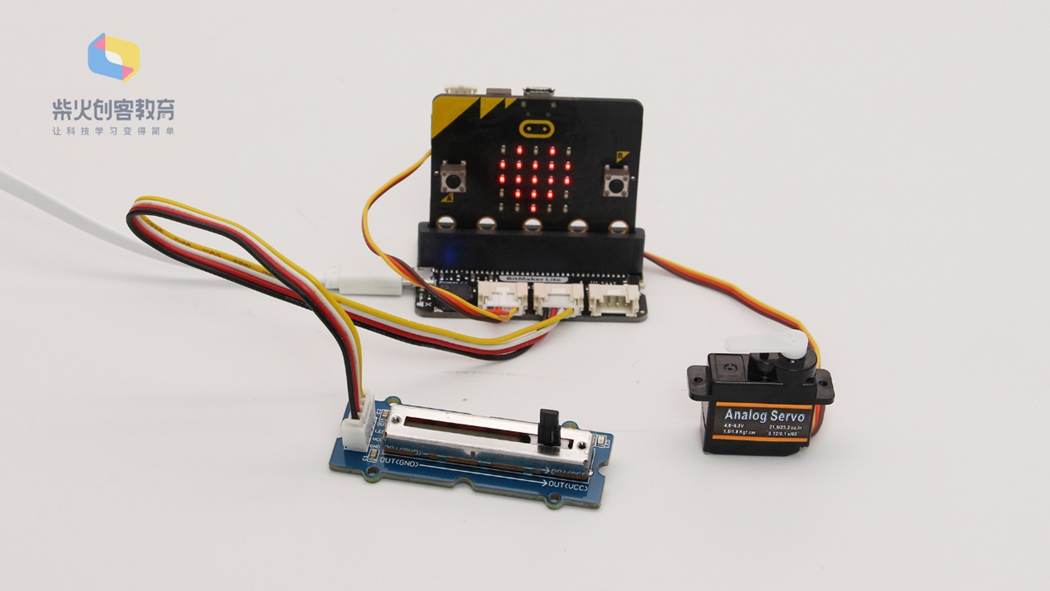
4.2 Write a Program
First, add a forever block. Connect an IF-THEN-ELSE statement inside. Follow this program logic and code: if the P2 connection port produces a value less than 500, the servo will rotate at 90 degrees and pause for 0.1 seconds; otherwise, the servo will rotate at 180 degrees and pause for 0.1 seconds.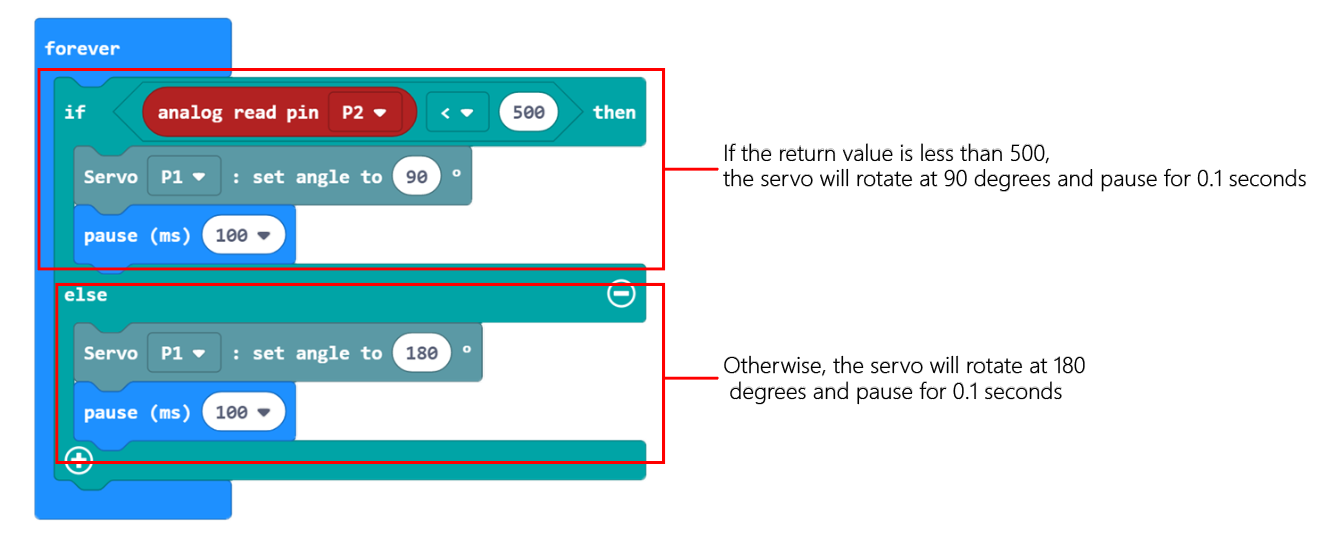
4.3 Connect a Device
Connect the slide potentiometer to the P2 connection port , and servo to P1 on the BitMaker Lite. Slide the micro:bit into BitMaker Lite and be careful not to reverse it. Then use a USB cable to connect the micro:bit and your PC together. Check if the LED indicator on the micro:bit lights up. If not, the USB cable may be connected mistakenly.
4.4 Download a Program
You have been introduced how to download a program in the previous tutorials, which can be simplified into steps as: rename a program, click the “Download” button and send it to the micro:bit.
4.5 Run a Program
Turn on the switch on the BitMaker Lite and see if the program can run normally.
III Course Materials
You can see related course materials about the BitStarter Kit on our online learning platform Make2Learn via this address: https://make2learn.tinkergen.com/
IV Attachments
Attachment: BitStarter Kit Tutorial Source Code

若有收获,就点个赞吧
0 人点赞
