pytest优点
1.简单灵活,像写Python代码一样写测试⽤例;
2.为测试⽅方法输⼊入不不同参数化;
3.自动重试失败的测试⽤用例例;
4.支持allure2测试报告;
5.具有很多第三⽅方插件 (http://plugincompat.herokuapp.com/),并且可以⾃自定义扩展;
pytest规范
1.测试文件以 test 开头(以 _test 结尾也可以)
2.测试类名以 Test 开头驼峰式(TestDemo),并且不能带有 __init 方法
3.测试函数以 test_ 开头
生成测试报告
方法一:在本地生成
# 1.生成xml数据pytest --alluredir=./log/report/xml# 2.解析xml为html文件allure generate --clean-alluredir ./log/report/xml --output ./log/report/html# 3.在浏览器中打开html文件# 一定要在pycharm中,右键选择open in browser打开,直接在文件所在目录中打开数据无法显示
方法二:在线生成
# 在测试执行期间收集结果方法一:在终端执行pytest -s --alluredir=./result/方法二:在py文件的主方法添加参数if __name__ == '__main__':pytest.main(['--alluredir', './result', 'test_severity.py'])# 测试完成后查看实际报告, 在线看报告。allure serve ./result/
pytest特性
1.assume, 有多个assert时,其中一个失败,后面不受影响会继续运行
import pytestdef test_multiple_assert():# assert 1 == 2 # 有多个assert时,其中一个失败,后面的则不会执行# assert 2 == 4# assert 3 == 4pytest.assume(1 == 2) # 使用assume,其中一个失败,其他也会执行pytest.assume(2 == 2)pytest.assume(3 == 4)
2.order,指定用例的运行顺序
'''使用场景:修改账号信息,需要依赖前面创建好的信息,需指明运行的先后顺序'''import pytest@pytest.mark.run(order=2)def test_add2():assert value == 10@pytest.mark.run(order=1)def test_add1():global valuevalue = 10assert value == 10
3.suger,显示用例执行的进度条 ⚠️该组建生效,必须在命令行运行py文件(pytest xx.py) 如图所示

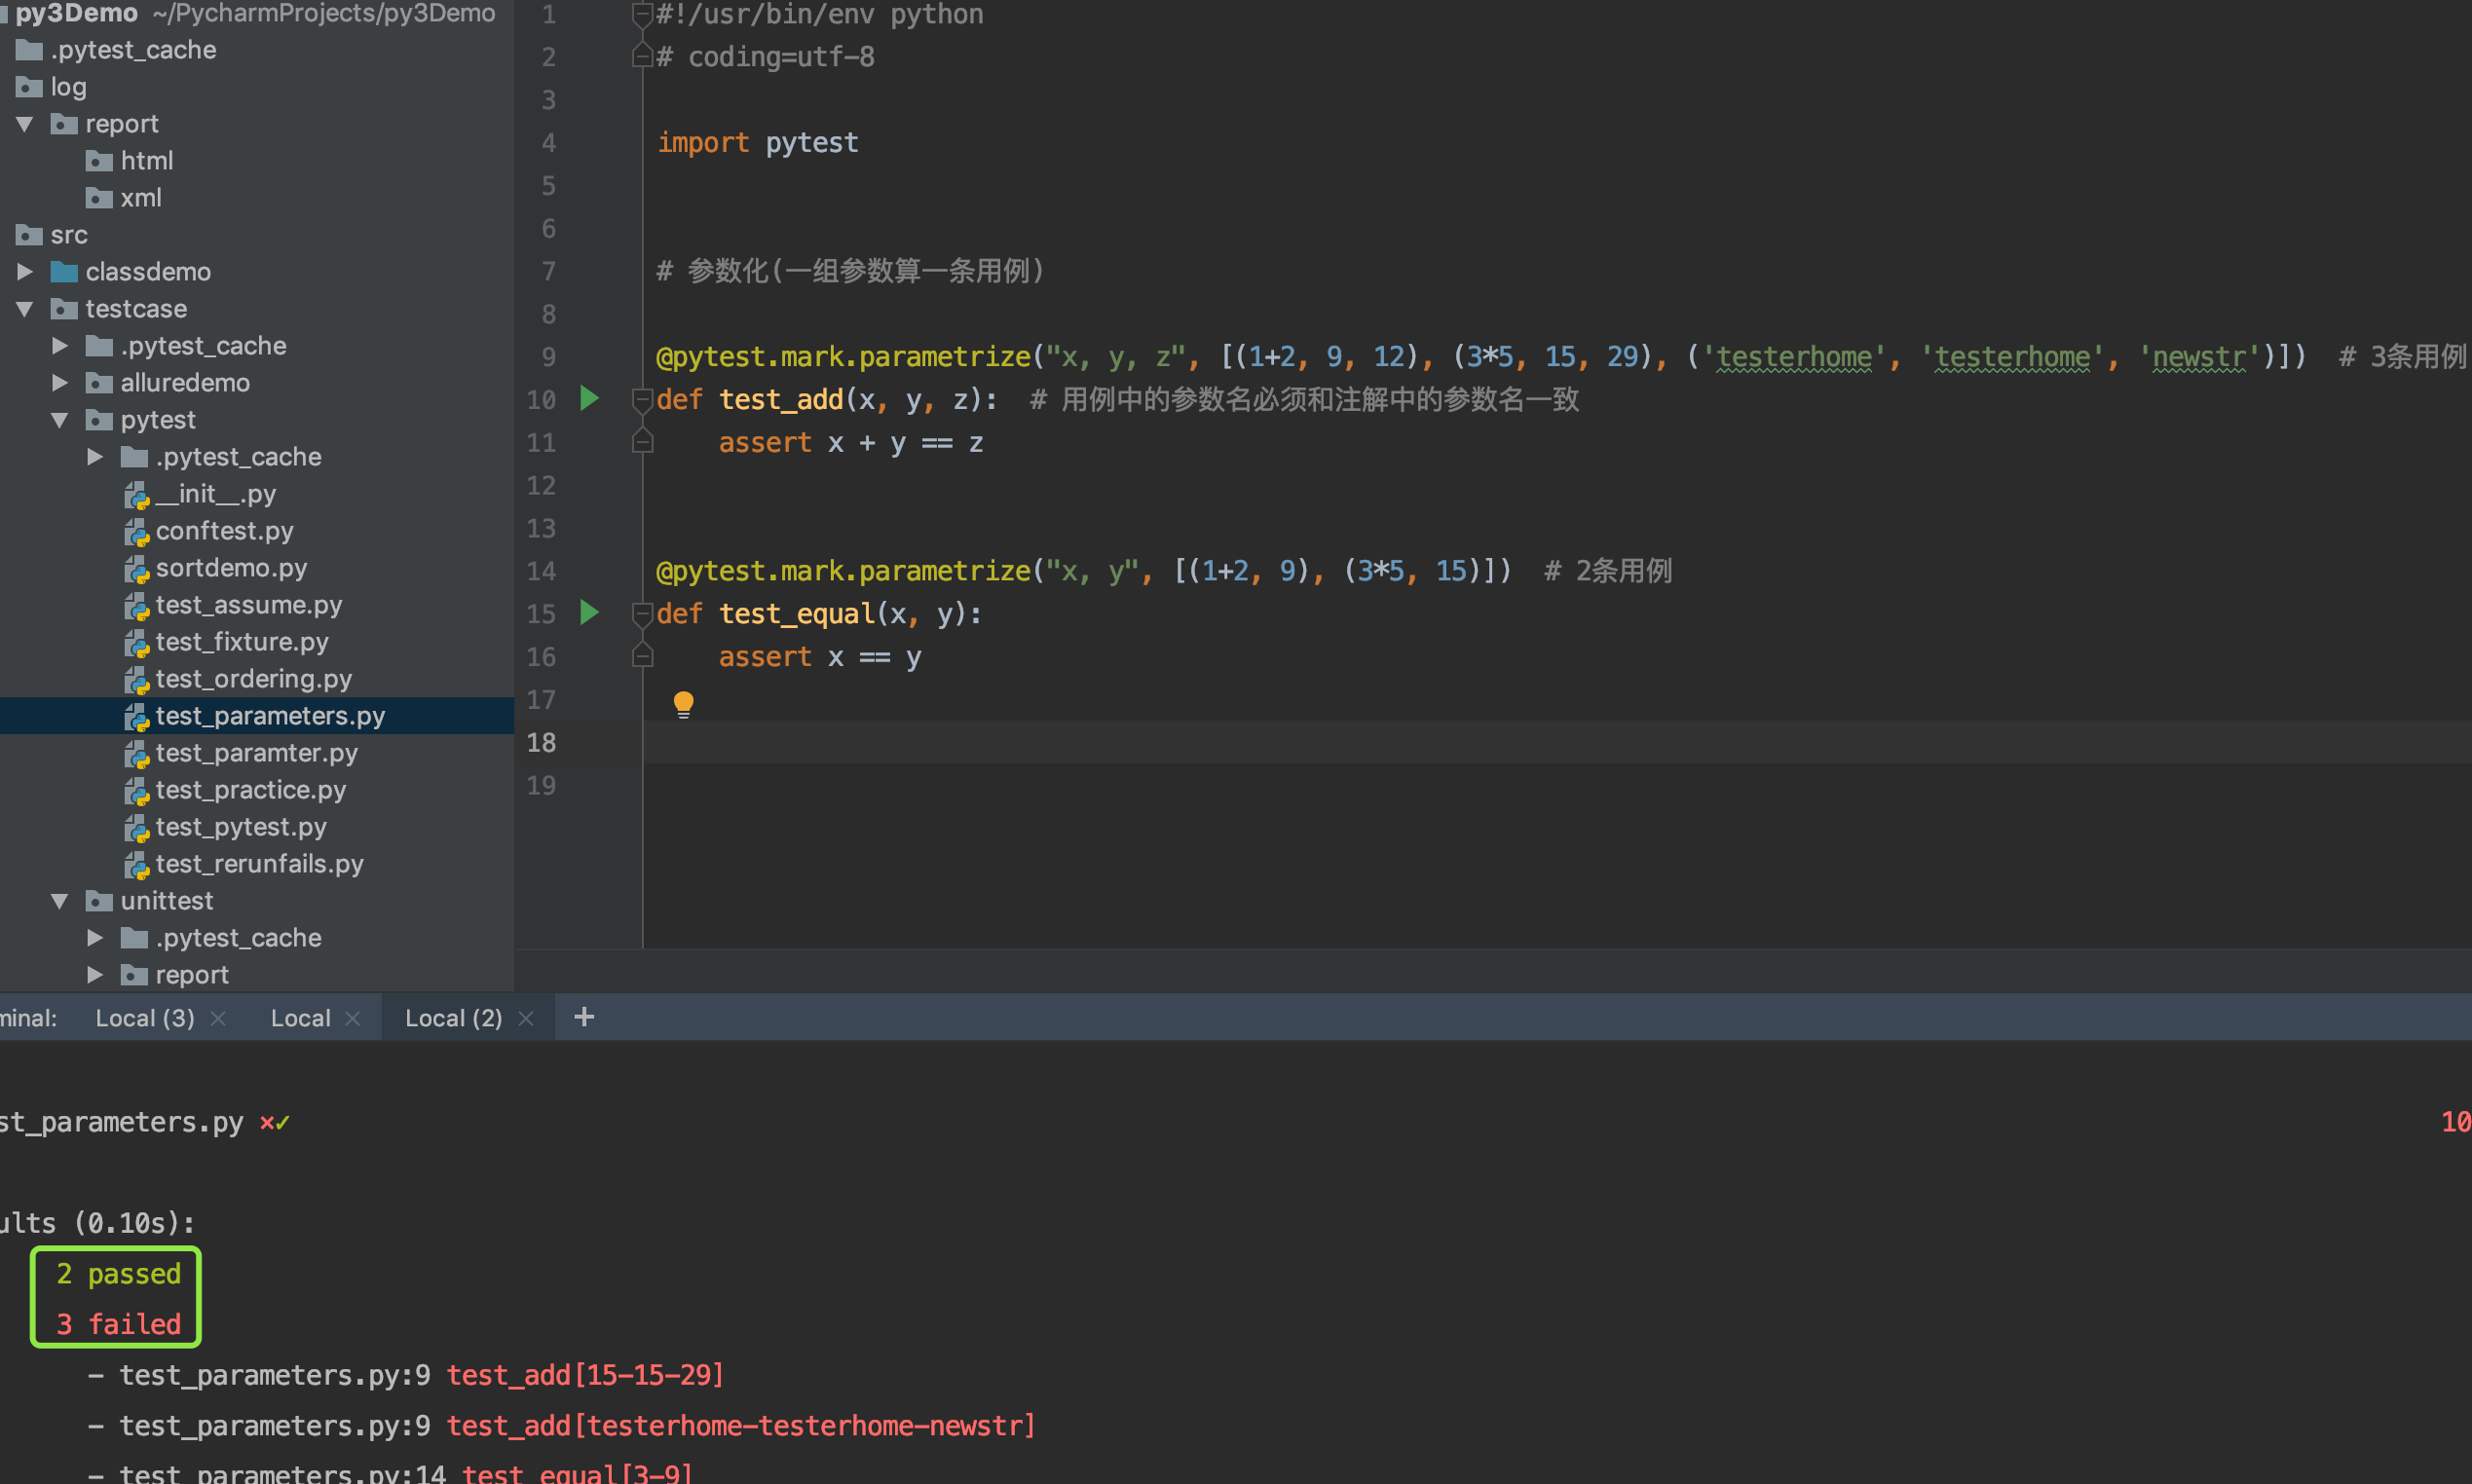
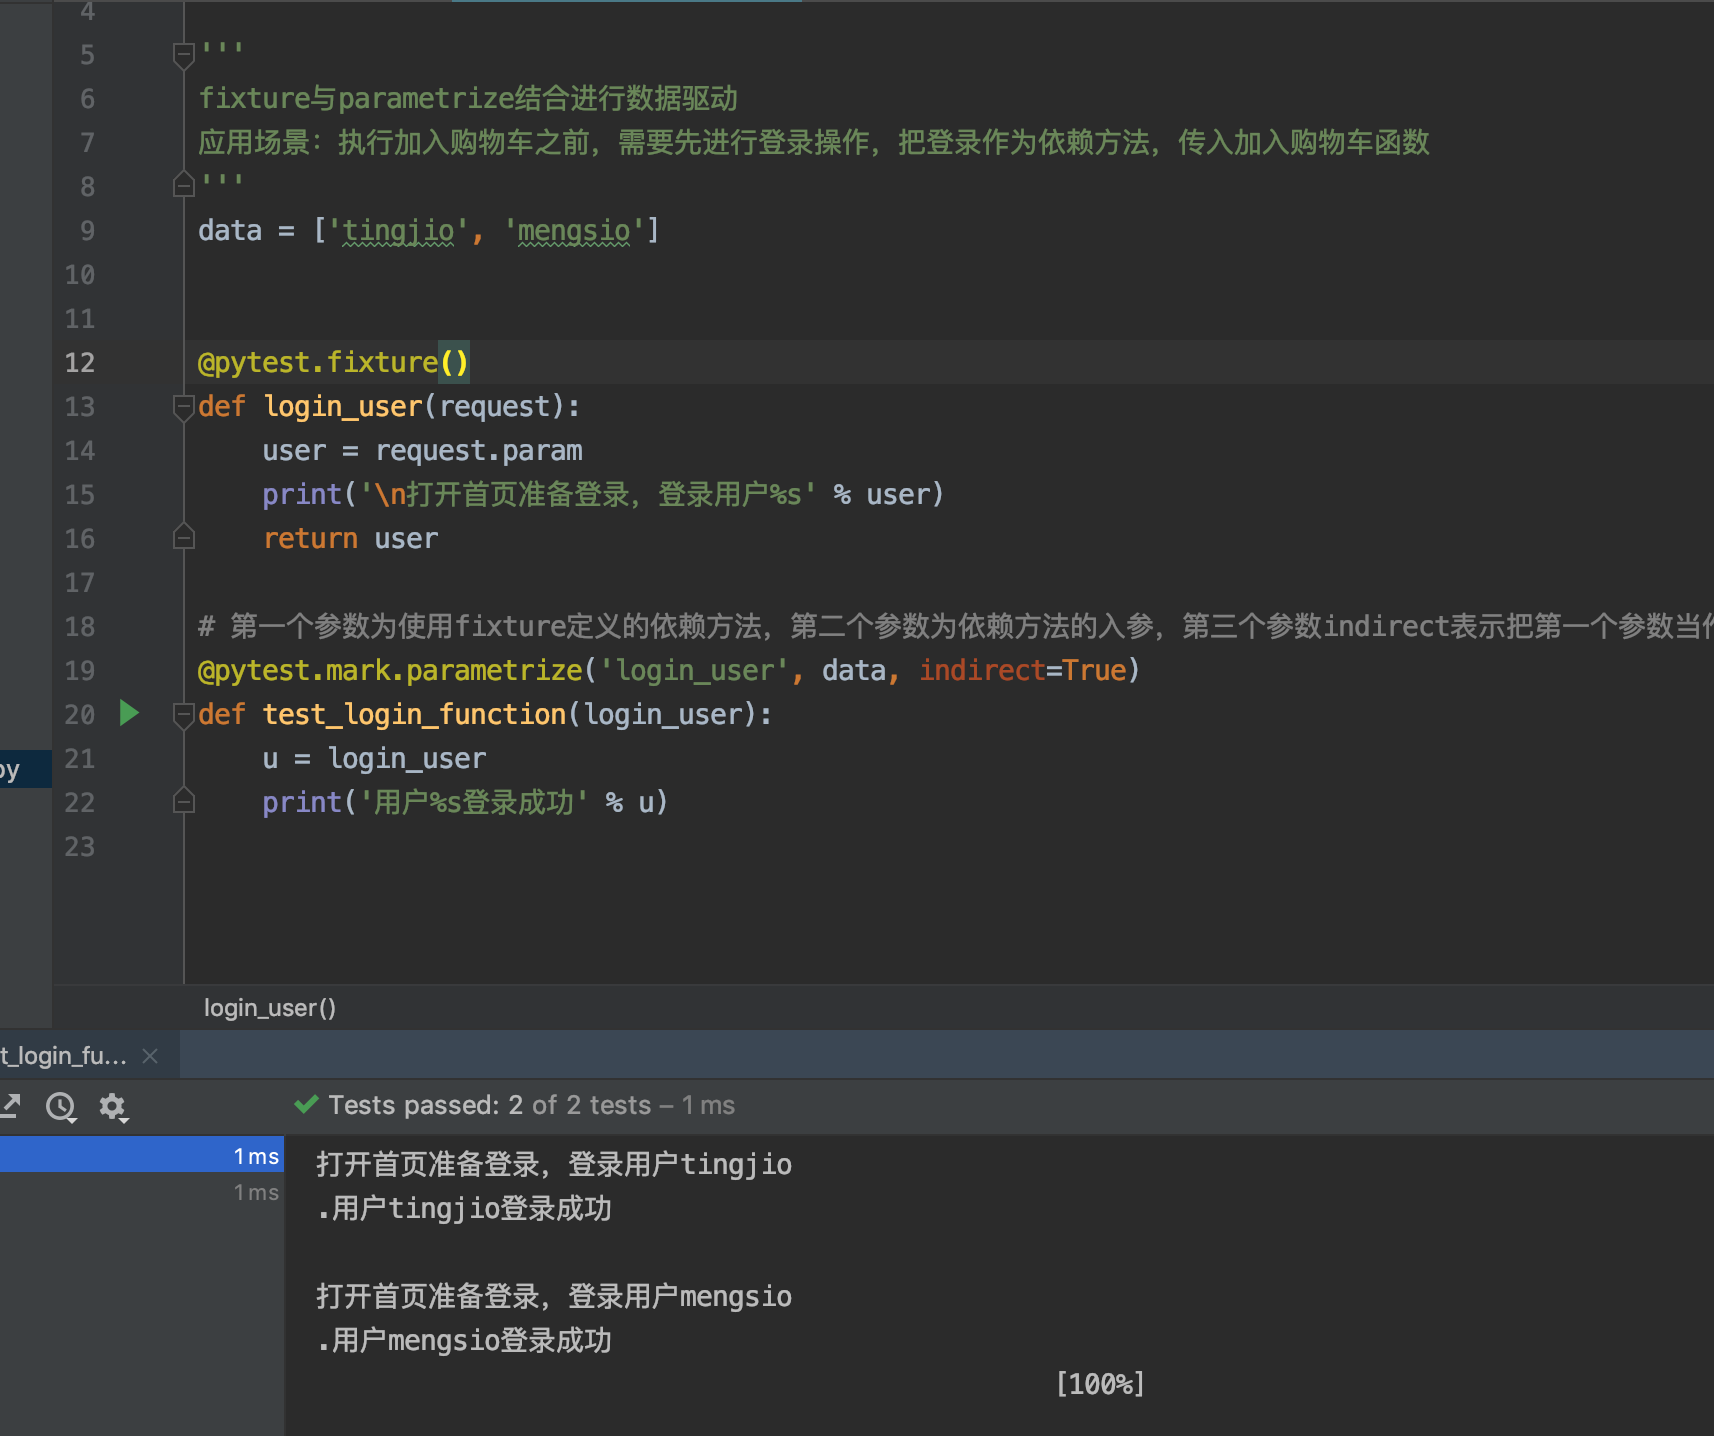
4.parameter,参数化
5.运行失败重试(在终端运行pytest —reruns 4 xx.py)
import random'''运行失败重试在终端使用参数--reruns指定重试的次数(本用例运行:pytest --reruns 4 test_rerunfails.py)'''def add(x, y):return x+ydef test_add():num = random.randint(3, 10)print('the random value is:', str(num))assert add(1, 3) == num

若有收获,就点个赞吧
0 人点赞
