前言:
在开始本文之前,我想跟大家澄清两个概念,一个是测试框架一个是测试工具。很多人容易把他们搞混了,测试框架是诸如Unittest、Pytest、TestNG这类,而测试工具指的则是Selenium、Appium、Jmeter这类。
测试框架的作用是,帮助我们管理测试用例、执行测试用例、参数化、断言、生成测试报告等基础性工作,让我们将精力用在测试用例的编写上。好的测试框架应该具有很高的扩展性,支持二次开发,并能够支持多种类型的自动化测试。
测试工具的作用是为了完成某一类型的测试,比如Selenium用于对WEB UI进行自动化测试,Appium用来对APP进行自动化测试,Jmeter可以用来进行接口自动化测试和性能测试。
6.1 Pytest 的核心优势
Pytest是三方团体开发的基于unittest开发的另一款更高级更好用的单元测试框架, 它会测试工作变的十分的高效。是目前软件自动化测试最流行的测试框架之一目前支撑最新版本的官方介绍文档: [https://docs.pytest.org/en/6.2.x/contents.html](https://docs.pytest.org/en/6.2.x/contents.html) 支撑PDF格式下载<br /> <br />Pytest使构建简单且可扩展的测试变得容易。测试具有表达性和可读性,不需要样板代码。在几分钟内开始对应用程序或库进行小型单元测试或复杂功能测试
框架维护者: 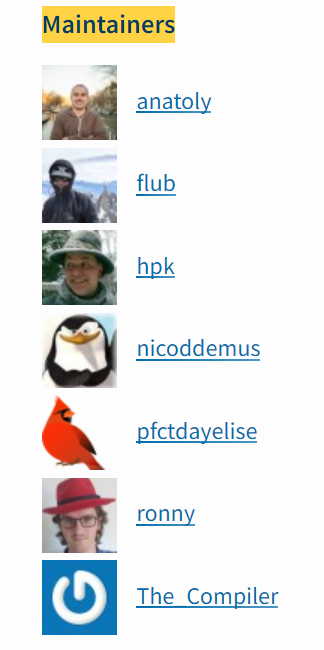
向这些大师致敬!
pytest 的官方网站介绍,它具有如下特点和优势:
  1. 非常容易上手,入门简单,文档丰富,文档中有很多实例可以参考
  1. 能够支持简单的单元测试和复杂的功能测试
  1. 支持参数化
  1. 执行测试过程中可以将某些测试跳过(skip),或者对某些预期失败的case标记成失败
  1. 支持重复执行(rerun)失败的 case
  1. 支持运行由 nose, unittest 编写的测试 case
  1. 可生成 html 报告
  1. 方便的和持续集成工具 jenkins 集成
  1. 可支持执行部分用例
  1. 具有很多第三方插件,并且可以自定义扩展
6.2 Pytest 的安装
Pip 库: [https://pypi.org/project/pytest/](https://pypi.org/project/pytest/)<br /> <br /> pytest 需要python 3.7 版本以上<br /> <br /> 安装命令:
** pip install -U pytest (-u 是升级 安装, 如果是新安装 也可以不带这个参数)**<br /> <br /> 查看是否安装成功:
** pip show pytest**<br />** **<br /> 可以发现当前最新版本是v6.25<br />
6.3 Pytest 快速入门
6.3.1 Pytest用例设计收集原则
     用Pytest写用例时候,一定要按照下面的规则去写,否则不符合规则的测试用例是<br />     不会执行的

  - **文件名以 test_*.py 文件和*_test.py**
  - 以  test_ 开头的函数
  - **以  Test 开头的类,不能包含 __init__ 方法**
  - 以  test_ 开头的类里面的方法
  - **所有的包 package 必须要有__init__.py 文件**

       <br />             所以对于以函数形式存在的一个一个unittest 用例可以用pytest 直接运行, 对于类和模块<br />      则需要按照命名规则改一下名字, Pytest 也支持 unittest 的断言模式<br />
6.3.2 Pytest 命令行执行测试用例规则
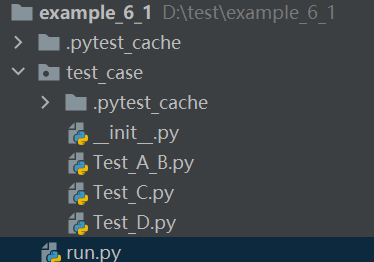
<br /> ** 例子 6-1: **
**文件目录:** <br /> 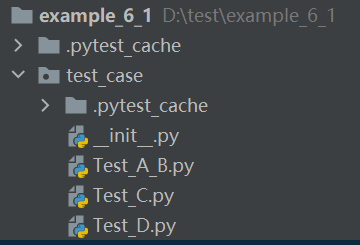<br /> <br /> 其中Test_A_B, Test_C, Test_D 模块都是Unittest 例子4-2 中的测试用例, 其命名符合pytest<br /> 规则,因此可以直接拿来使用<br /> <br /> 1. 某个目录下所有的用例
执行命令:** pytest D:\test\example_6_1\test_case **<br /> <br /> 执行结果:<br /> 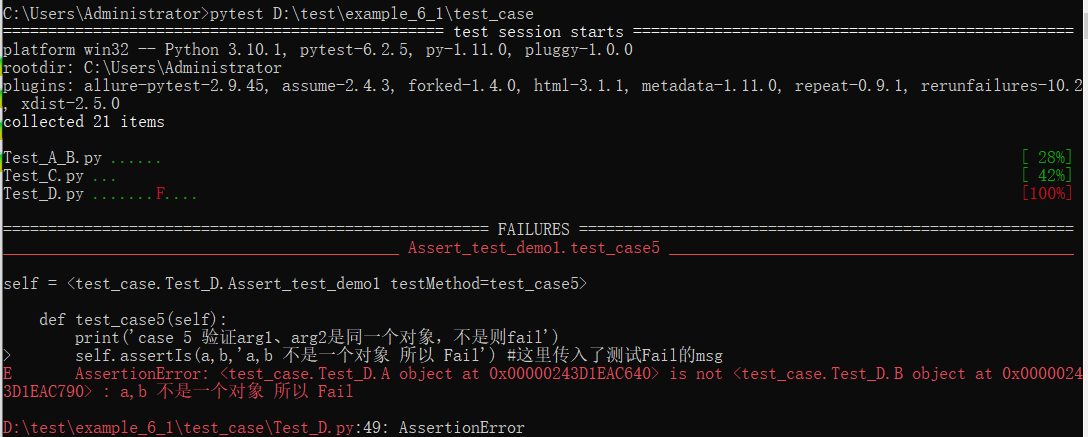
2、执行某一个 py 文件下用例
执行命令:** pytest D:\test\example_6_1\test_case \Test_A_B.py**<br /> <br /> 执行结果:<br /> <br /> 执行命令:** pytest -v D:\test\example_6_1\test_case \Test_A_B.py**<br /> 加个参数v 可以在控制台显示详细的测试结果<br /> 执行结果:<br /><br /> 后面的执行命令都加上v啦
3、运行Test_A_B.py 模块里面的某个函数,或者某个类,某个类里面的方法<br /> <br /> ** 通过:: 域操作符实现**
**某个函数:**<br /> 执行命令:pytest -v D:\test\example_6_1\test_case\Test_A_B.py::test_fuction
某个类
执行命令:pytest -v D:\test\example_6_1\test_case\Test_A_B.py::Test_A
某个类中的某个方法
执行命令:pytest -v D:\test\example_6_1\test_case\Test_A_B.py::Test_A::test_caseA1
4、-m 标记表达式(后续讲解)
执行命令: 运行被标记的测试用例 pytest -m=’marked_case’
将运行用 @pytest.mark.marked_case装饰器修饰的所有测试,后面再展开讲标记哦
5、-q 简单打印,只打印测试用例的执行结果
执行命令: pytest -q D:\test\example_6_1\test_case
执行结果:<br />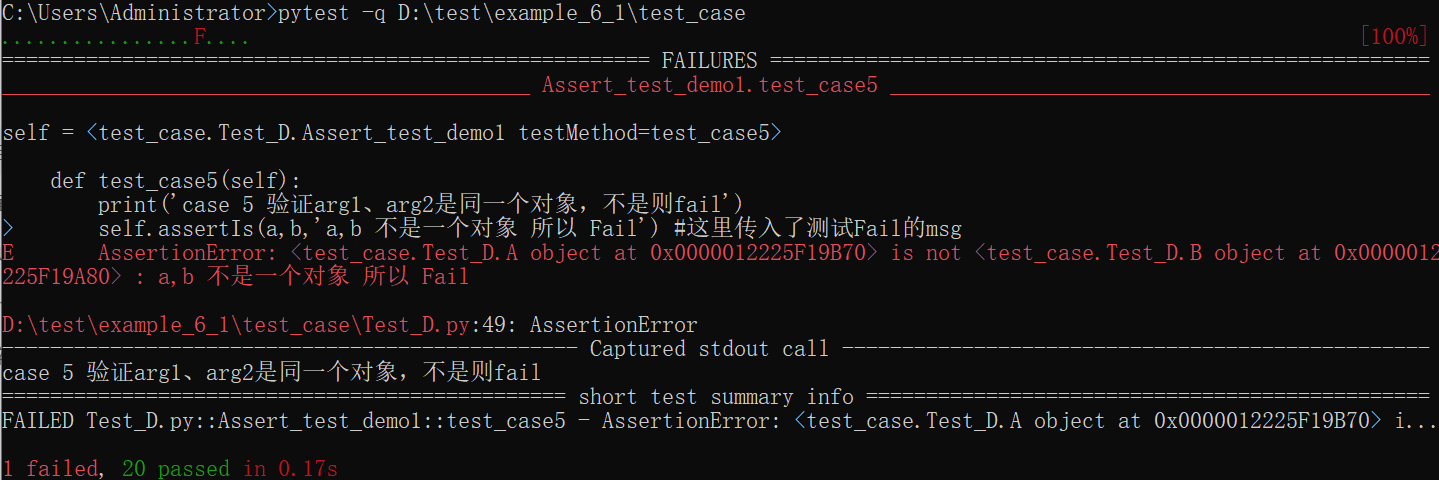
6、-s 详细打印
**执行命令**: pytest -s D:\test\example_6_1\test_case<br /> 执行结果: 相对于unittest 中verbosity=2 详细测试结果<br /> <br /> 7、-x 遇到Fail或错误时停止测试
**执行命令**: pytest D:\test\example_6_1\test_case -x<br /> 执行结果:<br /> 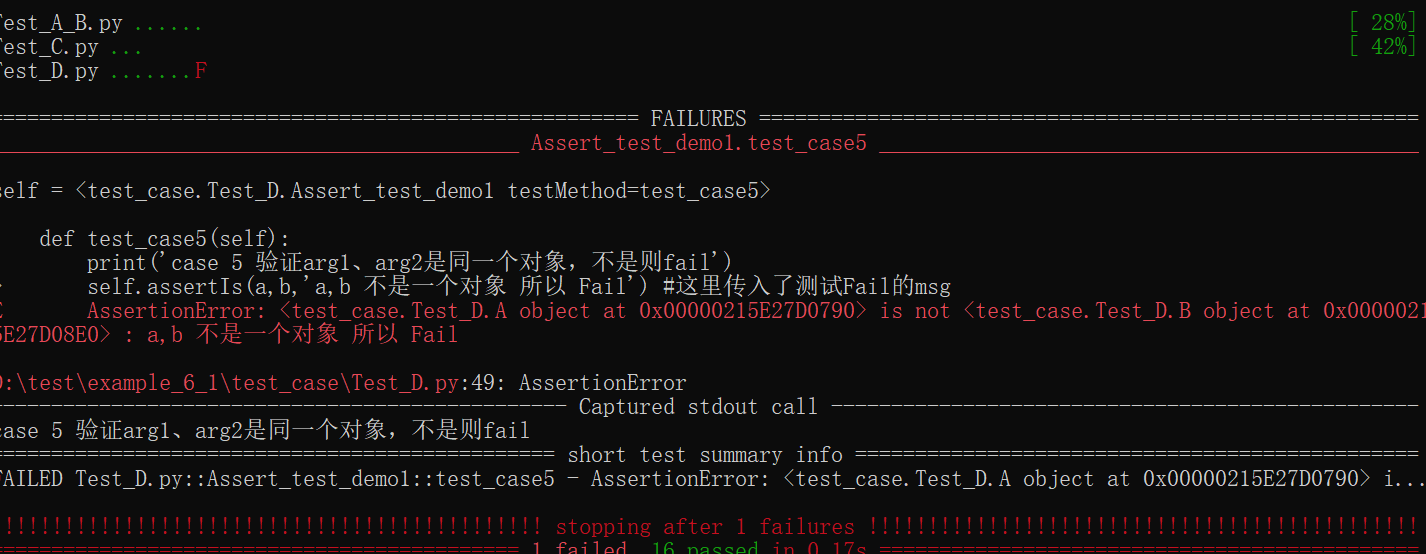<br /> 可以发现一旦出现测试用例fail就停止测试了
8、—maxfail=num,当用例错误个数达到指定数量时,停止测试
修改测试用例文件 Test_C 增加3个 fail 项目
**执行命令**:pytest -q D:\test\example_6_1\test_case --maxfail=3<br /> ** 执行结果:**<br /><br /> <br /> 9、-k 匹配用例名称<br /> <br /> 执行测试用例模块名称包含Test_A的所有用例<br /> **执行命令**: pytest -s -k Test_A D:\test\example_6_1\test_case<br /> ** 执行结果: **<br />
10、-k 根据用例名称排除某些用例
执行测试用例模块名称不包含Test_A的所有用例
执行命令: pytest -s -k “not Test_A “ D:\test\example_6_1\test_case
执行结果: 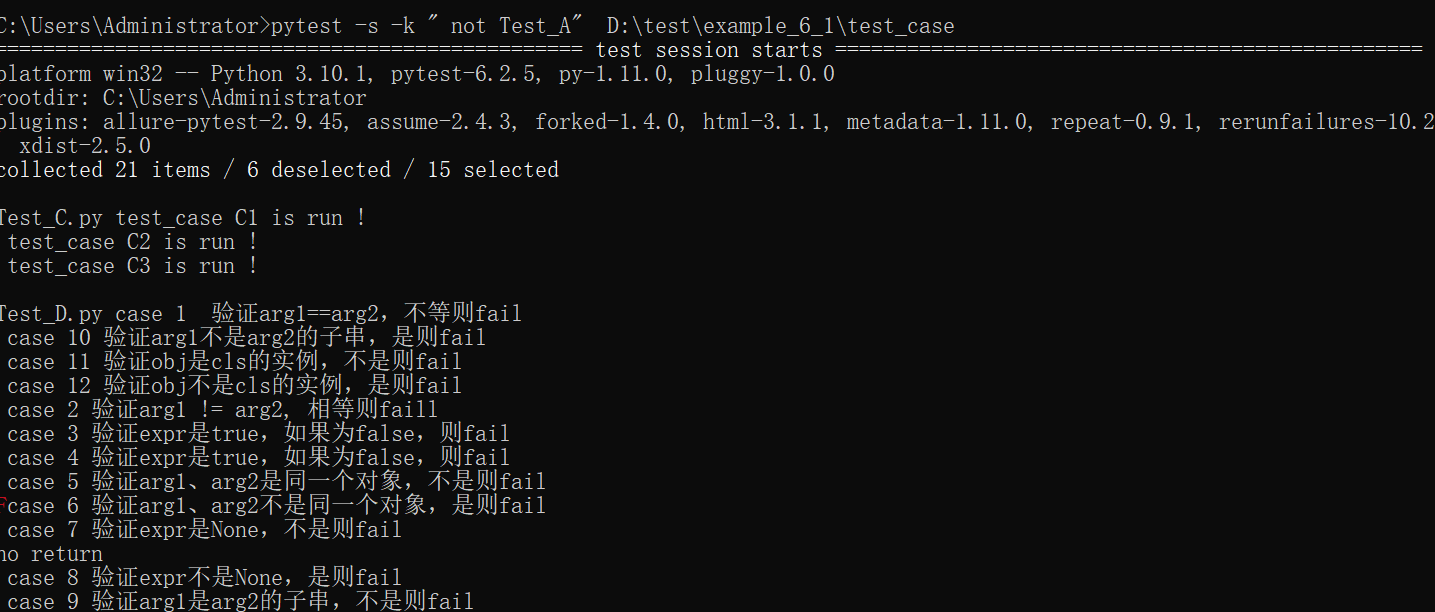
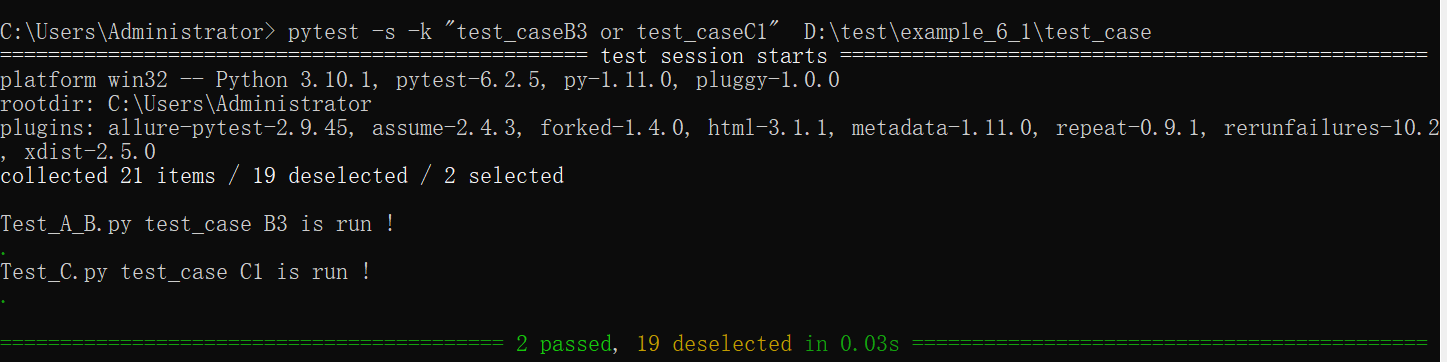
11、-k 同时匹配不同的用例名称
** 执行命令**: pytest -s -k "test_caseB3 or test_caseC1" D:\test\example_6_1\test_case<br /> **执行结果:**
6.3.4 Pycharm运行Pytest
平时写代码,咱们都在Pycharm写的,怎么可能一直用cmd来跑用例呢,现在我们就来看看在Pycharm中如何运行Pytest
- 首先,我们先要去settings里面设置单元测试框架为Pytest
- 如果是nosetests的话,右键运行是以python脚本运行的哦
- 如果设置了unittest则是以unittest框架去运行


注意:
一般情况下: 如果模块名字是以Test 开头,则默认配置pytest 执行该模块
6.3.5 通过pytest.mian()执行测试用例
在实际项目中我们一般会安排一个主函数模块,作为自动化测试的入口。
模块文件所在目录如下:
run.py 代码
import pytest

if __name__ == '__main__':

    pytest.main()
运
行的时候,使用 python 运行 run.py 来执行测试用例。
这样就能在 pycharm 里面右键运行,不带参数默认运行当前目录及子目录的所有文件夹的测试用例。
执行结果:
C:\python310\python.exe D:/test/example_6_1/run.py
============================= test session starts =============================
platform win32 — Python 3.10.1, pytest-6.2.5, py-1.11.0, pluggy-1.0.0
rootdir: D:\test\example_6_1
plugins: allure-pytest-2.9.45, assume-2.4.3, forked-1.4.0, html-3.1.1, metadata-1.11.0, repeat-0.9.1, rerunfailures-10.2, xdist-2.5.0
collected 21 items
test_case\Test_A_B.py …… [ 28%]
test_case\Test_C.py … [ 42%]
test_case\Test_D.py …….F…. [100%]
================================== FAILURES ===================================
__ Asserttestdemo1.testcase5 __
self =
def test_case5(self):<br /> print('case 5 验证arg1、arg2是同一个对象,不是则fail')<br />> self.assertIs(a,b,'a,b 不是一个对象 所以 Fail') #这里传入了测试Fail的msg<br />E AssertionError: <test_case.Test_D.A object at 0x0000027CE3C35000> is not <test_case.Test_D.B object at 0x0000027CE3C353F0> : a,b 不是一个对象 所以 Fail
test_case\Test_D.py:49: AssertionError
—————————————— Captured stdout call ——————————————-
case 5 验证arg1、arg2是同一个对象,不是则fail
=========================== short test summary info ===========================
FAILED test_case/Test_D.py::Assert_test_demo1::test_case5 - AssertionError: <…
======================== 1 failed, 20 passed in 0.16s =========================
pytest.mian()和 unittest.mian() 功能相近,提供了一个命令行参数的接口。
先看看 pytest.main() 的源码,main 函数 的内容:
- args 传一个list对象,list 里面是多个命令行的参数。【包括运行的测试用例(例如:test_a.py);运行测试用例的命令行参数(例如:-vs)】
main() 源码
def main(args=None, plugins=None):
    """ return exit code, after performing an in-process test run.

    :arg args: list of command line arguments.

    :arg plugins: list of plugin objects to be auto-registered during
                  initialization.
    """
    from _pytest.main import EXIT_USAGEERROR

    try:
        try:
            config = _prepareconfig(args, plugins)
        except ConftestImportFailure as e:
            exc_info = ExceptionInfo(e.excinfo)
            tw = py.io.TerminalWriter(sys.stderr)
            tw.line(
                "ImportError while loading conftest '{e.path}'.".format(e=e), red=True
            )
            exc_info.traceback = exc_info.traceback.filter(filter_traceback)
            exc_repr = (
                exc_info.getrepr(style="short", chain=False)
                if exc_info.traceback
                else exc_info.exconly()
            )
            formatted_tb = safe_str(exc_repr)
            for line in formatted_tb.splitlines():
                tw.line(line.rstrip(), red=True)
            return 4
        else:
            try:
                return config.hook.pytest_cmdline_main(config=config)
            finally:
                config._ensure_unconfigure()
    except UsageError as e:
        tw = py.io.TerminalWriter(sys.stderr)
        for msg in e.args:
            tw.line("ERROR: {}\n".format(msg), red=True)
        return EXIT_USAGEERROR
复制代码
所以这个和上面提到通过命令执行测试用例的参数是对应的:
main() 函数如果不带任何参数,那么执行的效果跟我们在 cmd 直接运行 pytest 命令一样,默认运行的是当前目录及子目录的所有文件夹的测试用例
例如:
1、在命令行运行带上 -s 参数: pytest -s
那么在 pytest.main() 里面等价于:
import pytest # 带上-s参数 pytest.main([“-s”])
2、在命令行运行带上多个参数时: pytest -s -x
那么在 pytest.main() 里面等价于:
import pytest # 带上-s -x参数 pytest.main([“-s”, “-x”])
3、指定运行 cases/module1 文件夹下的全部用例, 在命令行运行时, 先 cd 到项目的根目录: pytest cases/module1
那么在 pytest.main() 里面等价于:
import pytest # 运行指定文件夹目录 pytest.main([“cases/module1”])
4、运行指定的 cases/module1/test_x1.py 下的全部用例,在命令行运行时, 先cd到项目的根目录: pytest cases/module1/test_x1.py
那么在 pytest.main() 里面等价于:
import pytest # 运行指定py文件 pytest.main([“cases/module1/test_x1.py”])
5、运行指定的 cases/module1/test_x1.py 下的某一个用例 test_x, 在命令行运行时, 先cd到项目的根目录: pytest cases/module1/test_x1.py::test_x
那么在 pytest.main() 里面等价于:
import pytest # 运行指定py文件下的test_x pytest.main([“cases/module1/test_x1.py::test_x”])

若有收获,就点个赞吧
0 人点赞
