建module(maven)
创建module的时候选择maven,不要使用springboot
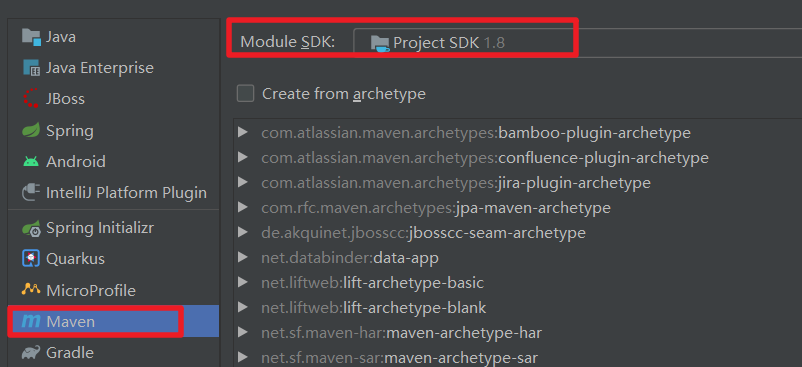
工程名字叫:cloud-consumer-order80
改pom
<?xml version="1.0" encoding="UTF-8"?><project xmlns="http://maven.apache.org/POM/4.0.0"xmlns:xsi="http://www.w3.org/2001/XMLSchema-instance"xsi:schemaLocation="http://maven.apache.org/POM/4.0.0 http://maven.apache.org/xsd/maven-4.0.0.xsd"><parent><artifactId>cloud2020</artifactId><groupId>com.sgy.cloud2020</groupId><version>1.0-SNAPSHOT</version></parent><modelVersion>4.0.0</modelVersion><artifactId>cloud-consumer-order80</artifactId><dependencies><dependency><groupId>org.springframework.boot</groupId><artifactId>spring-boot-starter-web</artifactId></dependency><dependency><groupId>org.springframework.boot</groupId><artifactId>spring-boot-devtools</artifactId><scope>runtime</scope><optional>true</optional> <!-- 表示依赖不会传递 --></dependency><dependency><groupId>org.springframework.boot</groupId><artifactId>spring-boot-starter-test</artifactId></dependency><dependency><groupId>org.projectlombok</groupId><artifactId>lombok</artifactId><scope>provided</scope></dependency></dependencies></project>
改YML
创建: application.yml
server:
  port: 80
添加启动类
package com.sgy.springcloud;

import org.springframework.boot.SpringApplication;
import org.springframework.boot.autoconfigure.SpringBootApplication;

/**
 * Created by AaronShen on 2020/5/26
 */
@SpringBootApplication
public class OrderMain80 {
    public static void main(String[] args) {
        SpringApplication.run(OrderMain80.class,args);
    }
}
引入实体类
创建Payment
/**
 * Created by AaronShen on 2020/5/26
 */
@Data
@AllArgsConstructor
@NoArgsConstructor
public class Payment extends BaseEntities{
    /**
     * 主键
     */
    private String id;

    private String serial;
}
统一结果类,自行引入吧,在005-(cloud)中已经详细介绍了
创建controller
引入RestTemplate
springboot开发的http访问的客户端
创建ApplicationContextConfig,然后就可以直接注入使用了
package com.sgy.springcloud.config;

import org.springframework.context.annotation.Bean;
import org.springframework.context.annotation.Configuration;
import org.springframework.web.client.RestTemplate;

/**
 * Created by AaronShen on 2020/5/26
 */
@Configuration
public class ApplicationContextConfig {
    @Bean
    public RestTemplate getRestTemplate() {
        return new RestTemplate();
    }
}
controller
package com.sgy.springcloud.controller;

import com.sgy.springcloud.entites.Payment;
import com.sgy.springcloud.entites.result.R;
import lombok.extern.slf4j.Slf4j;
import org.springframework.web.bind.annotation.GetMapping;
import org.springframework.web.bind.annotation.PathVariable;
import org.springframework.web.bind.annotation.RequestBody;
import org.springframework.web.bind.annotation.RestController;
import org.springframework.web.client.RestTemplate;

import javax.annotation.Resource;

/**
 * Created by AaronShen on 2020/5/26
 */
@Slf4j
@RestController
public class OrderController {
    private final static String PATMEMT_URL = "http://127.0.0.1:8090";
    @Resource
    RestTemplate restTemplate;

    @GetMapping("/consumer/payment/create")
    public R create(@RequestBody Payment payment) {
        return restTemplate.postForObject(PATMEMT_URL + "/payment/create",payment,R.class);
    }

    @GetMapping("/consumer/payment/find/{id}")
    public R find(@PathVariable(value = "id") String id) {
        return restTemplate.getForObject(PATMEMT_URL + "/payment/find/" + id,R.class);
    }
}
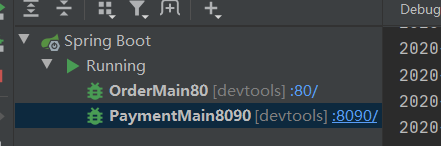
解决没有出现Services Tree
正常是出现如下
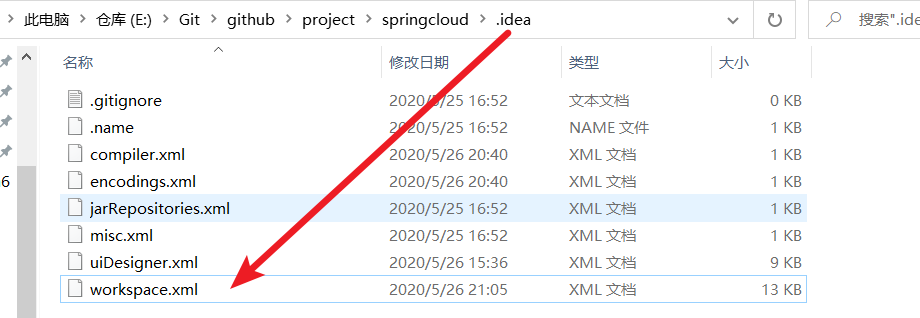
修改idea的workspace.xml的方式来快速打开Run Dasboard窗口
找到RunDashboard,添加如下
<option name="configurationTypes">
      <set>
        <option value="SpringBootApplicationConfigurationType" />
      </set>
    </option>
最后重启idea即可

若有收获,就点个赞吧
0 人点赞
