1)perf安装错误
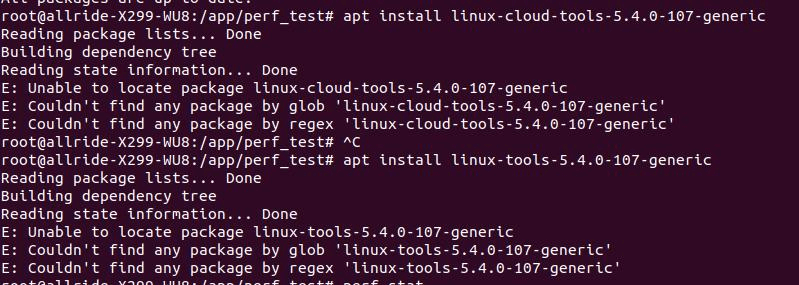 如图,安装时找不到对应的包,尤其是linux-tools-5.4.0-107-generic
解决方法:
在docker内换源(改为阿里源之后安装成功):
$ sudo vim /etc/apt/sources.listdeb http://mirrors.aliyun.com/ubuntu/ bionic main restricted universe multiversedeb http://mirrors.aliyun.com/ubuntu/ bionic-security main restricted universe multiversedeb http://mirrors.aliyun.com/ubuntu/ bionic-updates main restricted universe multiversedeb http://mirrors.aliyun.com/ubuntu/ bionic-proposed main restricted universe multiversedeb http://mirrors.aliyun.com/ubuntu/ bionic-backports main restricted universe multiversedeb-src http://mirrors.aliyun.com/ubuntu/ bionic main restricted universe multiversedeb-src http://mirrors.aliyun.com/ubuntu/ bionic-security main restricted universe multiversedeb-src http://mirrors.aliyun.com/ubuntu/ bionic-updates main restricted universe multiversedeb-src http://mirrors.aliyun.com/ubuntu/ bionic-proposed main restricted universe multiversedeb-src http://mirrors.aliyun.com/ubuntu/ bionic-backports main restricted universe multiverse
2)不同机器的perf.data读不出数据
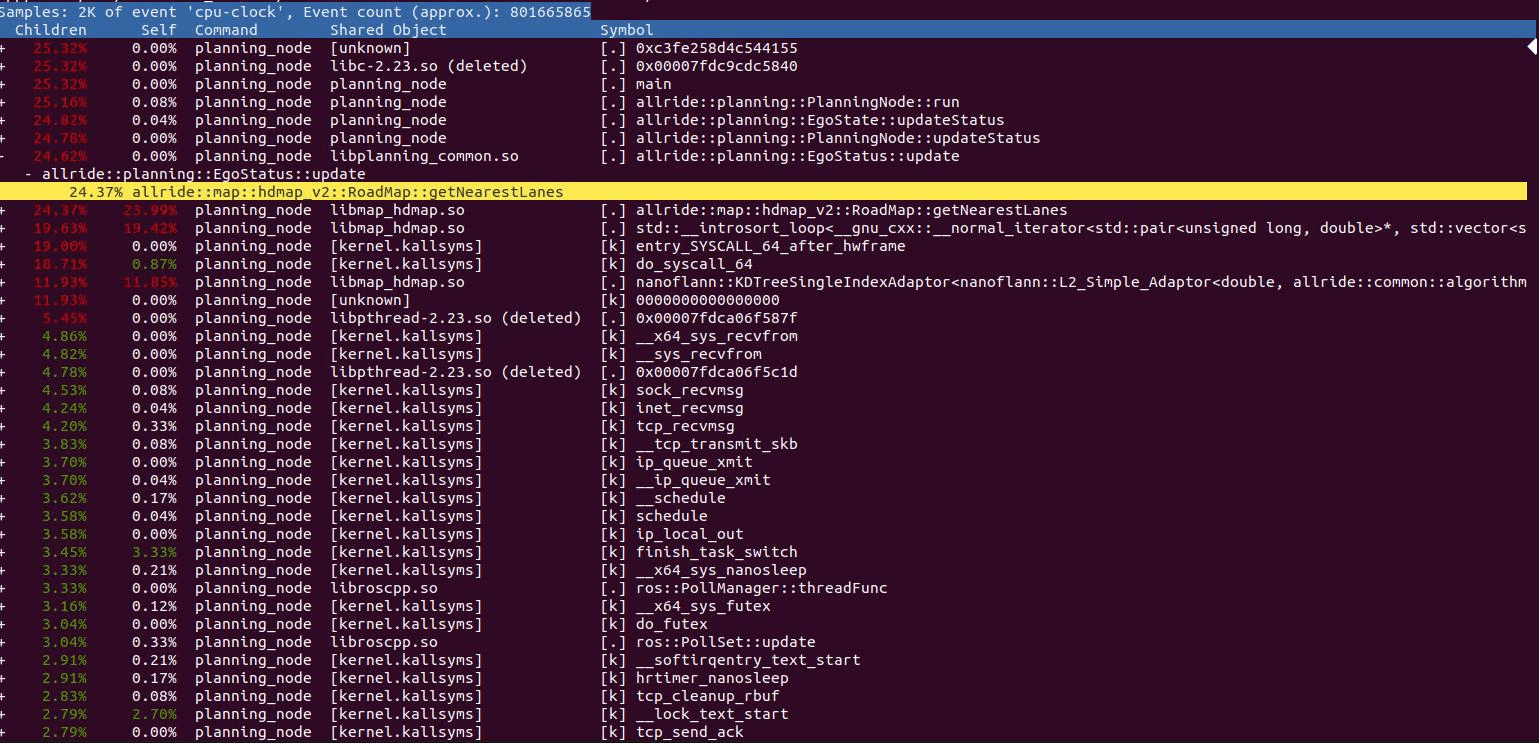
perf record后的perf.data数据只能在本机上report并进行函数栈追踪,如果本机下载服务器的perf.data,将无法追踪函数栈,结果会全部都是planning_node,没有分析价值。
解决方法:
过程:perf源码中有perf archive命令,用于将相关符号打包,方便在其它机器进行分析;但实际运用中报错perf archive is not a perf-command,可能是文档问题,故查看perf源码将perf-archive脚本从源码中提出,手动进行:
#!/bin/bash# SPDX-License-Identifier: GPL-2.0# perf archive# Arnaldo Carvalho de Melo <acme@redhat.com>PERF_DATA=perf.dataif [ $# -ne 0 ] ; thenPERF_DATA=$1fi## PERF_BUILDID_DIR environment variable set by perf# path to buildid directory, default to $HOME/.debug#if [ -z $PERF_BUILDID_DIR ]; thenPERF_BUILDID_DIR=~/.debug/else# append / to make substitutions workPERF_BUILDID_DIR=$PERF_BUILDID_DIR/fiBUILDIDS=$(mktemp /tmp/perf-archive-buildids.XXXXXX)NOBUILDID=0000000000000000000000000000000000000000perf buildid-list -i $PERF_DATA --with-hits | grep -v "^$NOBUILDID " > $BUILDIDSif [ ! -s $BUILDIDS ] ; thenecho "perf archive: no build-ids found"rm $BUILDIDS || trueexit 1fiMANIFEST=$(mktemp /tmp/perf-archive-manifest.XXXXXX)PERF_BUILDID_LINKDIR=$(readlink -f $PERF_BUILDID_DIR)/cut -d ' ' -f 1 $BUILDIDS | \while read build_id ; dolinkname=$PERF_BUILDID_DIR.build-id/${build_id:0:2}/${build_id:2}filename=$(readlink -f $linkname)echo ${linkname#$PERF_BUILDID_DIR} >> $MANIFESTecho ${filename#$PERF_BUILDID_LINKDIR} >> $MANIFESTdonetar cjf $PERF_DATA.tar.bz2 -C $PERF_BUILDID_DIR -T $MANIFESTrm $MANIFEST $BUILDIDS || trueecho -e "Now please run:\n"echo -e "$ tar xvf $PERF_DATA.tar.bz2 -C ~/.debug\n"echo "wherever you need to run 'perf report' on."exit 0
在测试机上运行:
$ ./perf-archive.sh -i perf.data
生成符号表二进制文件:perf.data.tar.bz2
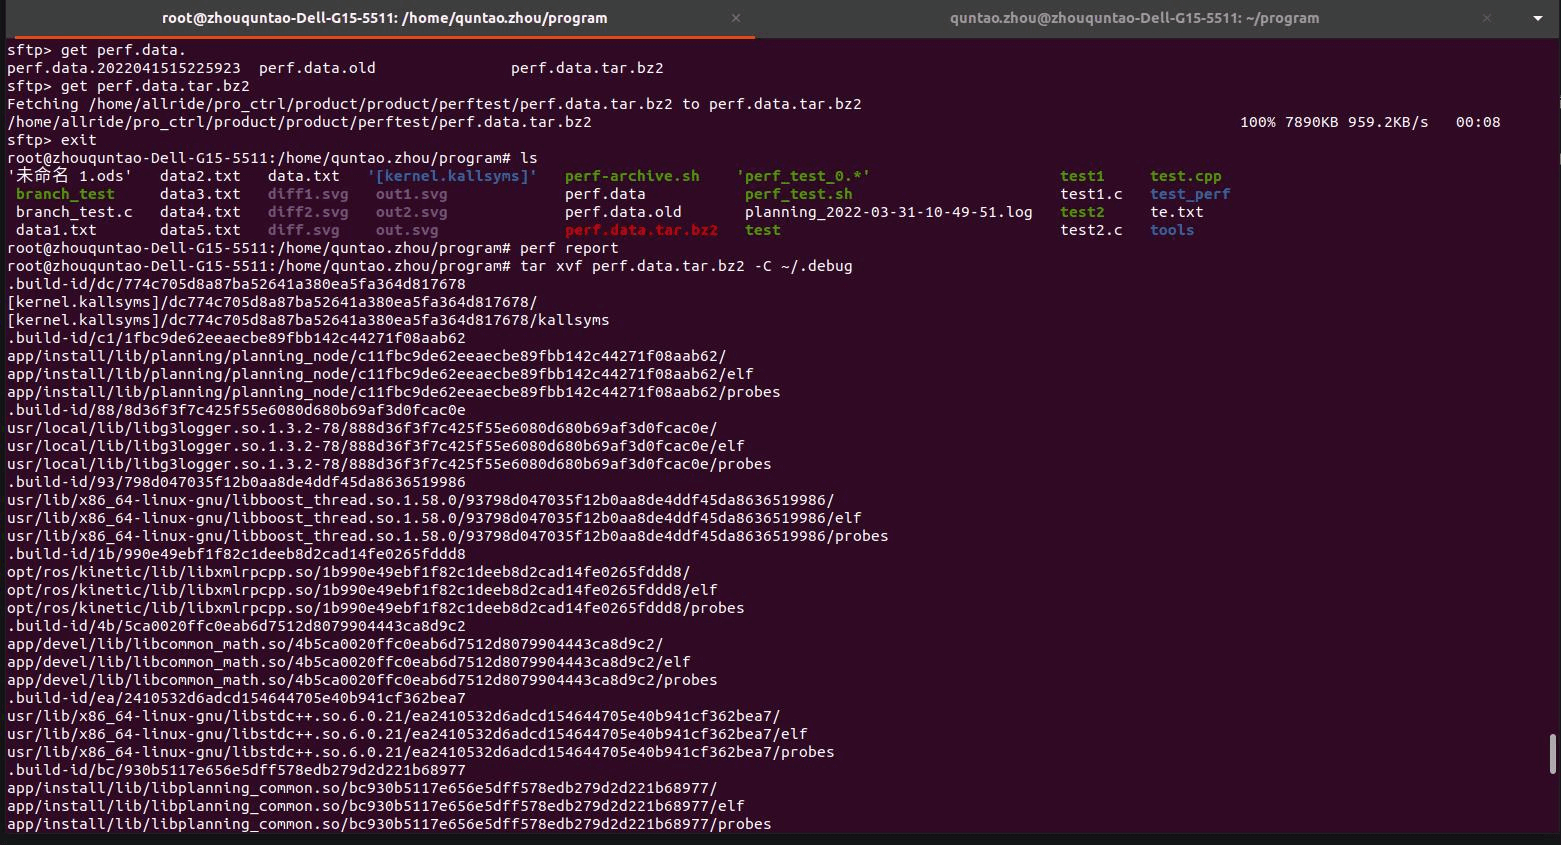
之后在任何机器上,只要复制perf.data和perf.data.tar.bz2就可以分析
运行命令:
$ tar xvf perf.data.tar.bz2 -C ~/.debug

若有收获,就点个赞吧
0 人点赞
