一、反向代理
实例一:
使用 nginx 反向代理,访问 www.123.com 直接跳转到 192.168.10.104:8080 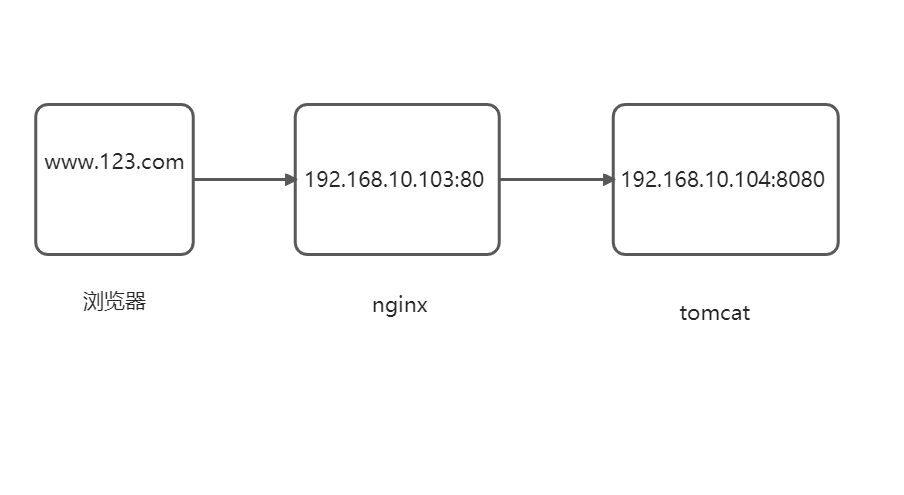
环境:
192.168.10.103:80 — nginx
192.168.10.104:8080 — tomcat
windows主机配置域名和IP映射关系:
C:\Windows\System32\drivers\etc hosts文件添加如下内容:
——————————————————————————————————-
192.168.10.103 www.123.com
——————————————————————————————————
浏览器访问测试映射关系:http://www.123.com:8080/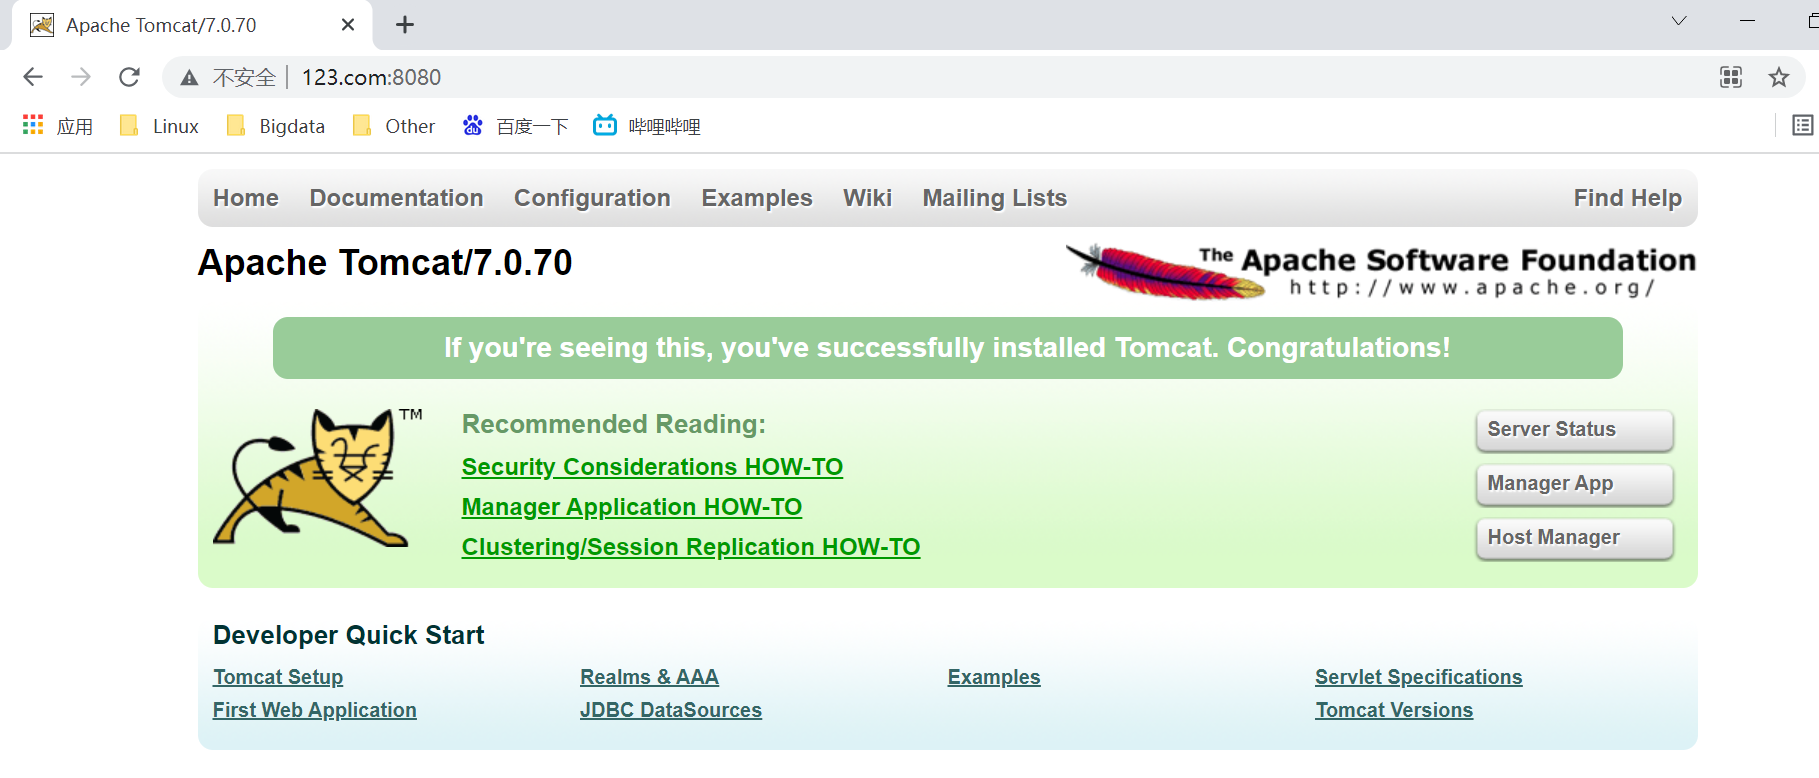
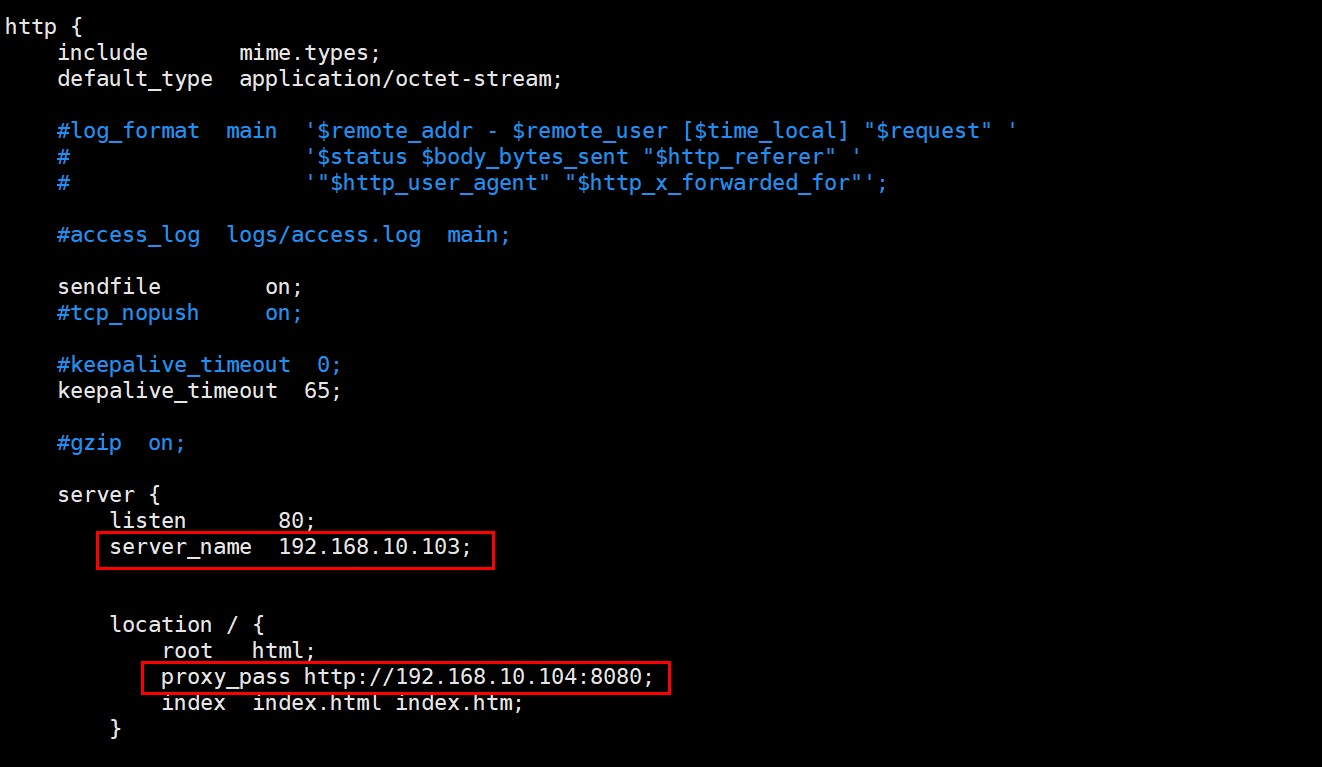
nginx配置文件修改:
[root@hadoop103 ~]# cd /usr/local/nginx/conf/
[root@hadoop103 conf]# vim nginx.conf
server {listen 80;server_name 192.168.10.103;location / {root html;proxy_pass http://192.168.10.104:8080;index index.html index.htm;}
[root@hadoop103 conf]# cd ../sbin/
[root@hadoop103 sbin]# ./nginx -s reload
浏览器测试代理效果:
http://www.123.com/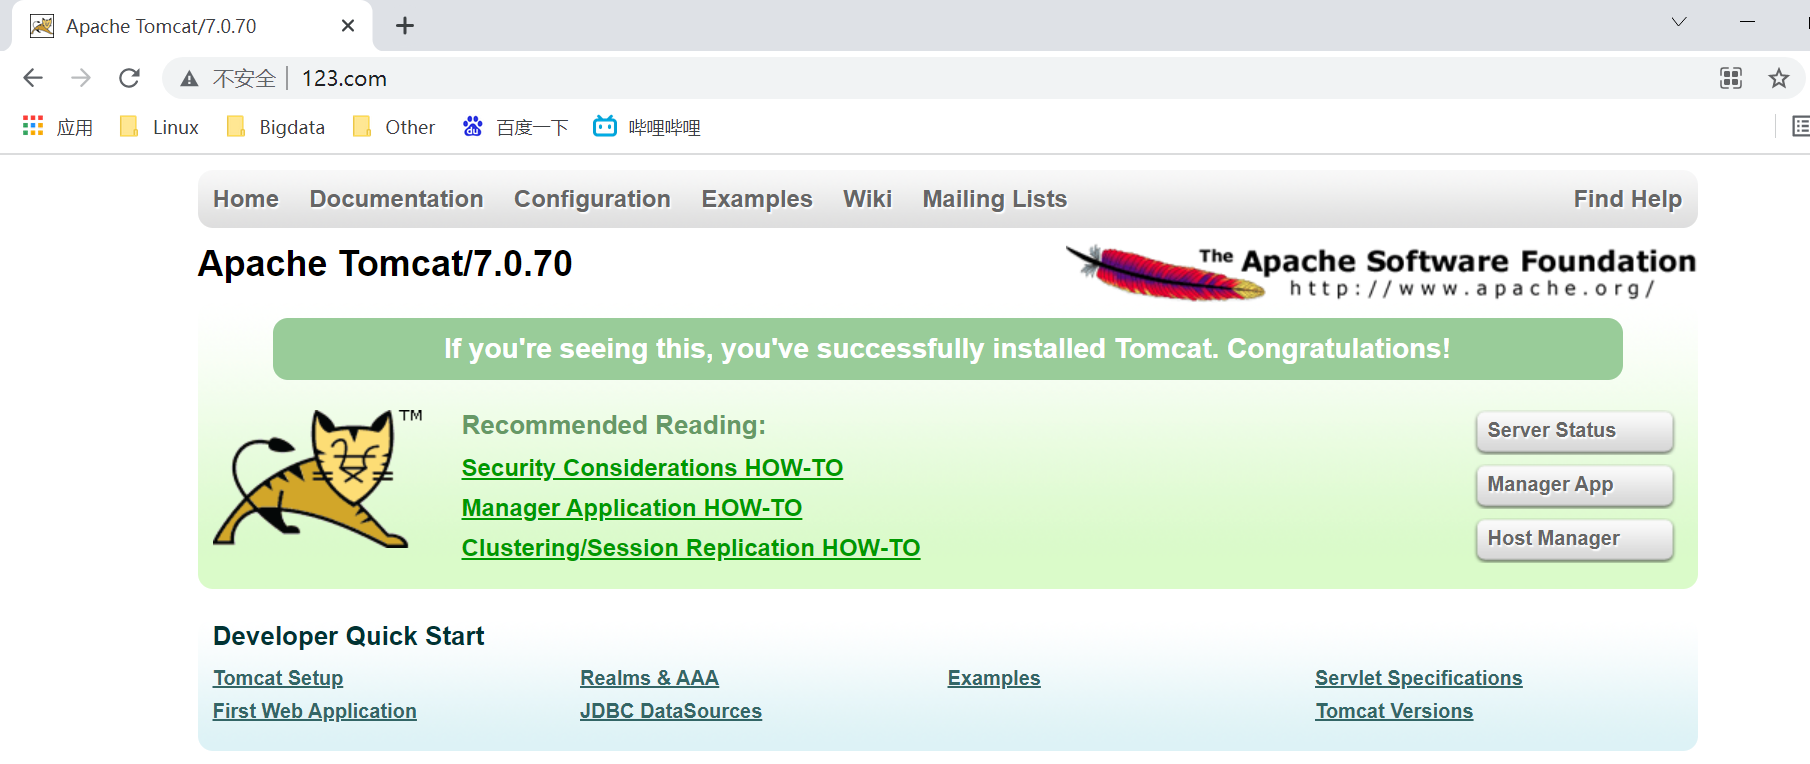
示例二:
使用 nginx 反向代理,根据访问的路径跳转到不同端口的服务中
访问 http://192.168.10.103:9001/edu/ 直接跳转到 192.168.10.104:8080
访问 http://192.168.10.103:9001/vod/ 直接跳转到 192.168.10.103:8081
环境:
nginx:192.168.10.103:9001
tomcat01:192.168.10.103:8080
tomcat02:192.168.10.103:8081
在192.168.10.103上安装两个tomcat(/usr/local/tomcat8080,/usr/local/tomcat8081)
且修改/usr/local/tomcat8081/conf/server.xml 主配置文件中的端口:
<Server port="8015" shutdown="SHUTDOWN">...<Connector port="8081" protocol="HTTP/1.1"connectionTimeout="20000"redirectPort="8443" />...<Connector port="8019" protocol="AJP/1.3" redirectPort="8443" />...
原配置文件:
<Server port="8005" shutdown="SHUTDOWN">...<Connector port="8080" protocol="HTTP/1.1"connectionTimeout="20000"redirectPort="8443" />...<Connector port="8009" protocol="AJP/1.3" redirectPort="8443" />...
tomcat分别创建测试页面:<br />[root@hadoop103 ~]# mkdir /usr/local/tomcat8080/webapps/edu<br />[root@hadoop103 ~]# vim /usr/local/tomcat8080/webapps/edu/index.html
<!DOCTYPE HTML><html lang="en"><head><meta charset="UTF-8"><title>Web8080</title></head><body><h3>Tomcat8080</H3></body></html>
[root@hadoop103 ~]# mkdir /usr/local/tomcat8081/webapps/vod
[root@hadoop103 ~]# vim /usr/local/tomcat8081/webapps/vod/index.html
<!DOCTYPE HTML><html lang="en"><head><meta charset="UTF-8"><title>Web8081</title></head><body><h3>Tomcat8081</H3></body></html>
修改nginx主配置文件:
[root@hadoop103 ~]# cd /usr/local/nginx/conf/
[root@hadoop103 conf]# vim nginx.conf 在 http 块中添加 server{}
server {listen 9001;server_name 192.168.10.103;location ~/edu/ {root html;proxy_pass http://192.168.10.103:8080;index index.html index.htm;}location ~/vod/ {root html;proxy_pass http://192.168.10.103:8081;index index.html index.htm;}}
[root@hadoop103 conf]# cd ../sbin/
[root@hadoop103 sbin]# ./nginx -s reload
浏览器测试代理效果:
http://192.168.10.103:9001/edu/
http://192.168.10.103:9001/vod/
location 指令说明:该指令用于匹配 URL
语法:
1、= :用于不含正则表达式的 uri 前,要求请求字符串与 uri 严格匹配,
如果匹配成功,就停止继续向下搜索并立即处理该请求。
2、~ :用于表示 uri 包含正则表达式,并且区分大小写。
3、~ :用于表示 uri 包含正则表达式,并且不区分大小写。
4、^~ :用于不含正则表达式的 uri 前,要求 Nginx 服务器找到标识 uri 和请求字符串匹配度
最高的 location 后,立即使用此 location 处理请求,而不再使用 location 块中的正则 uri
和请求字符串做匹配。
注意:如果 uil 包含正则表达式,则必须要有 ~ 或者 ~ 标识。
二、负载均衡
1. 负载均衡配置
环境准备:
tomct:192.168.10.103:8080
tomct:192.168.10.104:8080
nginx:192.168.10.103:80
192.168.10.103上:
[root@hadoop103 ~]# cd /usr/local/tomcat/webapps
[root@hadoop103 webapps]# mkdir edu
[root@hadoop103 webapps]# vim edu/index.html
<!DOCTYPE HTML><html lang="en"><head><meta charset="UTF-8"><title>Apache Tomcat Examples</title></head><body><h3>192.168.10.103:8080</H3></body></html>
192.168.10.104上:
[root@hadoop104 ~]# cd /usr/local/tomcat/webapps
[root@hadoop104 webapps]# mkdir edu
[root@hadoop104 webapps]# vim edu/index.html
<!DOCTYPE HTML><html lang="en"><head><meta charset="UTF-8"><title>Apache Tomcat Examples</title></head><body><h3>192.168.10.104:8080</H3></body></html>
重启tomcat
在nginx的配置文件中配置负载均衡:
[root@hadoop103 ~]# cd /usr/local/nginx/conf/
[root@hadoop103 conf]# vim nginx.conf
http{......#gzip on;upstream myserver{ # myserver为自己起的负载均衡的名字server 192.168.10.103:8080; # tomcat 服务器的地址server 192.168.10.104:8080; # tomcat 服务器的地址}server {listen 80; # nginx监听端口server_name 192.168.10.103; # nginx服务器地址#charset koi8-r;#access_log logs/host.access.log main;location / {proxy_pass http://myserver; # http://所起的负载均衡的名字root html;index index.html index.htm;}#error_page 404 /404.html;# redirect server error pages to the static page /50x.html......}......}
[root@hadoop103 conf]# cd ../sbin/
[root@hadoop103 sbin]# ./nginx -s stop
[root@hadoop103 sbin]# ./nginx
浏览器测试负载均衡效果:http://192.168.10.103/edu/
刷新页面后自动变为: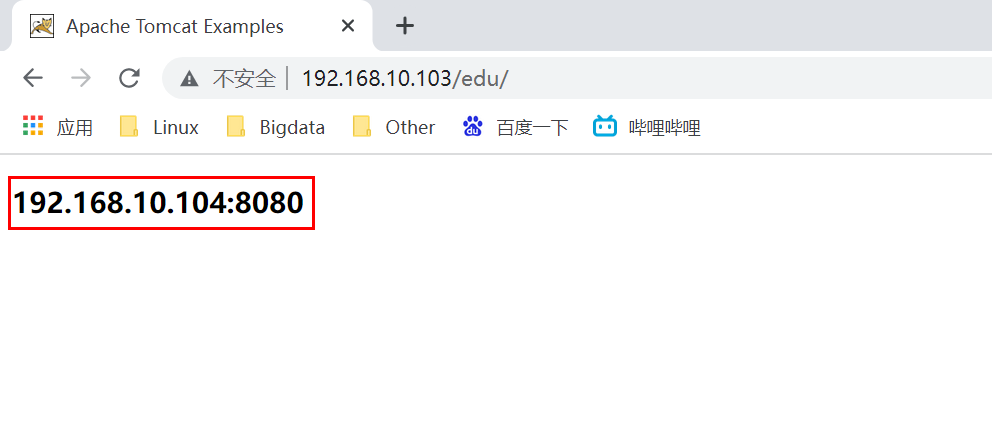
备注:默认情况下为轮询策略
(即:每个请求按时间顺序逐一分配到不同服务器,若服务器 down 掉,能自动剔除)
2. Nginx常见的负载均衡策略
1)轮询(默认策略)
每个请求按时间顺序逐一分配到不同的后端服务器,如果后端服务器 down 掉,能自动剔除。
2)weight权重
weight 代表权,重默认为 1,权重越高被分配的客户端越多;
指定轮询几率,weight 和访问比率成正比,用于后端服务器性能不均的情况。
配置示例:
http{......#gzip on;upstream server_pool{ # server_pool为自己起的负载均衡的名字server 192.168.10.103:8080 weight=10; # tomcat 服务器的地址server 192.168.10.104:8080 weight=11; # tomcat 服务器的地址}......}
104服务器的权重大于103服务器,则前端访问会被较多的分配都104这台后端服务器上
3)ip_hash(IP哈希)
每个请求按访问 ip 的 hash 结果分配,即每个前端请求会被固定访问到一个后端服务器,可以解决 session 的问题
配置示例:
http{......#gzip on;upstream server_pool{ # server_pool为自己起的负载均衡的名字ip_hash;server 192.168.10.103:8080; # tomcat 服务器的地址server 192.168.10.104:8080; # tomcat 服务器的地址}......}
4)fair(第三方)
按后端服务器的响应时间来分配请求,响应时间短的优先分配
配置示例:
http{......#gzip on;upstream server_pool{ # server_pool为自己起的负载均衡的名字fair;server 192.168.10.103:8080; # tomcat 服务器的地址server 192.168.10.104:8080; # tomcat 服务器的地址}......}
三、动静分离配置
1. 动静分离介绍
Nginx 动静分离:把是动态请求跟静态请求分开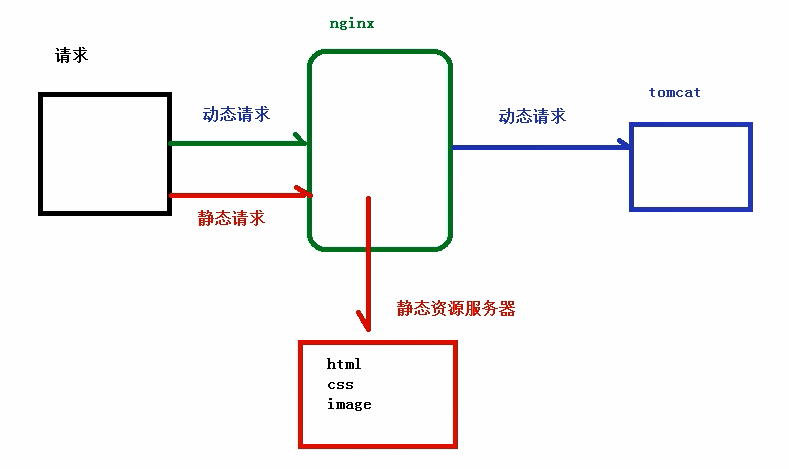
动静分离从目前实现角度来讲大致分为两种:
第一种:纯粹把静态文件独立成单独的域名,放在独立的服务器上(目前较主流)
第二种:将动态跟静态文件混合在一起发布,通过 nginx 来分开
配置方法:
动态跟静态文件混合在一起发布,通过 nginx 来分开;
通过 expires 参数设置,可以使浏览器缓存过期时间,减少与服务器之前的请求和流量;
Expires 的定义:是给一个资源设定一个过期时间,即无需去服务端验证,直接通过浏览器 自身确认是否过期即可,所以不会产生额外的流量。(适合不经常变动的资源)
注意:如果经常更新的文件,不建议使用 Expires 来缓存
2. 动静分离配置
1)nginx服务器准备
2)资源环境准备
准备静态资源:
[root@hadoop103 ~]# mkdir -p /data/{www,image}
[root@hadoop103 ~]# vim /data/www/index.html
<!DOCTYPE HTML><html lang="en"><head><meta charset="UTF-8"><title>动静分离</title></head><body><h3>动静分离配置测试-静态页面</h3></body></html>
[root@hadoop103 www]# cd /data/image/
(给/data/image/目录下放入一张图片)
3)nginx配置文件设置
http{......#gzip on;server {listen 80;server_name 192.168.10.103;#charset koi8-r;#access_log logs/host.access.log main;location /www/ { # 访问规则root /data/; # 静态资源路径index index.html index.htm;}location /image/ { # 访问规则root /data/; # 静态资源路径autoindex on; # 列出访问目录}......}......}
[root@hadoop103 conf]# cd ../sbin/
[root@hadoop103 sbin]# ./nginx -s reload


