1.安装freeswitch
主要参考网址:https://www.cnblogs.com/5444de/p/12446992.html
1.1 关闭防火墙
必须关闭fs、opensips防火墙或配置端口,否则无法正常使用
#关闭防火墙systemctl stop firewalld#开机不启动防火墙 这个命令好像无效 有机会试的话再找找systemctl disable firewalld
1.3 安装依赖
#先自行安装epel源和阿里源,可见前面报告yum install -y http://files.freeswitch.org/freeswitch-release-1-6.noarch.rpm epel-releaseyum install -y git alsa-lib-devel autoconf automake bison broadvoice-devel bzip2 curl-devel libdb4-devel e2fsprogs-devel erlang flite-devel g722_1-devel gcc-c++ gdbm-devel gnutls-devel ilbc2-devel ldns-devel libcodec2-devel libcurl-devel libedit-devel libidn-devel libjpeg-devel libmemcached-devel libogg-devel libsilk-devel libsndfile-devel libtheora-devel libtiff-devel libtool libuuid-devel libvorbis-devel libxml2-devel lua-devel lzo-devel mongo-c-driver-devel ncurses-devel net-snmp-devel openssl-devel opus-devel pcre-devel perl perl-ExtUtils-Embed pkgconfig portaudio-devel postgresql-devel python-devel python-devel soundtouch-devel speex-devel sqlite-devel unbound-devel unixODBC-devel wget which yasm zlib-devel libshout-devel libmpg123-devel lame-devel
1.4 编译安装
cd usr/local/src/bootstrap.sh./configuremakemake install#安装声音文件,时间较长,如中断需要删除已经下载的tar.gz再重新下载make sounds-installmake moh-install#设置软连接地址方便启动sudo ln -sf /usr/local/freeswitch/bin/freeswitch /usr/local/bin/sudo ln -sf /usr/local/freeswitch/bin/fs_cli /usr/local/bin/
1.5问题
在make或者./configure出现问题,./configure如果不行应该是版本问题
参考https://www.cnblogs.com/hezhixiong/p/4797511.html
  1. 执行“./configure -C”时,如果出现报错,就是缺少开发包文件(库文件),这种错误比较好解决,缺少什么库文件就安装相应的库文件。

  2. 执行“make && make install”时,我遇到了一个比较麻烦的错误,昨天下午整了一个下午都没解决,所以该文章主要是为了共享这个错误而写。

    错误内容:Makefile:797: *** You must install libyuv-dev to build mod_fsv。停止。

    解决方案:

      (1)下载libyuv源码并编译

        cd freeswitch/libs
        git clone https://freeswitch.org/stash/scm/sd/libyuv.git
        cd libyuv
        make -f linux.mk CXXFLAGS="-fPIC -O2 -fomit-frame-pointer -Iinclude/"
        make install
        cp /usr/lib/pkgconfig/libyuv.pc /usr/lib64/pkgconfig/

        (如果只是安装libyuv,接下来还会有报错,我把我报错而需要安装的文件统一罗列如下)

      (2)下载libvpx源码并编译

        cd ..
        git clone https://freeswitch.org/stash/scm/sd/libvpx.git
        cd libvpx
        ./configure --enable-pic --disable-static --enable-shared
        (如果出现Configuration failed。错误原因为:Neither yasm nor nasm have been found,则参考以下“※”解决该错误.)
        make
        make install
        cp /usr/local/lib/pkgconfig/vpx.pc /usr/lib64/pkgconfig/

      (※)下载yasm并编译

        yasm是一个汇编编译器,是nasm的升级版
        yasm下载地址:http://www.tortall.net/projects/yasm/releases/
        yasm解压命令:tar -zxvf ****.tar.gz (我下载的是yasm-1.3.0.tar.gz)
        yasm编译安装:① ./configure, ② make, ③make install
        yasm安装完毕之后回到第二步重新安装libvpx

      (3)下载opus并编译

        cd ..
        git clone https://freeswitch.org/stash/scm/sd/opus.git
        cd opus
        ./autogen.sh
        ./configure
        make
        make install
        cp /usr/local/lib/pkgconfig/opus.pc /usr/lib64/pkgconfig

      (4)下载libpng并编译

        cd ..
        git clone https://freeswitch.org/stash/scm/sd/libpng.git
        cd libpng
        ./configure
        make
        make install
        cp /usr/local/lib/pkgconfig/libpng* /usr/lib64/pkgconfig/

  下载并安装以上四个依赖文件后,重新执行FreeSWITCH的“./configure”之后,“make && make install”就能正常安装FreeSWITCH了。起码我这边是安装成功了。

  以上四个依赖文件安装之后如果还有出现其他错误,重新执行“./configure”,”make“时如有报以下错误,请参考以下解决:

  (1)系统没有安装lua的错误

    CXX    mod_lua_la-mod_lua.lo
    mod_lua.cpp:37:17: error: lua.h: No such file or directory
    mod_lua.cpp:38:21: error: lauxlib.h: No such file or directory
    mod_lua.cpp:39:20: error: lualib.h: No such file or directory
      解决方法:yum install lua lua-devel

      (2)系统缺少sndfile的库文件

    make[4]: Entering directory `/usr/local/src/freeswitch-1.6.0/src/mod/formats/mod_sndfile'
    Makefile:796: *** You must install libsndfile-dev to build mod_sndfile. Stop
    解决方法:
      下载包libsndfile-1.0.26.tar.gz 上传到服务器
      下载地址 http://www.mega-nerd.com/libsndfile/#Download
      tar zxvf libsndfile-1.0.26.tar.gz
      ./configure
      make
      make install
      cp /usr/local/lib/pkgconfig/sndfile.pc /usr/lib64/pkgconfig
      重新执行重新执行FreeSWITCH的“./configure”,再make 及make install即可。
1.6 启动freeswitch
# 生成环境后台运行 推荐
freeswitch -rp -nc -nonat
#直接启动 不输入nonat会有警告
freeswitch -nonat
# 可以查看到详细的日志信息
freeswitch -c -nonat -rp
#如果运行freeswitch出现以下错误,是因为端口被占用了。
Cannot lock pid file /usr/local/freeswitch/run/freeswitch.pid.
# 默认后台运行
freeswitch -nc
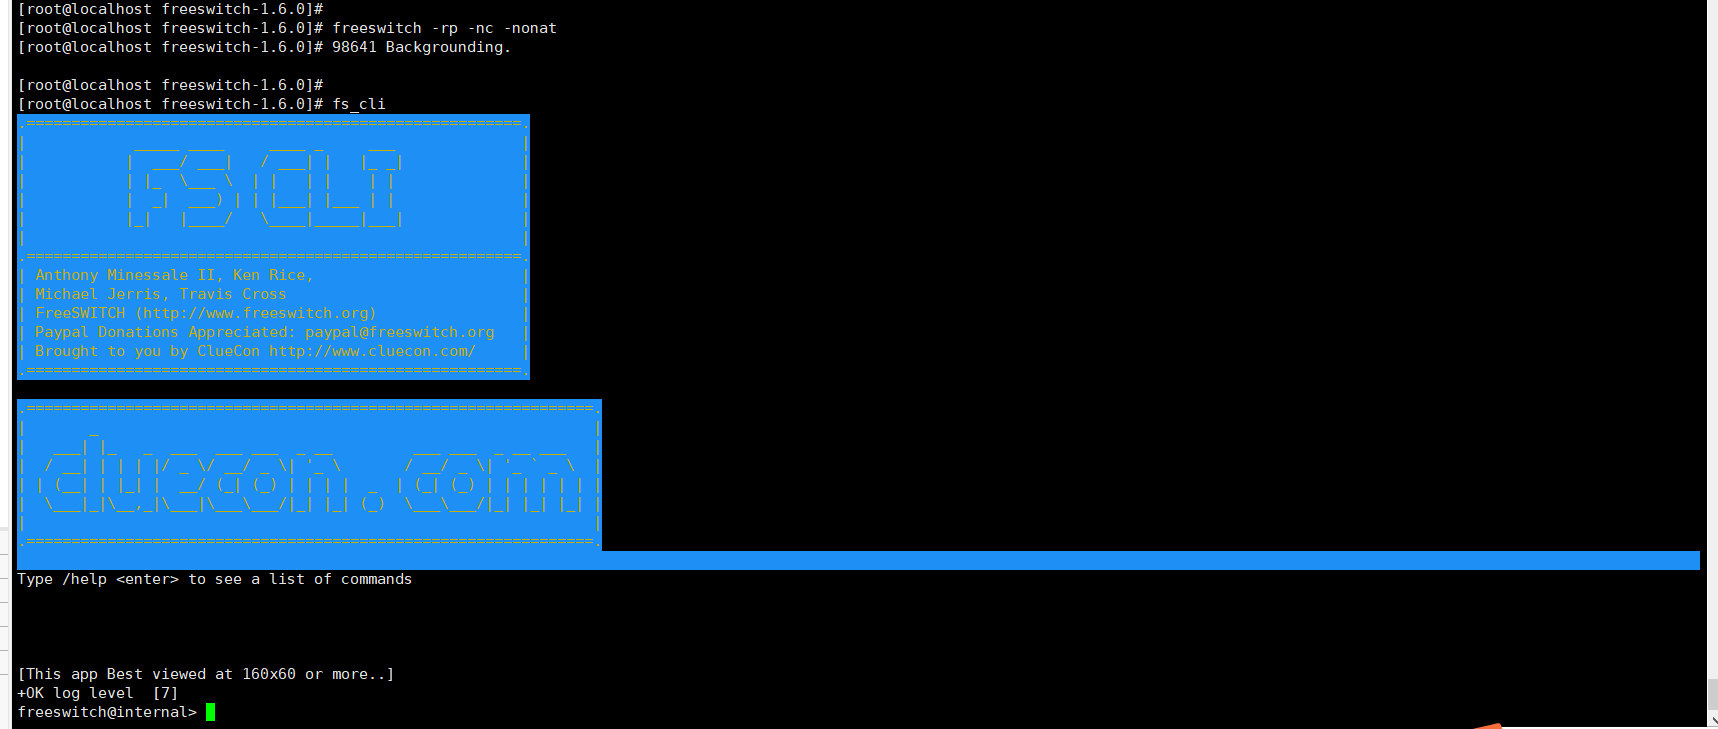
#进入fs控制台
fs_cli
#两种方式退出fs控制台
/exit
ctrl+d
1.7 验证freeswitch安装成功
freeswitch默认有1000~1019 20个分机号,密码都是1234
默认账号需要等待时间才能接通
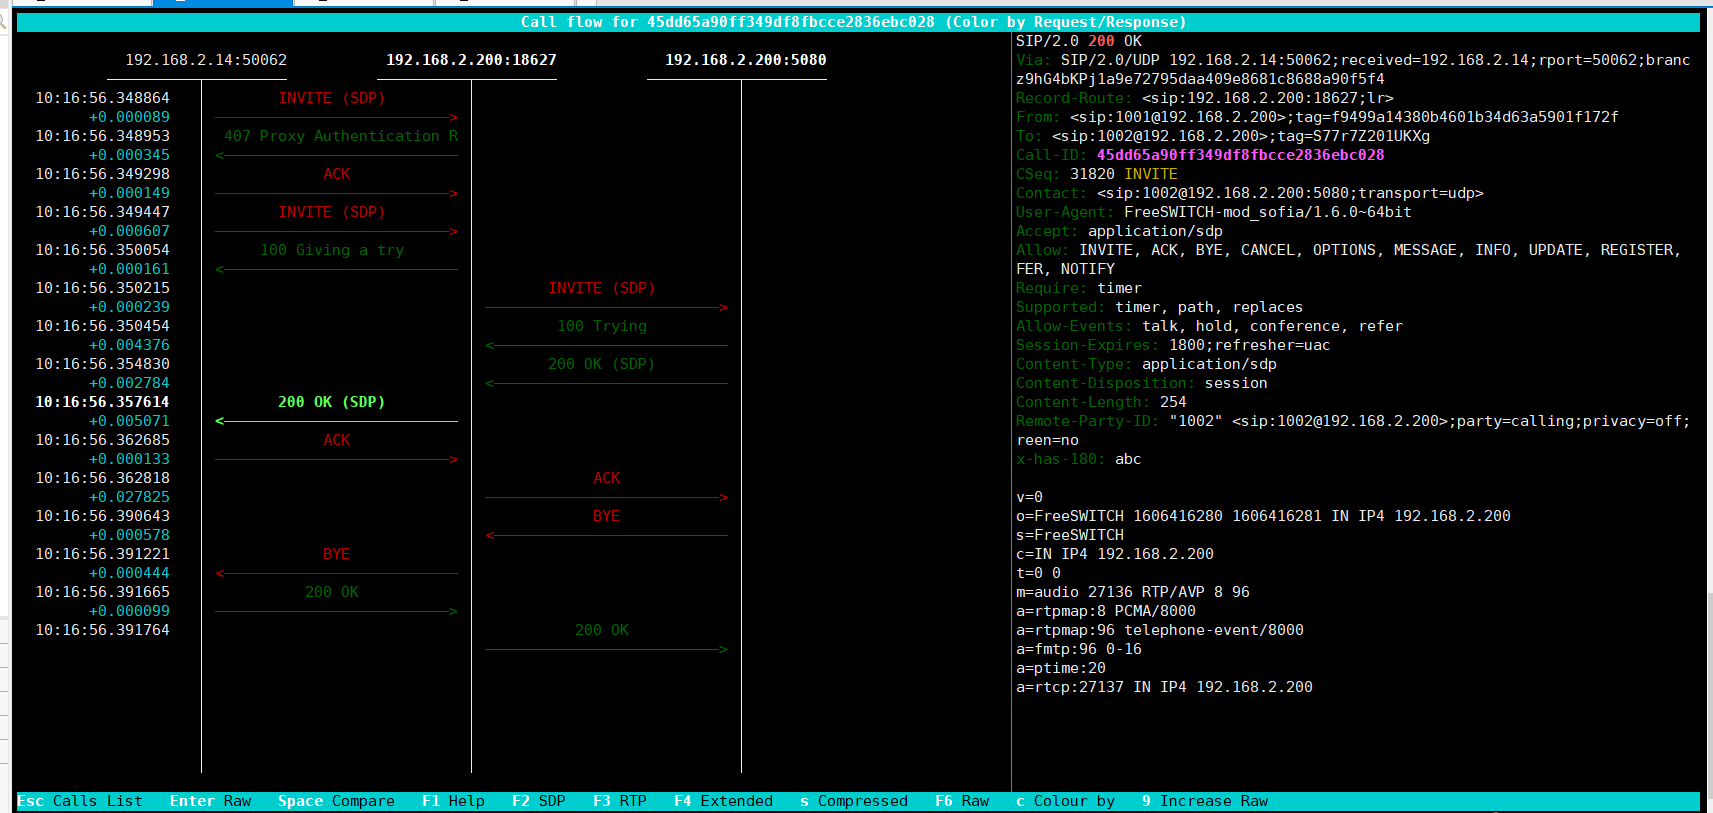
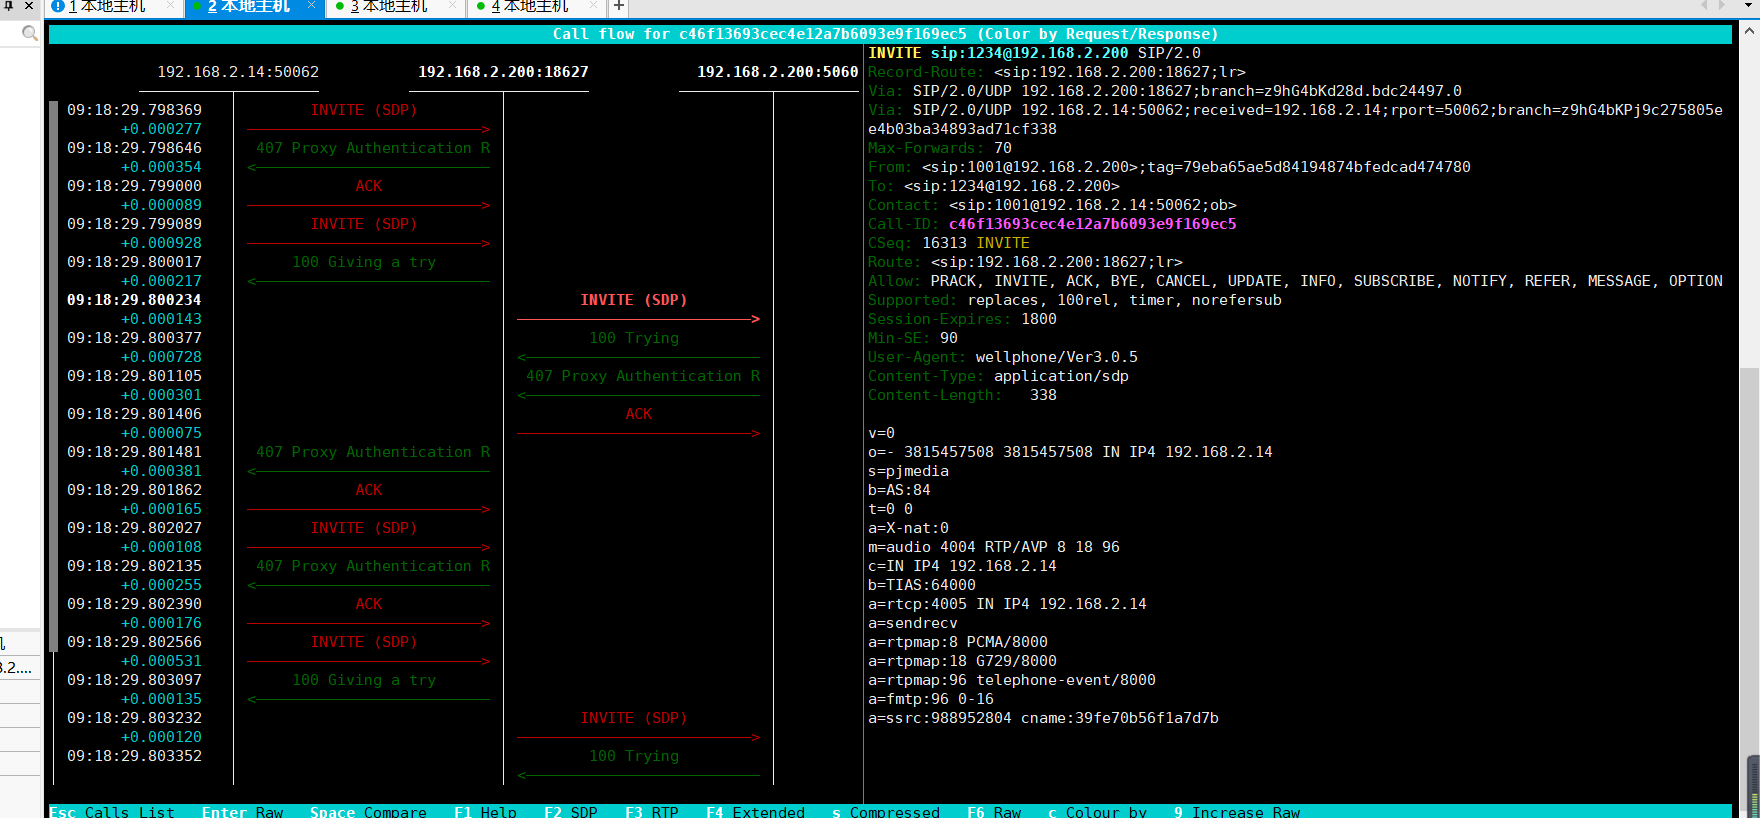
抓包结果
拓展
呼入 自动应答
originate sofia/external/8888@192.168.2.161:5060 &echo
2.编写dialplan,做个呼入的自动应答
1.编写拨号计划 文件/usr/local/freeswitch/conf/dialplan.xml
#自己写的最好放在最上面,<context>后面
    <extension name="PlayBack Test">
    #对1开头号码进行放音,如果要对任意号码进行放音选择^4(.*)$
      <condition field="destination_number" expression="^1\d*$">
         <action application="set" data="This is a Test MP3"/>
         #200ok
         <action application="answer" />
         #endless_playback循环放音
         <action application="endless_playback" data="/root/test.mp3"/>
      </condition>
    </extension>
2.对MP3文件进行支持
#在源代码目录编译安装
make mod_shout-install

#在FreeSWITCH加载模块
load mod_shout
3.重读xml配置文件
reloadxml
问题
转载地址问题,fs地址错误,需要修改
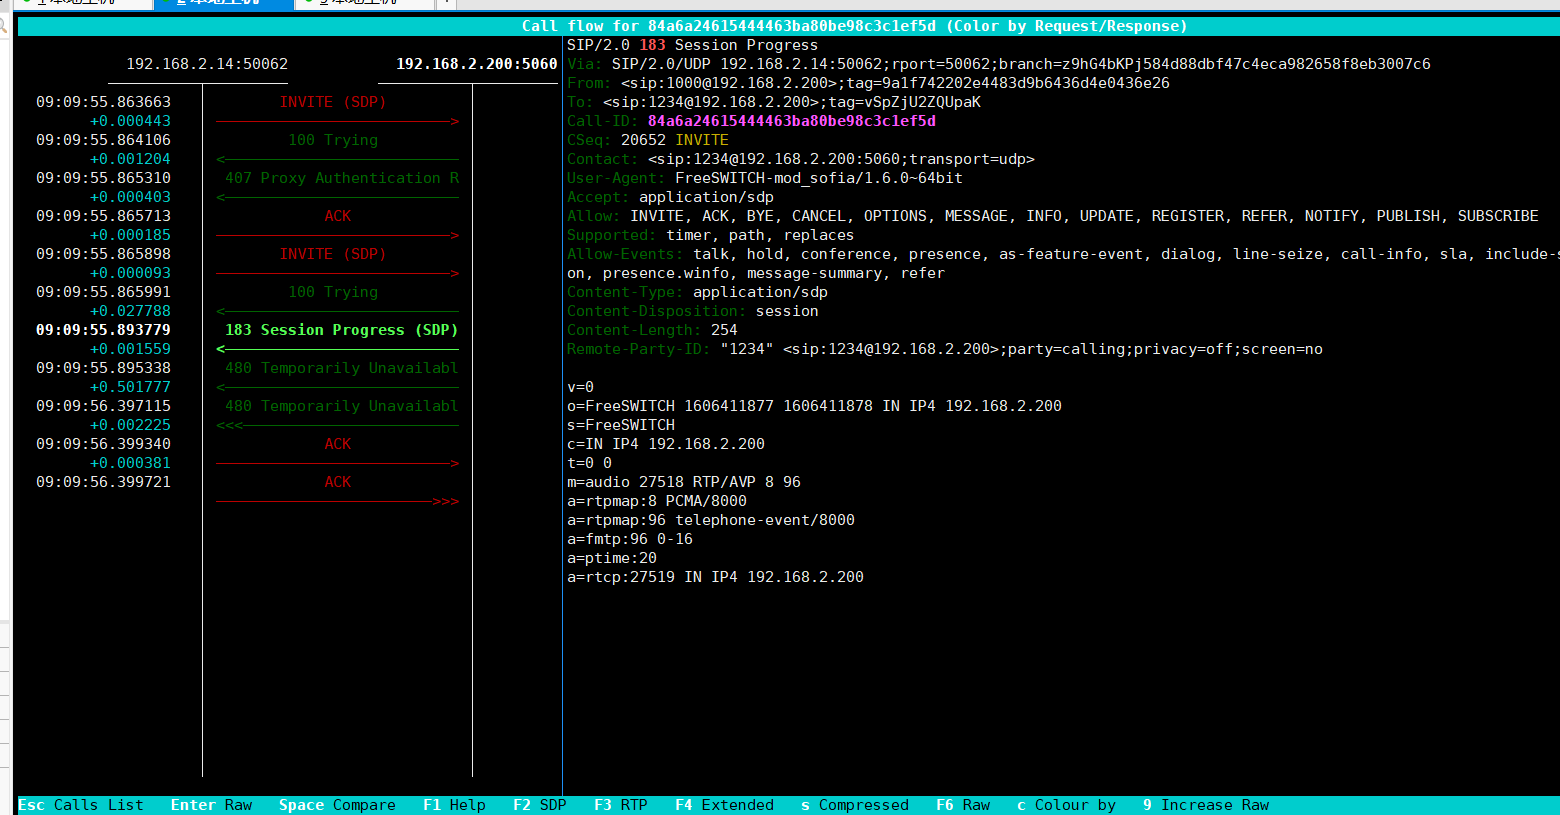
认证用户信息时,使用的是opensipsctl的账户密码,因为使用的是内部端口internal需要进行freeswitch用户验证,外部端口不需要进行用户名验证,使用外部端口
#查看端口信息
sofia status
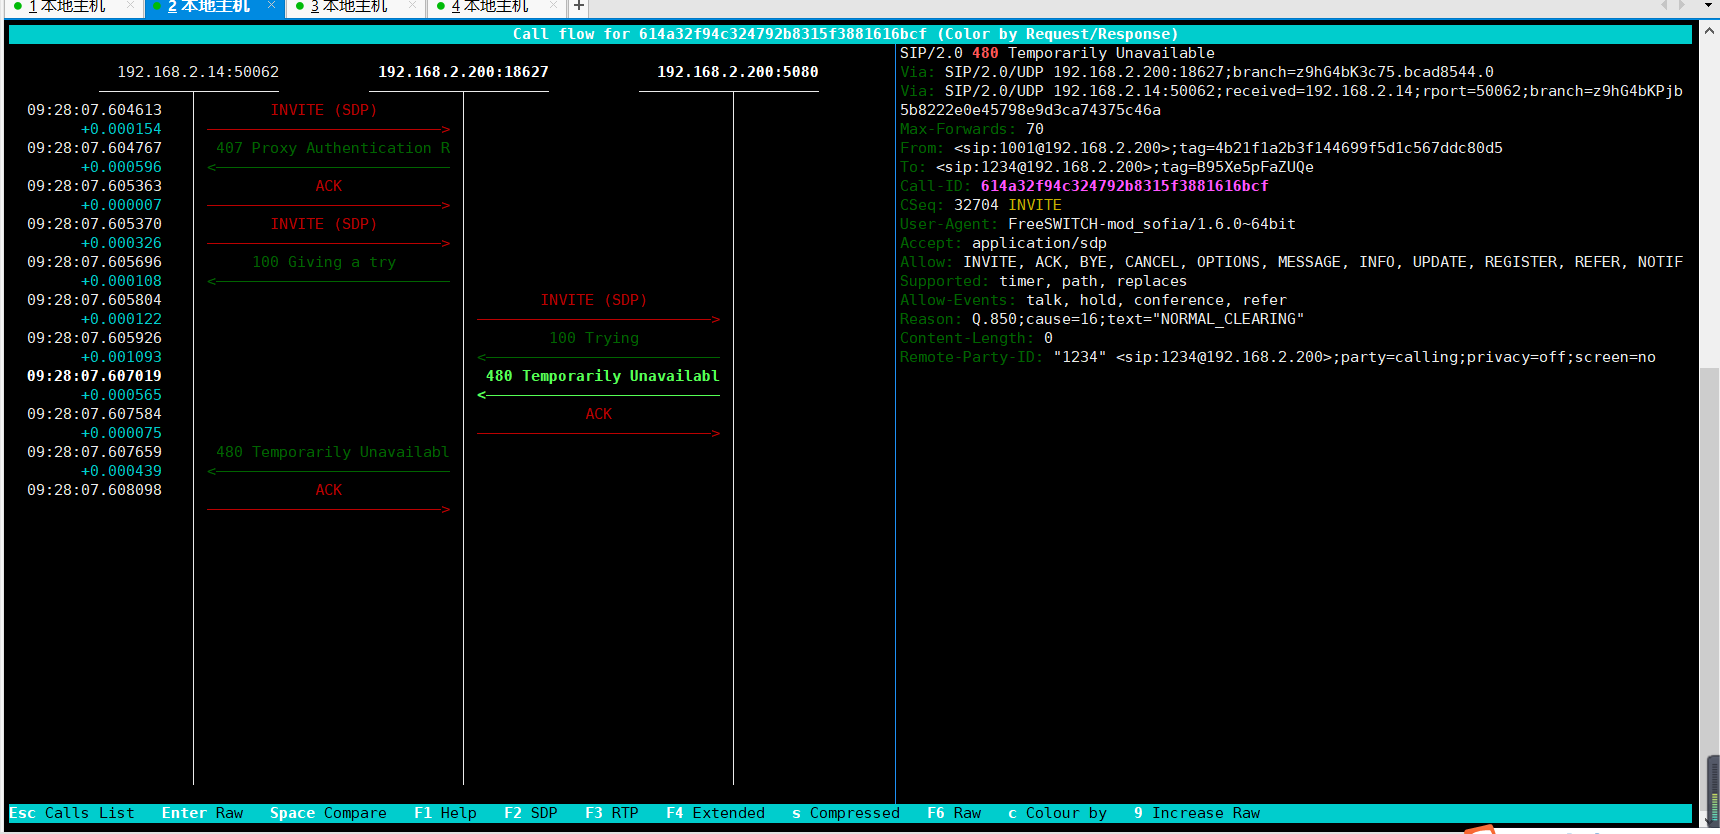
480应该是未找到该用户
 3.从fs_cli呼叫到opensip到分机
1.在opensips代码中编写
#与前几节课的代码合并  has_totag是确定是否有tag
if(is_method("INVITE")&&!has_totag()){
    #通过dispatcher查找fs
    if(ds_is_in_list("$si","$sp","1")){
       #通过查找location表中是否有该注册账户
       if(!lookup("location","m")){
            if(!db_does_uri_exist()){
                send_reply("420","Bad Extension");
                exit;
            }

            t_reply("404","Not Found");
            exit;
       }

       record_route();
       t_relay();
       exit;
    }

    #第四课
    if(!proxy_authorize("","subscriber")){
        proxy_challenge("","0");
        exit;
    }

    if(!ds_select_dst("1","1")){
         sl_send_reply("500","Service full");
         exit;
    }
    consume_credentials();
    record_route();
    t_on_reply("add_head");
    t_relay();
    exit;

}
2.在freeswitch输入命令-呼叫到opensips
#方法一
originate sofia/external/sip:1001@192.168.2.200:18627 &echo

#方法二 可以根据自己账户注册的域名来呼叫
originate sofia/external/1001@luobx.cc;fs_path=sip:192.168.2.200:18627 &echo

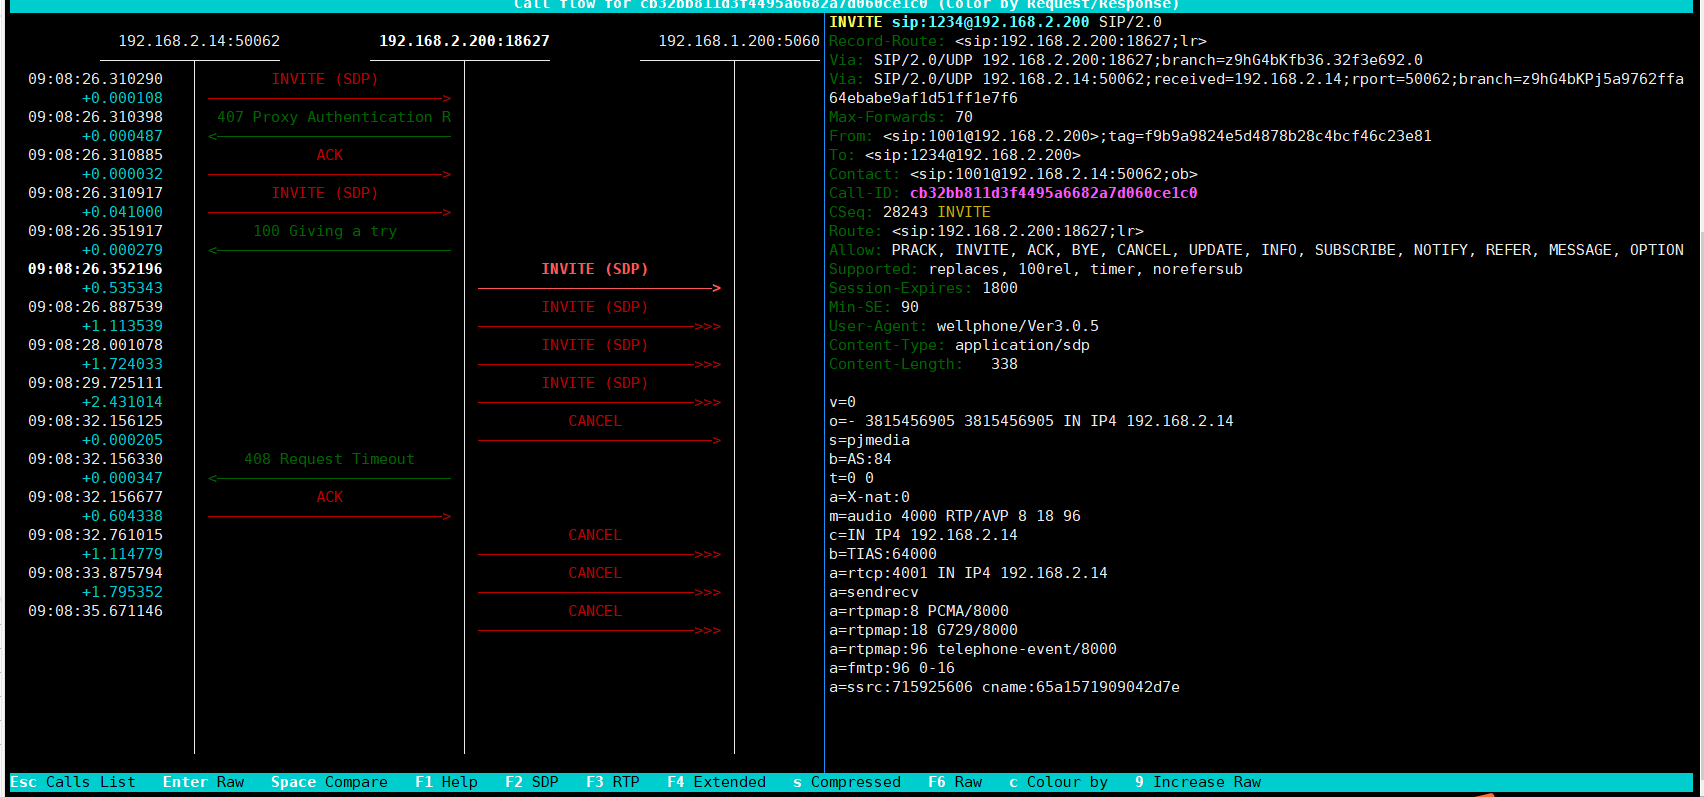
问题
location表中没有用户信息
https://opensips.org/docs/modules/2.4.x/usrloc.html#param_db_mode
#设置usrloc模块
loadmodule "usrloc.so"
modparam("usrloc","nat_bflag","NAT")
modparam("usrloc","db_mode", 3)
modparam("usrloc","db_url","mysql://root:a8616436@192.168.2.200:3306/opensips")

db_mode配置
0  single-instance-no-db single-instance-no-db  这将完全禁用数据库。仅会使用内存
1  single-instance-sql-write-through 对usrloc的所有更改也会立即反映在数据库中。这很慢,但是非常可靠
2  single-instance-sql-write-back  写回方案。这是前两种方案的组合。对内存进行所有更改,并在计时器中完成数据库同步
3  sql-only   仅DB方案。不保留任何内存缓存,所有操作都直接由数据库执行
重新注册

若有收获,就点个赞吧
0 人点赞
