 ">
">

用户认证:通俗点说就是系统认为用户是否能登录
用户授权:就是系统判断用户是否有权限去做某项操作。比如linux里的文件,有的用户只有读权限,有的有写读。
springSecurity优点:功能更强大,与spring无缝衔接
缺点是重量级(即里面用到了很多其他依赖)
Shiro:Apache旗下的轻量级权限控制框架,优点是轻量级
基本原理
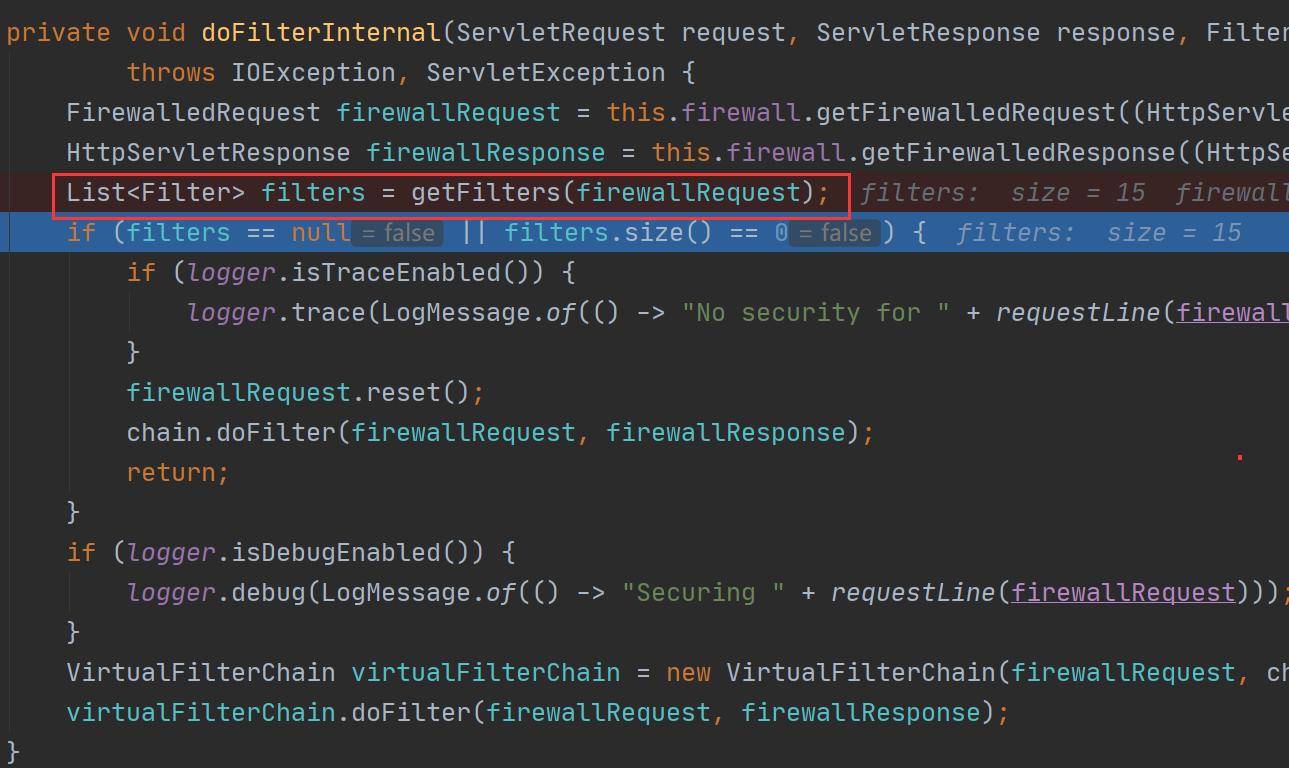
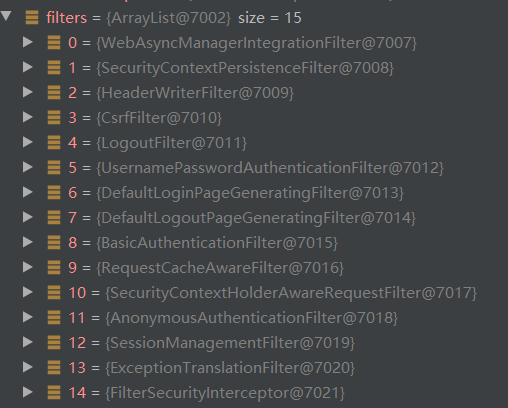
SpringSecurity本质是一个过滤器链:
从启动是可以获取到过滤器链:
代码底层流程:重点看三个过滤器
FilterSecurityInterceptor:是一个方法即的权限过滤器,基本位于过滤链的最底部

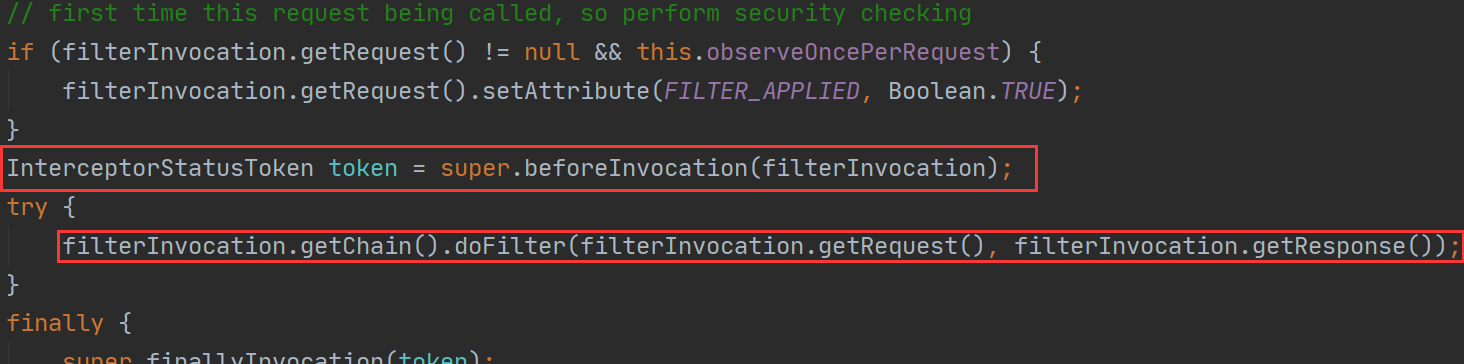

ExceptionTranslationFilter:是个异常过滤器,用来处理在认证授权过程中抛出的异常
UsernamePasswordAuthenticationFilter:对/login的post请求做拦截,校验表单中的用户名,密码
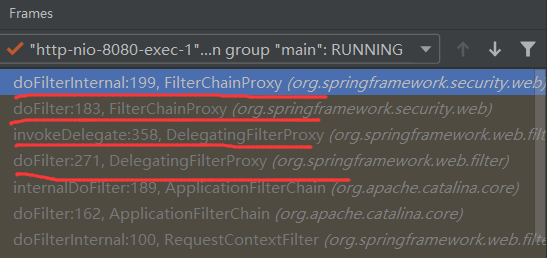
过滤器是如何进行加载的?
首先是通过DelegatingFilterProxy获得FilterChainProxy
怎么获取到呢?
1.先看DelegatingFilterProxy的doFilter() -> initDelegate(),这个方法里面有getBean,是为了拿到Filter。
(这里targetBeanName是固定的,是“springSecurityFilterChain”)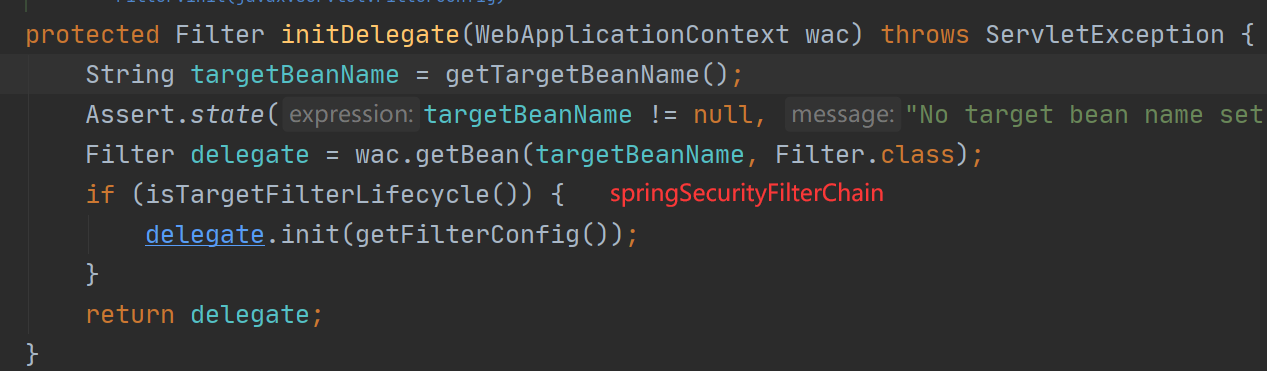

由上面可以看出,delegate的实际类型是FilterChainProxy,那么delegate为什么是FilterChainProxy呢?怎么得到的?看下面:
SecurityFilterAutoConfiguration自动配置类引入了SecurityAutoConfiguration配置类
SecurityAutoConfiguration配置类引入了WebSecurityEnableConfiguration配置类(需要满足条件)
WebSecurityEnableConfiguration配置类中构造springSecurityFilterChain时,调用了WebSecurity的build方法
WebSecurity最终会创建FilterChainProxy对象,并作为springSecurityFilterChain返回
然后让FilterChainProxy去获得所有的过滤器,然后遍历选择合适的过滤器
看这些源码的意义就是,如果springboot不给我们默认配置好,那我们自己也能知道怎么配,该配啥。
两个重要的接口

用户认证
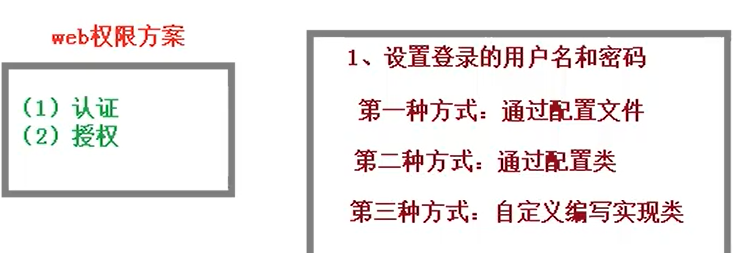
配置文件

配置类方式:继承WebSecurityConfigurerAdapter类
@Configurationpublic class SecurityConfig extends WebSecurityConfigurerAdapter {@Overrideprotected void configure(AuthenticationManagerBuilder auth) throws Exception {PasswordEncoder passwordEncoder = new BCryptPasswordEncoder();String password = passwordEncoder.encode("123");auth.inMemoryAuthentication().withUser("lucy").password(password).roles("admin");}@BeanPasswordEncoder password() {return new BCryptPasswordEncoder();}}
自定义类方式
第一步:创建配置类,设置使用那个userDetailService实现类
第二步:编写实现类,返回User对象,User对象有用户名密码和操作权限
首先写出了配置类:
@Configurationpublic class SecurityConfigTest extends WebSecurityConfigurerAdapter {@Autowiredprivate UserDetailsService userDetailsService;@Overrideprotected void configure(AuthenticationManagerBuilder auth) throws Exception {auth.userDetailsService(userDetailsService).passwordEncoder(password());}@BeanPasswordEncoder password() {return new BCryptPasswordEncoder();}}
UserDetailService是从数据库里面查询数据的步骤,所以这里可以用来从数据库查数据。
@Service("userDetailsService")public class MyUserDetailService implements UserDetailsService {@AutowiredUserMapper userMapper;@Overridepublic UserDetails loadUserByUsername(String username) throws UsernameNotFoundException {// 先查出来用户名和密码,条件查询需要使用QueryWrapperQueryWrapper<Users>wrapper = new QueryWrapper<>();// 相当于username = ?wrapper.eq("username",username);Users users = userMapper.selectOne(wrapper);if(users==null) {throw new UsernameNotFoundException("用户名不存在!");}System.out.println(users);List<GrantedAuthority>auths = AuthorityUtils.commaSeparatedStringToAuthorityList("role");return new User(users.getUsername(),new BCryptPasswordEncoder().encode(users.getPassword()),auths);}}
现在security算是配好了。
接下来配置一下mybatis-plus,来模拟从数据库里拿数据。
步骤:1.配置数据地址,用户名等 2.导入myatis-plus依赖。 3.创建mapper接口
spring.datasource.driver-class-name=com.mysql.jdbc.Driver
spring.datasource.url=jdbc:mysql:///graduatemanagement?serverTimezone=GMT%2B8&useUnicode=true&characterEncoding=utf-8
spring.datasource.username=root
spring.datasource.password=root
@Repository
public interface UserMapper extends BaseMapper<Users> { }
然后在主类上 开启扫描
@SpringBootApplication
@MapperScan("com.lee.security")
public class VhrApplication {
    public static void main(String[] args) {
        // SpringApplication.run(VhrApplication.class, args);
        SpringApplicationBuilder builder = new SpringApplicationBuilder(VhrApplication.class);
        builder.application().setAdditionalProfiles("prod");
        builder.run(args);
    }

}
配置自己的登录页面
如下,只要配置自己的loginPage(),loginProcessingUrl(),defaultSuccessUrl()。
如果想使用默认的,把这些注释就好了
@Configuration
public class SecurityConfigTest extends WebSecurityConfigurerAdapter {
    @Override
    protected void configure(HttpSecurity http) throws Exception {
        http.formLogin()  // 自定义自己编写的登录页面
                .loginPage("/login.html")  // 登录页面设置
                .loginProcessingUrl("/handle/login")   // 序号1
                .defaultSuccessUrl("/test/index").permitAll() // 登录成功之后跳转的页面
                .and().authorizeRequests()
                .antMatchers("/","/test/hello","/handle/login").permitAll()// 设置那些路径可以访问,不需认证
                .anyRequest().authenticated()
                .and().csrf().disable();  // 关闭csrf保护
    }
}
在resources/static 目录下创建 login.html文件。
<body>
<form action="/handle/login" method="post">
<!--    name必须是username和password,因为security底层只接收他俩-->
    用户名:<input type="text" name="username"><br/>
    密码:<input type="text" name="password"><br/>
    <input type="submit" value="login">
</form>
</body>
control层:
@RestController
@RequestMapping("/test")
public class IndexController1 {

    @RequestMapping("/hello")
    public String hello() {
        return "hello security";
    }

    @RequestMapping("/index")
    public String index() {
        return "hello index";
    }
}
用 localhost:8080/aaa测试,会跳转到 login.html。
用 除了 / 、/test/hello去试,最后都会返回被拦截到login.html
在login.html上登录,会从表单的action 跳到 /handle/login去处理。而我们恰好做了 /handler/login处理请求(序号1)。 然后如果请求成功,就会发到成功页面,如果请求失败,就会走到失败页面。
自己去测试一下就好了。

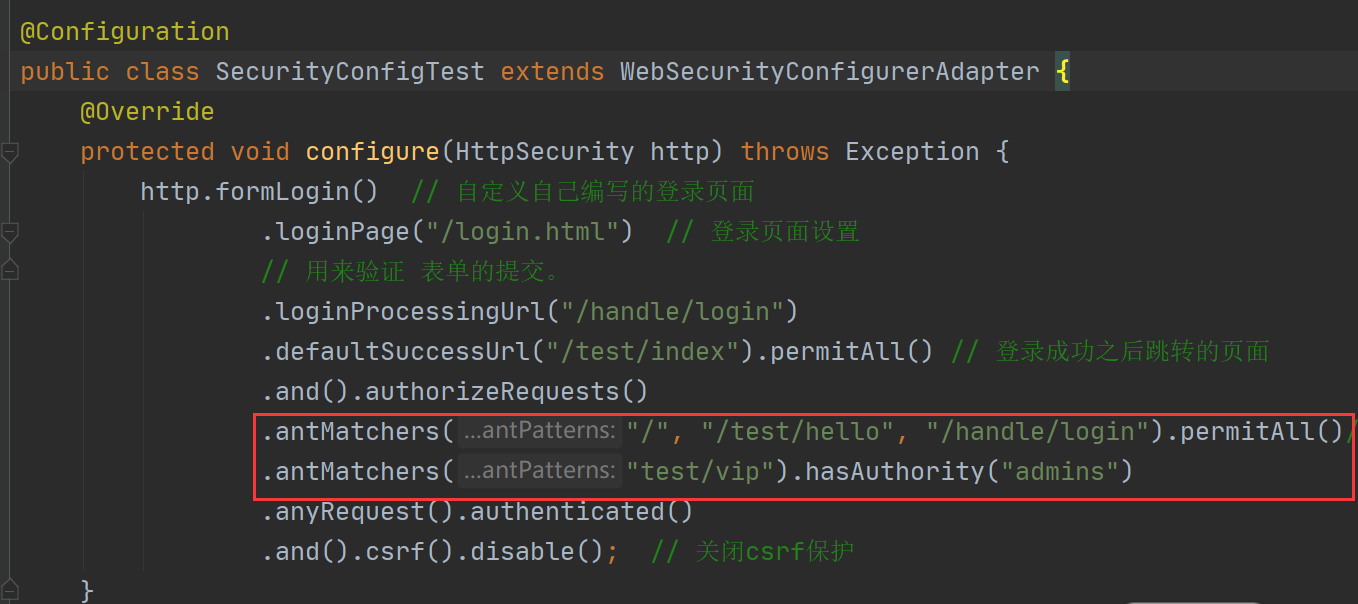
当前用户必须有admins权限时才能访问/test/vip,否则不行。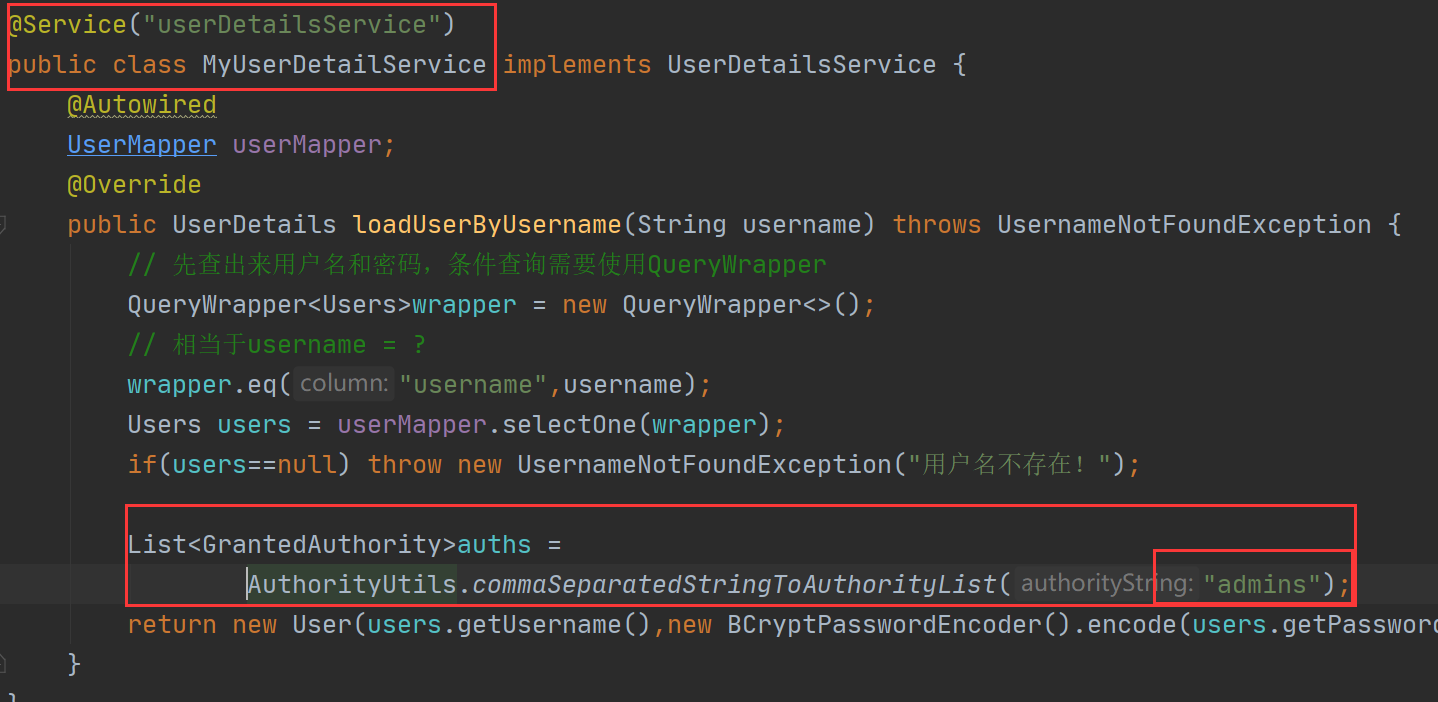
在这里给user增加admins权限
也可以设置多个权限:下面就是有经理或admins权限都可以访问
也可以设置角色。
只有是这个角色,才有权限访问改地址。下面是给用户设置角色
注意,必须有ROLE_前缀,看看源码就懂了。
自定义403页面: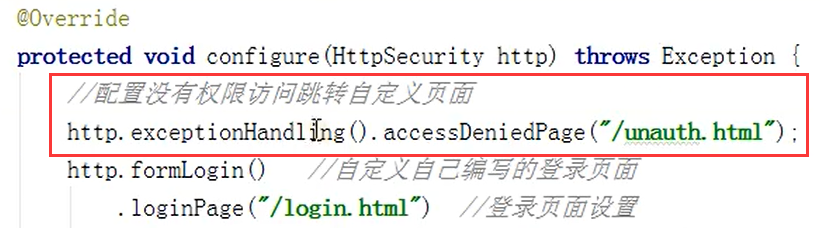
@Secured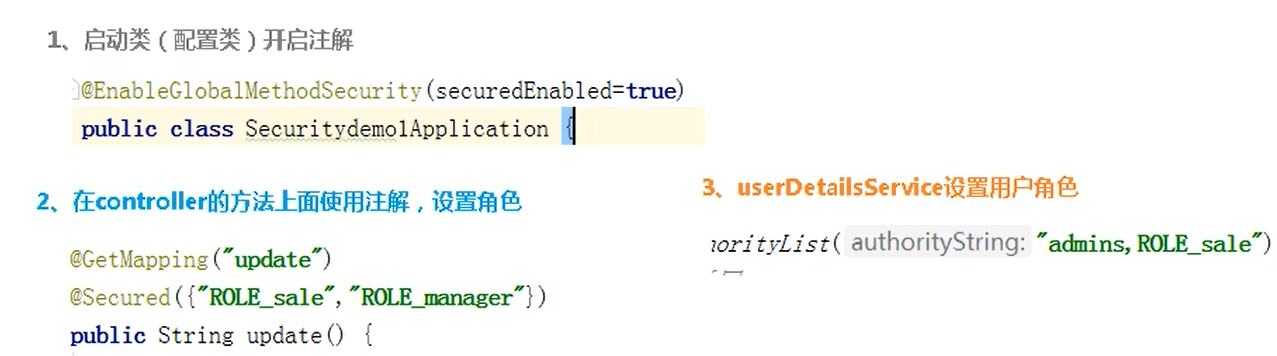
主类上添加开启注解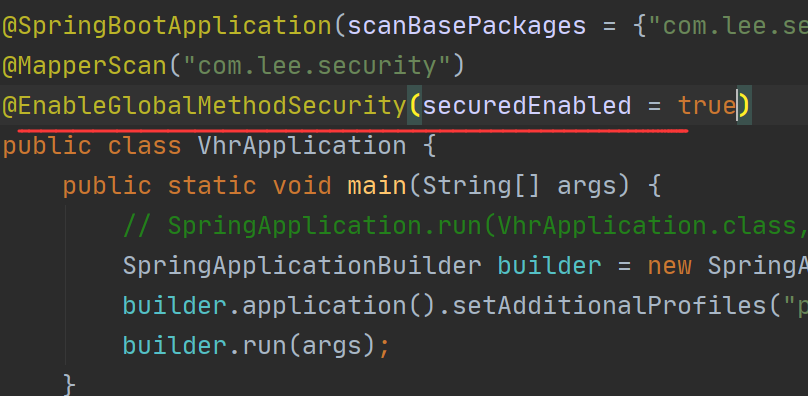
control层特定方法上加上指定角色,表示只有这些角色才有自己访问自己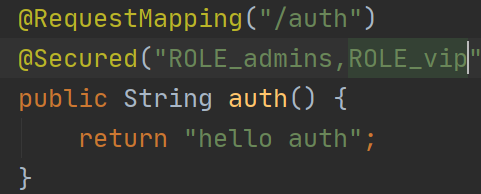

@PreAuthorize是用来设置权限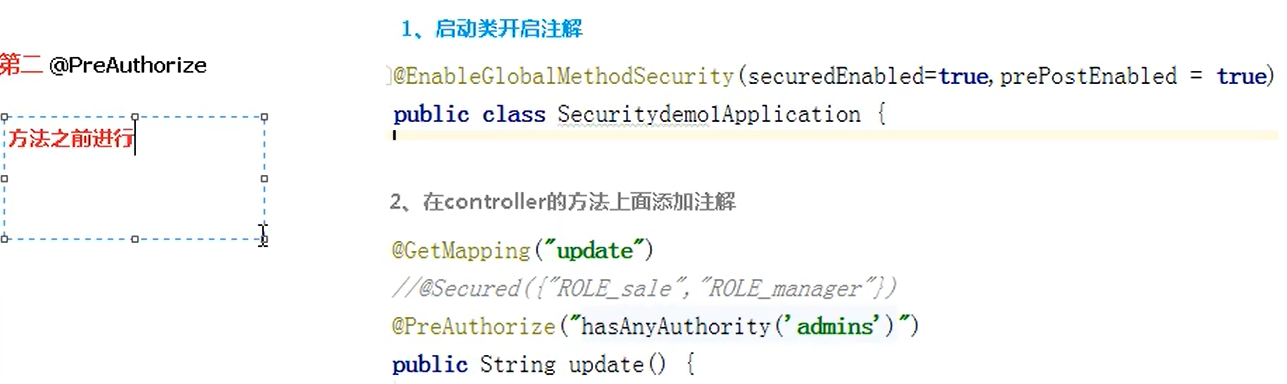
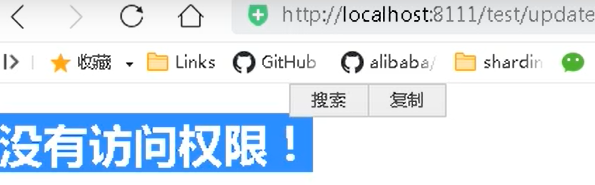
@PostAuthorize:在方法执行之后设置权限,就是先执行完方法,然后再判断是否有权限,如果没有权限,就不返回数据。 
如下,使用 路径进行访问,方法执行了,但是并没有请求并没有得到返回结果,而是显示没有权限访问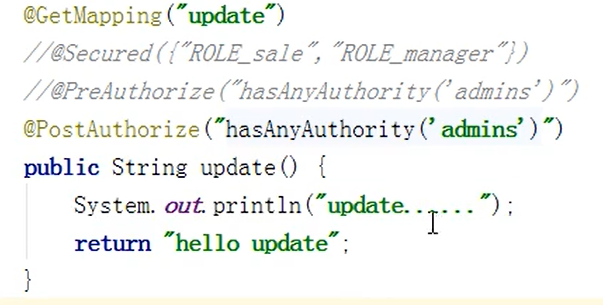
@PostAuthorize:对返回的数据进行过滤,过滤后返回。只有通过过滤的数据才能显示。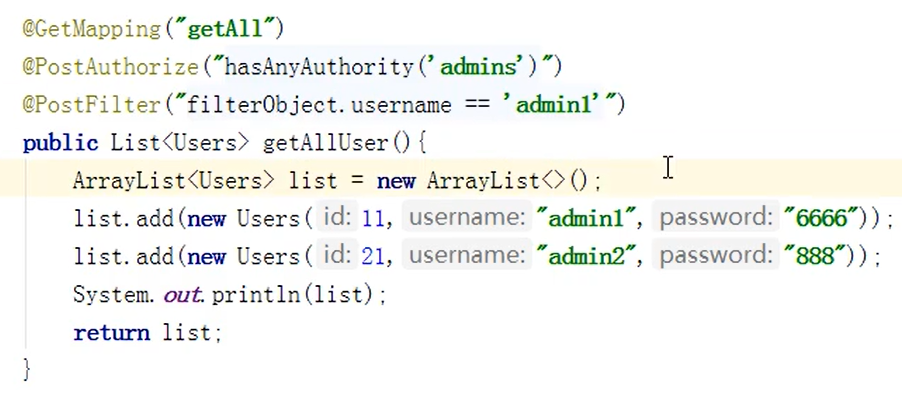
浏览器输入地址访问该方法,前面页面上只显示了 admin1。因为这个admin1通过了过滤。
登出
通过前端页面发起登出请求,然后被后端接收,进行处理,如果成功登出,就跳转到test/hello。其实感觉配置类里的这些东西好像做了control层做的工作
<body>
    <h1>hello,欢迎你</h1>
    <a href="/logout">退出</a>
</body>
配置类上注册登出
流程:前端点击退出 -> 请求就到后端的配置类上,被/logout接收,然后如果登出成功 -> /test/hello
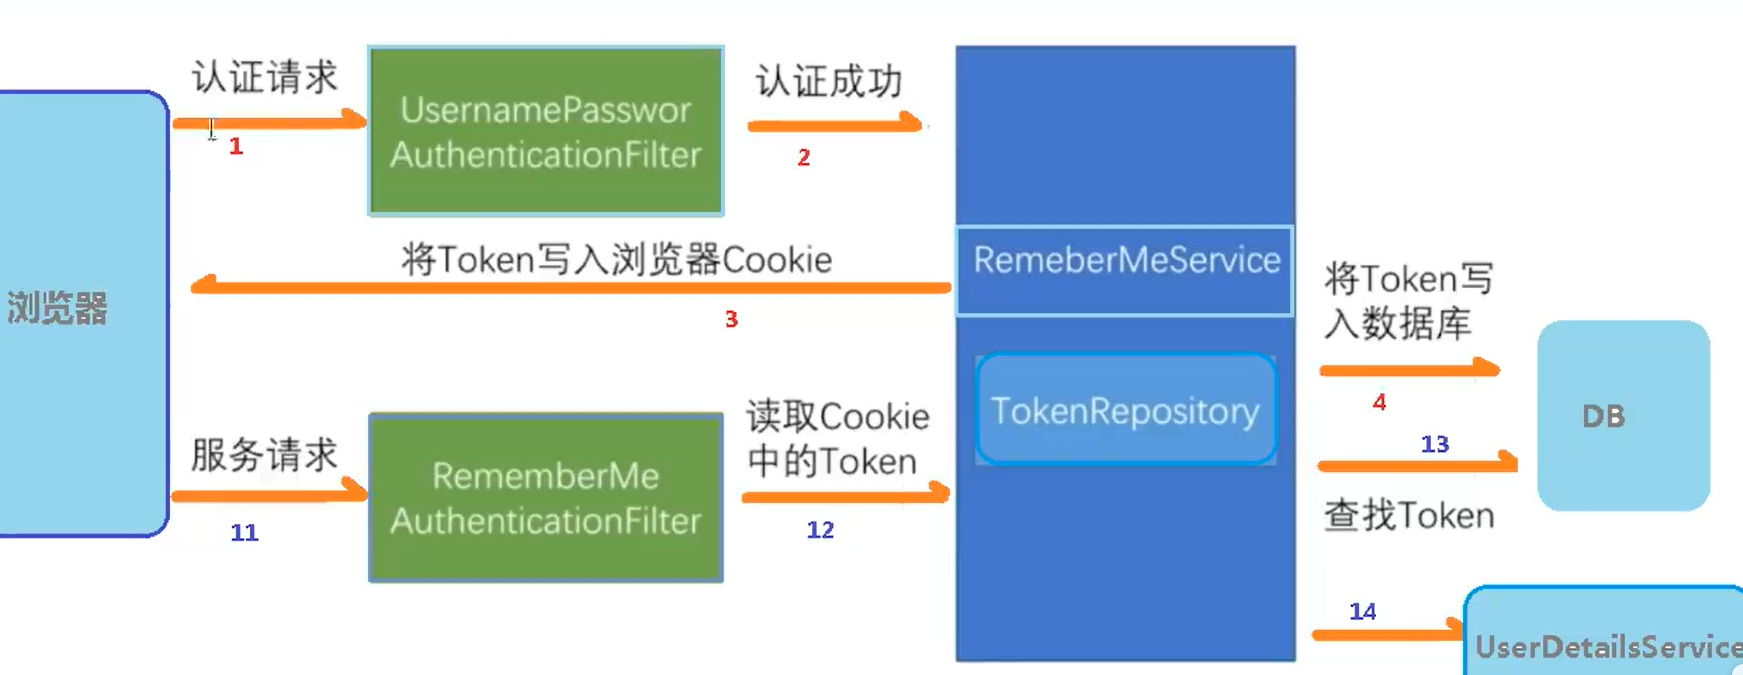
基于数据库实现记住我
使用默认的记住我,配置下面一个就行了:
        http.formLogin()  // 自定义自己编写的登录页面
                // .loginPage("/login.html")  // 登录页面设置
                // 用来验证 表单的提交。
                // .loginProcessingUrl("/handle/login")
                // .defaultSuccessUrl("/test/index").permitAll() // 登录成功之后跳转的页面
                .and().authorizeRequests()
                .antMatchers("/", "/test/hello", "/handle/login").permitAll()// 设置那些路径可以访问,不需认证
                .antMatchers("test/vip").hasRole("sale")
                .anyRequest().authenticated()
                .and().rememberMe()
                .and().csrf().disable();  // 关闭csrf保护
这个小时必须完成这些视频,不然就去死吧。再他妈分心杀了你
使用自己的记住我,前端页面需要加上remember-me标签。
添加配置,这个配置只要写在@Configuration上就行。不过要配合WebSecurityConfigurerAdapter一起使用。
@Configuration
public class SecurityConfigTest extends WebSecurityConfigurerAdapter {

 @Autowired
 DataSource dataSource;

 @Bean
 public PersistentTokenRepository persistentTokenRepository() {
     JdbcTokenRepositoryImpl jtr = new JdbcTokenRepositoryImpl();
     jtr.setDataSource(dataSource);
     return jtr;
 }
@Configuration public class SecurityConfigTest extends WebSecurityConfigurerAdapter { @Override protected void configure(HttpSecurity http) throws Exception { http.logout().logoutUrl("/logout").logoutSuccessUrl("/test/hello").permitAll(); http.rememberMe(); http.formLogin() // 自定义自己编写的登录页面 .loginPage("/login.html") // 登录页面设置 // 用来验证 表单的提交。 .loginProcessingUrl("/handle/login") .defaultSuccessUrl("/test/index").permitAll() // 登录成功之后跳转的页面 .and().authorizeRequests() .antMatchers("/", "/test/hello", "/handle/login").permitAll()// 设置那些路径可以访问,不需认证 .antMatchers("test/vip").hasRole("sale") .anyRequest().authenticated() //重点是下三行 .and().rememberMe().tokenRepository(persistentTokenRepository()) .tokenValiditySeconds(3600) .userDetailsService(userDetailsService) .and().csrf().disable(); // 关闭csrf保护 }3.写前端页面,注意下面的action改成 /handle/login

原理
源码:
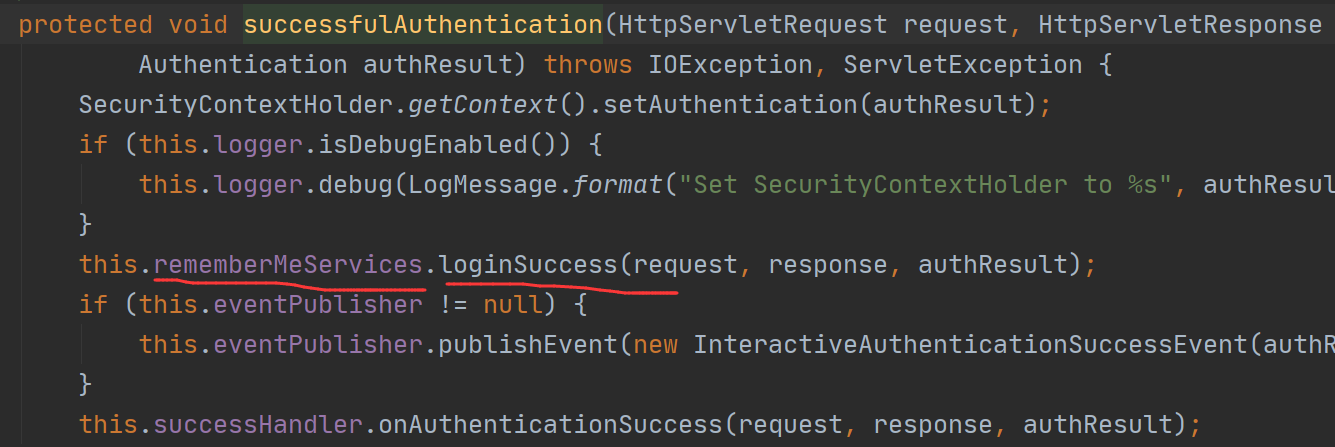
还是正常的访问,被Filter拦截,然后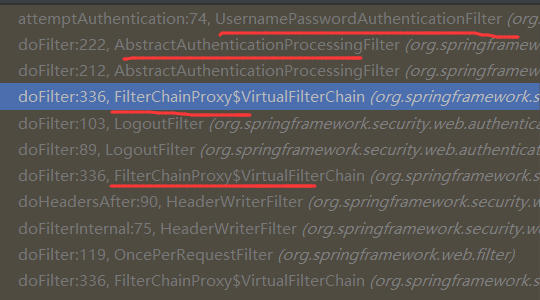


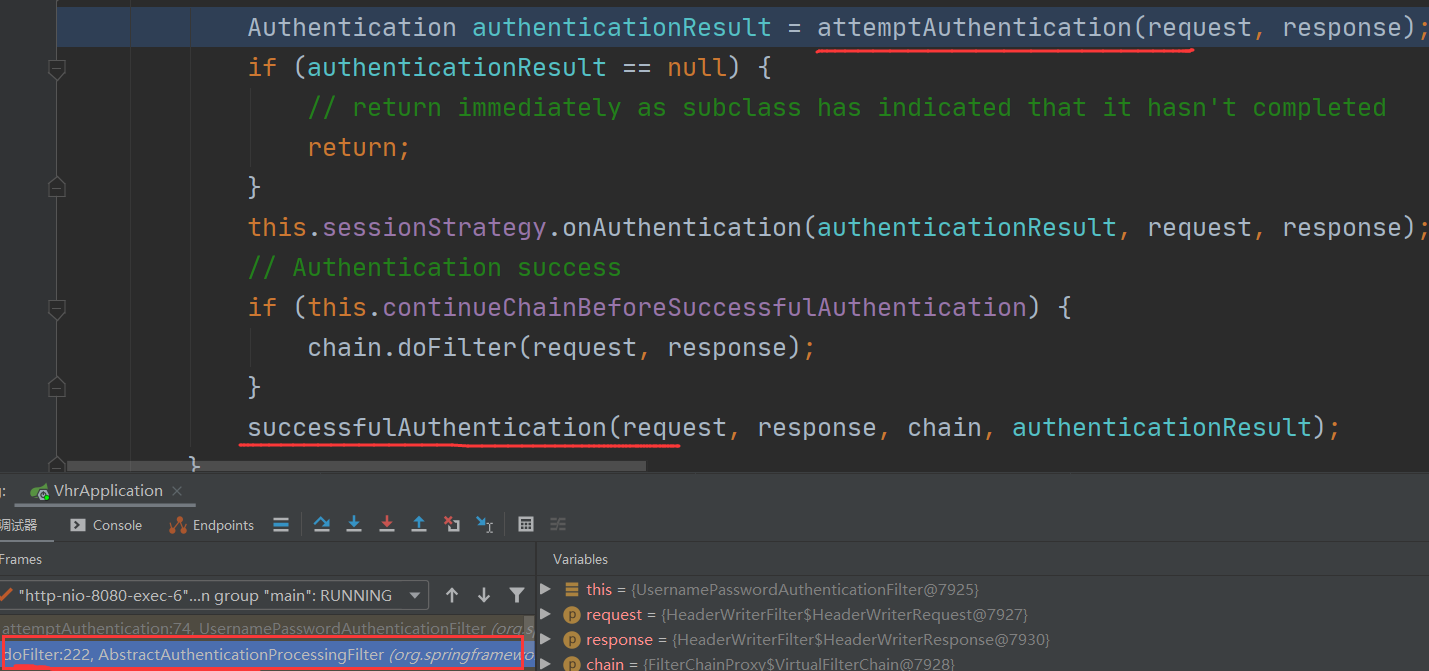
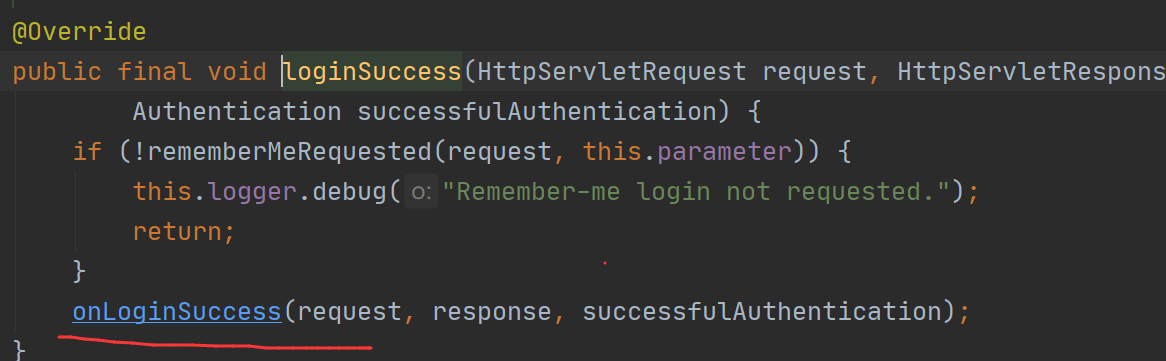
相当于是遍历所有的过滤器,最后匹配到了UsernamePasswordAuthenticationFilter,然后调用他的attemptAuthentication去验证,验证完之后,继续调他的successfulAuthentication()。
attemptAuthentication代码如下(不看也行),就是获取参数,然后验证。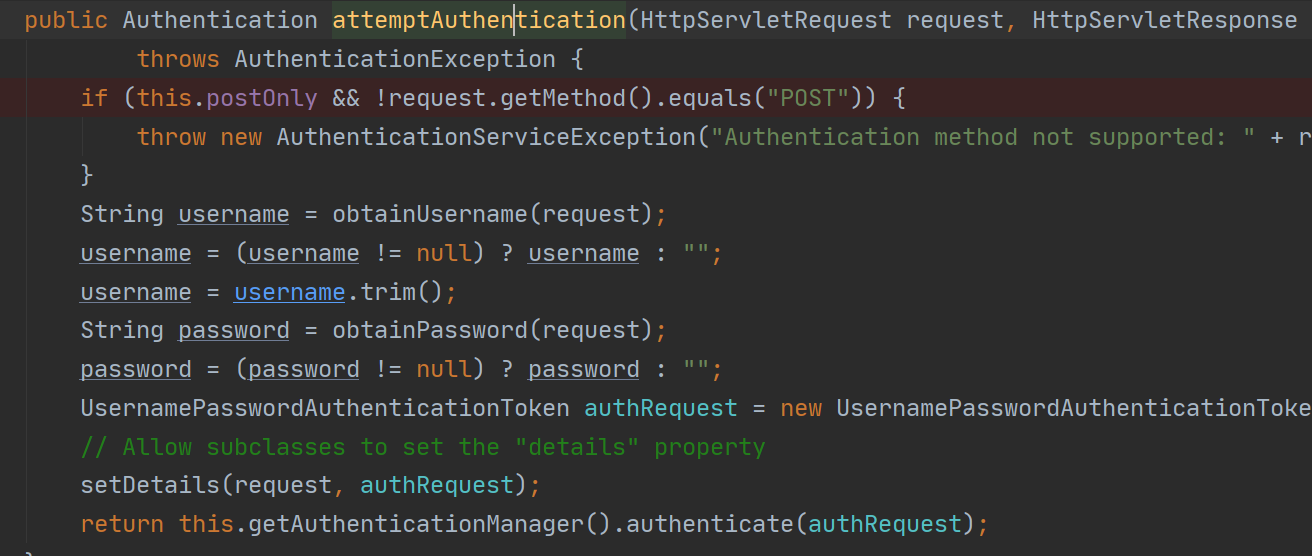

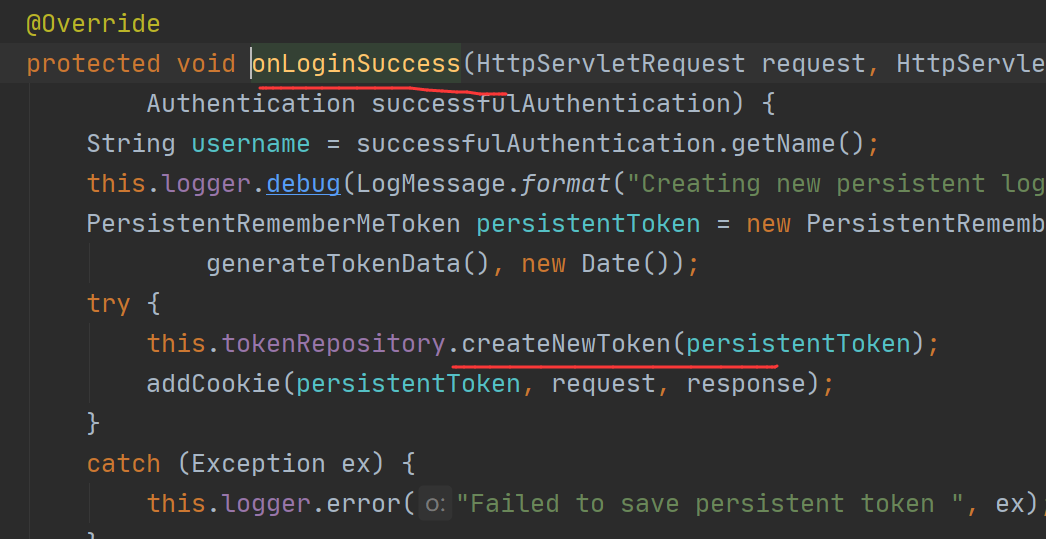
addCookie() 就是给客户端加上cookie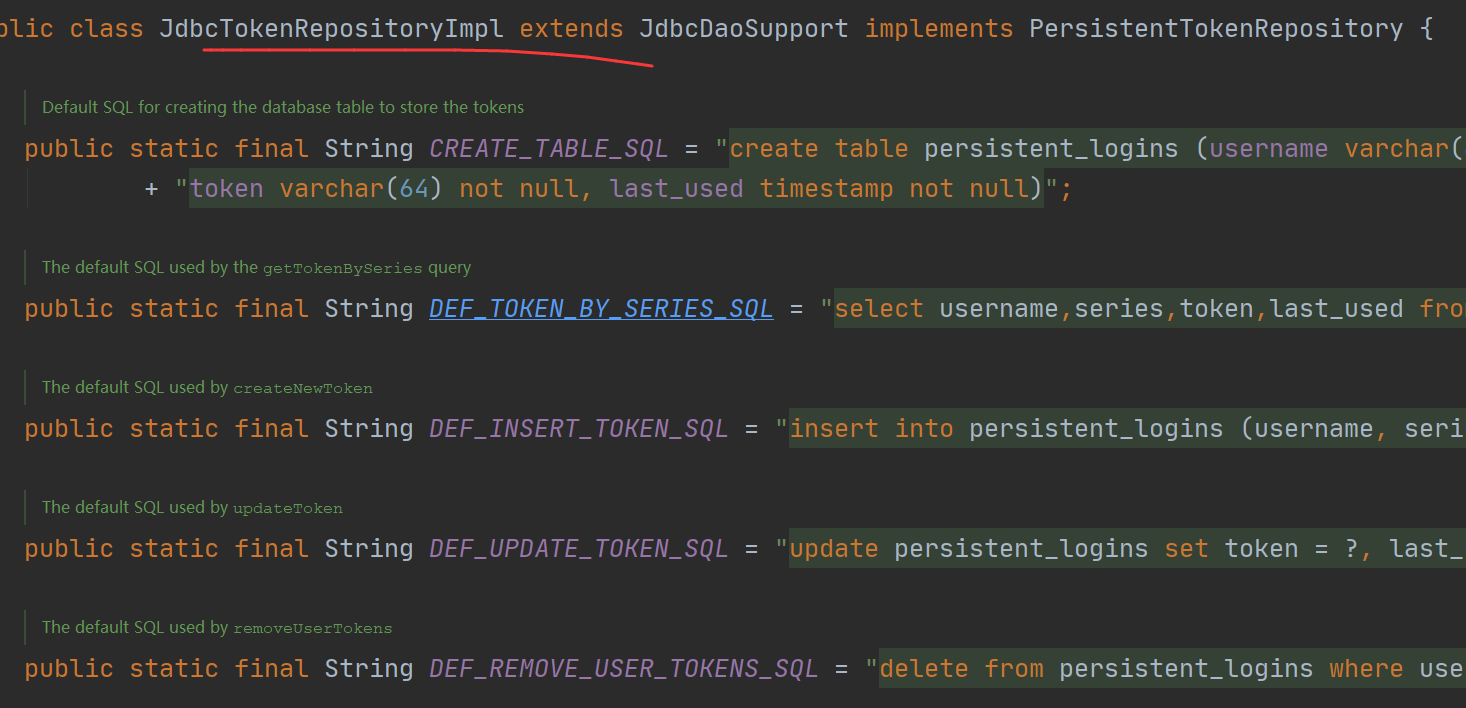
createNewToken()就是往数据库里创建token令牌。
总之大致方向有了,自己debug一下吧,不难。
上面是第一次请求流程,下面看第二次请求流程

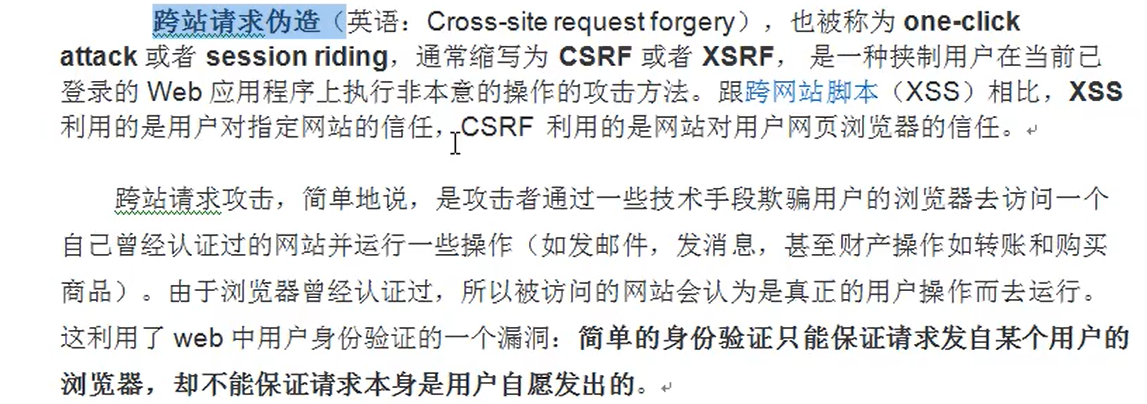
CSRF理解
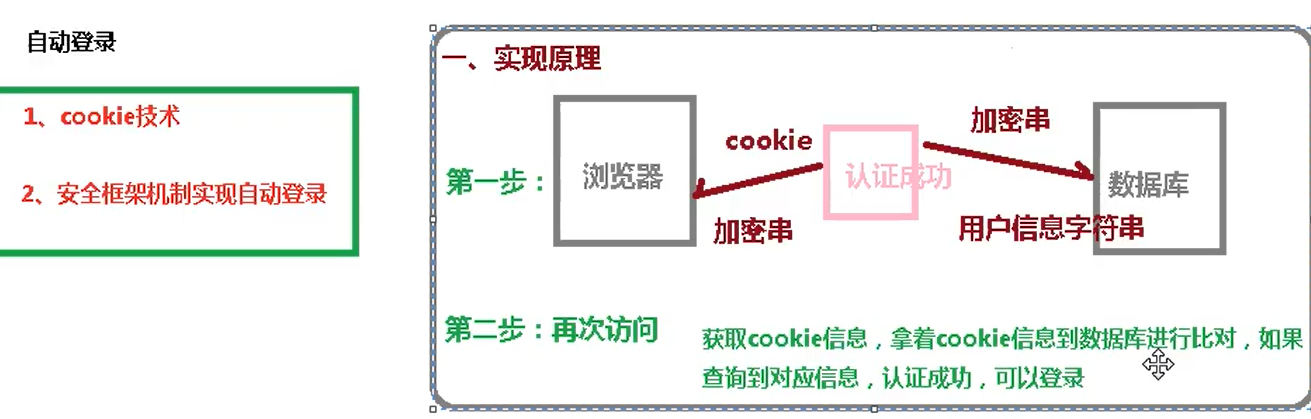
自动登录
- cookie技术
- 安全框架机制实现自动登录

若有收获,就点个赞吧
0 人点赞
