1. Spring IOC/DI
1 通过配置文件进行
1.1 导入Spring依赖包
sping有很多依赖包,因此需要批量导入的方式,新建lib然后一个个导入的方式太慢。需要在项目右键properties-Java BuildPath里选择到指定目录后,全选,即可批量导入。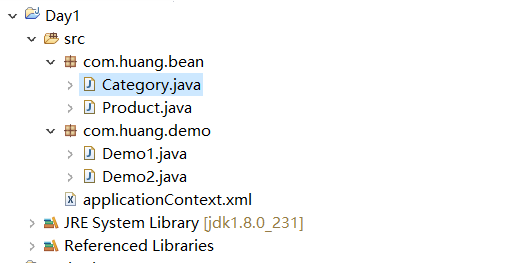
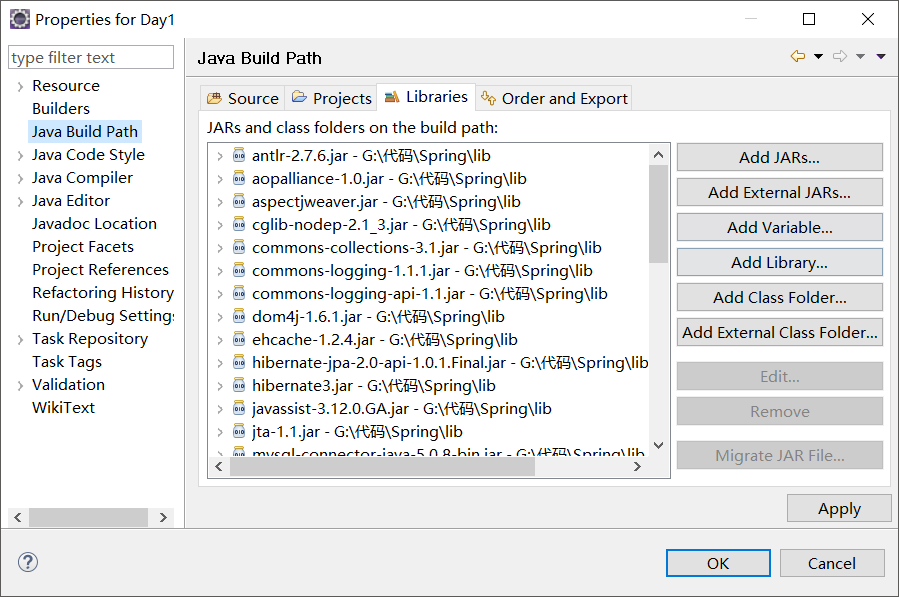
1.2 配置文件
配置文件的名字可以不确定,但推荐使用applicationContext.xml。
1.3 创建两个JavaBean
什么是JavaBean?
JavaBean的标准
- 提供无参public的构造方法(默认提供)
- 每个属性,都有public的getter和setter
- 如果属性是boolean,那么就对应is和setter方法
Category类别。
package com.huang.bean;public class Category {private int id;private String name;public int getId() {return id;}public void setId(int id) {this.id = id;}public String getName() {return name;}public void setName(String name) {this.name = name;}@Overridepublic String toString() {// TODO Auto-generated method stubreturn "["+this.id+","+this.name+"]";}}
- Product商品。
package com.huang.bean;public class Product {private int id;private String name="product2";private float price;//一个商品对应一种商品种类private Category category;public int getId() {return id;}public void setId(int id) {this.id = id;}public String getName() {return name;}public void setName(String name) {this.name = name;}public float getPrice() {return price;}public void setPrice(float price) {this.price = price;}public Category getCategory() {return category;}public void setCategory(Category category) {this.category = category;}@Overridepublic String toString() {// TODO Auto-generated method stubreturn "["+this.id+","+this.name+","+this.price+" "+"\n"+"\t"+this.category+"]";}}
1.3 修改配置文件。用标签对声明两个Spring对象。
- 标签对作用
- bean标签对表示一个javabean对象,name属性指定这个bean的名字,class指定这个对象的类。
- bean标签下的property标签指定每个属性的复制情况,name指定属性名,value指定属性内容,如果是简单的数据类型可以用value直接赋值,如果是对象类型的数据类型,需要手动创建另外一个bean,用ref标签指向另一个bean。
- 配置文件实例
<?xml version="1.0" encoding="UTF-8"?><beans xmlns="http://www.springframework.org/schema/beans"xmlns:xsi="http://www.w3.org/2001/XMLSchema-instance" xmlns:aop="http://www.springframework.org/schema/aop"xmlns:tx="http://www.springframework.org/schema/tx" xmlns:context="http://www.springframework.org/schema/context"xsi:schemaLocation="http://www.springframework.org/schema/beanshttp://www.springframework.org/schema/beans/spring-beans-3.0.xsdhttp://www.springframework.org/schema/aophttp://www.springframework.org/schema/aop/spring-aop-3.0.xsdhttp://www.springframework.org/schema/txhttp://www.springframework.org/schema/tx/spring-tx-3.0.xsdhttp://www.springframework.org/schema/contexthttp://www.springframework.org/schema/context/spring-context-3.0.xsd"><bean name="c" class="com.huang.bean.Category"><property name="id" value="1" /><property name="name" value="category 1" /></bean><bean name="p" class="com.huang.bean.Product"><property name="id" value="1" /><property name="name" value="Product 1" /><property name="price" value="10.2" /><property name="category" ref="c" /></bean></beans>
1.4 Demo
- 代码 ```java package com.huang.demo;
import org.springframework.context.ApplicationContext; import org.springframework.context.support.ClassPathXmlApplicationContext;
import com.huang.bean.Category; import com.huang.bean.Product;
public class Demo1 { public static void main(String[] args) { // 指定Spring上下文环境 // IOC 反转控制 是Spring的基础,Inversion Of Control // DI 依赖注入 Dependency Inject. 简单地说就是拿到的对象的属性,已经被注入好相关值了,直接使用即可。 ApplicationContext context = new ClassPathXmlApplicationContext(new String[] { “applicationContext.xml” }); // 从Spring那里拿到一个对象 // context.getBean方法返回数据类型,返回的是Object类型,需要强制转换 // 注入了普通数据类型 Category c = (Category) context.getBean(“c”); System.out.println(c); // 注入了对象类型 Product p = (Product) context.getBean(“p”); System.out.println(p);
}
}
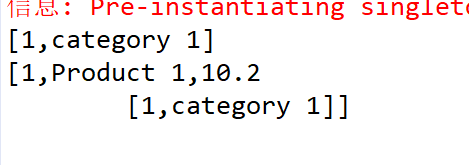
2. 效果<a name="vexhg"></a>## 2 IOC/DI<a name="RLA7D"></a>### 2.1IOC和DI概念1. IOC 反转控制 是Spring的基础,Inversion Of Control。1. DI 依赖注入 Dependency Inject. 简单地说就是拿到的对象的属性,已经被注入好相关值了,直接使用即可。<a name="klg0i"></a>### 2.2 原理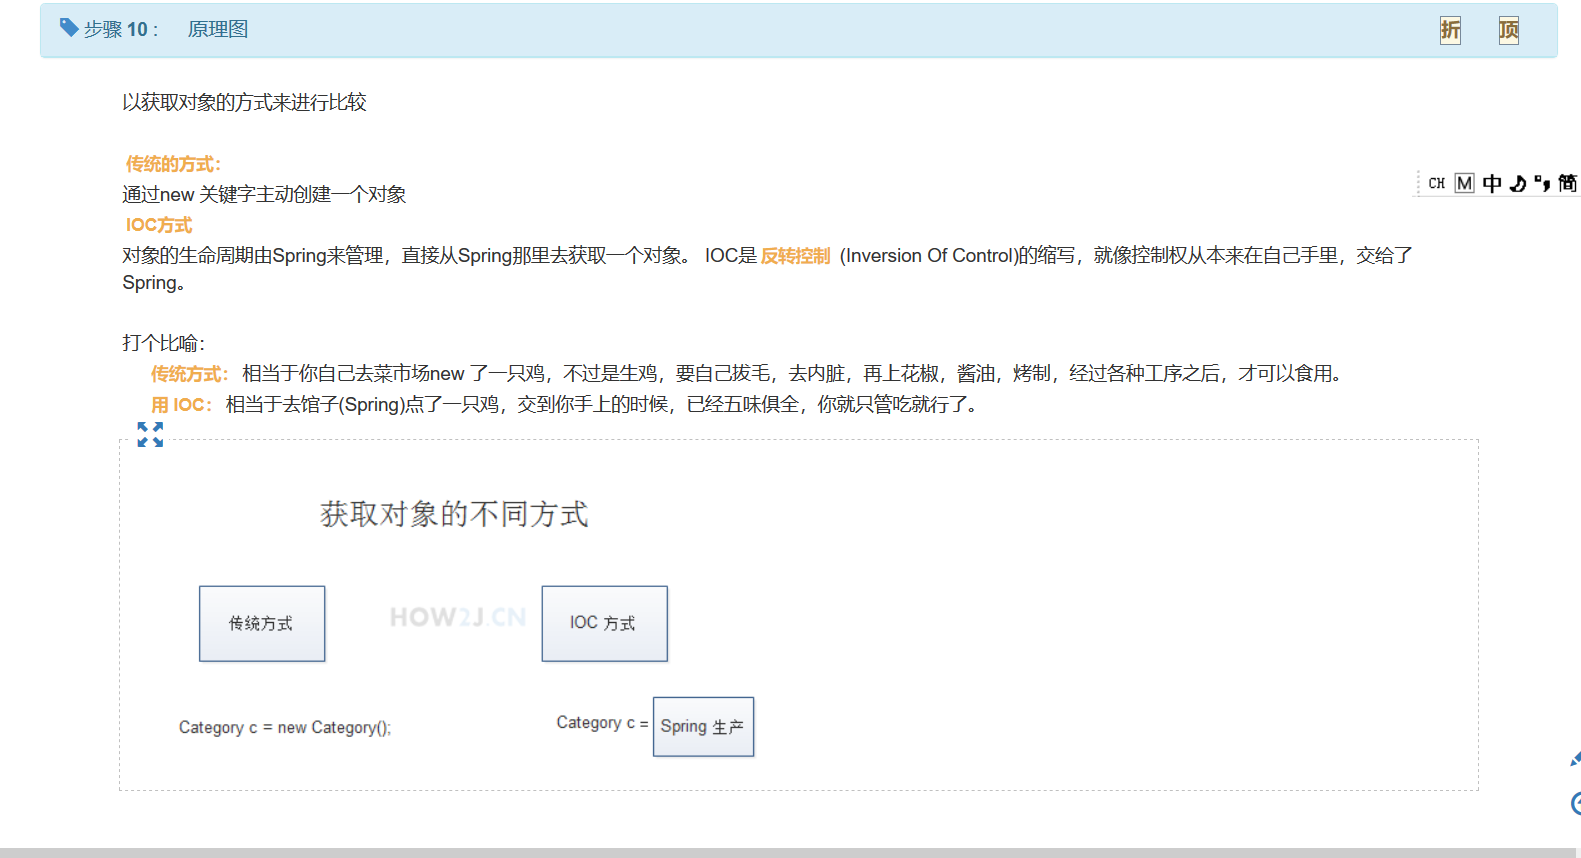<a name="W3gXK"></a>## 3 通过注解方式<a name="tYlY8"></a>### 3.1 数据类型为对象类型时使用注解11. 配置文件中注释掉Product的category属性的赋值,同时添加标签允许使用注解方式。```xml<!-- 允许使用注解方式 --><context:annotation-config /><!-- 许多JavaBean实例 --><bean name="c" class="com.huang.bean.Category"><property name="id" value="1" /><property name="name" value="category 1" /></bean><bean name="p" class="com.huang.bean.Product"><property name="id" value="1" /><property name="name" value="Product 1" /><property name="price" value="10.2" /><!-- <property name="category" ref="c" /> --></bean>
- 在Product这个bean文件的caetgory属性前添加autowired注解,这个注解可
public class Product {private int id;private String name;private float price;//一个商品对应一种商品种类@Autowiredprivate Category category;
- Demo,还是那个Demo测试结果也相同。
发现可以自动匹配上。
3.2 数据类型为对象类型时使用注解2
- autowired注解有一个特点,如果能够匹配到多个指定类型的bean实例,那么就会报错。
<!-- 许多JavaBean实例 --><bean name="c" class="com.huang.bean.Category"><property name="id" value="1" /><property name="name" value="category 1" /></bean><bean name="c2" class="com.huang.bean.Category"><property name="id" value="2" /><property name="name" value="category 2" /></bean>

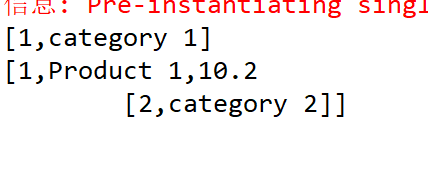
- 因此使用resource可以指定特定name的bean实例。
public class Product {private int id;private String name;private float price;//一个商品对应一种商品种类@Resource(name="c2")private Category category;public int getId() {
- 运行Demo可以把Product实例与第二个Category匹配上。
3.3 纯注解的方式
- 删除配置文件中前面的所有部分,只留下允许使用纯注解的配置。
<?xml version="1.0" encoding="UTF-8"?><beans xmlns="http://www.springframework.org/schema/beans"xmlns:xsi="http://www.w3.org/2001/XMLSchema-instance" xmlns:aop="http://www.springframework.org/schema/aop"xmlns:tx="http://www.springframework.org/schema/tx" xmlns:context="http://www.springframework.org/schema/context"xsi:schemaLocation="http://www.springframework.org/schema/beanshttp://www.springframework.org/schema/beans/spring-beans-3.0.xsdhttp://www.springframework.org/schema/aophttp://www.springframework.org/schema/aop/spring-aop-3.0.xsdhttp://www.springframework.org/schema/txhttp://www.springframework.org/schema/tx/spring-tx-3.0.xsdhttp://www.springframework.org/schema/contexthttp://www.springframework.org/schema/context/spring-context-3.0.xsd"><!-- 纯注解的方式,指定bean的位置 --><context:component-scan base-package="com.huang.bean" /></beans>
- 修改各个JavaBean,通过Component注解使得其成为一个bean。
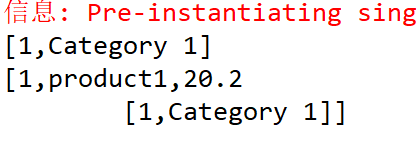
@Component("c")public class Category {private int id=1;private String name="Category 1";
@Component("p")public class Product {private int id=1;private String name="product1";private float price=20.2f;// 一个商品对应一种商品种类@Autowiredprivate Category category;
- 运行Demo,相同效果
- 这种方法把类写死了,所有这个类的对象初始化各个属性都为特定值,所以还是推荐使用配置文件配置的方式。
