部署环境(博主): CPU/内存:2核/8GB 带宽:1Mbps Linx环境:CenterOS——64位——8.4版本
参考文献: 1、gitlab搭建与基本使用 2、解决policycoreutils-python is needed by问题
获得Gitlab的RPM包:https://mirrors.tuna.tsinghua.edu.cn/gitlab-ce/yum/el8/
一、GitLab搭建与基本使用
1.0-部署Gitlab的最低服务器要求
网上对配置有很多说法,有的说3GB内存可以勉强跑起来,有的说至少给gitlab分4GB内存,学生党的2GB根本没法看啊,一开始不知道这么吃内存,每次一安装完就卡死,还以为安装流程有问题,经过很多尝试终于在自己可怜的学生服务器上运行起来了。
1.0.1-官方给出推荐的配置:
1.0.2-建议服务器最低配置:
2核 8G以上内存
1.1-安装并配置必要的依赖关系
1.1.2-安装SSH
sudo yum install -y curl policycoreutils-pythonopenssh-server
//出现以下说明成功: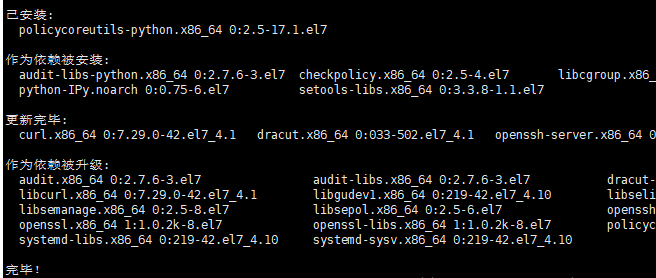
1.1.2-将SSH服务设置成开启自启动。
sudo systemctl enable sshd
1.1.3-启动SSH服务。
sudo systemctl start sshd
1.1.4-安装防火墙(如果已经安装了防火墙并且已经在运行状态,则可直接进行第1.1.6步)
yum install firewalld systemd -y
1.1.5-开启防火墙
service firewalld start

1.1.6-添加http服务到firewalld,pemmanent表示永久生效,若不加—permanent系统下次启动后就会失效。
sudo firewall-cmd --permanent --add-service=http
//使用FirewallID:
#手动开启端口:5656firewall-cmd --permanent --zone=public --add-port=5656/tcp#重启firewall-cmd --reload

1.1.6-1-如果出现以下错误,则表示没有安装/启动FirewallID,需按照以下教程先进行安装。
教程:https://blog.csdn.net/weixin_48803304/article/details/108182360
1、安装yum install -y firewalldyum install -y firewall-config2、配置开启firewall服务#重启firewalld服务(注意有个d)systemctl restart firewalld#设置开机自启动(注意有个d)systemctl enable firewalld特别提醒: firewall 和 iptables冲突 , 需要禁用其中一个#停止iptables服务systemctl stop iptables#禁用iptables服务systemctl mask iptables3、使用启动systemctl start firewalld # 启动systemctl status firewalld #查看firewalld当前状态systemctl enable firewalld # 开机启动systemctl stop firewalld # 关闭systemctl disable firewalld # 取消开机启动使用查看开放端口命令firewall-cmd --list-ports#设置脚本firewall-cmd --permanent --zone=public --add-service=ftpfirewall-cmd --permanent --zone=public --add-port=21/tcpfirewall-cmd --permanent --zone=public --add-port=80/tcpfirewall-cmd --permanent --zone=public --add-port=8080/tcpfirewall-cmd --reload命令说明 :–permanent 永久生效 / 否则重启失效–zone 作用域 一般都是public , 可以使用firewall-cmd --list-all-zones命令查看当前使用的域–add-service 添加服务–add-port 添加端口, 格式为 端口号/端口协议查看端口开放情况#查看某个端口firewall-cmd --zone=public --query-port=80/tcp#查看所有端口开放情况firewall-cmd --zone=public --list-ports4、端口转发路由 :# 将80端口的流量转发至8080firewall-cmd --add-forward-port=port=80:proto=tcp:toport=8080# 将80端口的流量转发至192.168.0.1firewall-cmd --add-forward-port=proto=80:proto=tcp:toaddr=192.168.1.0.1# 将80端口的流量转发至192.168.0.1的8080端口firewall-cmd --add-forward-port=proto=80:proto=tcp:toaddr=192.168.0.1:toport=80805、扩展命令 :# 检查是否允许伪装IPfirewall-cmd --query-masquerade# 允许防火墙伪装IPfirewall-cmd --add-masquerade# 禁止防火墙伪装IPfirewall-cmd --remove-masquerade#删除端口firewall-cmd --zone=public --remove-port=80/tcp --permanent
1.1.7-重启防火墙。
sudo systemctl reload firewalld
1.1.8-接下来安装Postfix以发送通知邮件。
sudo yum install postfix
1.1.9-将postfix服务设置开启自启动。
sudo systemctl enable postfix
1.1.10-启动postfix
sudo systemctl start postfix
//在安装Postfix期间,可能会出现配置屏幕。选择“Internet Site”并按enter键。使用您的服务器的外部DNS以“mail name”并按enter。如果出现额外的屏幕,继续按enter键接受默认值。
1.1.11-检查系统中是否安装了wget。
wget -v
//检查系统中是否已经安装wget,使用命令若出现下图wget相关版本描述则说明系统中已经安装wget ,若报系统找不到命令说明wget未安装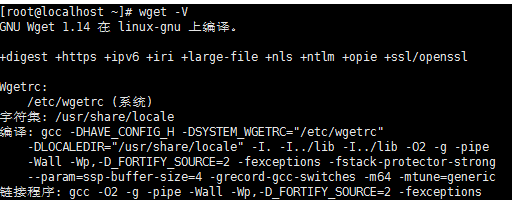
1.1.12-如果未安装wget,则进行安装:
yum -y install wget

1.1.12-你在Vim编辑器。
yum install vim -y
1.2-添加Gitlab镜像(社区版免费)
这里需要注意自己CenterOS的版本,不同的版本需要安装不同版本的Gitlab,主编使用的是CenterOS8。 点击获取Gitlab:https://mirrors.tuna.tsinghua.edu.cn/gitlab-ce/yum/el8/
//博主安装的是gitlab-ce-14.5.0-ce.0.el8.x86_64.rpm版本:
1.2.1-添加Gitlab镜像(注意CetnerOS版本,不然会出现这个错误)。
“policycoreutils-python is needed by”
//CenterOS8
//下载:wget https://mirrors.tuna.tsinghua.edu.cn/gitlab-ce/yum/el8/gitlab-ce-14.5.0-ce.0.el8.x86_64.rpm//安装Gitlab:rpm -i gitlab-ce-14.5.0-ce.0.el8.x86_64.rpm
//出现这个说明安装成功: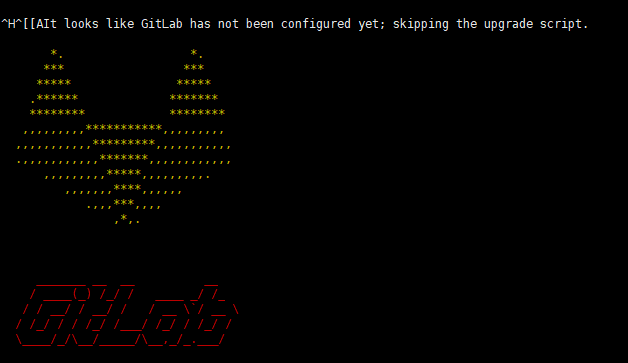
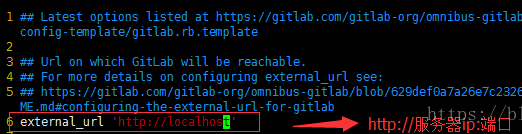
1.2.2-修改Gitlab配置文件,执行服务器IP和自定义端口。
vim /etc/gitlab/gitlab.rb
进入编辑器后按“i”键进入编辑状态,ESC键退出编辑状态
退出并保存,命令输入“:wq”
ps:注意这里设置的端口不能被占用,默认是8080端口,如果8080已经使用,请自定义其它端口,并在防火墙设置开放相对应得端口
external_url 'http://xxx.xx.xxx.xx:xxxx'
1.2.3-重启并启用GitLab。
gitlab-ctl reconfigure
//主编在运行这一步的时候出现了问题,但是我的服务器是1核1G内存的服务器,后来直接爆出这个错误:
//解决:由于服务器1G的CPU运行内存,换至2G运行内存时问题解决。所以解决办法是换至大于等于2G CPU运行内存(但是内存还是太小了,后面又出现了新问题)。
1.2.4-然后在输入一下命令进行重启。
--启动gitlab-ctl start--重启gitlab-ctl restart--查看状态gitlab-ctl status
//当出现这个说明已经安装成功了: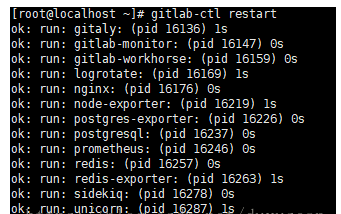
12.4-当我在外网输入IP+端口进行访问时。就出现了这个问题: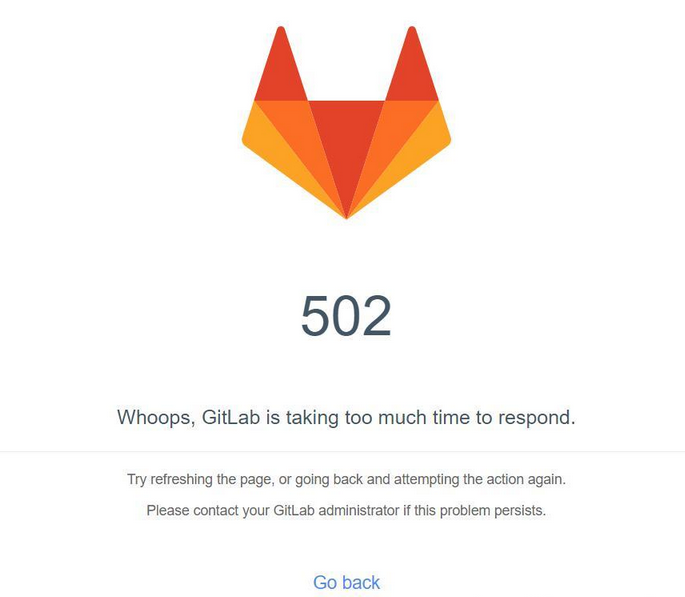
1.3-GitLab报502错误
博主使用了2核4G的机器,配置成功后访问时,报502错误,这个错误的原因是机器的内存少了。
(1)解决方案一:加内存
把机器的配置调整为【2核8G】就能正常访问了。
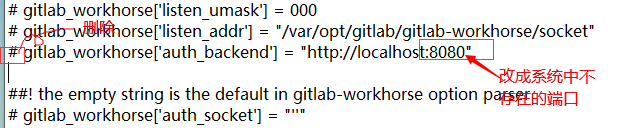
(2)解决方案二:改配置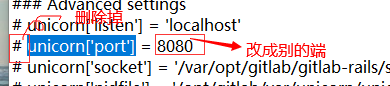
1-然后在输入一下命令进行重启。
--重新启动配置GitLabgitlab-ctl reconfigure--启动gitlab-ctl start--重启gitlab-ctl restart--查看状态gitlab-ctl status
//当出现这个说明已经安装成功了:
12.5-如何GitLab IP+端口一直无法访问,可以关闭防火墙。
systemctl stop firewalld
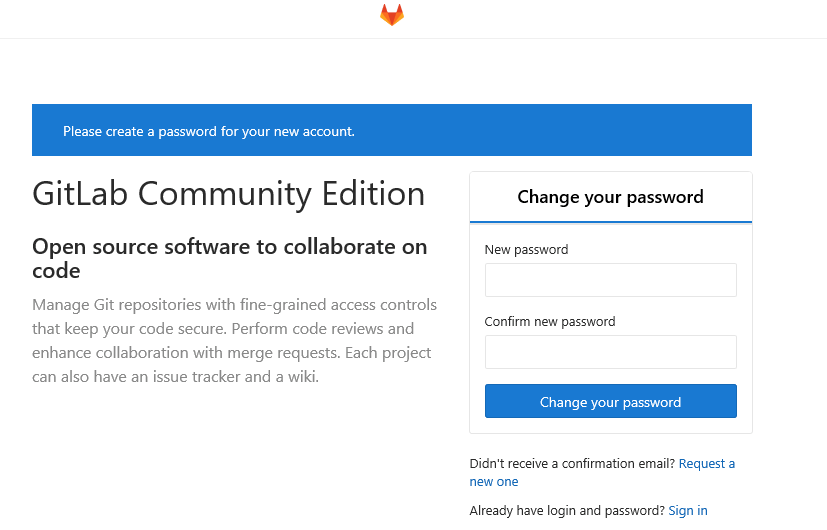
1.4-初始化管理员密码
教程:
1.进入到gitlab 的ssh命令行
root@03cbecccf5c8:/#
2.登录到Gitlab服务器
root@03cbecccf5c8:/# gitlab-rails console production
如果执行上面的指令提示
Traceback (most recent call last): 8: from bin/rails:4:in
<main>'
    7: from bin/rails:4:in
require’ 6: from /opt/gitlab/embedded/lib/ruby/gems/2.6.0/gems/railties-6.0.2/lib/rails/commands.rb:18:in<top (required)>' 5: from /opt/gitlab/embedded/lib/ruby/gems/2.6.0/gems/railties-6.0.2/lib/rails/command.rb:46:ininvoke’ 4: from /opt/gitlab/embedded/lib/ruby/gems/2.6.0/gems/railties-6.0.2/lib/rails/command/base.rb:69:inperform' 3: from /opt/gitlab/embedded/lib/ruby/gems/2.6.0/gems/thor-0.20.3/lib/thor.rb:387:indispatch’ 2: from /opt/gitlab/embedded/lib/ruby/gems/2.6.0/gems/thor-0.20.3/lib/thor/invocation.rb:126:ininvoke_command' 1: from /opt/gitlab/embedded/lib/ruby/gems/2.6.0/gems/thor-0.20.3/lib/thor/command.rb:27:inrun’ /opt/gitlab/embedded/lib/ruby/gems/2.6.0/gems/railties-6.0.2/lib/rails/commands/console/console_command.rb:95:inperform': wrong number of arguments (given 1, expected 0) (ArgumentError) 9: from bin/rails:4:in‘ 8: from bin/rails:4:in require' 7: from /opt/gitlab/embedded/lib/ruby/gems/2.6.0/gems/railties-6.0.2/lib/rails/commands.rb:18:in‘ 6: from /opt/gitlab/embedded/lib/ruby/gems/2.6.0/gems/railties-6.0.2/lib/rails/command.rb:46:in invoke' 5: from /opt/gitlab/embedded/lib/ruby/gems/2.6.0/gems/railties-6.0.2/lib/rails/command/base.rb:69:inperform’ 4: from /opt/gitlab/embedded/lib/ruby/gems/2.6.0/gems/thor-0.20.3/lib/thor.rb:387:indispatch' 3: from /opt/gitlab/embedded/lib/ruby/gems/2.6.0/gems/thor-0.20.3/lib/thor/invocation.rb:126:ininvoke_command’ 2: from /opt/gitlab/embedded/lib/ruby/gems/2.6.0/gems/thor-0.20.3/lib/thor/command.rb:20:inrun' 1: from /opt/gitlab/embedded/lib/ruby/gems/2.6.0/gems/thor-0.20.3/lib/thor/command.rb:34:inrescue in run’ /opt/gitlab/embedded/lib/ruby/gems/2.6.0/gems/thor-0.20.3/lib/thor/base.rb:506:in `handle_argument_error’: ERROR: “rails console” was called with arguments [“production”] (Thor::InvocationError) Usage: “rails console [options]”
则可能是Gitlab版本不一样,然后参数方式不一样,需要用如下方式:
root@03cbecccf5c8:/# gitlab-rails console -e production
3.查询用户
user = User.where(username:”root”).first => #
4.修改密码
user.password = “qwer1234” => “qwer1234”
5.保存
> user.save!
Enqueued ActionMailer::DeliveryJob (Job ID: 1f015e02-34bc-4b26-8e37-3101937b7ce1) to Sidekiq(mailers) with arguments: “DeviseMailer”, “password_change”, “deliver_now”, #
=> true
6.登录
账号:root
密码:qwer1234
[
](https://blog.csdn.net/Junna_zeng/article/details/116779285)
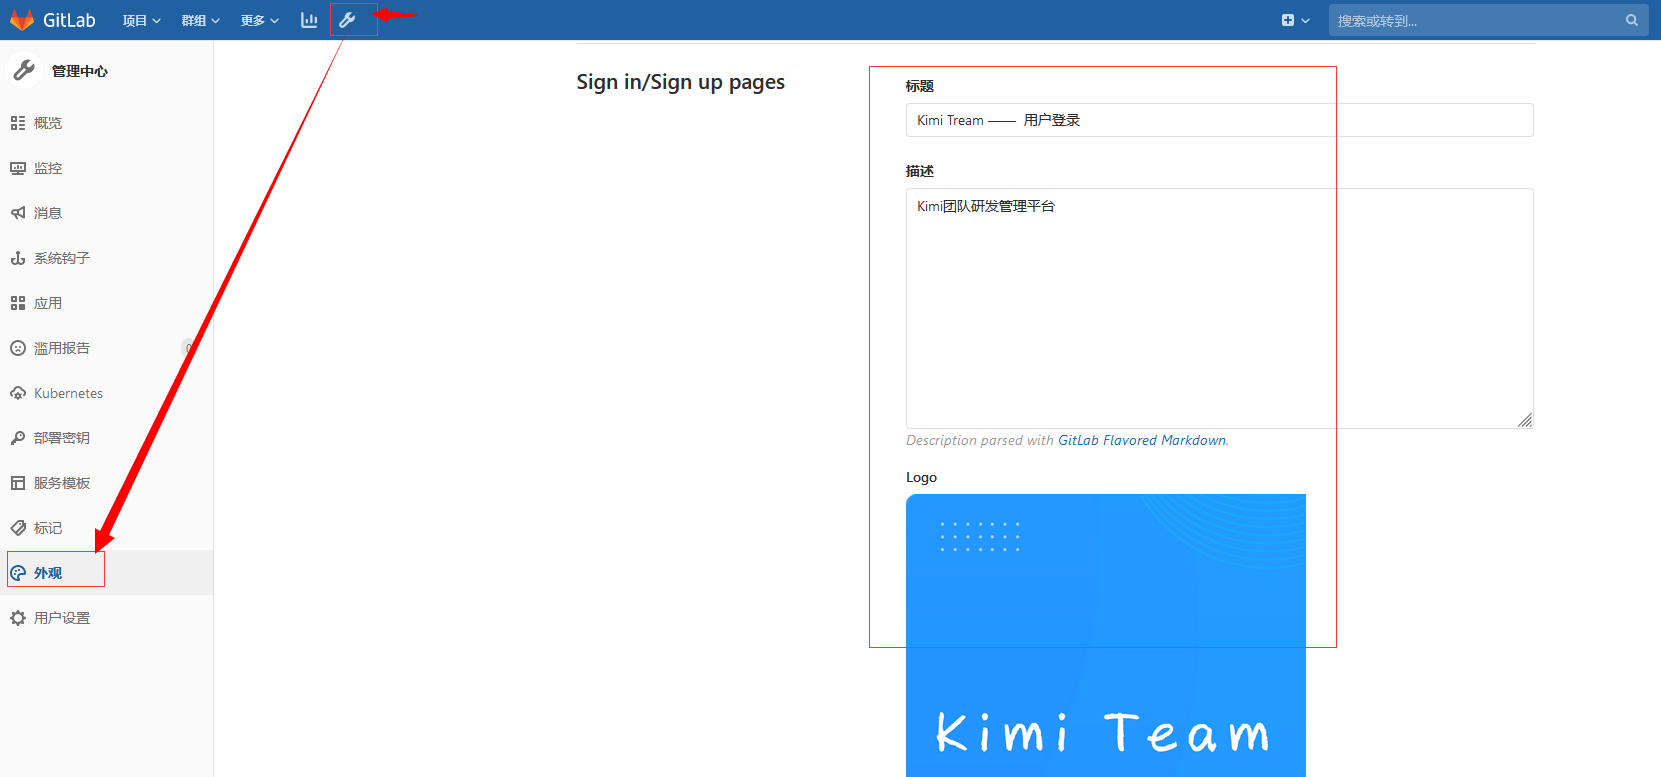
二、界面更改/关闭注册功能
2.1-界面更改
2.2-关闭注册功能

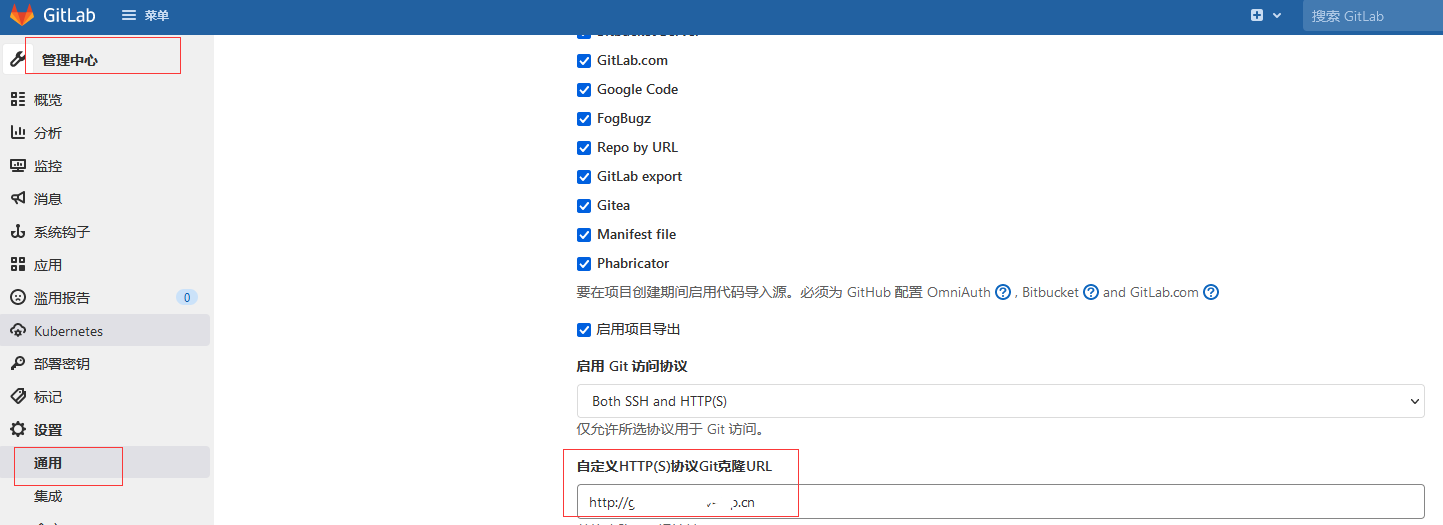
2.3-自定义HTTP(S)协议Git克隆URL
三、Gitlab常用命令
重启配置,并启动gitlab服务 sudo gitlab-ctl reconfigure
启动所有 gitlab sudo gitlab-ctl start
重新启动GitLab sudo gitlab-ctl restart
停止所有 gitlab sudo gitlab-ctl stop
查看服务状态 sudo gitlab-ctl status
查看Gitlab日志 sudo gitlab-ctl tail
修改默认的配置文件 sudo vim /etc/gitlab/gitlab.rb
检查gitlab gitlab-rake gitlab:check SANITIZE=true —trace
四、设置能在外网访问
博主使用的是阿里云服务器,该教程配置外网访问:https://blog.csdn.net/weixin_43122090/article/details/103548956

若有收获,就点个赞吧
0 人点赞
