- Step 1: Create a new project">Step 1: Create a new project
- Step 2: Install dependencies">Step 2: Install dependencies
- Step 3: Define your GraphQL schema">Step 3: Define your GraphQL schema
- Step 4: Define your data set">Step 4: Define your data set
- Step 5: Define a resolver">Step 5: Define a resolver
- Step 6: Create an instance of ApolloServer">Step 6: Create an instance of ApolloServer
- Step 7: Start the server">Step 7: Start the server
- Step 8: Execute your first query">Step 8: Execute your first query
Step 1: Create a new project
- From your preferred development directory, create a directory for a new project and
cdinto it:
mkdir graphql-server-examplecd graphql-server-example
- Initialize a new Node.js project with
npm(or another package manager you prefer, such as Yarn):
npm init --yes
Your project directory now contains a package.json file.
Step 2: Install dependencies
Applications that run Apollo Server require two top-level dependencies:
apollo-serveris the core library for Apollo Server itself, which helps you define the shape of your data and how to fetch it.graphqlis the library used to build a GraphQL schema and execute queries against it.
Run the following command to install both of these dependencies and save them in your project’s node_modules directory:
npm install apollo-server graphql
Also create an empty index.js file in your project’s root directory:
touch index.js
To keep things simple, index.js will contain all of the code for this example application.
Step 3: Define your GraphQL schema
Every GraphQL server (including Apollo Server) uses a schema to define the structure of data that clients can query.
In this example, we’ll create a server for querying a collection of books by title and author.
Open index.js in your preferred editor and paste the following into it:
const { ApolloServer, gql } = require('apollo-server');// A schema is a collection of type definitions (hence "typeDefs")// that together define the "shape" of queries that are executed against// your data.const typeDefs = gql`# Comments in GraphQL strings (such as this one) start with the hash (#) symbol.# This "Book" type defines the queryable fields for every book in our data source.type Book {title: Stringauthor: String}# The "Query" type is special: it lists all of the available queries that# clients can execute, along with the return type for each. In this# case, the "books" query returns an array of zero or more Books (defined above).type Query {books: [Book]}`;
This snippet defines a simple, valid GraphQL schema. Clients will be able to execute a query named books, and our server will return an array of zero or more Books.
Step 4: Define your data set
Now that we’ve defined the structure of our data, we can define the data itself.
:::tips
Apollo Server can fetch data from any source you connect to (including a database, a REST API, a static object storage service, or even another GraphQL server).
:::
For the purposes of this tutorial, we’ll just hardcode some example data.
Add the following to the bottom of index.js:
const books = [{title: 'Harry Potter and the Chamber of Secrets',author: 'J.K. Rowling',},{title: 'Jurassic Park',author: 'Michael Crichton',},];
This snippet defines a simple data set that clients can query. Notice that the two objects in the array each match the structure of the Book type we defined in our schema.
Step 5: Define a resolver
We’ve defined our data set, but Apollo Server doesn’t know that it should use that data set when it’s executing a query. To fix this, we create a resolver.
Resolvers tell Apollo Server how to fetch the data associated with a particular type. Because our Book array is hardcoded, the corresponding resolver is straightforward.
Add the following to the bottom of index.js:
// Resolvers define the technique for fetching the types defined in the// schema. This resolver retrieves books from the "books" array above.const resolvers = {Query: {books: () => books,},};
Step 6: Create an instance of ApolloServer
We’ve defined our schema, data set, and resolver. Now we just need to provide this information to Apollo Server when we initialize it.
Add the following to the bottom of index.js:
// The ApolloServer constructor requires two parameters: your schema// definition and your set of resolvers.const server = new ApolloServer({ typeDefs, resolvers });// The `listen` method launches a web server.server.listen().then(({ url }) => {console.log(`🚀 Server ready at ${url}`);});
Step 7: Start the server
node index.js
You should see the following output:
🚀 Server ready at http://localhost:4000/
We’re up and running!
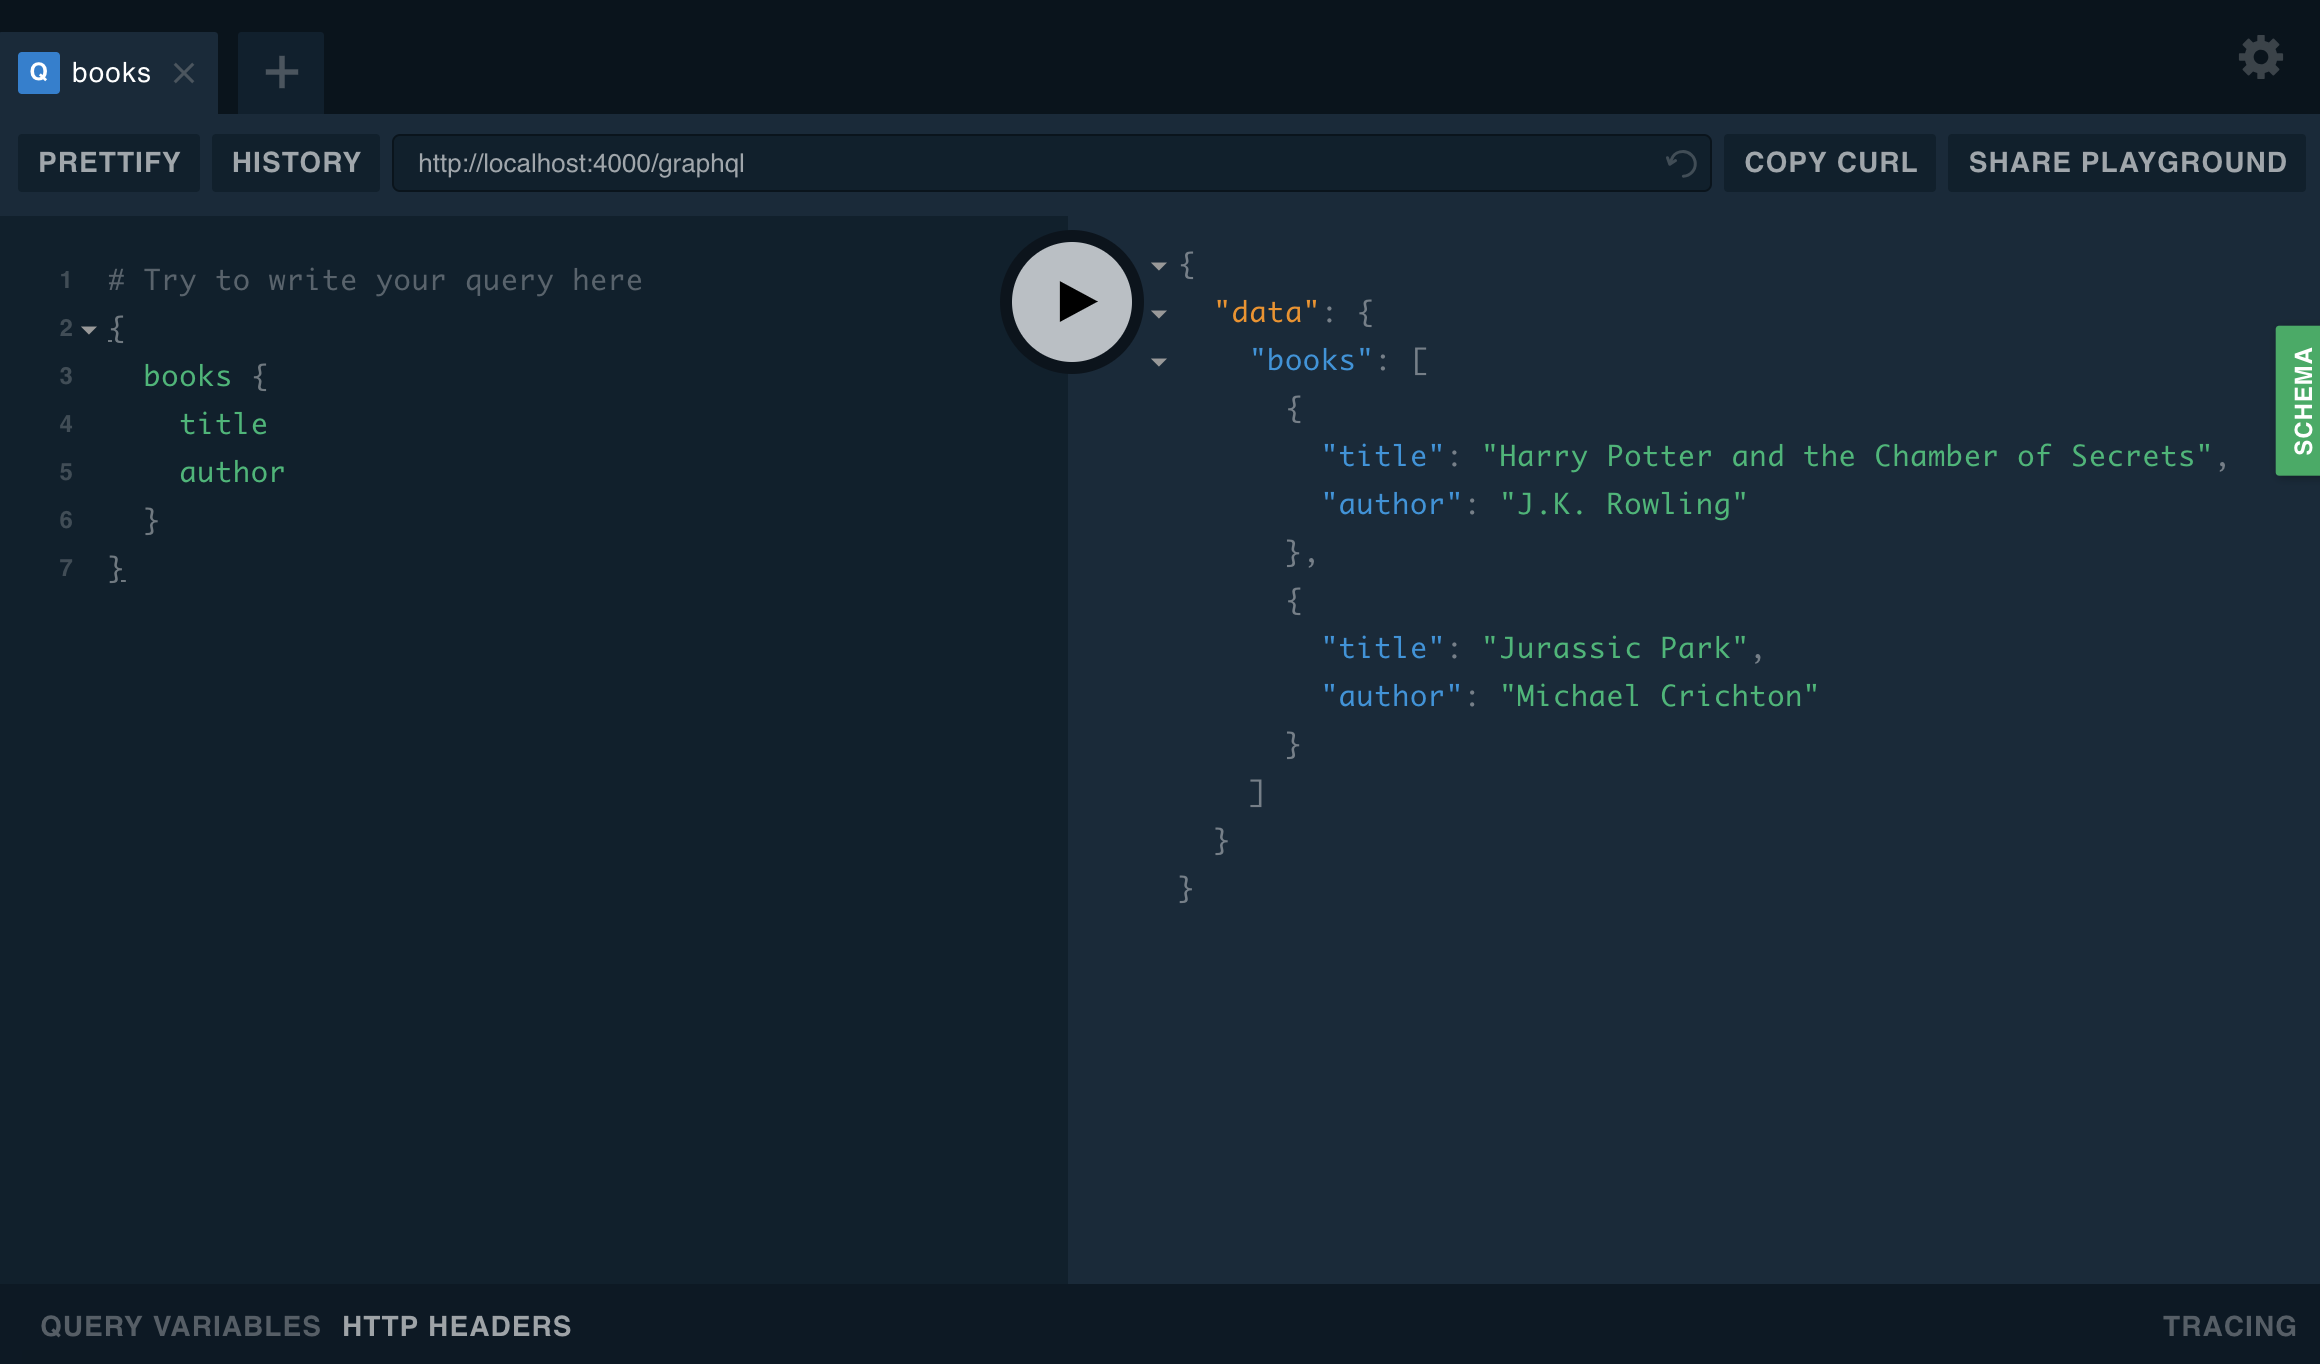
Step 8: Execute your first query
We can now execute GraphQL queries on our server. To execute our first query, we’ll use a tool called GraphQL Playground.
Note: If your server is deployed to an environment where
NODE_ENVis set toproduction, GraphQL Playground and introspection will be disabled by default. To enable them, you’ll need to explicitly setplayground: trueandintrospection: truewithin the options toApolloServer‘s constructor.
With your server still running, visit http://localhost:4000 in your browser to open GraphQL Playground. (Apollo Server hosts GraphQL Playground automatically when you run it in development.)

若有收获,就点个赞吧
0 人点赞
