1. 网络基础概述
Linux作为⼀个成熟的操作系统, 在服务器市场、嵌⼊式设备等⽅⾯都取得了巨⼤的成功, 在⽹络 上的应⽤也越来越多。 所以掌握如何在Linux系统中配置、管理⽹络就变得⾮常必要。
Linux7⽹卡命名规则:
传统的rhel系统以eth0 eth1名来命名⽹卡, 在rhel7系统开始使⽤新的命名规则:
基于固件、设备结构、设备类型
- 1.由两个字⺟开头标识固件
- 以太⽹⽹卡以 en 开头
- ⽆线⽹卡以 wl 开头
- 2.设备结构
- o 表示板载⽹卡(on-board)
- s 热插拔结构(hotplug slot)
- p PCI插槽位置
2. 网络接口信息查看
1.查看网络接口配置信息
//查看当前处于活动状态的网络接口[root@xmh ~]# ifconfig//仅查看eth0网卡状态信息[root@xmh ~]# ifconfig eth0//查看所有网卡状态信息,包括禁用和启用[root@xmh ~]# ifconfig -aeth0: flags=4163<UP,BROADCAST,RUNNING,MULTICAST> mtu 1500inet 10.0.0.200 netmask 255.255.255.0 broadcast 10.0.0.255inet6 fe80::bf18:a3ff:b534:fb5 prefixlen 64 scopeid 0x20<link>ether 00:0c:29:c3:3f:88 txqueuelen 1000 (Ethernet)RX packets 1147 bytes 97236 (94.9 KiB)RX errors 0 dropped 0 overruns 0 frame 0TX packets 863 bytes 135682 (132.5 KiB)TX errors 0 dropped 0 overruns 0 carrier 0 collisions 0//网卡配置信息含义如下:UP: ⽹卡处于活动状态BROADCAST: ⽀持⼴播RUNNING: ⽹线已接⼊MULTICAST: ⽀持组播MTU: 最⼤传输单元(字节),即此接⼝⼀次所能传输的最⼤封包inet: 显示IPv4地址⾏inet6: 显示IPv6地址⾏link/enther: 指设备硬件(MAC)地址txqueuelen: 传输缓存区⻓长度⼤⼩RX packets: 接收的数据包TX packets: 发送的数据包errors: 总的收包的错误数量dropped: 由于各种原因, 导致拷⻉贝在内存过程中被丢弃collisions: ⽹络信号冲突情况, 值不为0则可能存在⽹络故障//其他查看ip指令[root@xmh ~]# ip addr show eth02: eth0: <BROADCAST,MULTICAST,①UP,LOWER_UP> mtu 1500 qdisc pfifo_fast state UP qlen 1000②link/ether 00:0c:29:c3:3f:88 brd ff:ff:ff:ff:ff:ff③inet 10.0.0.200/24 brd ④10.0.0.255 scope global eth0valid_lft forever preferred_lft forever⑤inet6 fe80::bf18:a3ff:b534:fb5/64 scope linkvalid_lft forever preferred_lft forever①活动接⼝为UP②: Link⾏指定设备的MAC地址③: inet⾏显示IPv4地址和前缀④: ⼴播地址、作⽤域和设备名称在此⾏⑤: inet6⾏显示IPv6信息//ip命令也可⽤于显示关于⽹络性能的统计信息, ⽐如: 发送和传送的数据包、错误、丢弃[root@xmh ~]# ip -s link show eth02: eth0: <BROADCAST,MULTICAST,UP,LOWER_UP> mtu 1500 qdisc pfifo_fast state UP mode DEFAULT qlen 1000link/ether 00:0c:29:c3:3f:88 brd ff:ff:ff:ff:ff:ffRX: bytes packets errors dropped overrun mcast114184 1377 0 0 0 0TX: bytes packets errors dropped carrier collsns166230 1062 0 0 0 0
3. NetworkManager管理网络
RHEL/CentOS7系统默认使⽤NetworkManager来提供⽹络服务,这是⼀种动态管理⽹络配置的守护进程,能够让⽹络设备保持连接状态。NetworkManager提供的命令⾏和图形配置⼯具对⽹络进⾏设定, 设定保存的配置⽂件 在/etc/sysconfig/network-scripts⽬录下, ⼯具有nmcli, nmtui, nm-connect-editor
device物理设备, 例如enp2s0,virbr0,team0connection连接设置, 指的是一套具体的⽹络配置⽅案
多个连接connection可以应用到相同的device物理设备
单个物理设备同一时间只能应用其中某个connection连接
优点:针对单个物理网络接口,设定不同的网络连接,根据需要进行启用对应的连接
启动NetworkManager并加入开机自启
[root@xmh ~]# systemctl start NetworkManager[root@xmh ~]# systemctl enable NetworkManager
1.使⽤nmcli命令查看设备以及连接情况
//查看设备状态(物理网卡接口信息)[root@xmh ~]# nmcli deviceDEVICE TYPE STATE CONNECTIONeth0 ethernet connected eth0eth1 ethernet connected eth1lo loopback unmanaged --//指定查看设备的详细状态[root@xmh ~]# nmcli device show eth0//查看连接状态(逻辑上的配置文件)[root@xmh ~]# nmcli connectionNAME UUID TYPE DEVICEeth0 3e5219dc-c557-4bf9-87b9-efb0aa5ef6bf 802-3-ethernet eth0eth1 c86443df-6da4-4e79-9092-7d26c1431018 802-3-ethernet eth1//所有活动的连接[root@xmh ~]# nmcli connection show --active//查看指定设备ID连接详细情况[root@xmh ~]# nmcli connection show "eth0"//删除指定连接的配置文件[root@xmh ~]# nmcli connection delete "eth1"//修改配置文件名[root@xmh ~]# nmcli connection modify eth1 connection.id config-eth1
2.使⽤nmcli创建新的连接
//1.定义⼀个名为dhcp的连接, 配置DHCP方式获取地址//实质是添加/etc/sysconfig/network-scripts/ifcfg-ens33-dhcp配置⽂件[root@xmh ~]# nmcli connection add \con-name ens33-dhcp ifname eth0 autoconnect yes \type ethernet ipv4.method autoNAME UUID TYPE DEVICEeth0 3e5219dc-c557-4bf9-87b9-efb0aa5ef6bf 802-3-ethernet eth0eth1 c86443df-6da4-4e79-9092-7d26c1431018 802-3-ethernet eth1ens33-dhcp 1ce44bff-34a1-46b8-aee4-88f8035c5ca6 802-3-ethernet --//激活指定的连接名为ens33-dhcp的连接[root@xmh ~]# nmcli connection up ens33-dhcp[root@xmh ~]# nmcli connectionNAME UUID TYPE DEVICEens33-dhcp 1ce44bff-34a1-46b8-aee4-88f8035c5ca6 802-3-ethernet eth0//2.新增⼀个静态地址的连接, 配置IP、掩码、⽹关等(新建连接会自动激活)//#实质是添加/etc/sysconfig/network-scripts/ifcfg-eth1-static配置⽂件[root@xmh ~]# nmcli connection add con-name eth1-static ifname eth1 \type ethernet autoconnect yes \ipv4.method manual \ipv4.addresses 172.16.1.200/24 \ipv4.gateway 172.16.1.2 \ipv4.dns 172.16.1.2 \+ipv4.dns 114.114.114.114//激活指定的连接名为eht1-static的连接(默认连接不自动激活,处于断开状态)[root@xmh ~]# nmcli connection up eth1-static[root@xmh ~]# nmcli connection showNAME UUID TYPE DEVICEeth1-static a9ba12f8-b4da-4a0c-a8a8-538c71f6dedf 802-3-ethernet eth1地址添加流程1.添加⼀个连接的配置2.给连接指定⼀个名称3.连接配置绑定物理⽹卡4.⽹卡的类型,⽹卡开机启动5.⽹卡通过什么途径获取地址(静态、dhcp)6.配置对应的IP地址、掩码、⽹关、DNS
3.使⽤nmcli修改已有的⽹络连接
//1.取消开机⾃动激活⽹络[root@xmh ~]# nmcli connection modify eth1-static autoconnect no//2.修改连接的dns(会将原有的DNS覆盖)[root@xmh ~]# nmcli connection modify eth1-static ipv4.dns 114.114.114.114//3.给连接再增加dns,有些设定值通过+/-可以增加或则移除设定[root@xmh ~]# nmcli connection modify eth1-static +ipv4.dns 8.8.8.8//4.替换连接的静态IP和默认⽹关[root@xmh ~]# nmcli connection modify eth1-static ipv4.addresses 172.16.1.121 ipv4.gateway 172.16.1.254//5.添加⼀个没有默认⽹关的IP[root@xmh ~]# nmcli connection modify eth1-static +ipv4.addresses 172.16.1.122/24//6.修改完毕,nmlci仅仅修改并保存了配置,要激活更改,需要重激活连接[root@xmh ~]# nmcli connection down eth1-static && \ nmcli connection up eth1-static//删除⾃建的connection[root@xmh ~]# nmcli connection delete eth1-static//图形⼯具配置 nm-connection-editor
4.使⽤nmcli管理⽹络配置⽂件
- 新增物理⽹卡
- 拷贝配置⽂件(可以和设备名称⼀致)
- 修改配置,UUID、连接名称、设备名称、IP地址
- 重新加载⽹络配置
- 启⽤连接,并检查
//修改eht1-static配置⽂件
[root@xmh ~]# vim /etc/sysconfig/network-scripts/ifcfg-eth2-static
TYPE=Ethernet
PROXY_METHOD=none
BROWSER_ONLY=no
BOOTPROTO=none
DEFROUTE=yes
IPV4_FAILURE_FATAL=no
NAME=eth2-static
DEVICE=eth2
ONBOOT=yes
IPADDR=172.16.2.200
PREFIX=24
GATEWAY=172.16.2.2
DNS1=172.16.2.2

//如果创建新的连接,重载配置并启动连接
[root@xmh ~]# nmcli connection reload
[root@xmh ~]# nmcli connection up eth2-static

//如果连接已启用,重启配置,重启对应连接
[root@xmh ~]# nmcli connection reload
[root@xmh ~]# nmcli connection down eht2-static && \ nmcli connection down eht2-static

提示:UUID会自动生成
4. 原⽣Network管理⽹络
CentOS/RHEL的⽹络配置⽂件默认⽬录为/etc/sysconfig/network-scripts
默认第⼀块物理⽹卡配置⽂件为ifcfg-eth0, 如果有第⼆块物理⽹卡, 配置⽂件则为 ifcfgeth1以此类推。
注意: 如果新增物理⽹卡没有配置⽂件,可选择复制系统默认的进⾏修改。
1.删除 NetworkManger 建⽴连接, 同时停⽌ NetworkManger 服务
[root@xmh ~]# systemctl disable NetworkManager
[root@xmh ~]# systemctl stop NetworkManager
2.添加⼀块物理⽹卡, 然后新增⽹络连接配置⽂件
//复制配置eth0配置⽂件为eth1
[root@xmh ~]# cp /etc/sysconfig/network-scripts/{ifcfg-eth0,ifcfg-eth1}

//编辑⽹卡配置⽂件
[root@nginx ~]# vim /etc/sysconfig/network-scripts/ifcfg-eth1 TYPE=Ethernet
PROXY_METHOD=none
BROWSER_ONLY=no
BOOTPROTO=none
DEFROUTE=yes
NAME=eth1
DEVICE=eth1
ONBOOT=yes
IPADDR=172.16.1.200
NETMASK=255.255.255.0
GATEWAY=172.16.1.2
DNS1=172.16.1.2

//重启network⽹络服务加载⽹络
[root@xmh ~]# systemctl restart network.service

//选项
BOOTPROTO=none      #获取地址⽅式[none|dhcp|static]
DEFROUTE=yes        #将接⼝设定为默认路由[yes|no]
NAME=eth1           #连接名称
DEVICE=eth1         #设备名称
ONBOOT=yes          #开机⾃启动
USERCTL=yes         #允许⾮root⽤户管理接⼝[yes|no]
IPADDR=172.16.1.200 #固定IP地址
NETMASK=255.255.255.0   #掩码
GATEWAY=172.16.1.2      #⽹关
DNS1=172.16.1.2         #域名解析
5. Route设置路由以及⽹关
Linux主机之间是使⽤IP进⾏通信, 假设A主机和B主机同在⼀个⽹段内且⽹卡都处于激活状态, 则A具备和B直接通信的能⼒, 但如果A主机和B主机处于两个不同的⽹段, 则A必须通过路由器才能和B通信, 路由器属于IT设备的基础设施, 每⼀个⽹段都应该⾄少有⼀个⽹关
//增加⽹段路由
[root@xmh ~]# route add -net 192.168.10.0/24 gw 172.16.1.2
[root@xmh ~]# route add -net 0.0.0.0/0 gw 10.0.0.2

//删除⽹段路由
[root@xmh ~]# route del -net 192.168.10.0/24
[root@xmh ~]# route del -net 0.0.0.0/0 gw 10.0.0.2

//增加主机路由
[root@xmh ~]# route add -host 192.168.11.32 gw 172.16.1.2

//删除主机路由
[root@xmh ~]# route del -host 192.168.11.32/32

//查看当前路由表 route -n
如果重启, 配置信息就不存在, 必须将这种配置信息写到相关的配置⽂件中才能永久保存,⽐如⽹卡配置⽂件的GATEWAY
6. 主机名设定与名称解析服务
⽣产环境中必须配置主机名,同时主机名也需要遵循⼀定的规范, ⽐如:
公有云: 地区-项⽬-业务-服务-节点-地址
wh-shop-register-nginx-node1-192.168.56.13
wh-med-pay-mysql-master01-192.168.56.11
wh-med-pay-mysql-slave01-192.168.56.12
1.主机名查看与配置
//hostname命令可以查看主机名, 也可以⽤于临时修改主机名
[root@xmh ~]# hostname "test"

rhel7系统建议使⽤hostnamectl修改和查看主机名
//设定永久名称
[root@xmh ~]# hostnamectl set-hostname nginx.node1.xmh.com

//永久修改主机名会自动修改/etc/hostname⽂件
[root@xmh ~]# cat /etc/hostname
nginx.node1.xmh.com

//检查状态信息
[root@xmh ~]# hostnamectl
   Static hostname: nginx.node1.xmh.com
         Icon name: computer-vm
           Chassis: vm
        Machine ID: 1cd0270b268b4f2fb7d0507ded38b096
           Boot ID: bf9dcb2d007747e1be260084ccf3e16c
    Virtualization: vmware
  Operating System: CentOS Linux 7 (Core)
       CPE OS Name: cpe:/o:centos:centos:7
            Kernel: Linux 3.10.0-693.el7.x86_64
      Architecture: x86-64
DNS客户端配置:/etc/hosts ⽂件, 加快域名解析, ⽅便⼩型局域⽹⽤户使⽤内部设备
假设公司有A B两台主机, B主机添加的IP为10.0.0.12,为了⽅便访问B主机, 可以在A主机 的 /etc/hosts ⽂件中添加⼀条记录
10.0.0.12 hostB
完成后在A主机上使⽤ping命令测试到B主机的连通性, 如果没有添加记录, 将会显示 unknown host hostB的错误
使⽤hosts⽂件仅能为有限的主机记录, ⽆法将所有已知的主机名记录到 hosts ⽂件中, 因此当今⼏乎所有的主机都在使⽤DNS来解析地址,DNS是全互联⽹上主机名及其 IP 地址对应关系的数据库, 配置⽂件/etc/resolv.conf
[root@xmh ~]# cat /etc/resolv.conf

// Generated by NetworkManager
search xmh
nameserver 211.161.122.200
7. ⽹络检测⼯具与故障排查
ping 命令的⽬的在于测试另⼀台主机是否可达, 如果png不到某台主机,就说明对⽅主机已经出现了问题, 但是不排除由于链路中的防⽕墙、ping被丢弃等原因造成ping不通的情况
-c 指定ping的次数
-i 指定ping包的发送间隔
-w 如果ping没有回应, 则在指定超时时间后退出
-I 指定特定的网卡ping
hostn/slookup命令是⽤来查询DNS记录的,如果使⽤域名作为host的参数, 命令返回该域名的IP
[root@xmh ~]# host xiongminghao.top
traceroute命令是⽤来路由跟踪, 检测⽹络故障出现在 ISP 运营商或是对端服务⽆法响应
[root@xmh ~]# traceroute baidu.com
traceroute to baidu.com (220.181.57.216), 30 hops max, 60 byte packets
 1  gateway (10.0.0.2)  0.203 ms  0.111 ms  0.172 ms
 2  * * *
ss/netstat命令查看⽹络连接状态
-t tcp协议的连接
-a 所有状态的连接
-n 数字化输出
-u upd协议的连接
-l 处于listen状态的连接
-p 输出相应进程的名字

1. Show TCP sockets (LISTEN)
[root@xmh~]# ss -tnl
[root@xmh~]# ss -tnl |grep :80
[root@xmh~]# ss -tnl |grep :21
[root@xmh~]# ss -atn
[root@xmh~]# ss -atn |grep :22

//常⻅见端⼝
http 80/tcp
https 443/tcp
ssh 22/tcp
ftp 20,21/tcp
mysql 3306/tcp
rsync 873/rsync
redis 6379/tcp
⽹络故障排查:
- ⽹络故障分为硬件\软件故障
- ⽹卡损坏
- 链路故障
- ⽹卡驱动不兼容
- ⽹络排查思路
- 1.ping本地回环⼝, 确定本机TCP/IP协议栈是否正常
- 2.ping本机IP地址, 确定本地设备以及驱动是否正常
- 3.ping同⽹段主机, 确定⼆层⽹络是否正常⼯作
- 4.ping⽹关地址, 确定本地与⽹络是否正常
- 5.ping公⽹地址, 确定本地路由是否正常
- 6.ping公⽹域名, 确定DNS客户端是否正常
- 服务故障排查思路
- 1.使⽤telnet检查端⼝是否开放
- 2.检查服务端防⽕墙以及SElinux
- 3.检查相应的权限是否配置正常
- 4.检查⽇志是否有异常
- 5.检查完毕后持续测试
建议: 所有的排查思路都从OSI七层模型由下往上逐⼀进⾏排查(学会看⽇志)
8. Linux7修改⽹卡为eth0
1.已安装Linux7系列操作系统, 修改⽹卡命名规则为eth0 eth1
//1.修改⽹卡配置⽂件
[root@xmh ~]# cd /etc/sysconfig/network-scripts/
[root@xmh network-scripts]# mv ifcfg-eno16777728 ifcfg-eth0 [root@xmh network-scripts]# vim ifcfg-eth0
NAME=eth0
DEVICE=eth0

//2.GRUB添加kernel参数
[root@xmh ~]# vim /etc/sysconfig/grub GRUB_CMDLINE_LINUX="...net.ifnames=0 biosdevname=0 quiet"
[root@xmh ~]# grub2-mkconfig -o /boot/grub2/grub.cfg

//3.重启系统⽣效
[root@xmh ~]# reboot

//默认centos7不⽀持ifconfig命令安装net-tools包
[root@xmh ~]# yum install net-tools
[root@xmh ~]# ifconfig eth0 #在次查看⽹卡信息
2.在安装系统选择Install Centos7按下Tab设定kernel内核参数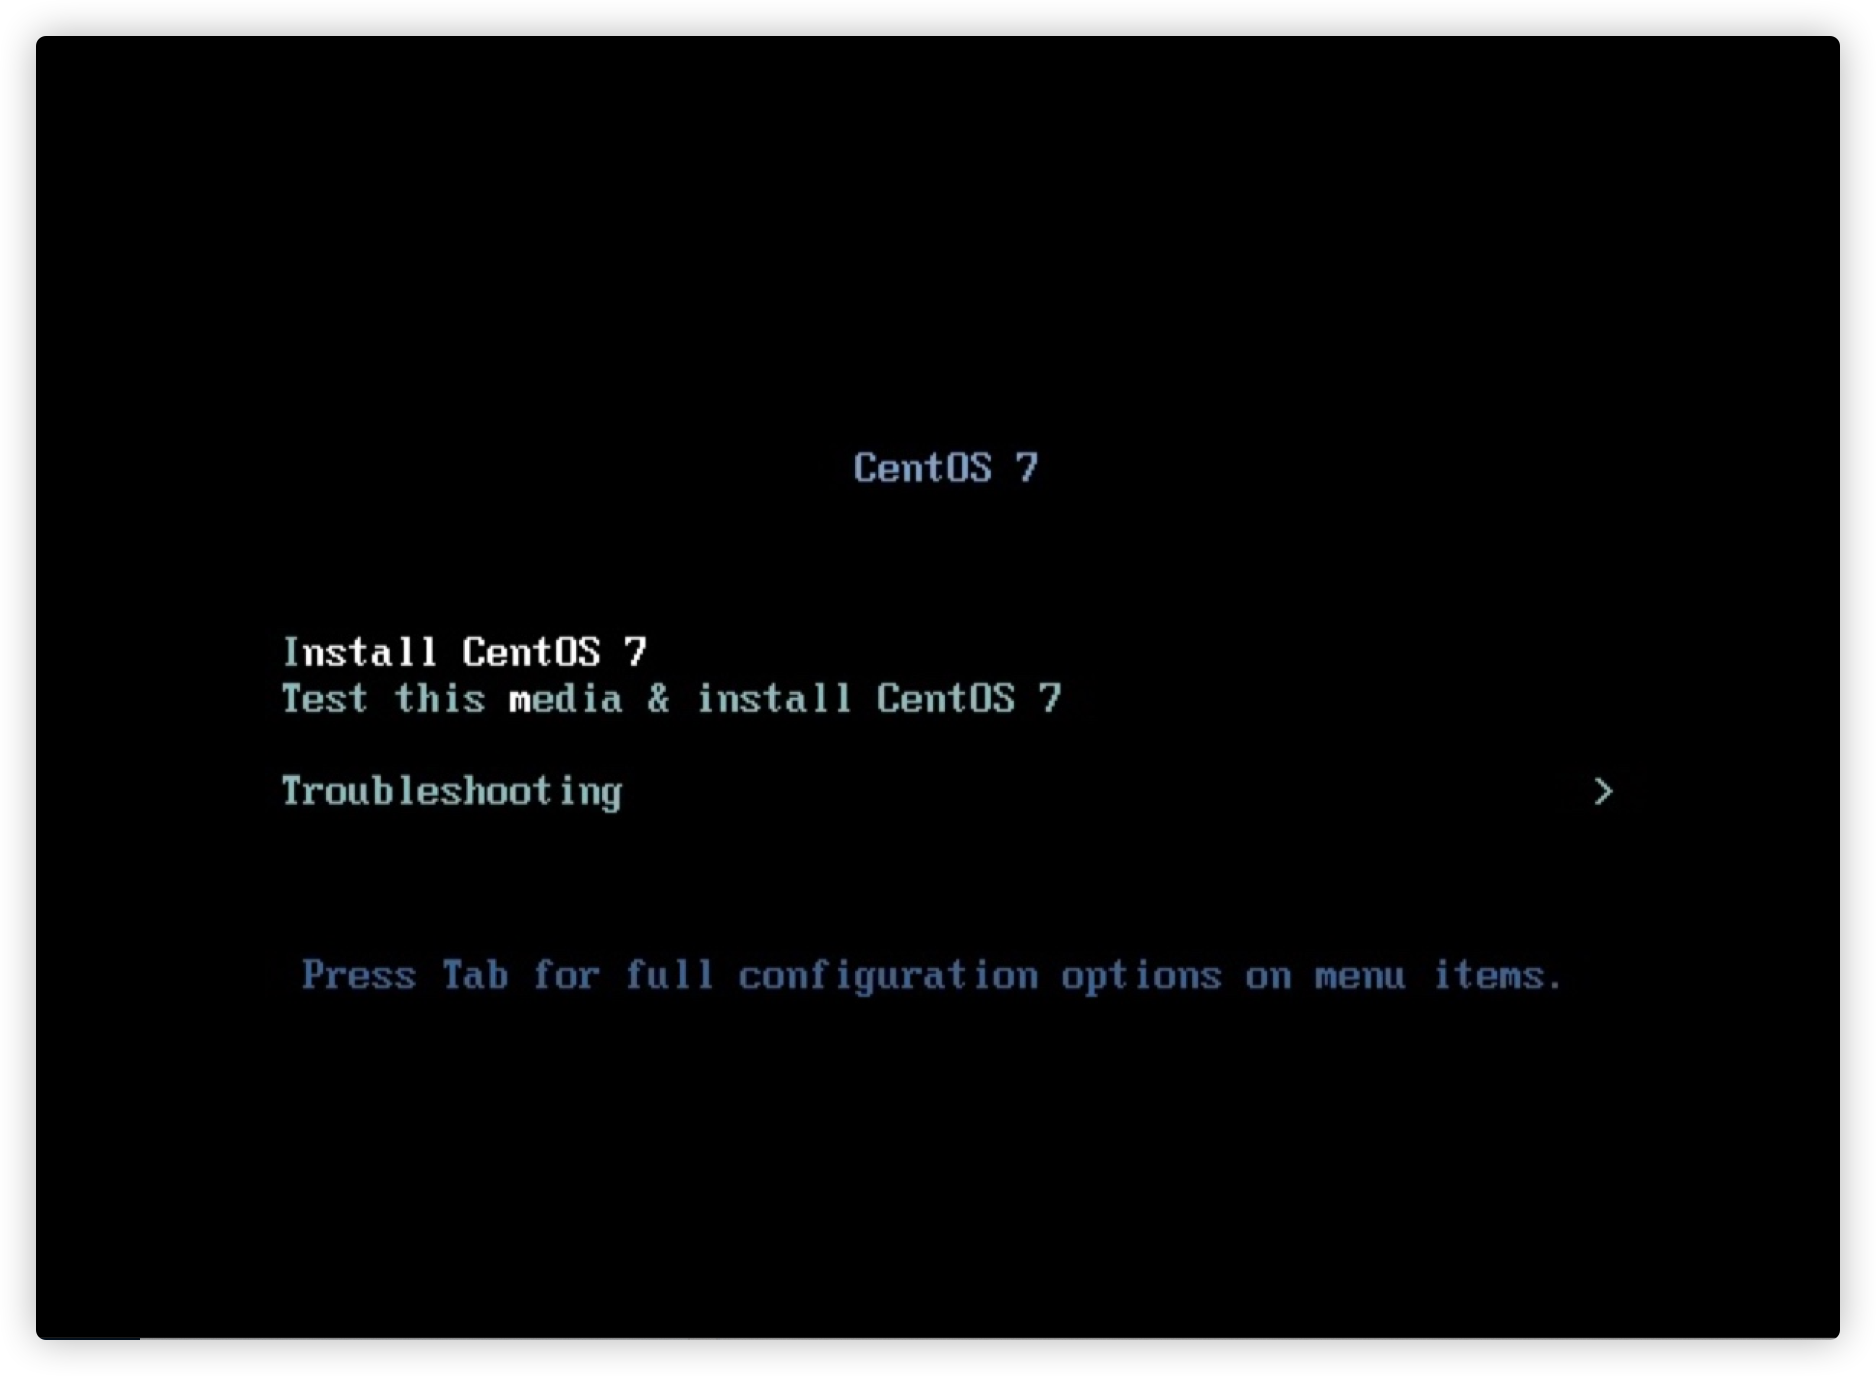
增加内核参数: net.ifnames=0 biosdevname=0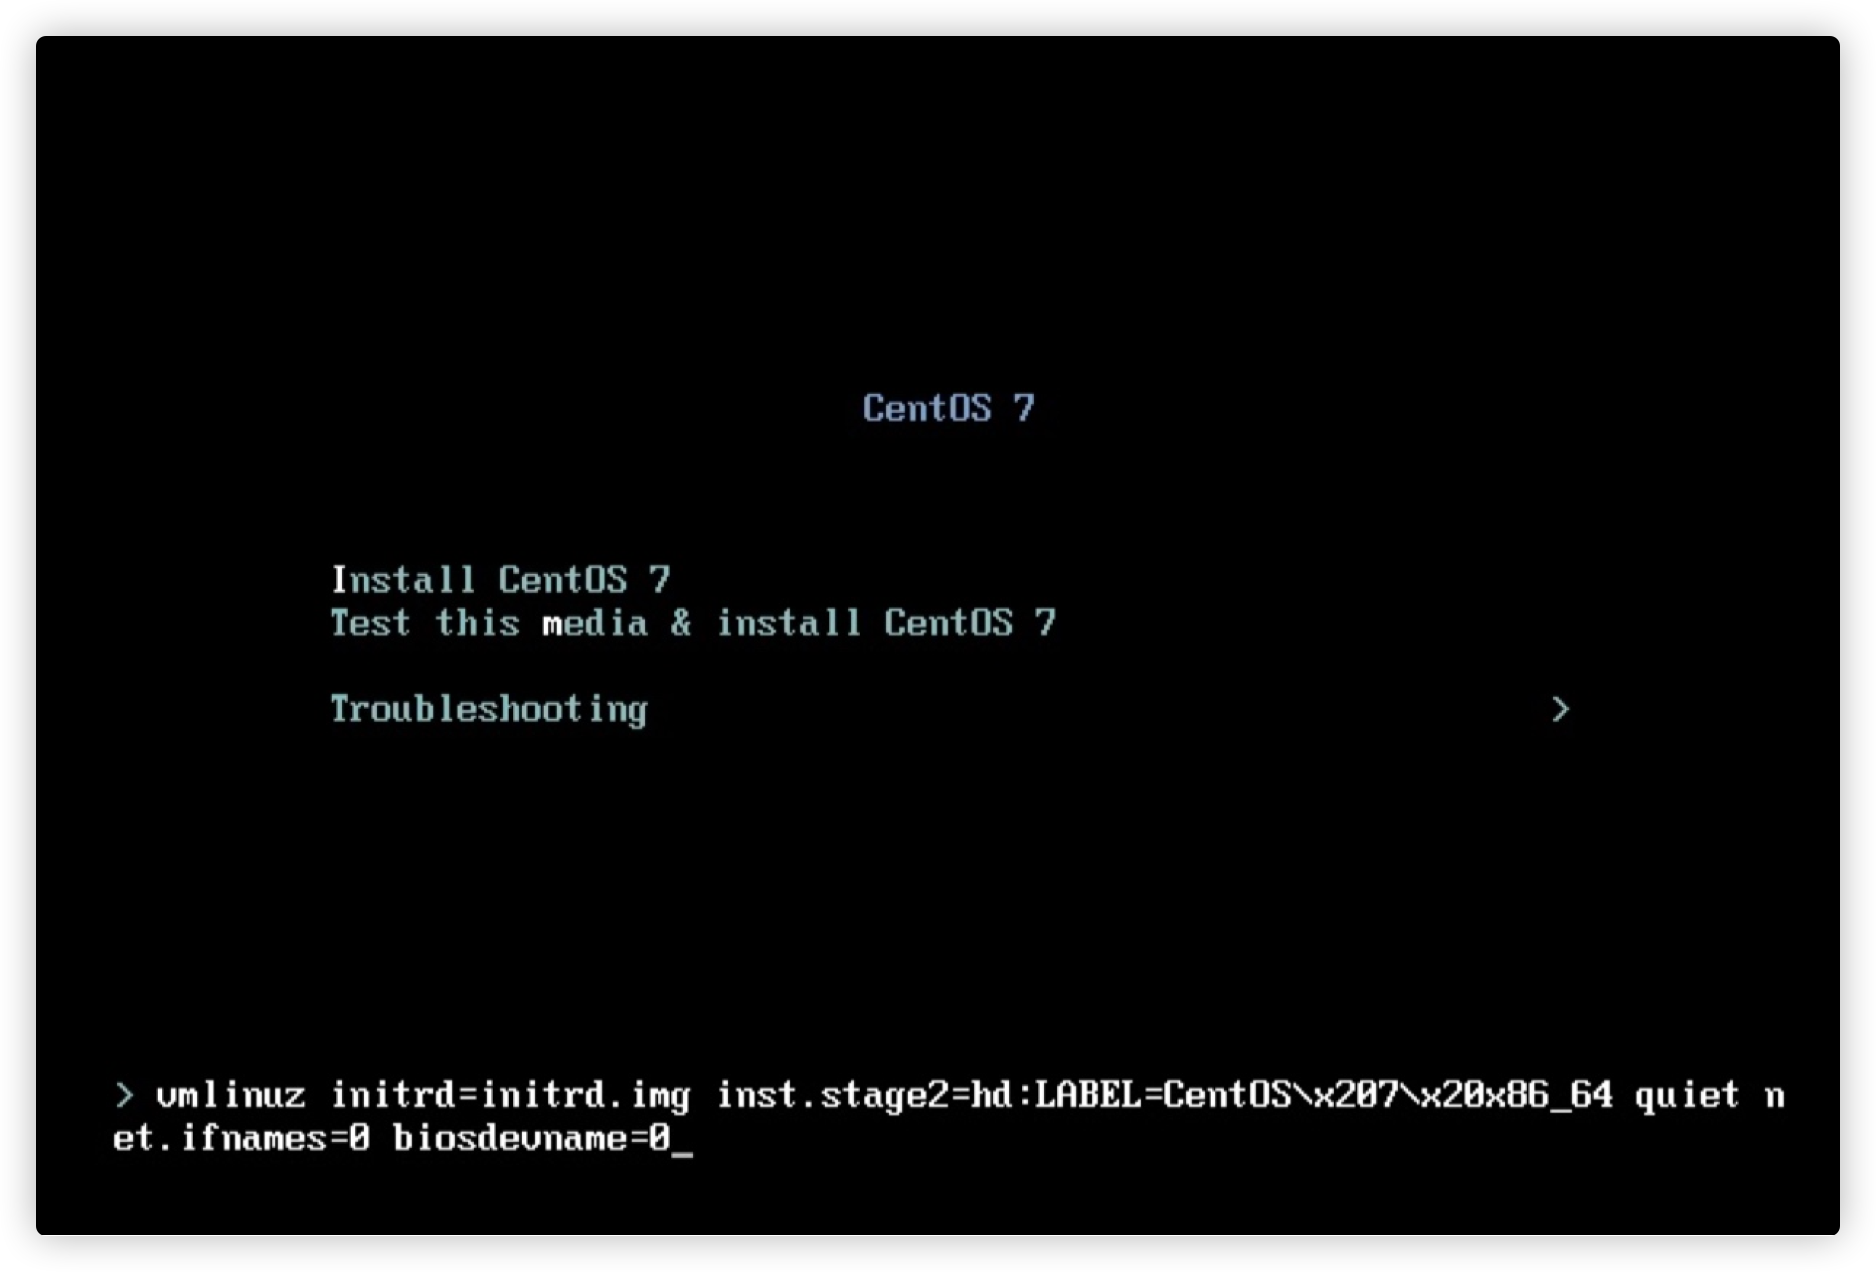
9. 管理聚合链路和桥接网络
通过⽹⼝绑定技术Bonding,实现⽹络冗余, 负载均衡, 从⽽提升⽹络传输能⼒,避免⽹络链路单点 故障, 达到⾼可⽤⾼可靠的⽬的。 Bonding 的两种绑定⼯作模式:实际上有7种,其他不常⽤
- 模式0
balance-rr负载轮询(例如;两块⽹卡单独都是100MB,聚合为一个⽹络传输带宽为200MB) - 模式1
active-backup⾼可⽤(其中⼀条线若断线,其他线路将会⾃动备援)
                        --> eth0   ----\
app  --发送数据到--> bond0        <---> switch
                        --> eth1   ----\
注意:做了链路聚合之后的网卡接口的MAC地址和逻辑聚合接口的MAC地址一致
9.1. Centos7 配置bond聚合链路
centos7系统配置链路聚合bond
1.完成bond0, balance-rr
[root@xmh ~]# nmcli device
DEVICE  TYPE      STATE         CONNECTION
eth0    ethernet  connected     eth0
eth1    ethernet  connected     eth1
eth2    ethernet  disconnected  --
eth3    ethernet  disconnected  --

//创建bond0, 模式为balance-rr
nmcli connection add  type bond \
mode balance-rr con-name bond0 ifname bond0 \
ipv4.method manual \
ipv4.address 192.168.56.223/24 \
ipv4.gateway 192.168.56.2 \
ipv4.dns 114.114.114.114

//添加物理⽹卡连接⾄bond0
[root@xmh ~]# nmcli connection add type bond-slave \
con-name bond-slave2 ifname eth2 master bond0
[root@xmh ~]# nmcli connection add type bond-slave \
con-name bond-slave3 ifname eth3 master bond0

//启动两个bond连接
[root@xmh ~]# nmcli connection up bond-slave2
[root@xmh ~]# nmcli connection up bond-slave3

//查看bond配置信息
[root@xmh ~]# cat /proc/net/bonding/bond0

//关闭eth2⽹卡, 测试bond0是否正常
[root@xmh ~]# ifdown eth2
Device 'eth2' successfully disconnected.

[root@xmh ~]# nmcli device disconnect eth2 #eth2网卡已经关闭
Error: Device 'eth2' (/org/freedesktop/NetworkManager/Devices/4) disconnecting failed: This device is not active
Error: not all devices disconnected.

//eth2网卡关闭了,仍然能够ping通bond0接口的IP地址
[root@backup ~]# ping 192.168.56.223
PING 192.168.56.223 (192.168.56.223) 56(84) bytes of data.
64 bytes from 192.168.56.223: icmp_seq=1 ttl=64 time=0.378 ms
64 bytes from 192.168.56.223: icmp_seq=2 ttl=64 time=0.749 ms
2.完成bond1, active-backup
[root@xmh ~]# nmcli device
DEVICE  TYPE      STATE         CONNECTION
eth0    ethernet  connected     eth0
eth1    ethernet  connected     eth1
eth2    ethernet  disconnected  --
eth3    ethernet  disconnected  --

//创建bond1相关设备
[root@xmh ~]# nmcli connection add type bond \
con-name bond1 ifname bond1 mode active-backup \
ipv4.method manual \
ipv4.addresses 192.168.56.223/24 \
ipv4.gateway 192.168.56.2 \
ipv4.dns 114.114.114.114

//添加连接⾄bond1
[root@xmh ~]# nmcli connection add type bond-slave con-name bond-slave2 ifname eth2 master bond1
[root@xmh ~]# nmcli connection add type bond-slave con-name bond-slave3 ifname eth3 master bond1

//启⽤相关连接
[root@xmh ~]# nmcli connection up bond1
[root@xmh ~]# nmcli connection up bond-slave2
[root@xmh ~]# nmcli connection up bond-slave3

//验证bond信息
[root@xmh ~]# cat /proc/net/bonding/bond1
Ethernet Channel Bonding Driver: v3.7.1 (April 27, 2011)

Bonding Mode: fault-tolerance (active-backup)
Primary Slave: None
Currently Active Slave: eth2 #目前是eth2网卡提供流量转发
MII Status: up
MII Polling Interval (ms): 100
Up Delay (ms): 0
Down Delay (ms): 0

Slave Interface: eth2
MII Status: up
Speed: 1000 Mbps
Duplex: full
Link Failure Count: 0
Permanent HW addr: 00:0c:29:c3:3f:9c
Slave queue ID: 0

Slave Interface: eth3
MII Status: up
Speed: 1000 Mbps
Duplex: full
Link Failure Count: 0
Permanent HW addr: 00:0c:29:c3:3f:a6
Slave queue ID: 0

//停⽌eth2物理⽹卡设备
[root@xmh ~]# ifdown eth2

//bond1会自动切换到由eth3来转发流量
[root@xmh ~]# grep "Currently Active Slave" /proc/net/bonding/bond1
Currently Active Slave: eth3
9.2. Centos7 配置team聚合链路
centos7/rhce7使⽤teaming实现聚合链路,能够提供⽹卡绑定之后的⽹络吞吐性能,并且提供⽹卡的故障切换处理能⼒,主从的切换不存在抢占性。Team是基于⼀个⼩型内核驱动实现聚合链路,在⽤户层提供teamd命令实现链路管理。
teamd可以实现以下模式的聚合链路
- broadcast ⼴播容错
- roundrobin 负载轮询
- activebackup 主备(必考)
- loadbalance 负载均衡
- lacp 需要交换机⽀持lacp协议
[root@xmh ~]# nmcli device
DEVICE  TYPE      STATE         CONNECTION
eth0    ethernet  connected     eth0
eth1    ethernet  connected     eth1
eth2    ethernet  disconnected  --
eth3    ethernet  disconnected  --

//建议使⽤命令⾏配置,图形界⾯配置不稳定
[root@xmh ~]# nmcli connection add  type team \
con-name team0 ifname team0 \
config '{"runner":{"name":"activebackup"}}' \
ipv4.method manual  \
ipv4.addresses 192.168.56.223/24 \
 ipv4.gateway 192.168.56.2 \
 ipv4.dns 114.114.114.114

//添加连接⾄team0
[root@xmh ~]# nmcli  connection add type team-slave con-name team0-port2 ifname eth2 master team0
[root@xmh ~]# nmcli  connection add type team-slave con-name team0-port3 ifname eth3 master team0

//查看team的0连接
[root@xmh ~]# nmcli connection  |grep "team0"
team0        c18899a5-5d0a-4447-b07a-bddfcd17c896  team            team0
team0-port2  62be02ae-bbb0-4098-abe8-b48d0e52ba1e  802-3-ethernet  eth2
team0-port3  7c22401e-ba01-4f7a-a3ad-a9cc05726cb6  802-3-ethernet  eth3

//检查team0状态
[root@xmh ~]# teamdctl team0 state
setup:
  runner: activebackup
ports:
  eth2
    link watches:
      link summary: up
      instance[link_watch_0]:
        name: ethtool
        link: up
        down count: 0
  eth3
    link watches:
      link summary: up
      instance[link_watch_0]:
        name: ethtool
        link: up
        down count: 0
runner:
  active port: eth2  #目前eth2为主,负责流量转发

//关闭eth2网卡后测试网络是否正常
[root@xmh ~]# ifdown eth2
[root@xmh ~]# teamdctl team0 state |grep "active port"
  active port: eth3  #当前主切换为eth3

//eth2网卡关闭了,仍然能够ping通team0接口的IP地址
[root@backup ~]# ping 192.168.56.223
PING 192.168.56.223 (192.168.56.223) 56(84) bytes of data.
64 bytes from 192.168.56.223: icmp_seq=1 ttl=64 time=0.467 ms
64 bytes from 192.168.56.223: icmp_seq=2 ttl=64 time=0.593 ms
动态修改team模式
//导出配置进⾏修改 (man teamd.conf)
[root@xmh ~]# teamdctl team0 config dump > /tmp/team.conf
[root@xmh ~]# vim /tmp/team.conf
    "runner": {
        "name": "roundrobin"  #模式为轮训

//以最新修改的配置选项修改team0属性
[root@xmh ~]# nmcli connection modify team0 team.config /tmp/team.conf

//修改之后需要重启team0
[root@xmh ~]# nmcli connection up  team0-port2
[root@xmh ~]# nmcli connection up  team0-port3
[root@xmh ~]# nmcli connection down  team0 && nmcli connection up team0

//查看team0的状态中的模式
[root@xmh ~]# teamdctl team0 state
setup:
  runner: roundrobin
9.3. Centos7 配置brige桥接网络
[root@xmh ~]# nmcli device
DEVICE  TYPE      STATE         CONNECTION
eth0    ethernet  connected     eth0
eth1    ethernet  connected     eth1
eth2    ethernet  disconnected  --
eth3    ethernet  disconnected  --

//创建桥接⽹络br1
[root@xmh ~]# nmcli connection add type  bridge \
con-name br1 ifname br1 \
ipv4.addresses 10.0.0.201/24 \
ipv4.method manual

//桥接⾄eth1
[root@xmh ~]# nmcli connection add  type  bridge-slave \
 con-name br1-port1 ifname eth1 master br1

[root@xmh ~]# ping -I br1 10.0.0.201
[root@xmh ~]# brctl show

若有收获,就点个赞吧
0 人点赞
