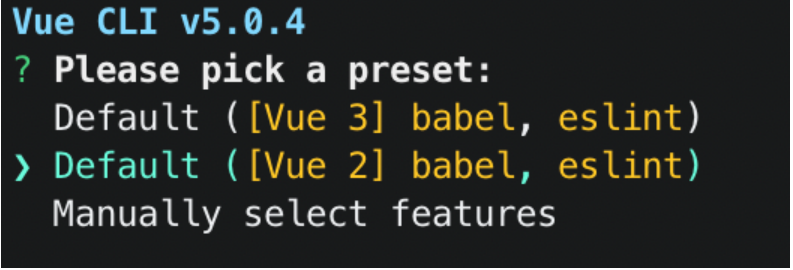
Vue基础环境搭建
安装脚手架:npm i @vue/cli -g 用于生成vue项目的基本骨架 或者 yarn global add @vue/cli
创建项目: vue create 项目名称 比如: vue create vue2-baisc
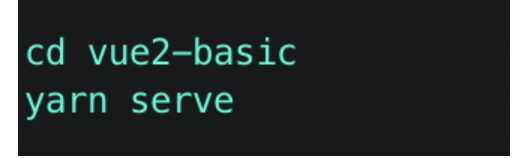
装好之后可以运行以下命令:
yarn是facebook旗下的包管理工具,作用和npm一样
yarn init npm init -y
yarn add 包名 默认安装到项目依赖 npm i 包名
yarn add 包名 --dev 安装到开发依赖 npm i 包名 -D
yarn remove 包名 移除包 npm uninstall 包名
安装vs code插件
- Vue VSCode Snippets
- Vue 3 Snippets
- Vetur
- ESlint
插值表达式{{}}
作用: 渲染数据 ```vue data() { return { msg: “hello world!”, age: 18, }; },
{{ msg }}
<a name="K2rBG"></a>## 指令在vue中,以v-开头的都是指令。指令用来增强html模版的功能。<a name="iQeQD"></a>### v-text (基本不用)```vue<div v-text="msg"></div><div v-text=" age > 18 ? '已成年' : '未成年'"></div><div v-text="msg + '😍'"></div><div v-text="msg.split('').reverse().join('')"></div><div v-text="age + 1"></div>
v-html
data() {return {htmlStr: '<h1>Vue基础</h1>'};<div v-html="htmlStr"></div>
注意:v-html不安全,需要确保你的字符串里面没有包含敏感信息。比如什么用户名密码之类的。
v-show
用来显示内容
data() {return {isVisible: true};},<div v-show="isVisible">hello world</div>
事件修饰符

@click.prevent可以直接阻止a标签的跳转@click.stop可以阻止事件冒泡@click.once事件只触发一次@click.capture使用事件的捕获模式@click.self只有event.target是当前操作的元素时才触发的@click.prevent事件的默认行为立即执行,无需等待事件回调执行完毕
事件组件
生命周期(生命周期钩子)
示例图:
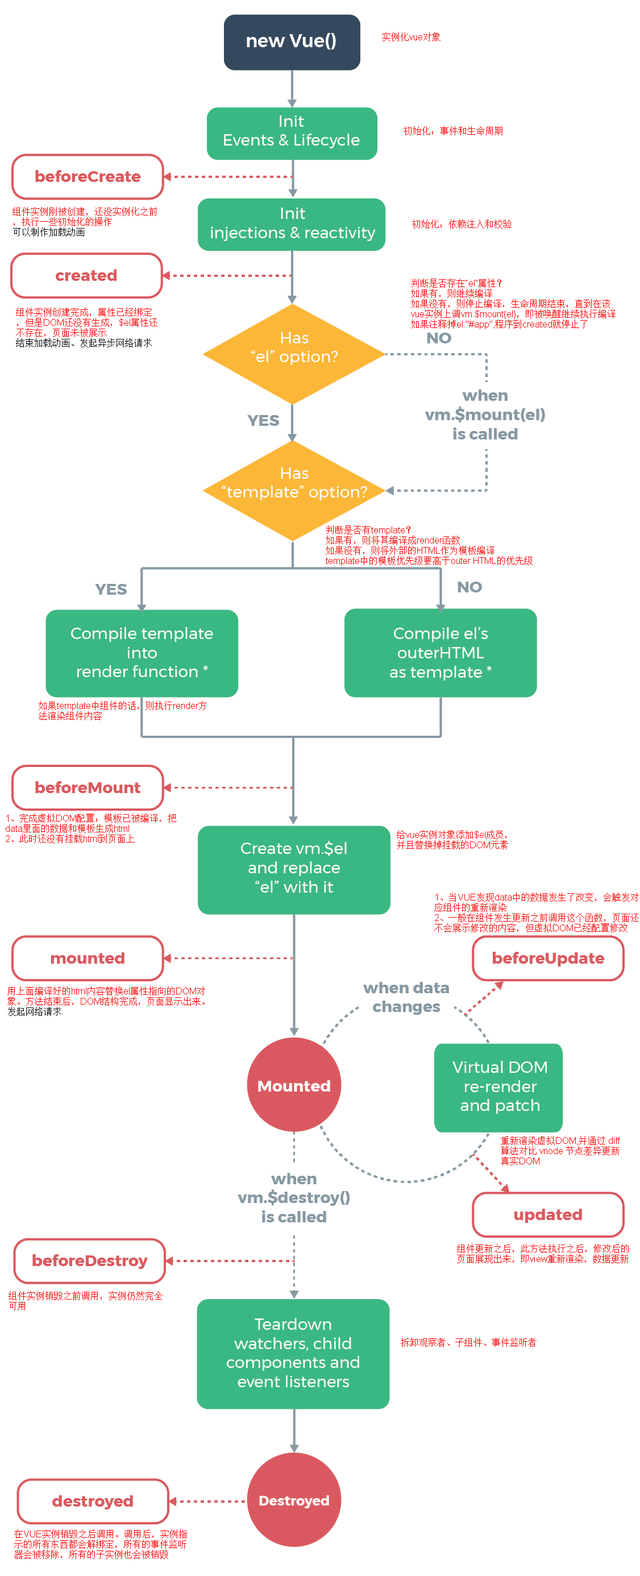
在特殊的时间点调出的函数
重点掌握 createdmountedbeforeDestroy这三个
beforeCreate () {console.log('beforeCreate', this.score, this.$el)},created () {// 一般在这里去发送请求console.log('created', this.score, this.$el)},beforeMount () {console.log('beforeMount', this.score, this.$el)},mounted () {this.timer = setInterval(() => {console.log('111')}, 1000)// 如果需要操作dom,可以在mounted钩子中执行console.log('mounted', this.score, this.$el)},// 这一对数据更新会执行beforeUpdate () {console.log('beforeUpdate', this.score, this.$el)},updated () {console.log('updated', this.score, this.$el)},// 组件被销毁会触发beforeDestroy () {// 开发可以在清除定时器和事件绑定clearInterval(this.timer)console.log('beforeDestroy', this.score, this.$el)},destroyed () {console.log('destroyed', this.score, this.$el)}

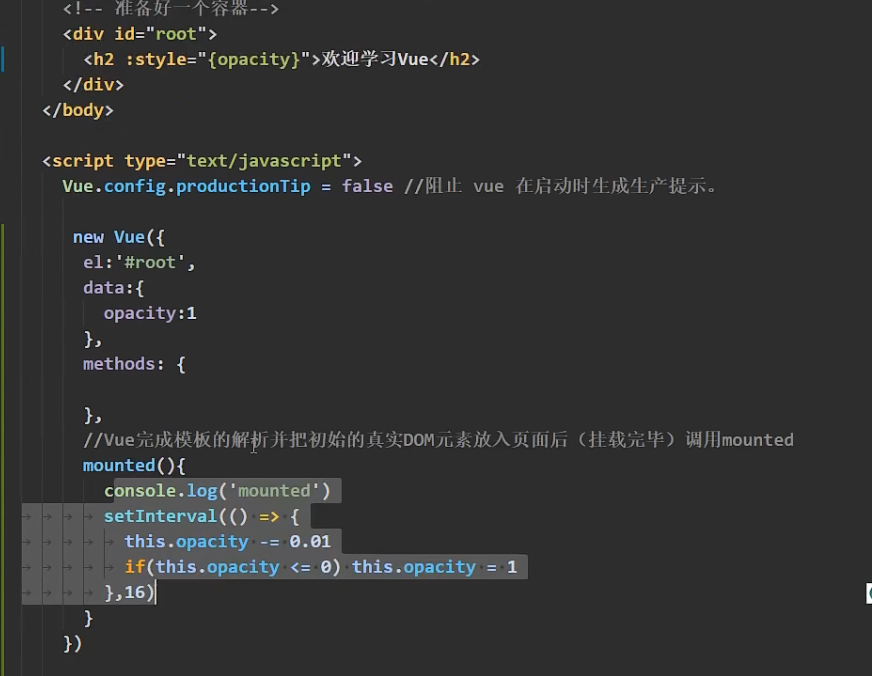
挂载mounted(){}
Vue完成模板的解析并把初始的真实DOM元素放入页面后()调用mounted
案例
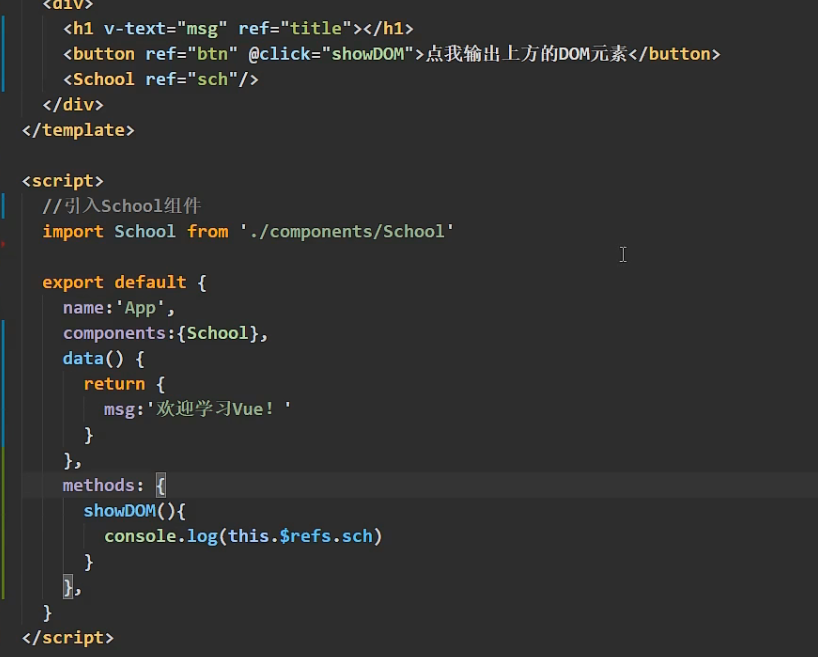
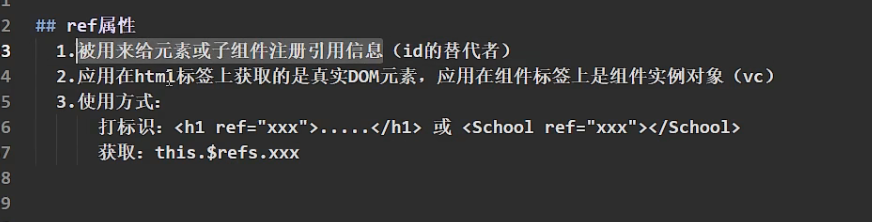
ref属性

组件、组件通信
组件
1、组件是可以复用的vue实例,如果网页中的某一个部分需要在多个场景中使用,那么我们可以将其抽出为一个组件,使用方法如下:
组件通信
父传子
利用props向儿子传递信息:
1、将需要传递的信息作为动态属性传递给儿子
2、儿子需要自定义一个props对象用来接受父亲传递过来的值(挖坑)
3、需要注意命名的书写,父亲动态属性的命名必须与儿子props里面对象的命令一致,具体如下图所示:
// 子组件ComSon<template><div class="son">我爸爸的房子 {{fHouse}} 车子是:{{fCar}}<button @click="handleClick">点击告诉爸爸我女朋友叫{{girlFriend}}</button></div></template><script>export default {// 1.1 在自组件中通过props属性定义坑,用来放父亲传过来数据// props: ['fHouse', 'fCar']props: {fHouse: {required: true,default: 100,type: Number},fCar: {required: true,default: '自行车',type: String}},methods: {handleClick() {// 2.1 通过this.$emit()发射一个自定义的事件名称,并携带参数传递给爸爸this.$emit('tell-father', this.girlFriend)}},data() {return {girlFriend: '翠花'}},}</script>
// 父组件<template><div class="father"><!-- 2.2 通过v-on指令监听儿子发射过来的自定义事件 --><ComSon :f-house="house" :f-car="car" @tell-father="getVal" /></div></template><script>import ComSon from './ComSon.vue'export default {components: {ComSon},data() {return {house: 200,car: '劳斯莱斯',songirl: '??'}},methods: {// 2.3 在事件的回调函数中,通过一个形参接受儿子传递过来的值getVal(v) {console.log('儿子在给我讲话', v)this.songirl = v}},}</script>
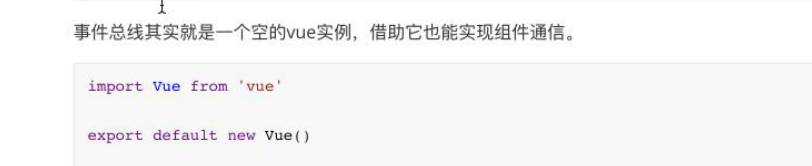
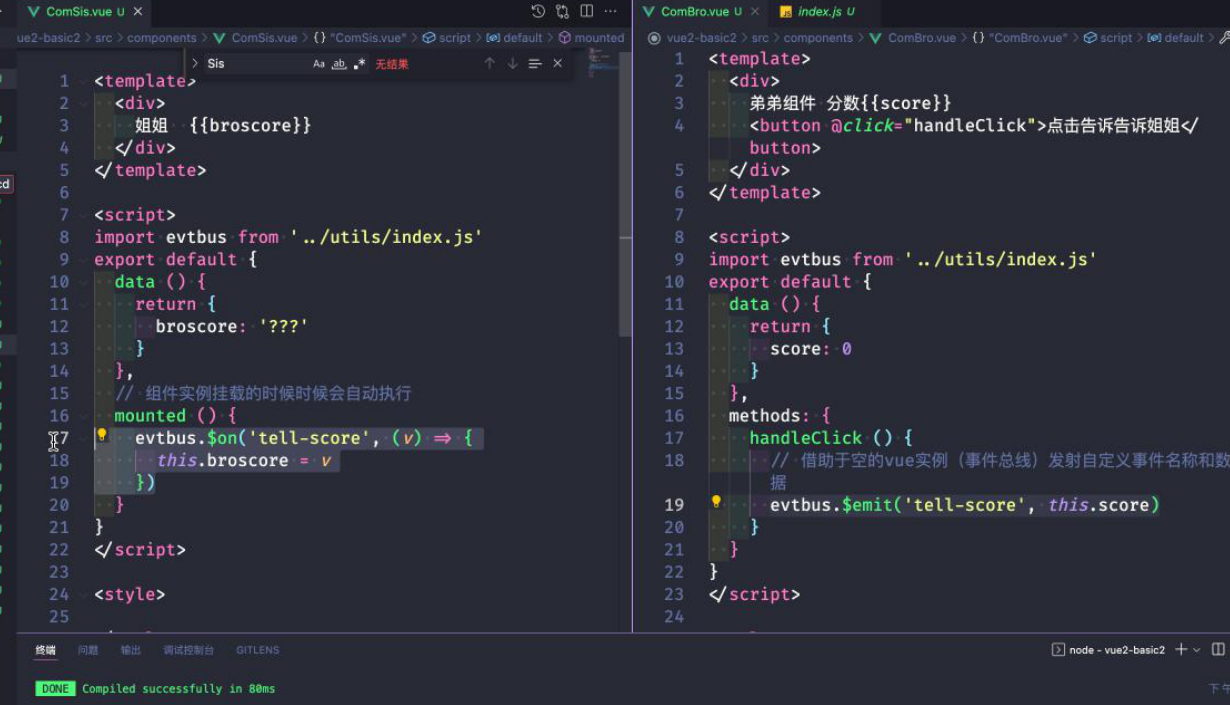
事件总线
创建一个新的js文件,里面是一个一个空的vue实例,借助它也能实现组件通信
import Vue from 'vue'export default new Vue()//发射事件 $emit(事件名称,数据)evtbus.$emit('tell-score', this.score)// 监听事件 $on(事件名称,回调函数)evtbus.$on('tell-score', (v) => {this.broscore = v})
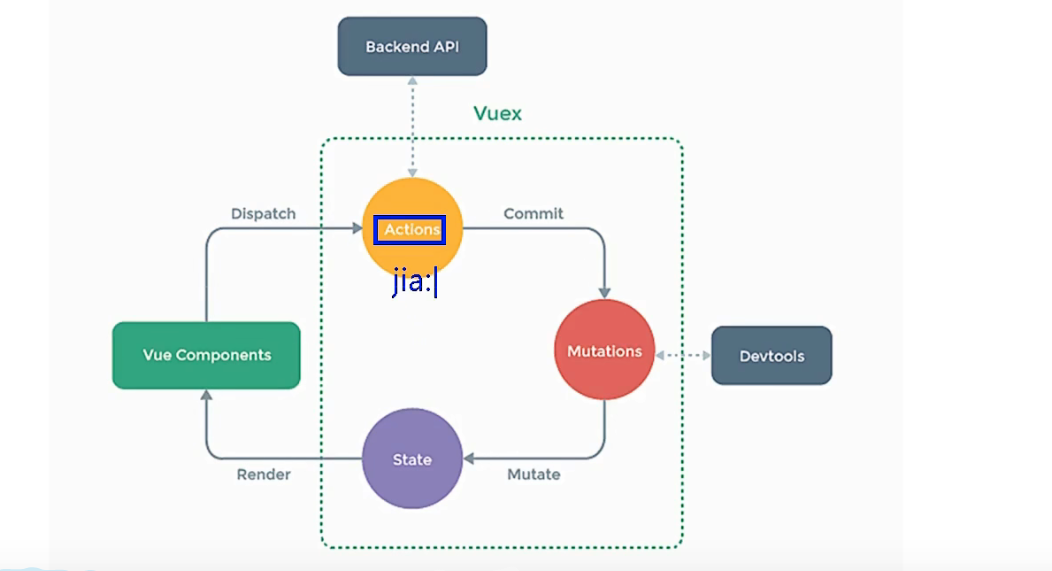
Vuex
安装: npm i vuex@3.6.2 -S
使用:
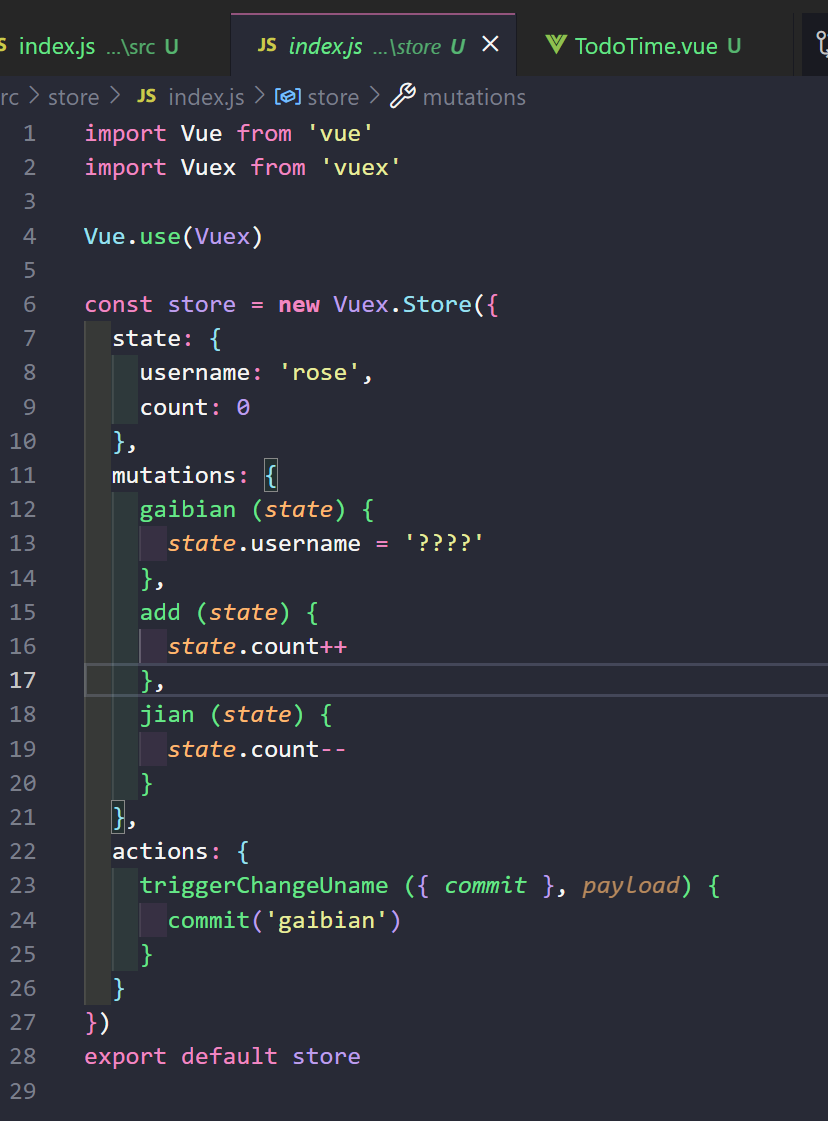
- 在src下新建store文件夹,然后再新建index.js ```javascript import Vue from ‘vue’ import Vuex from ‘vuex’
Vue.use(Vuex)
// 创建一个store仓库,放vuex里面的那些核心部分 const store = new Vuex.Store({ // state 暂存共享数据的地方 state: { username: ‘rose’ } })
export default store
2.再main.js中注入store```javascriptimport Vue from 'vue'import App from './App.vue'import router from './router'import store from './store'Vue.config.productionTip = falsenew Vue({router,store,render: h => h(App)}).$mount('#app')
state
mutations
定义
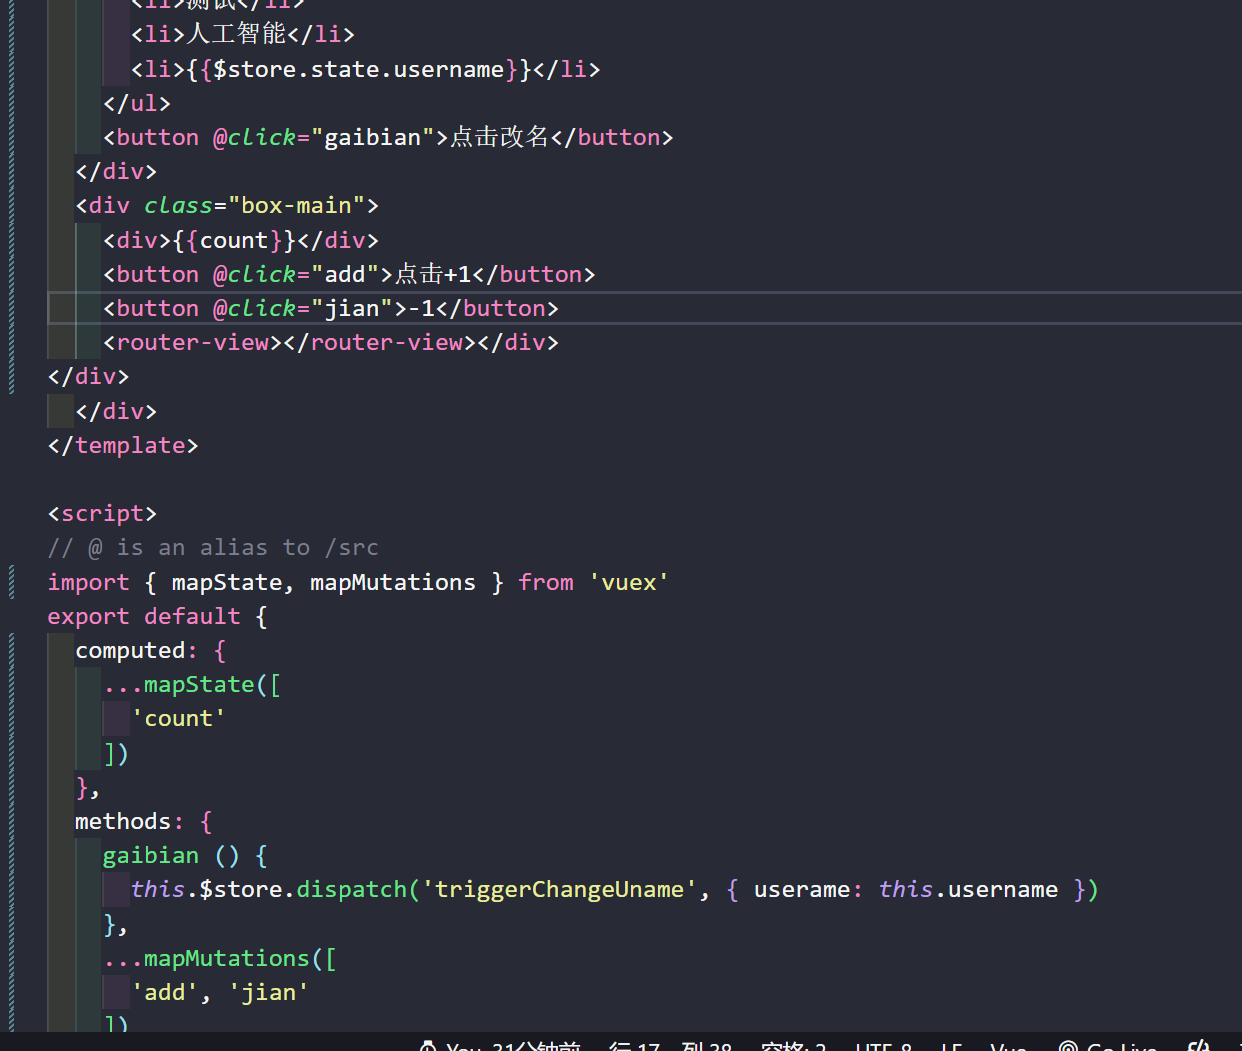
import Vue from 'vue'import Vuex from 'vuex'Vue.use(Vuex)// 创建一个store仓库,放vuex里面的那些核心部分const store = new Vuex.Store({// state 暂存共享数据的地方state: {username: '??'},// mutations里面存放的是修改state数据的函数,也只有mutations里面的函数可以修改mutations: {changeUsername (state) {state.username = 'jack'}}})export default store
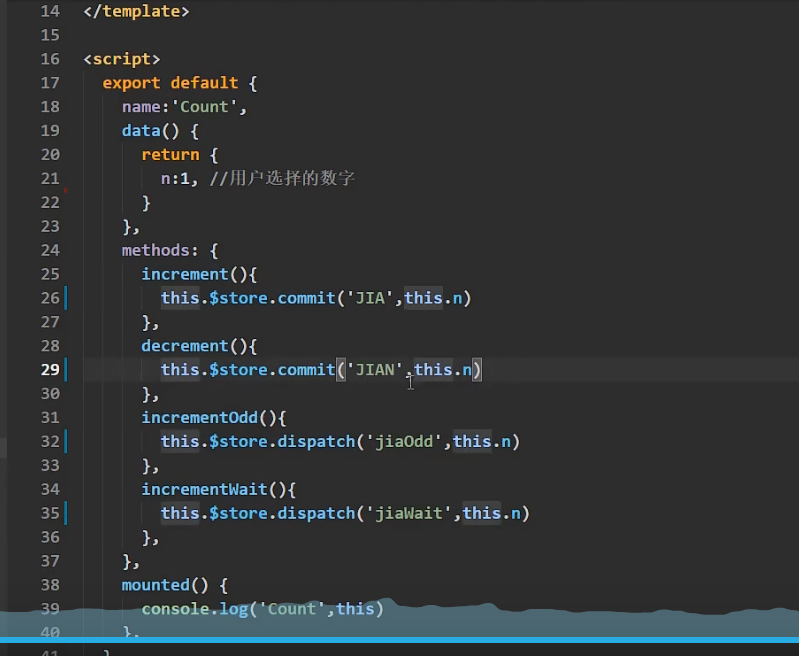
触发:
this.$store.commit('changeUsername')
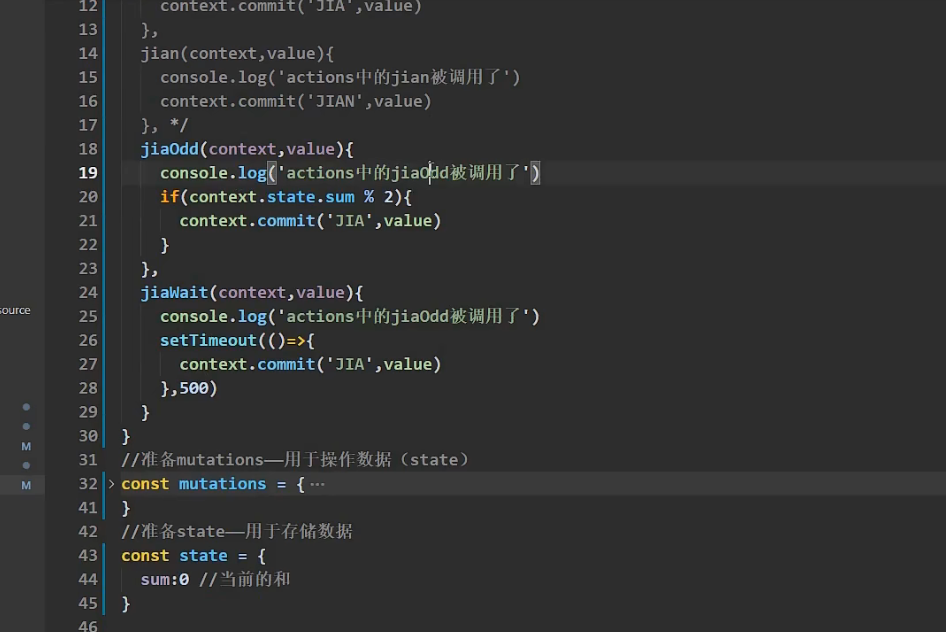
actions
actions里面可以触发mutations中的函数,还能处理异步
// actions里面放的是触发mutations的函数,他还能执行异步操作actions: {// 第一个参数是对象,默认的。里面有个commit属性。triggerChangeUname ({ commit }, payload) {console.log(payload)setTimeout(() => {commit('changeUsername', payload)}, 1000)}},
触发:this.$store.dispatch(‘triggerChangeUname’, 参数)
getters
// getters 类似于计算属性,根据state中的值的变化计算得到一个新的属性getters: {wrappedUname (state) {// 依赖state中的值的变化而变化return '❤️' + state.username + '❤️'}}
map系列映射函数
- mapState
- mapGetters
- mapMutations
mapActions
computed: {...mapState(['count']),...mapGetters(['evenOrOdd'])}methods: {...mapMutations(['changeCount']),...mapActions(['triggerChangeCount'])},
模块化
拆分模块
- 注入模块 ```javascript import Vue from ‘vue’ import Vuex from ‘vuex’ import user from ‘./modules/user’ import num from ‘./modules/num’
Vue.use(Vuex)
// 创建一个store仓库,放vuex里面的那些核心部分 const store = new Vuex.Store({ // 注册模块 modules: { userModule: user, numMudule: num } })
export default store ```
注意:这里只有在访问state的时候需要带上模块名,其他的getters,actions,mutations访问方式不变。
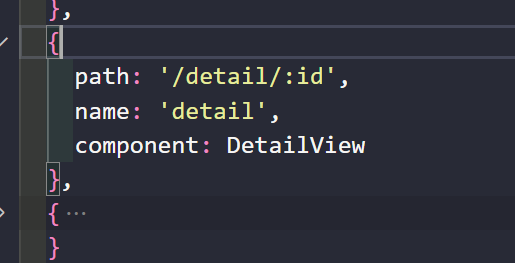
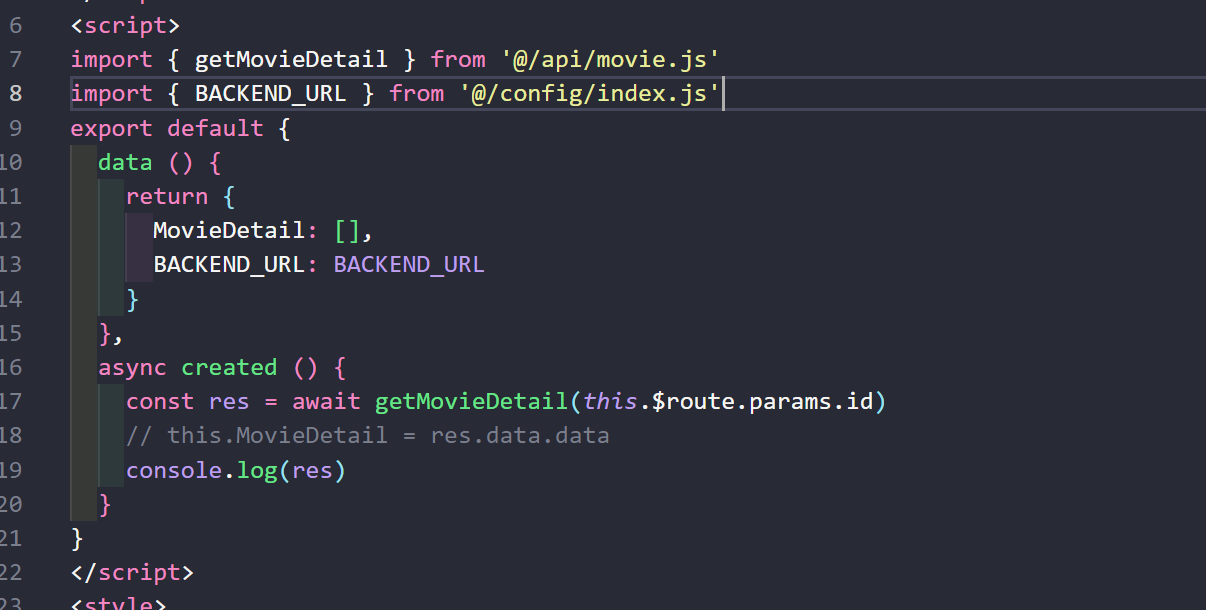
案例

传参id


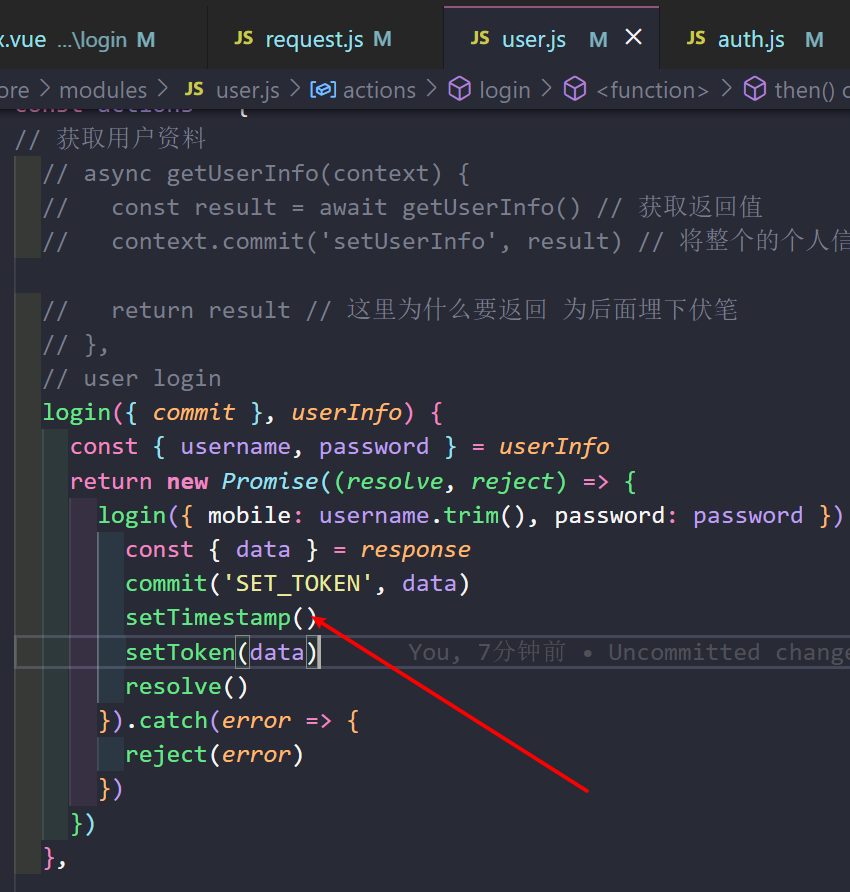
登录
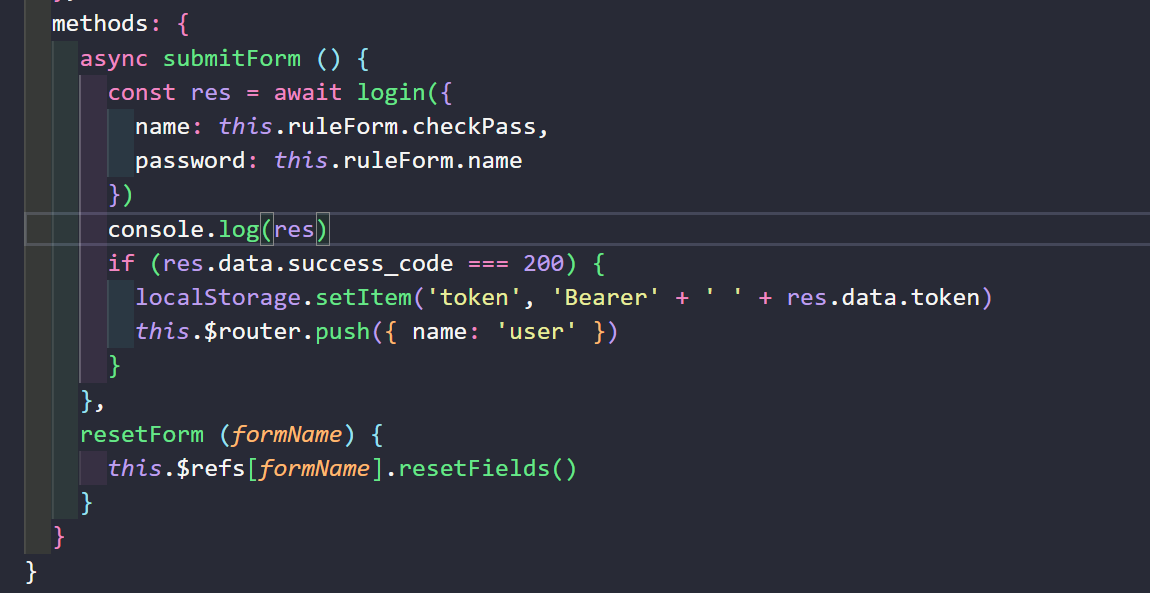

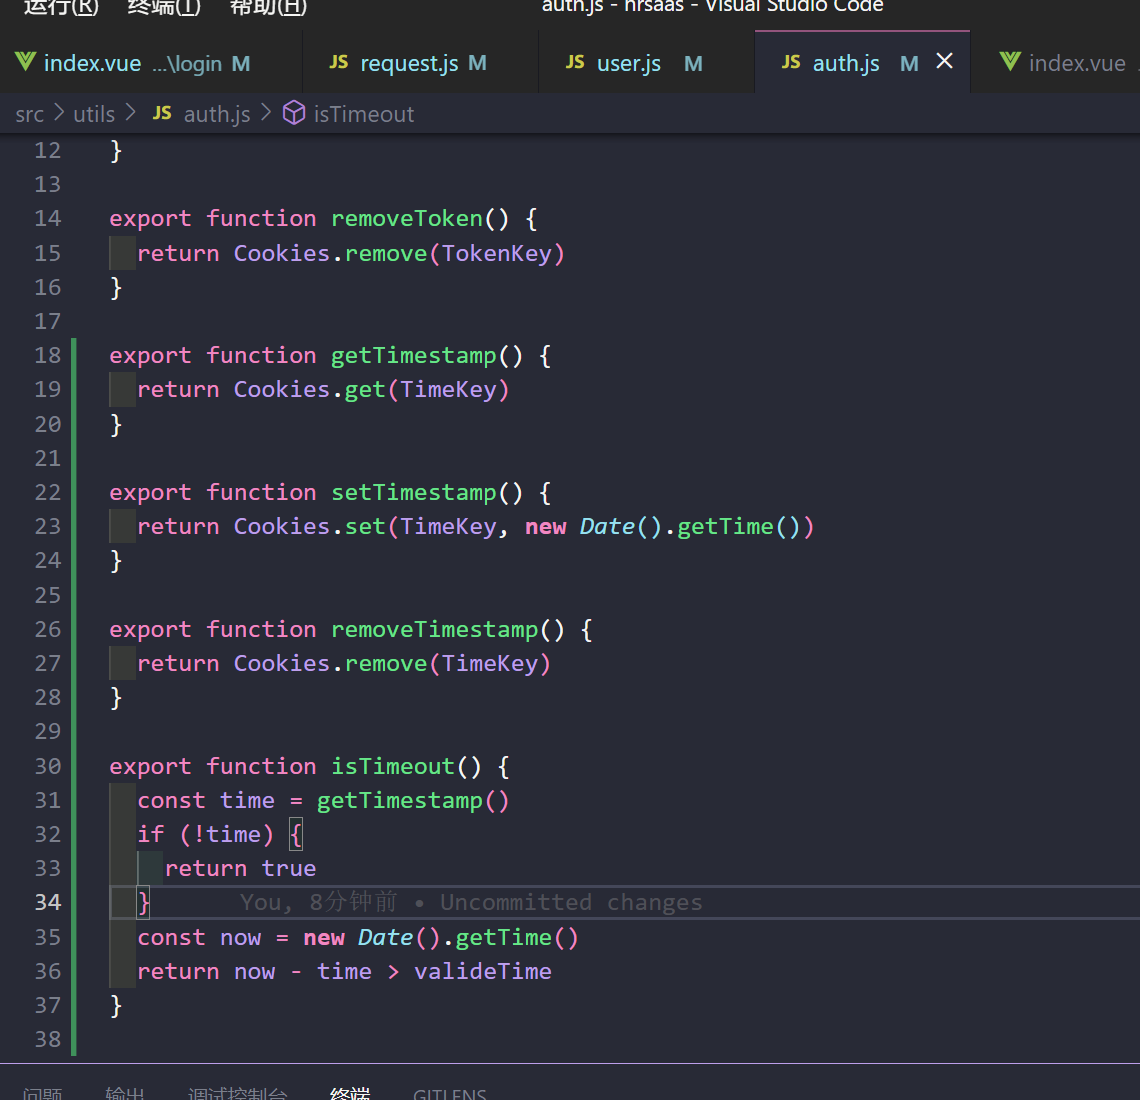
路由拦截

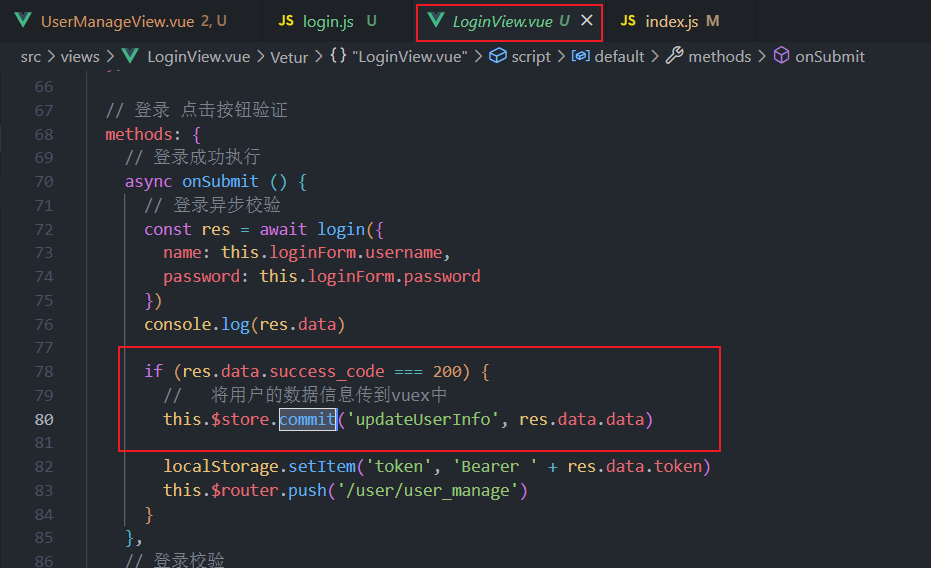
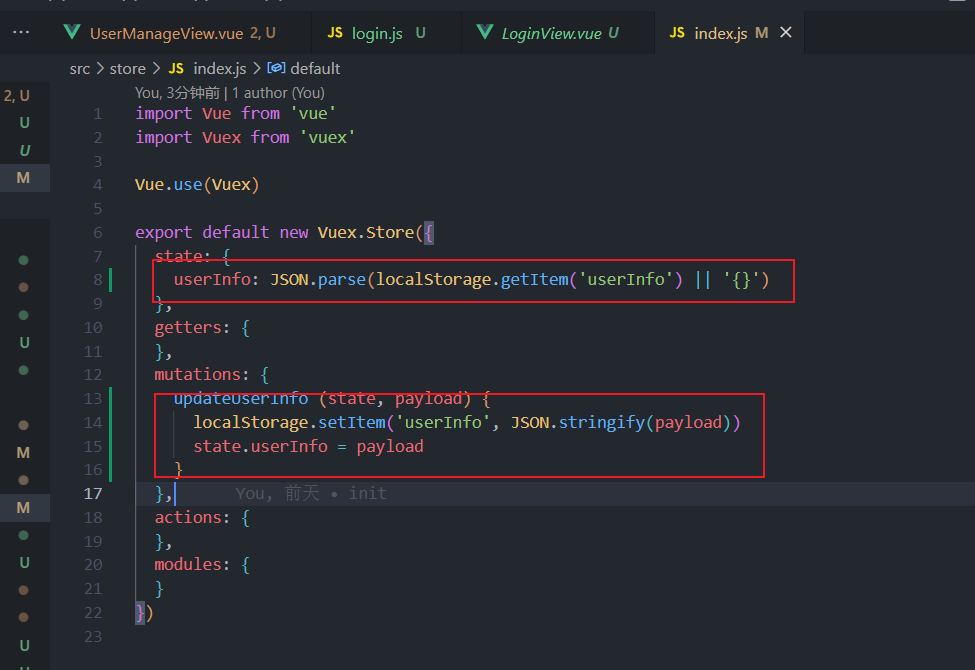
登录传值

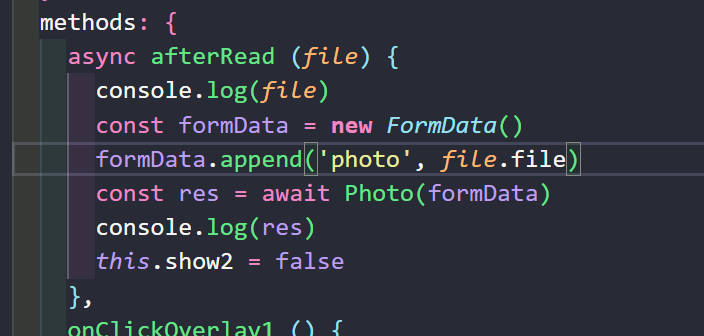
移动端vant-2上传图片
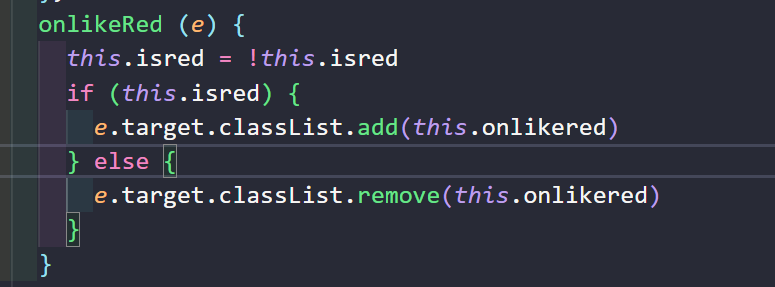
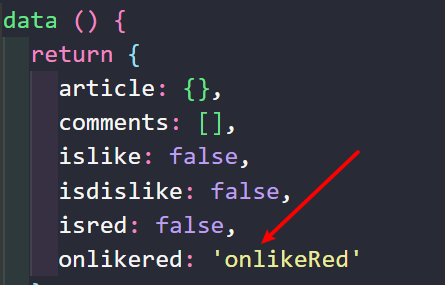
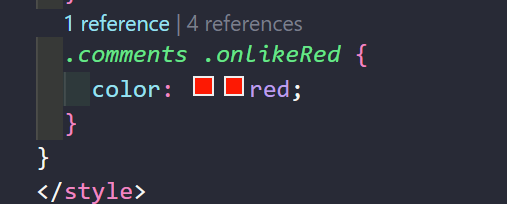
点赞

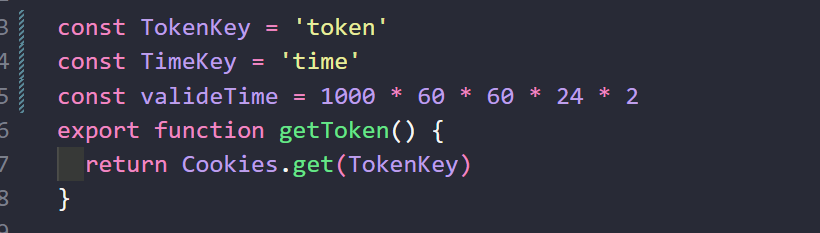
前端介入token失效
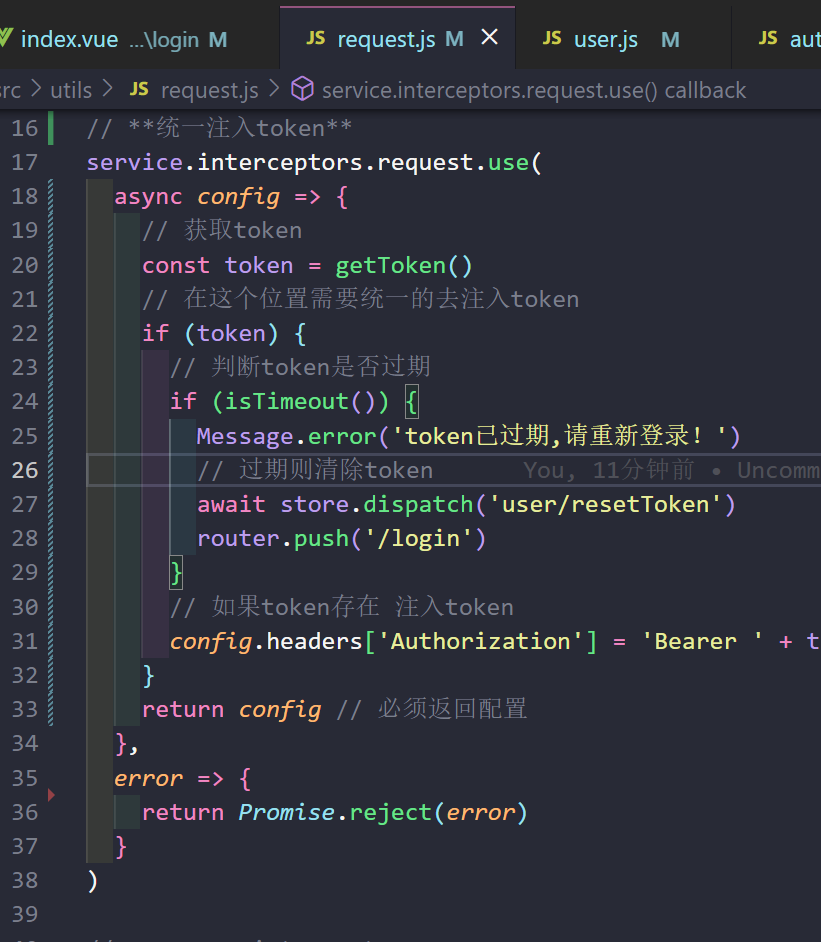

引入

若有收获,就点个赞吧
0 人点赞
