0. 参考文档
pipeline 官方文档
使用Jenkins Pipeline自动化构建发布Java项目
Jenkins高级篇之Pipeline方法篇
1. pipline 模式
- Declarative Pipeline 声明式pipeline (参考: https://blog.csdn.net/u011541946/article/details/83278214)
- Scripted Pipeline 脚本化pipeline
Scripted Pipeline是一个基于Groovy构建的,通用、高效的DSL。
声明性限制了用户具有更严格和预定义结构的可用性,使其成为更简单连续输送Pipeline的理想选择。
脚本化提供了极少的限制,因为Groovy本身只能对结构和语法进行限制,而不是任何Pipeline专用系统,使其成为高级用户和具有更复杂要求的用户的理想选择。
2. Declarative pipline
下面是一段示例代码,可直接运行。
pipeline {agent { docker 'maven:3.3.3' }stages {stage('build') {steps {sh 'mvn --version'}}}}
pipline 通过 jenkins 的 master/slave 模式运行, agent 指定要执行 pipline 代码的 slave 机器(即所谓的代理机器)
pipline {…} 的下一层,必须要有一个 agent, agent部分主要作用就是告诉Jenkins,选择那台节点机器去执行Pipeline代码。
2.1 agent 参数介绍:
any
在任何可用的代理上执行Pipeline或stage
pipeline {agent any}// 如果你Jenkins平台环境只有一个master,那么这种写法就最省事情.
none
不为 整个pipline运行分配代理, 并且每个stage 部分要有自己的agent
pipeline {agent nonestages {stage('Build'){agent {label '具体的节点名称'}}}}
label
在指定的 label 标签上 运行 pipline
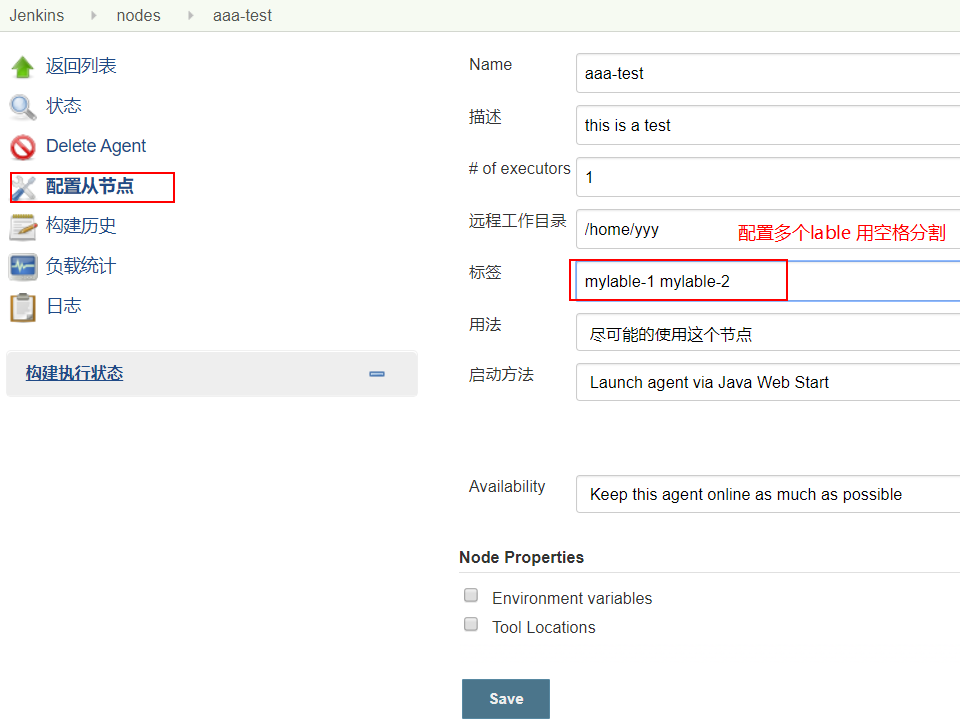
jenkins 在配置 从节点时,会指定 label
./
pipeline {agent {label 'mylabel-1' // 指定要在哪些标签上运行}}
node
和上面label功能类似,但是node运行其他选项,例如customWorkspace
下面是一段完整的pipline 代码:
pipeline {agent {node {label 'test'customWorkspace "${env.JOB_NAME}/${env.BUILD_NUMBER}" // 指定工作空间}}stages {stage ('build') {steps{sh "pwd"}}stage ('test') {steps{sh "echo ${JAVA_HOME}"}}}}
2.2 post 参数介绍
post 参数,构建状态相关。用来指定 当 pipline运行完成后,后续的一些操作。如: 测试完后对数据库的恢复,运行成功或失败后发送邮件等。
基本的代码布局如下:
pipeline {agent {label 'test'}stages {stage ('test') {steps {sh "echo hello ..."}}}post {//写相关post部分代码// ......}}- - - -https://blog.csdn.net/u011541946/article/details/83278531
always
无论Pipeline运行的完成状态如何,都会执行这段代码
一般 always 参数用来写相关清除、恢复环境 等操作代码。如: 测试完了,对数据库进行恢复操作,恢复到测试之前的环境。
pipeline {agent {label 'test'}stages {stage ('test') {steps {sh "echo hello ... test ..."println "this is a test ... " // 这个是Groovy风格的语法}}}post {always {script {echo "清除... 恢复..."}}}}
changed (不常用)
当本次构建的结果状态与上次的不一样时,触发 changed。
pipeline {agent {label 'test'}stages {stage ('test') {steps {sh "echo hello ... test ..."}}}post {changed {script {echo "与上次的构建状态发生了变化......"echo "已发邮件通知 ..."}}}}
failure
当本次构建失败时触发。
success
当本次构建成功后触发。
aborted
只有当前Pipeline处于“中止”状态时,才会运行,通常是由于Pipeline被手动中止。通常在具有灰色指示的Web UI中表示。
unstable
构建的不稳定状态。通常由测试失败,代码违例等引起,才能运行。通常在具有黄色指示的Web UI中表示。
pipeline {agent {label 'test'}stages {stage ('test') {steps {sh "echo hello ... test ..."}}}post {success {script {echo "success ..."echo "send mail ... "}}failure {script {echo "构建失败 ..."echo "已发邮件通知 ..."}}}}
2.3 指令
environment
用来定义一些环境变量。可以在 pipline层, stage层来定义变量。
// def NAME="mmm" // def 定义的变量的优先级最高pipeline {agent {label 'test'}environment {NAME="all-evn"}stages {stage ('test') {environment {NAME="step-env"}steps {println NAMEscript {def browsers = ['chrome', 'firefox']for (int i = 0; i < browsers.size(); ++i) {echo "Testing the ${browsers[i]} browser"}}}}}}
options
- buildDiscarder
pipeline保持构建的最大个数。例如:options { buildDiscarder(logRotator(numToKeepStr: ‘1’)) }
- disableConcurrentBuilds
不允许并行执行Pipeline,可用于防止同时访问共享资源等。例如:options { disableConcurrentBuilds() }
- skipDefaultCheckout
默认跳过来自源代码控制的代码。例如:options { skipDefaultCheckout() }
- skipStagesAfterUnstable
一旦构建状态进入了“Unstable”状态,就跳过此stage。例如:options { skipStagesAfterUnstable() }
- timeout
设置Pipeline运行的超时时间。例如:options { timeout(time: 1, unit: ‘HOURS’) }
- retry
失败后,重试整个Pipeline的次数。例如:options { retry(3) }
- timestamps
预定义由Pipeline生成的所有控制台输出时间。例如:options { timestamps() }
pipeline {agent {label 'test'}options {timeout(time: 1, unit: 'HOURS')retry(3)}stages {stage ('test') {steps {sh "echo retry ..."sh "echo1 test ..."}}}}
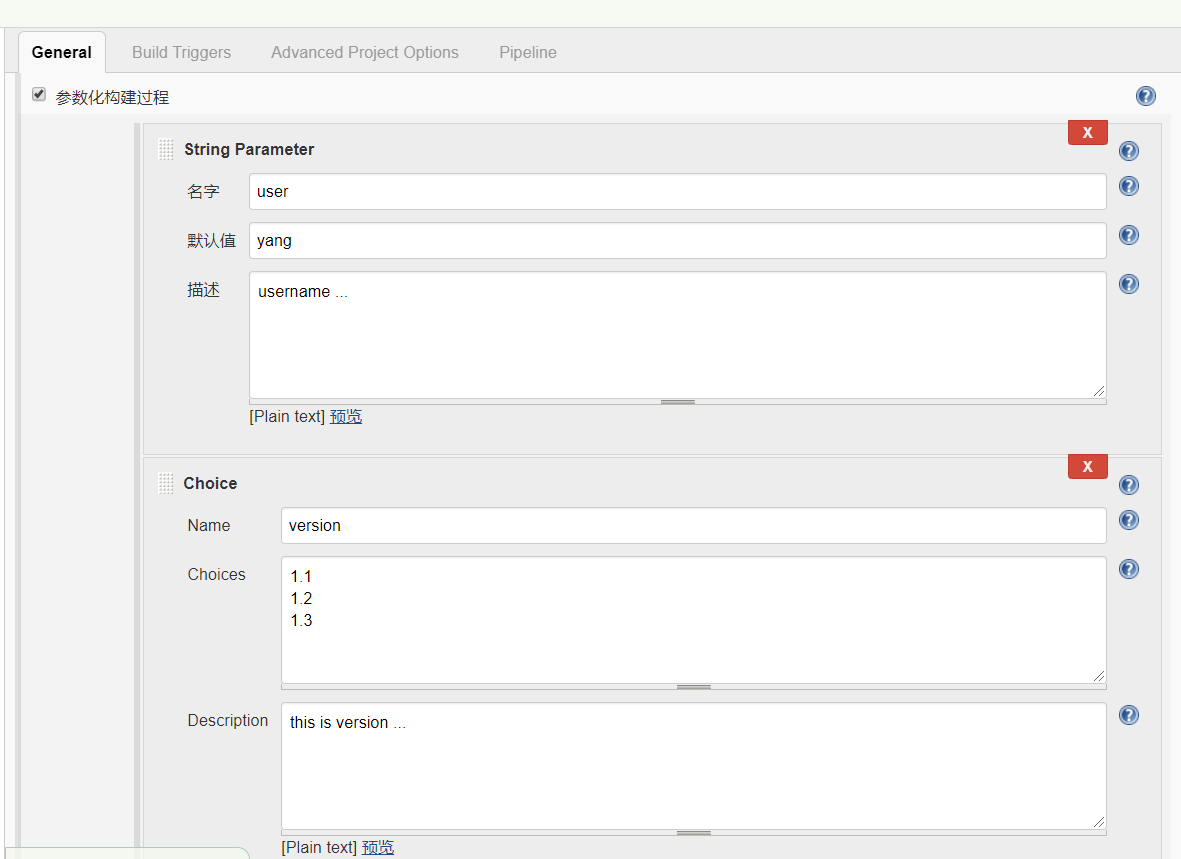
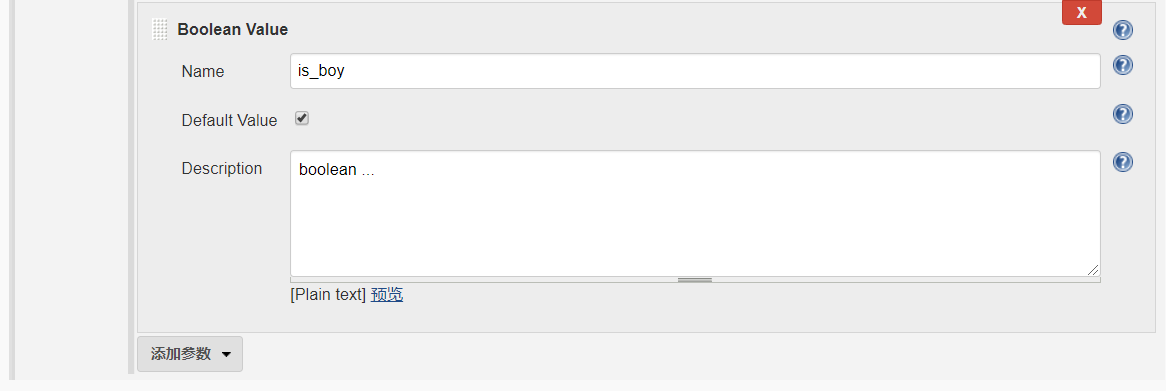
parameters (参数化构建)
- string
A parameter of a string type, for example: parameters { string(name: 'DEPLOY_ENV', defaultValue: 'staging', description: '') }
- booleanParam
A boolean parameter, for example: parameters { booleanParam(name: 'DEBUG_BUILD', defaultValue: true, description: '') }
- choice
choice(name: 'ENV_TYPE', choices: ['test', 'dev', 'product'], description: 'test means test env,….')
- text
text(name: 'Welcome_text', defaultValue: 'One\nTwo\nThree\n', description: '')
- file
parameters { file(name: 'FILE', description: 'Some file to upload') }
- password
password(name: 'PASSWORD', defaultValue: 'SECRET', description: 'A secret password')
目前只支持[ booleanParam, choice, credentials, file, text, password, run, string ]这几种参数类型,其他高级参数化类型还需等待社区支持。
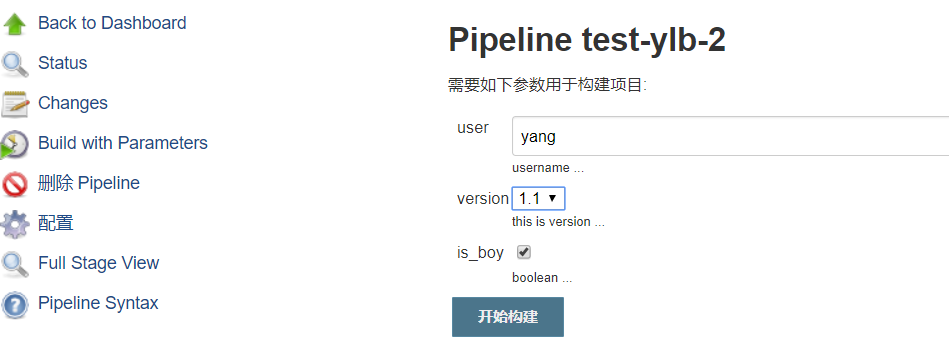
// 这里的 pipline 参数化,只要将pipline写代码即可, 不需要手动的去配置参数化构建。pipeline{agent {label 'test'}parameters {string(name: 'user', defaultValue: 'yang', description: 'please give a name')// 这里choice 这么写有问题, 使用下面的那个写法。// choice(name: 'version', choices: ['1.1', '1.2', '1.3'], description: 'select the version to test')choice(name: 'version', choices: '1.1\n1.2\n1.3', description: 'select the version to test')booleanParam(name: 'is_boy', defaultValue: true, description: 'you is boy or not')}stages {stage('test') {steps{echo "${params.user}"echo "${params.version}"echo "${params.is_boy}"}}}}// 保存之后,你会发现,菜单是Build now,而并不是Build with Parameters,// 这个是正常,你先点击Build now,先完成第一个构建,Jenkins第二个构建才会显示代码中的三个参数。// 刷新之后,就可以看到参数化构建这个菜单。
UI 界面


triggers (定时触发器)
cron
接受一个cron风格的字符串来定义Pipeline应重新触发的常规间隔,例如: `triggers { cron('H 4/* 0 0 1-5') }`
pollSCM
接受一个cron风格的字符串来定义Jenkins应该检查新的源更改的常规间隔。如果存在新的更改,则Pipeline将被重新触发。例如: `triggers { pollSCM('H 4/* 0 0 1-5') }`
upstream
接受逗号分隔的作业字符串和阈值。 当字符串中的任何作业以最小阈值结束时,将重新触发pipeline。例如: triggers { upstream(upstreamProjects: 'job1,job2', threshold: hudson.model.Result.SUCCESS) } // 当job1或job2运行成功的时,自动触发。
pipeline {agent {label 'test'}triggers {pollSCM('H * * * *')}stages {stage('test') {steps{echo "定时1分钟..."}}}}
tools
定义自动安装和放置工具的部分PATH。如果agent none指定,这将被忽略。
只支持定义 maven,jdk, gradle 三种工具的环境变量。
pipeline{agent {label 'test'}tools {jdk 'jdk8'}stages {stage('test') {steps{sh 'java -version'}}}}
注意:工具名称必须在Jenkins 管理Jenkins → 全局工具配置中预配置。例如,上面代码我写了jdk,那么我必须在jenkins管理的全局工具配置中有jdk配置。
when
内置条件
- branch
当正在构建的分支与模式给定的分支匹配时,执行这个阶段, 例如: when { branch 'master' }。注意,这只适用于多分支流水线。
- environment
当指定的环境变量是给定的值时,执行这个步骤, 例如: when { environment name: 'DEPLOY_TO', value: 'production' }
- expression
当指定的Groovy表达式评估为true时,执行这个阶段, 例如: when { expression { return params.DEBUG_BUILD } }
- not
当嵌套条件是错误时,执行这个阶段,必须包含一个条件,例如: when { not { branch 'master' } }
- allOf
当所有的嵌套条件都正确时,执行这个阶段,必须包含至少一个条件,例如: when { allOf { branch 'master'; environment name: 'DEPLOY_TO', value: 'production' } }
- anyOf
当至少有一个嵌套条件为真时,执行这个阶段,必须包含至少一个条件,例如: when { anyOf { branch 'master'; branch 'staging' } }
在进入 stage 的 agent 前评估 when
默认情况下, 如果定义了某个阶段的代理,在进入该stage 的 agent 后该 stage 的 when 条件将会被评估。但是, 可以通过在 when 块中指定 beforeAgent 选项来更改此选项。 如果 beforeAgent 被设置为 true, 那么就会首先对 when 条件进行评估 , 并且只有在 when 条件验证为真时才会进入 agent 。
pipeline {agent {label 'test'}environment {quick_test = true}stages {stage('Example Build') {steps {script {echo 'Hello World'}}}stage('Example Deploy') {when {expression {return (quick_test == "true")}}steps {echo 'Deploying'}}}}
2.4 并行
在声明式 pipeline 版本 1.2 之前,这是唯一的并行方式
pipeline {agent {label 'test'}stages {stage('run-parallel') {steps {parallel(a: {echo "task 1"},b: {echo "task 2"})}}}}
声明式流水线的阶段可以在他们内部声明多隔嵌套阶段, 它们将并行执行。 注意,一个阶段必须只有一个 steps 或 parallel 的阶段。 嵌套阶段本身不能包含进一步的 parallel 阶段, 但是其他的阶段的行为与任何其他 stage 相同。任何包含 parallel 的阶段不能包含 agent 或 tools 阶段, 因为他们没有相关 steps。
另外, 通过添加 failFast true 到包含 parallel的 stage 中, 当其中一个进程失败时,你可以强制所有的 parallel 阶段都被终止。
pipeline {agent anystages {stage('Non-Parallel Stage') {steps {echo 'This stage will be executed first.'}}stage('Parallel Stage') {when {branch 'master'}failFast trueparallel {stage('Branch A') {agent {label "for-branch-a"}steps {echo "On Branch A"}}stage('Branch B') {agent {label "for-branch-b"}steps {echo "On Branch B"}}}}}}
scripted
stage, node 没有明确的层级限制, 使用比较灵活。
stage('Example') {node('A01') {if (env.BRANCH_NAME == 'master') {echo 'I only execute on the master branch'} else {echo 'I execute elsewhere'}sh label: 'A01', script: 'echo A01 > /tmp/a.txt'}}
问题
1. pipline 中 pipline{...} 中可以写多个agent ?不可以。 最外层的 agent 是全局的。 每个 stage 中的 agent 也只能有一个。

