- 一、PXE简介
- 二、环境准备
- 三、软件配置
- 无人值守安装,需配置对应ks.cfg文件
- 响应使用者查询
- 响应激活查询
- 其他保持默认,最后一行添加如下,路径为上面系统镜像目录
- !/bin/bash
- PXE Service
- platform=x86, AMD64, 或 Intel EM64T
- version=DEVEL
- Install OS instead of upgrade
- Keyboard layouts
- Root password
- Use network installation
- System language
- System authorization information
- Use text mode install
- SELinux configuration
- Do not configure the X Window System
- Firewall configuration
- Network information
- Reboot after installation
- System timezone
- System bootloader configuration
- Clear the Master Boot Record
- Partition clearing information
一、PXE简介
PXE(preboot execute environment,预启动执行环境)是由Intel公司开发的最新技术,工作于Client/Server的网络模式,支持工作站通过网络从远端服务器下载映像,并由此支持通过网络启动操作系统,在启动过程中,终端要求服务器分配IP地址,再用TFTP(trivial file transfer protocol)或MTFTP(multicast trivial file transfer protocol)协议下载一个启动软件包到本机内存中执行,由这个启动软件包完成终端(客户端)基本软件设置,从而引导预先安装在服务器中的终端操作系统。PXE可以引导多种操作系统,如:Windows95/98/2000/windows2003/windows2008/winXP/win7/win8,linux系列系统等。
注:摘自百度百科。
PXE网络结构大致如图:
二、环境准备
- 上传CentOS7光盘镜像(这里使用1511和1810演示)
- 安装并配置好YUM软件源
安装所需软件
yum install -y yum dhcp xinetd tftp-server syslinux vsftpd
创建CentOS7系统镜像文件存放目录(可根据实际自定义),并复制对应版本系统文件
#创建对应目录
mkdir -p /pxe/centos7-1511/
mkdir -p /pxe/centos7-1511/
#挂载对应系统镜像并复制到创建的目录
mkdir -p /mnt/centos7-1511/
mkdir -p /mnt/centos7-1511/
mount /pxe/CentOS-7-x86_64-DVD-1511.iso /mnt/centos7-1511/
mount /pxe/CentOS-7-x86_64-DVD-1810.iso /mnt/centos7-1511/
cp -R /mnt/centos7-1511/* /pxe/centos7-1511/
cp -R /mnt/centos7-1810/* /pxe/centos7-1810/
关闭防火墙及SELinux(此处自行查阅资料)。
注:这里使用vsftp来传输系统文件,也可以使用http、nfs等方式,可根据实际情况选择配置。
注:本文非PXE自动化部署,如需无人值守部署可使用ks.cfg文件实现,文末有参考配置。
注:这里使用centos7的1511和1810版本演示,如需添加更多版本如上配置即可。
三、软件配置
syslinux加载器设置
vesamenu.c32和menu.c32是syslinux所拥有众多模块中的两个,它们的功能是制定启动器使用什么模式的背景。vesamenu.c32图形模式,menu.c32文本模式。这里选择menu.c32。同时还需要pxelinux.0文件,它对整个引导器的作用就如同内核对系统的作用一般,它可以解释default文件(配置引导菜单的文件)中的每个配置项,并根据配置项做出不同的反应,如等待的时间、启动器背景、启动菜单、内核引导等。
将这两个文件复制到tftp的访问目录中:cp /usr/share/syslinux/menu.c32 /var/lib/tftpboot/ cp /usr/share/syslinux/pxelinux.0 /var/lib/tftpboot/
然后创建pxelinux.cfg目录,pxelinux被执行后,它会扫描该目录下是否存在指定的配置文件,若存在则引用被制定的配置文件。default文件存放于pxelinux.cfg目录中,pxelinux程序最后扫描的配置文件名就是default,所以经常把启动器配置项都写入该文件中。
建立目录pxelinux.cfg并在此目录下建立default文件:mkdir /var/lib/tftpboot/pxelinux.cfg #为方便后续区分,创建对应文件夹以便后续存放启动文件 mkdir /var/lib/tftpboot/centos7-1511/ mkdir /var/lib/tftpboot/centos7-1810/
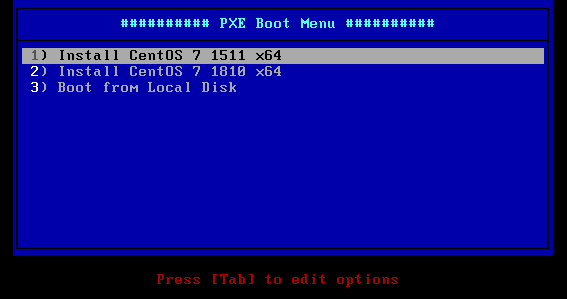
编辑引导菜单如下:vi /var/lib/tftpboot/pxelinux.cfg/default``` default menu.c32 prompt 0 timeout 300 ONTIMEOUT local
menu title ########## PXE Boot Menu ##########
label 1 menu label ^1) Install CentOS 7 1511 x64 kernel centos7-1511/vmlinuz append initrd=centos7-1511/initrd.img method=ftp://192.168.100.182/centos7-1511/ devfs=nomount
label 2 menu label ^2) Install CentOS 7 1810 x64 kernel centos7-1810/vmlinuz append initrd=centos7-1810/initrd.img method=ftp://192.168.100.182/centos7-1810/ devfs=nomount
无人值守安装,需配置对应ks.cfg文件
label 3 menu label ^3) Auto Install CentOS 7 1810 x64 kernel centos7-1810/vmlinuz append initrd=centos7-1810/initrd.img ks=ftp://192.168.100.182/centos7-1810/ks.cfg
label local menu label ^4) Boot from Local Disk menu default localboot 0xffff
1. <br />_注:这里使用centos7的1511和1810版本演示,如需添加更多版本如上配置即可。_<br />复制对应系统启动文件到对应目录:
cp /pxe/centos7-1511/images/pxeboot/initrd.img /var/lib/tftpboot/centos7-1511/ cp /pxe/centos7-1511/images/pxeboot/vmlinuz /var/lib/tftpboot/centos7-1511/ cp /pxe/centos7-1810/images/pxeboot/initrd.img /var/lib/tftpboot/centos7-1810/ cp /pxe/centos7-1810/images/pxeboot/vmlinuz /var/lib/tftpboot/centos7-1810/
1. <br />此时`/var/lib/tftpboot`目录结构如下:
/var/lib/tftpboot/ ├── centos7-1511 │ ├── initrd.img │ └── vmlinuz ├── centos7-1810 │ ├── initrd.img │ └── vmlinuz ├── menu.c32 ├── pxelinux.0 └── pxelinux.cfg └── default
2. dhcp服务配置<br />编辑配置文件:`vi /etc/dhcp/dhcpd.conf`<br />如下(ip地址等可根据实际情况修改):
ddns-update-style none; ignore client-updates; default-lease-time 259200; max-lease-time 518400;
响应使用者查询
allow booting;
响应激活查询
allow bootp; subnet 192.168.100.0 netmask 255.255.255.0 {
   #分配的ip地址池范围
   range dynamic-bootp 192.168.100.100 192.168.100.200;
   #网关地址
   option routers 192.168.100.1;
   #子网掩码
   option subnet-mask 255.255.255.0;
   #DNS
   option domain-name-servers 119.29.29.29,114.114.114.114;
   #本机ip地址
   next-server 192.168.100.182;
   #pxe启动文件
   filename "pxelinux.0";
}
3. tftp服务配置<br />由于tftp是由xinetd管理的,修改`/etc/xinetd.d/tftp`配置文件如下:
service tftp { socket_type = dgram protocol = udp wait = yes user = root server = /usr/sbin/in.tftpd server_args = -s /var/lib/tftpboot
#启用tftp
disable            = no
per_source        = 11
cps            = 100 2
flags            = IPv4
}
4. vsftpd服务配置<br />编辑配置文件`/etc/vsftpd/vsftpd.conf`如下:
其他保持默认,最后一行添加如下,路径为上面系统镜像目录
anon_root=/pxe/
5. 检查并启动服务<br />`systemctl start dhcpd xinetd tftp vsftpd`<br />_注:若启动失败请检查各服务配置后重试。_
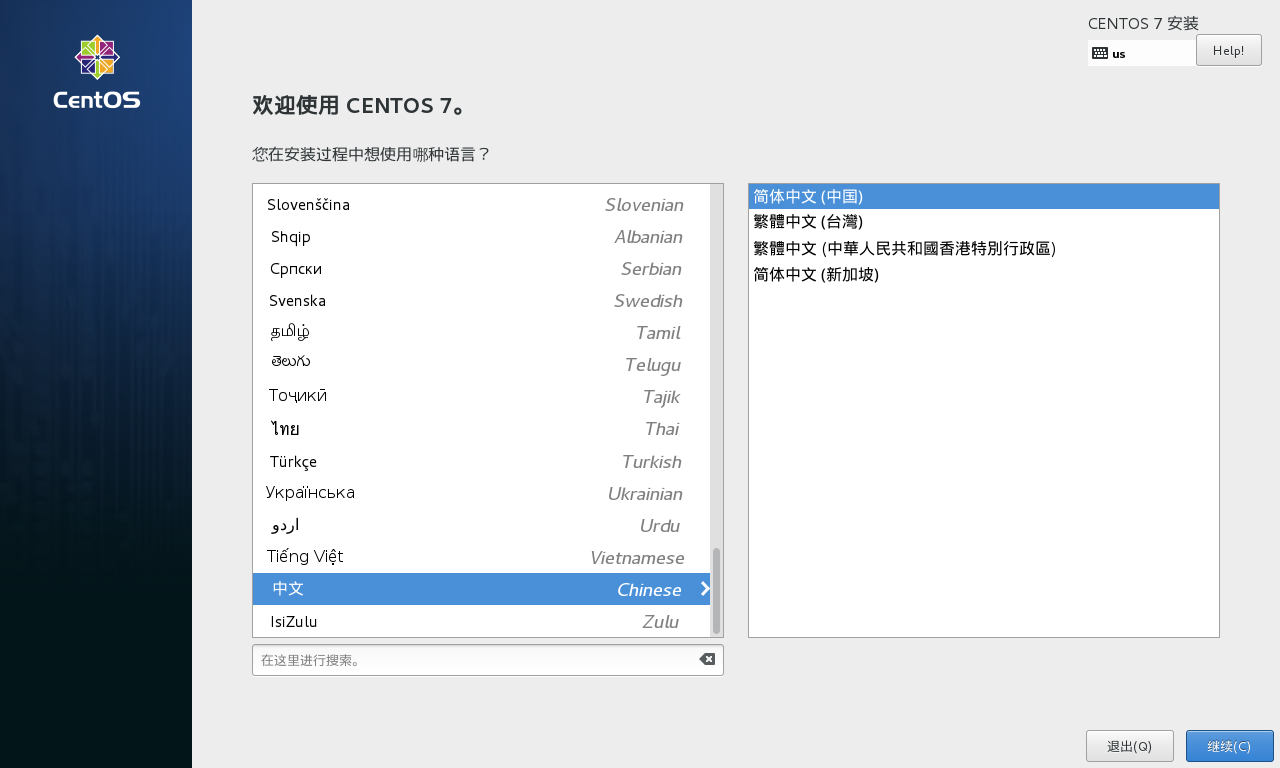
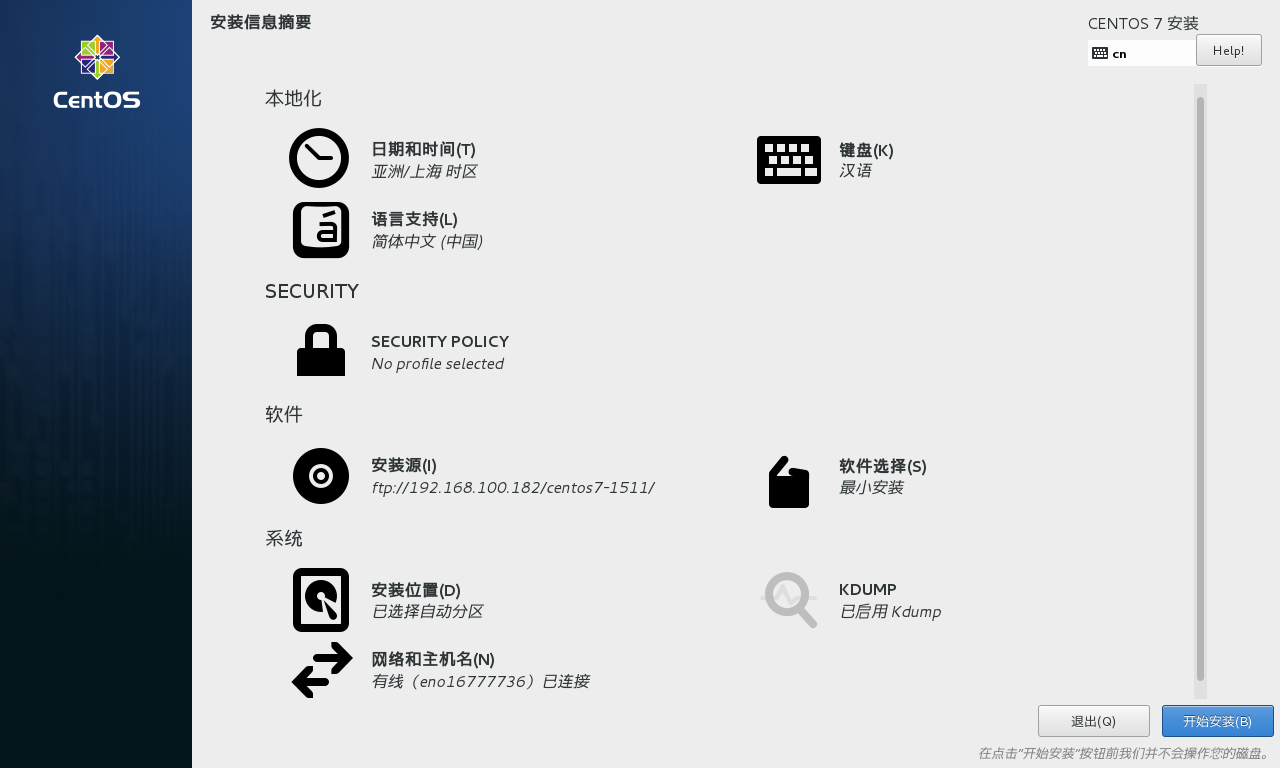
5. 客户机从网络启动安装系统<br />客户机开机BIOS选择从网卡启动即可引导安装界面,如图:<br /><br /><br />
<a name="d1e63fce"></a>
## 附1:个人启动停止脚本
个人为了方便管理PXE服务项,使用脚本批量启动或停止服务,将脚本放置在`/usr/bin/`目录则可以很方便地使用脚本。<br />如下是脚本`pxe.sh`内容:
!/bin/bash
PXE Service
case $1 in start) echo -e “\033[32m ### Start PXE Service…\033[0m” systemctl start dhcpd && echo -e “\033[32m >>> Start DHCP Service Success!\033[0m” systemctl start xinetd && echo -e “\033[32m >>> Start Xinetd Service Success!\033[0m” systemctl start tftp && echo -e “\033[32m >>> Start TFTP Service Success!\033[0m” systemctl start vsftpd && echo -e “\033[32m >>> Start vsFTP Service Success!\033[0m” echo -e “\033[32m ### Start PXE Service Success!\033[0m” ;; stop) echo -e “\033[32m ### Stop PXE Service…\033[0m” systemctl stop dhcpd && echo -e “\033[32m >>> Stop DHCP Service Success!\033[0m” systemctl stop xinetd && echo -e “\033[32m >>> Stop Xinetd Service Success!\033[0m” systemctl stop tftp && echo -e “\033[32m >>> Stop TFTP Service Success!\033[0m” systemctl stop vsftpd && echo -e “\033[32m >>> Stop vsFTP Service Success!\033[0m” echo -e “\033[32m ### Stop PXE Service Success!\033[0m” ;; restart) echo -e “\033[32m ### Restart PXE Service…\033[0m” systemctl restart dhcpd && echo -e “\033[32m >>> Restart DHCP Service Success!\033[0m” systemctl restart xinetd && echo -e “\033[32m >>> Restart Xinetd Service Success!\033[0m” systemctl restart tftp && echo -e “\033[32m >>> Restart TFTP Service Success!\033[0m” systemctl restart vsftpd && echo -e “\033[32m >>> Restart vsFTP Service Success!\033[0m” echo -e “\033[32m ### Restart PXE Service Success!\033[0m” ;; enable) echo -e “\033[32m ### Enable PXE Service…\033[0m” systemctl enable dhcpd && echo -e “\033[32m >>> Enable DHCP Service Success!\033[0m” systemctl enable xinetd && echo -e “\033[32m >>> Enable Xinetd Service Success!\033[0m” systemctl enable tftp && echo -e “\033[32m >>> Enable TFTP Service Success!\033[0m” systemctl enable vsftpd && echo -e “\033[32m >>> Enable vsFTP Service Success!\033[0m” echo -e “\033[32m ### Enable PXE Service Success!\033[0m” ;; disable) echo -e “\033[32m ### Disable PXE Service…\033[0m” systemctl disable dhcpd && echo -e “\033[32m >>> Disable DHCP Service Success!\033[0m” systemctl disable xinetd && echo -e “\033[32m >>> Disable Xinetd Service Success!\033[0m” systemctl disable tftp && echo -e “\033[32m >>> Disable TFTP Service Success!\033[0m” systemctl disable vsftpd && echo -e “\033[32m >>> Disable vsFTP Service Success!\033[0m” echo -e “\033[32m ### Disable PXE Service Success!\033[0m” ;; *) echo “### The input value is invalid, please try again…” ;; esac
启动服务:`pxe.sh start`<br />停止服务:`pxe.sh stop`<br />重启服务:`pxe.sh restart`<br />开机自启:`pxe.sh enable`<br />取消自启:`pxe.sh disable`<br />_注:若使用http或nfs方式,则具体服务名称根据实际情况更改。_

<a name="6c048664"></a>
## 附2:个人无人值守配置文件ks.cfg

注:可使用Kickstart工具生成或复制修改root目录下的`anaconda-ks.cfg`文件。<br />注:以下url地址自行根据实际修改,该配置默认删除所有分区并重新最小化安装,将此文件放到对应系统镜像文件根目录下并对应修改上文中引导菜单的网络文件路径,此配置密码为`000000`。<br />安装Kickstart工具:`yum reinstall -y system-config-kickstart`<br />如需X11需安装:`yum install -y xorg-x11-xauth wqy-zenhei-fonts*`
platform=x86, AMD64, 或 Intel EM64T
version=DEVEL
Install OS instead of upgrade
install
Keyboard layouts
keyboard ‘us’
Root password
rootpw —iscrypted $1$aq2UlNV/$5NBlTHhpgk6K3BEVHbsin0
Use network installation
url —url=”ftp://192.168.100.182/centos7-1810”
System language
lang zh_CN.UTF-8
System authorization information
auth —useshadow —passalgo=sha512
Use text mode install
text
SELinux configuration
selinux —enforcing
Do not configure the X Window System
skipx
Firewall configuration
firewall —enabled —ssh
Network information
network —bootproto=dhcp —device=eth0 —ipv6=auto —activate
Reboot after installation
reboot
System timezone
timezone Asia/Shanghai —isUtc
System bootloader configuration
bootloader —append=” crashkernel=auto” —location=mbr —boot-drive=sda autopart —type=lvm
Clear the Master Boot Record
zerombr
Partition clearing information
clearpart —all —initlabel
%packages @^minimal @core chrony kexec-tools %end ```

