1、背景
日常业务开发中,任务多,项目时间紧,产品和项目催得急,另外技术领导也并未强制要求编写单元测试,所以国内很大一部分程序员是不会去编写单元测试代码。我们团队也是(捂脸)。
最近在抽出业务中用到的组件,并单独剥离出来形成一个UI组件库;在参考学习业界优秀团队的开源组件库时,看到绝大部分开源组件库的单元测试覆盖率是非常高。因此,也在尝试编写一个组件,同时编写单元测试代码。
2、单元测试的含义
单元测试(模块测试)是开发者编写的一小段代码,用于检验被测代码的一个很小的、很明确的功能是否正确。通常而言,一个单元测试是用于判断某个特定条件(或者场景)下某个特定函数的行为。(源自百度百科)
3、Vue项目单元测试相关技术介绍
jest
jest是Vue官方放在最前面介绍的测试框架,由facebook出品。但是mocha也是一个非常优秀的测试框架。可以根据业务情况和团队来选择。
Vue Test Utils
Vue Test Utils 是 Vue.js 官方的单元测试实用工具库,提供更多详细的指引和自定义设置。
明白要测试的是什么
对于 UI 组件来说,我们不推荐一味追求行级覆盖率,因为它会导致我们过分关注组件的内部实现细节,从而导致琐碎的测试。
取而代之的是,我们推荐把测试撰写为断言你的组件的公共接口,并在一个黑盒内部处理它。一个简单的测试用例将会断言一些输入 (用户的交互或 prop 的改变) 提供给某组件之后是否导致预期结果 (渲染结果或触发自定义事件)。
4、撸起袖子就是干(编写单元测试)
第一步: 安装初始化一个项目
选择使用vue-cli3创建了一个项目,选择jest作为测试框架.
vue create vue-jest-test
- 新建项目test目录下有一个hello world组件单元测试示例文件,一起看一下
helloworld.spec.js
import {shallowMount} from '@vue/test-utils';import HelloWorld from '@/components/HelloWorld.vue';describe('HelloWorld.vue', () => {it('renders props.msg when passed', () => {const msg = 'new message';const wrapper = shallowMount(HelloWorld, {propsData: {msg}});expect(wrapper.text()).toMatch(msg)});});
第二步:新建一个card组件并编写单元测试
- components/card/index.vue```vue
<template><div class="card"><div class="card-header" v-if="$slots.header"><slot name="header"></slot></div><div class="card-body" v-if="$slots.body"><slot name="body"></slot></div></div></template><script>export default {name: 'card',props: {},created() {console.log(this.$slots)}}</script><style lang="scss" scoped>.card {border-radius: 12px;background-color: #ffffff;margin-bottom: 15px;}.card-header {font-size: 19px;color: #000000;padding: 12px 15px;}.card-body {padding:0 15px;min-height: 60px;}</style>
- 在test目录下新建card目录card.spec.js
card目录下包含模拟的header内容和body内容
根据组件的设计需要测试的内容:
- 测试能否正常渲染card组件
- 测试传入slot=header的时候是否正常
- 测试传入slot=body的时候是否正常
card.spec.js具体代码
import {mount} from '@vue/test-utils'import Card from '@/components/card/index.vue';import CardHeader from './header';import CardBody from './body';describe('card.vue', () => {it('renders empty card', () => {const wrapper = mount(Card);expect(wrapper.findAll('div')).toHaveLength(1);});it('renders pass a slot = header', () => {const wrapper = mount(Card, {slots: {header: CardHeader, // 将匹配 `<slot name="header" />`。}});expect(wrapper.find({name: 'header'}).is(CardHeader)).toBe(true);});it('renders pass a slot = body', () => {const wrapper = mount(Card, {slots: {header: CardBody, // 将匹配 `<slot name="header" />`。}});expect(wrapper.find({name: 'body'}).is(CardBody)).toBe(true);})});
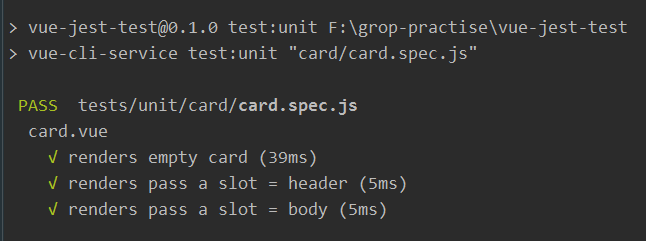
- 运行单元测试
// 运行所有的单元测试文件npm run test:unit// 运行单个单元测试文件npm run test:unit card/card.spec.js
运行成功后如下图

若有收获,就点个赞吧
0 人点赞
