一、配置文件格式
SpringBoot提供了多种属性配置方式
server.port=80
server:port: 81
server:port: 82
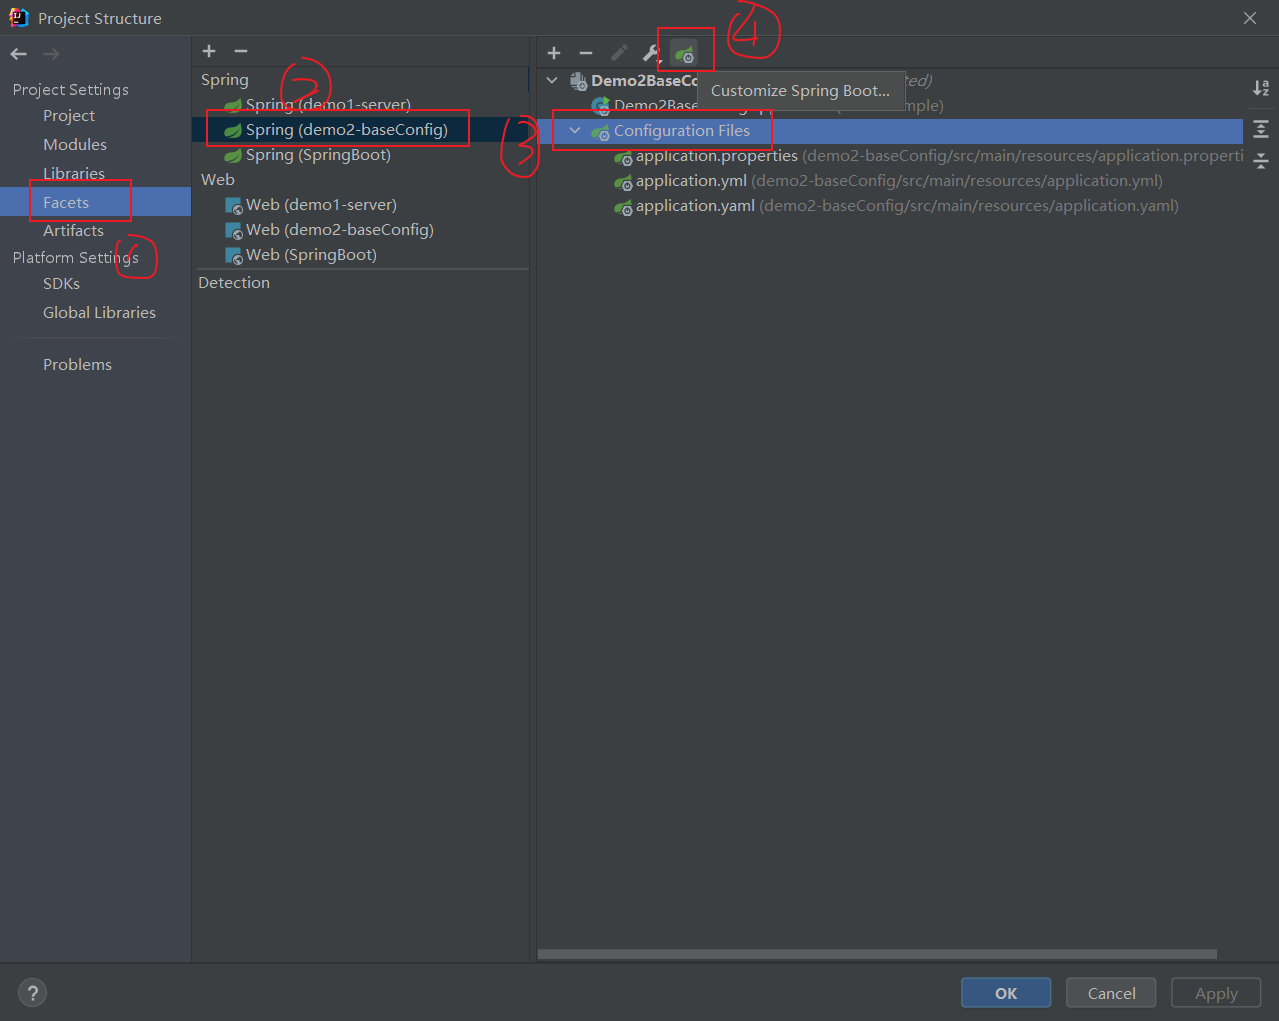
1、环境准备
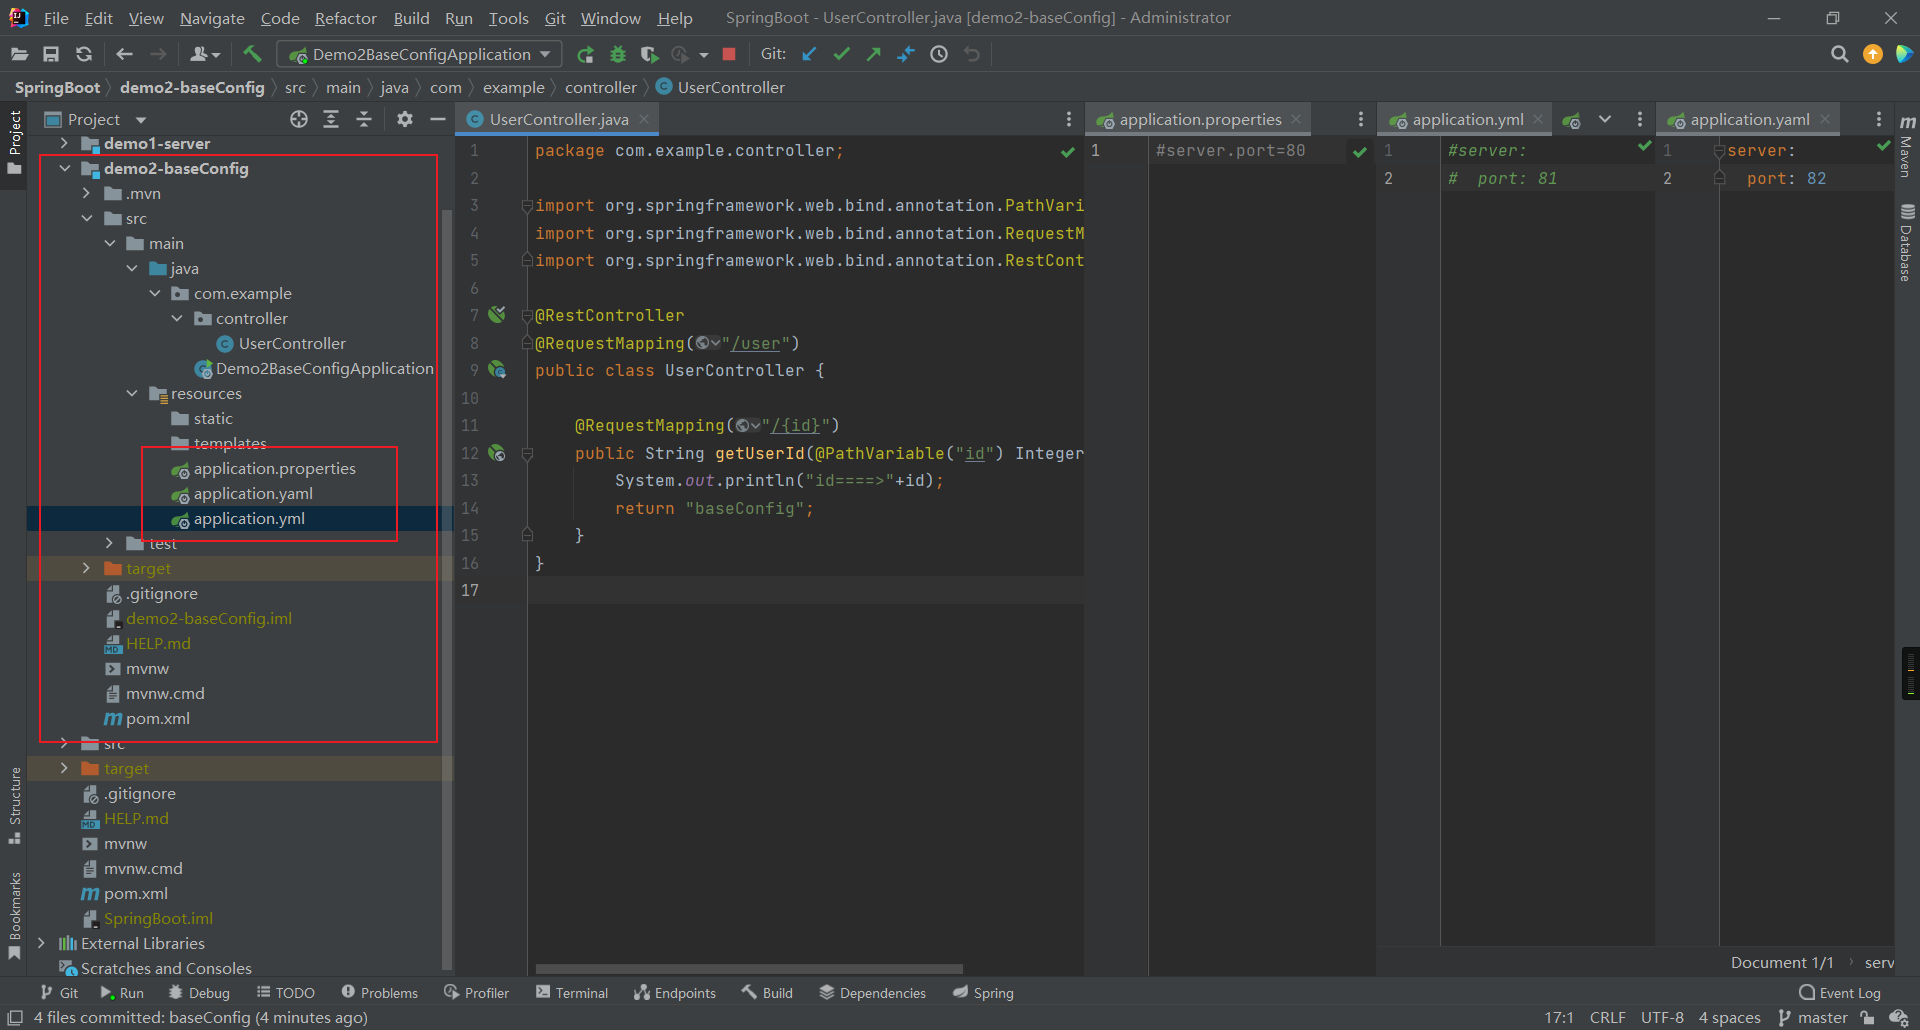
2、三种配置文件优先级
properties > yml > yaml
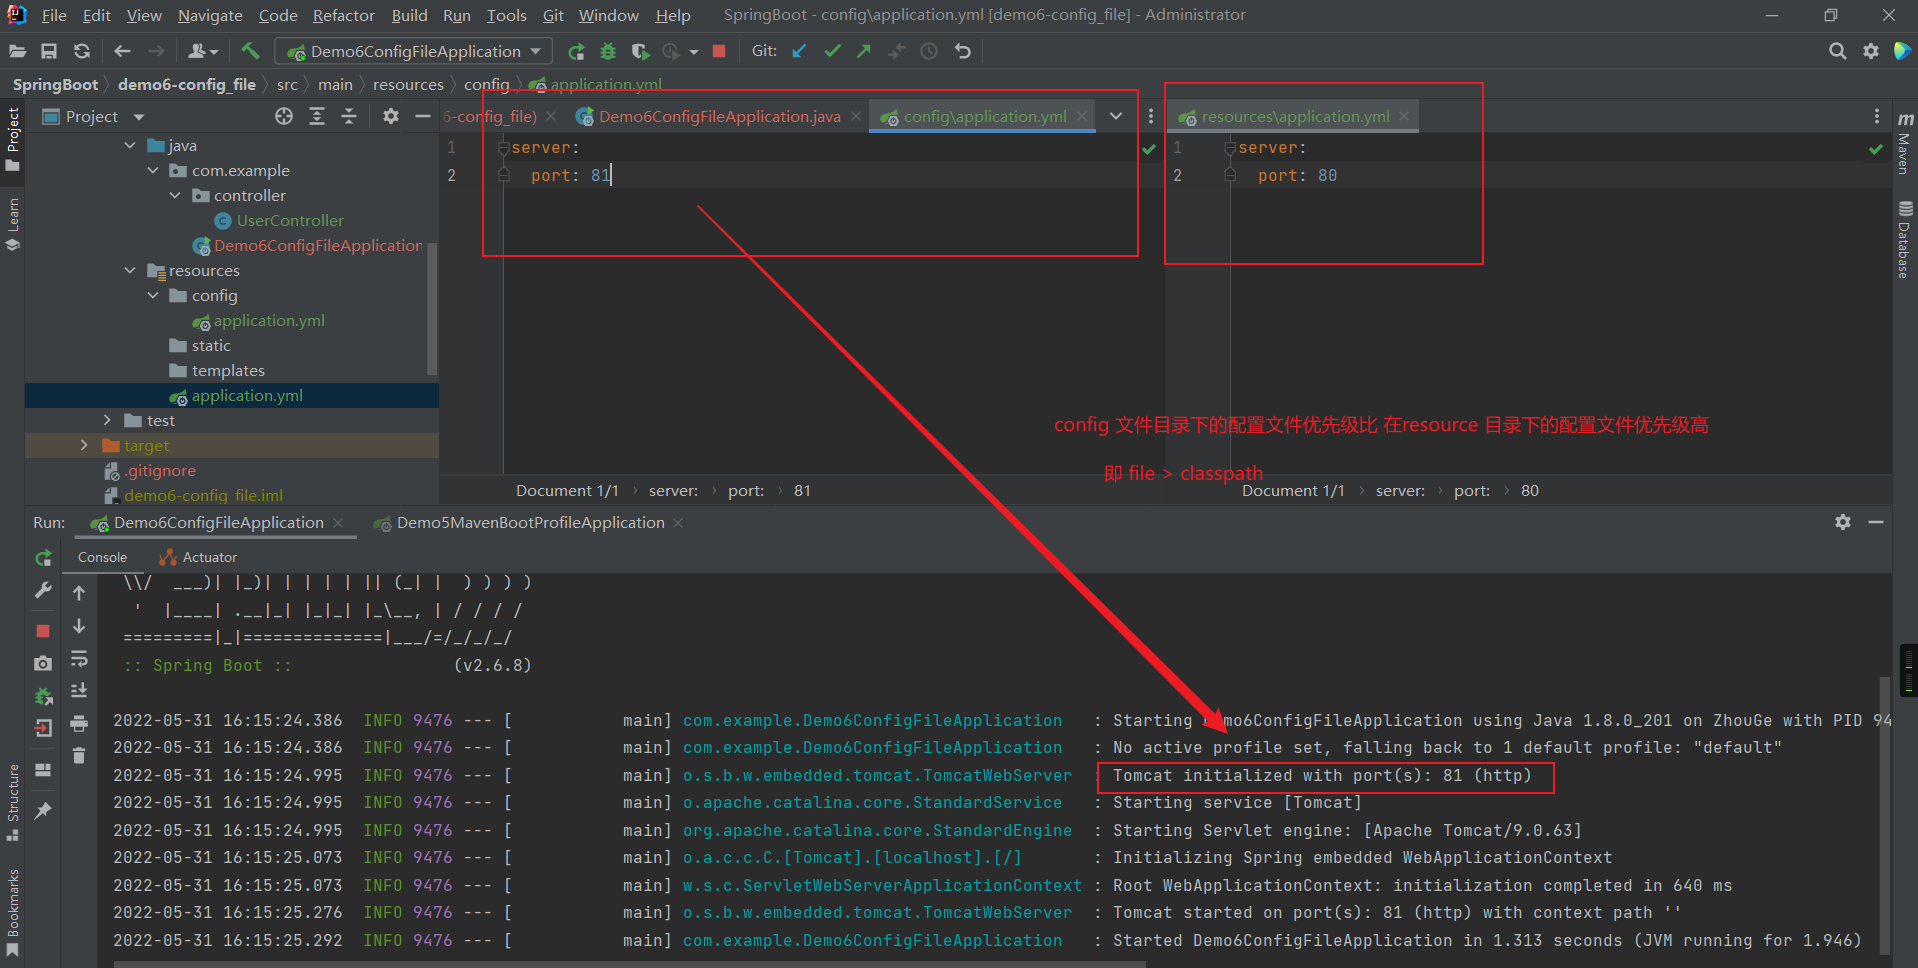
SpringBoot 中4级配置文件放置位置:
1级:classpath:application.yml
2级:classpath:config/application.yml
3级:file :application.yml
4级:file :config/application.yml
3、yaml 或 yml 配置文件没有提示
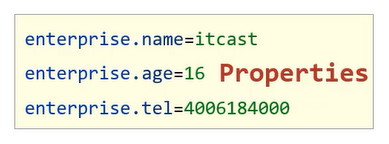
二、yaml格式
1、含义
YAML(YAML Ain’t Markup Language) 一种数据序列化格式
2、优点
-容易阅读
-容易与脚本语言交互
-以数据为核心,重数据轻格式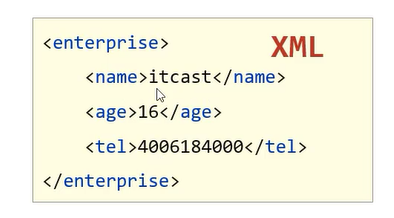
3、扩展名
.yml (主流)
.yaml
4、语法规则
- 大小写敏感
- 属性层级关系使用多行描述, 每行结尾使用冒号结束
- 使用缩进表示层级关系,同层级左侧对齐,只允许使用空格(不允许使用Tab键)
- 空格的个数并不重要,只要保证同层级的左侧对齐即可。
- 属性值前面添加空格(属性名与属性值之间使用冒号+空格作为分隔)
表示注释
三、yaml格式读取配置文件数据
```yaml lesson: springBoot
server: port: 80
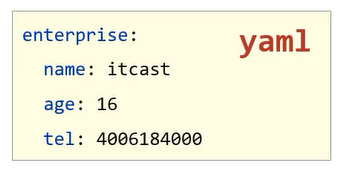
enterprise: name: zhouGe age: 21 tel: 18688883333 subjects:
- Java
- 前端
- 大数据 ```
1、@Value 注解读取数据
package com.example.controller;import com.example.pojo.User;import org.springframework.beans.factory.annotation.Autowired;import org.springframework.beans.factory.annotation.Value;import org.springframework.core.env.Environment;import org.springframework.web.bind.annotation.PathVariable;import org.springframework.web.bind.annotation.RequestMapping;import org.springframework.web.bind.annotation.RestController;@RestController@RequestMapping("/user")public class UserController {//使用@Variable注解读取数据@Value("${lesson}")private String lesson;@Value("${server.port}")private String port ;@Value("${enterprise.subjects[0]}")private String subject ;@RequestMapping("/{id}")public String getUserId(@PathVariable("id") Integer id){System.out.println("id======>"+id);System.out.println("===========使用@Value注解读取数据=============");System.out.println(lesson);System.out.println(port);System.out.println(subject);return "readData";}}
2、Envrioment 环境对象读取数据
package com.example.controller;import com.example.pojo.User;import org.springframework.beans.factory.annotation.Autowired;import org.springframework.beans.factory.annotation.Value;import org.springframework.core.env.Environment;import org.springframework.web.bind.annotation.PathVariable;import org.springframework.web.bind.annotation.RequestMapping;import org.springframework.web.bind.annotation.RestController;@RestController@RequestMapping("/user")public class UserController {//使用Environment 对象读取数据@Autowiredprivate Environment environment;@RequestMapping("/{id}")public String getUserId(@PathVariable("id") Integer id){System.out.println("id======>"+id);System.out.println("===========使用Environment读取数据=============");System.out.println(environment.getProperty("lesson"));System.out.println(environment.getProperty("server.port"));System.out.println(environment.getProperty("enterprise.subjects[1]"));return "readData";}}
3、自定义对象读取数据
SpringBoot 还提供了将配置文件中的数据封装到我们自定义的实体类对象中的方式。具体操作如下:
1. 将实体类 bean 的创建交给 Spring 管理。1. 在类上添加 @Component 注解1. **使用 @ConfigurationProperties 注解表示加载配置文件 **1. 在该注解中也可以使用 prefix 属性指定只加载指定前缀的数据1. 在 Controller 中进行注入
package com.example.pojo;import lombok.Data;import org.springframework.boot.context.properties.ConfigurationProperties;import org.springframework.stereotype.Component;@Data@Component@ConfigurationProperties(prefix = "enterprise")public class User {private String name ;private Integer age ;private String tel ;private String[] subjects ;}
package com.example.controller;import com.example.pojo.User;import org.springframework.beans.factory.annotation.Autowired;import org.springframework.beans.factory.annotation.Value;import org.springframework.core.env.Environment;import org.springframework.web.bind.annotation.PathVariable;import org.springframework.web.bind.annotation.RequestMapping;import org.springframework.web.bind.annotation.RestController;@RestController@RequestMapping("/user")public class UserController {//使用自定义对象读取数据@Autowiredprivate User user;@RequestMapping("/{id}")public String getUserId(@PathVariable("id") Integer id){System.out.println("id======>"+id);System.out.println("===========使用自定义对象读取数据=============");System.out.println(user);return "readData";}}
四、多环境配置
1、yaml版
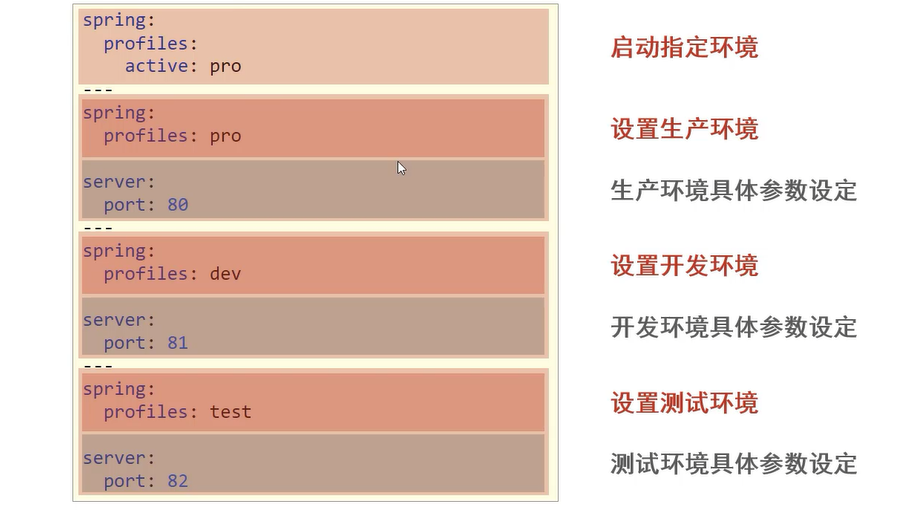
#需要启用的环境# --- 代表分割spring:profiles:active: dev---#开发环境spring:profiles: devserver:port: 80---#生产环境spring:profiles: proserver:port: 81---#测试环境spring:profiles: testserver:port: 82
2、properties版
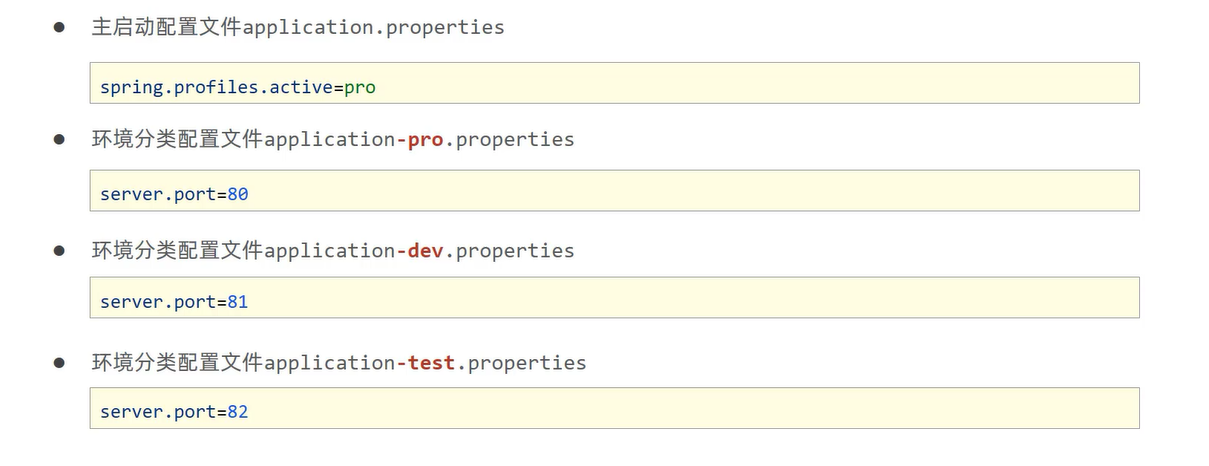
spring.profiles.active=dev
server.port=8080
server.port=8081
server.port=8082
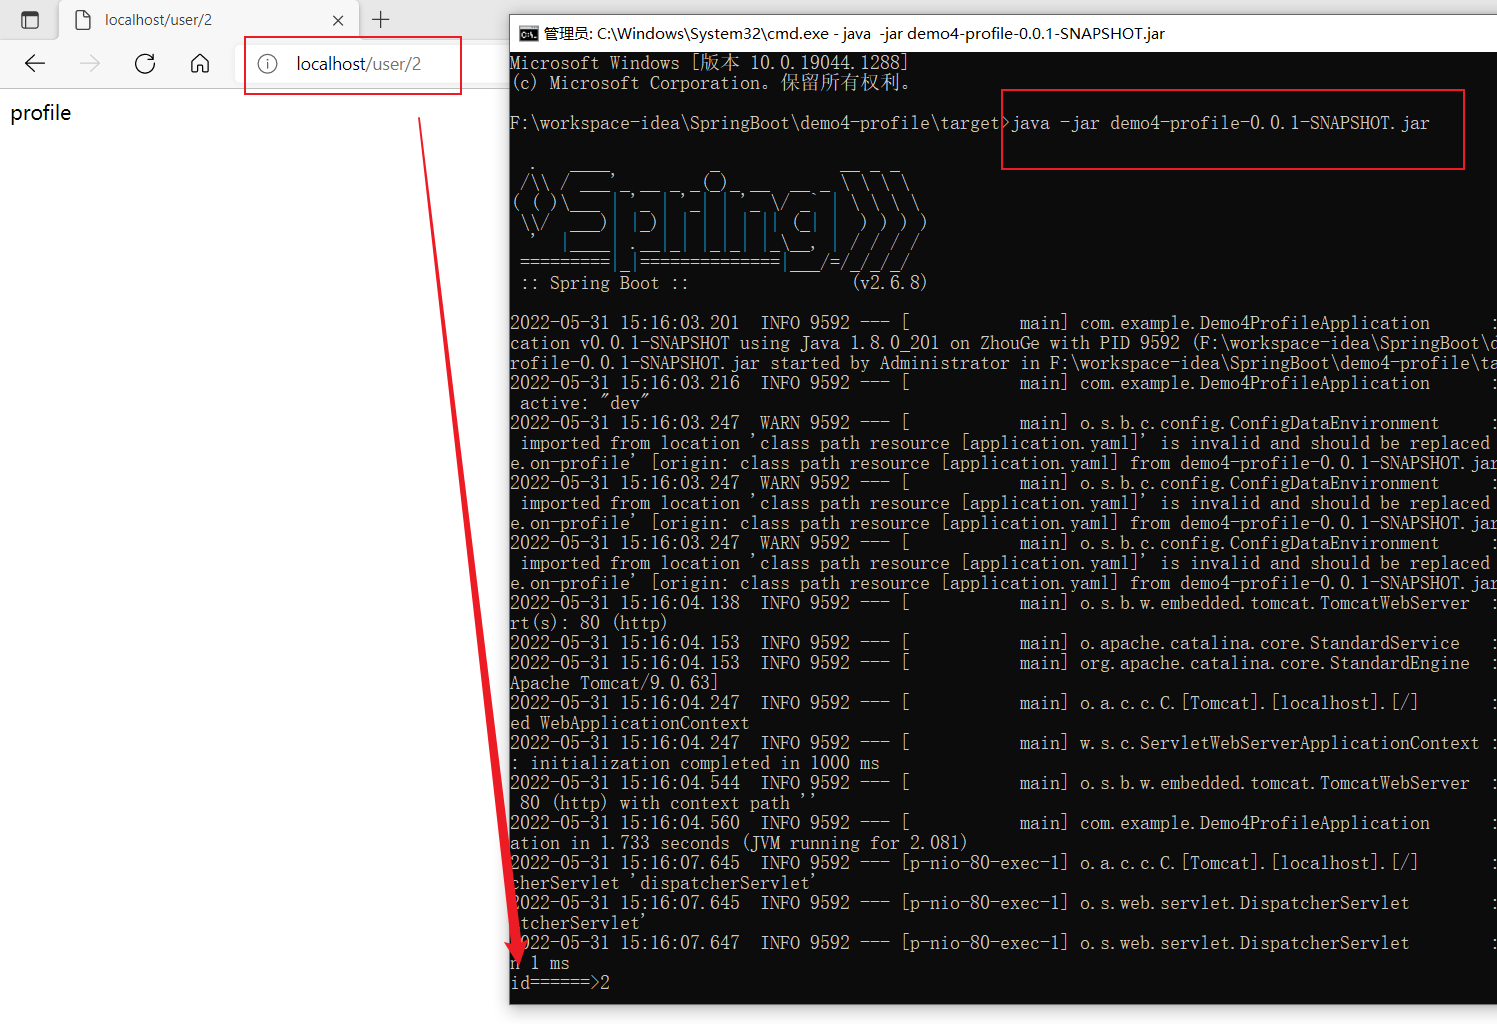
3、命令行配置
a、配置启动环境
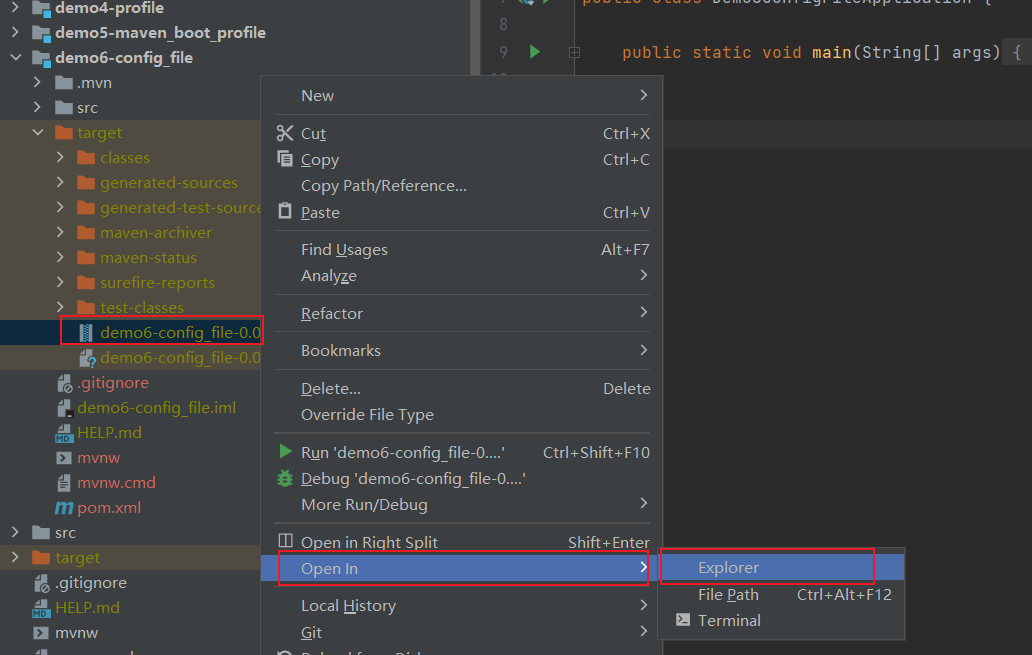
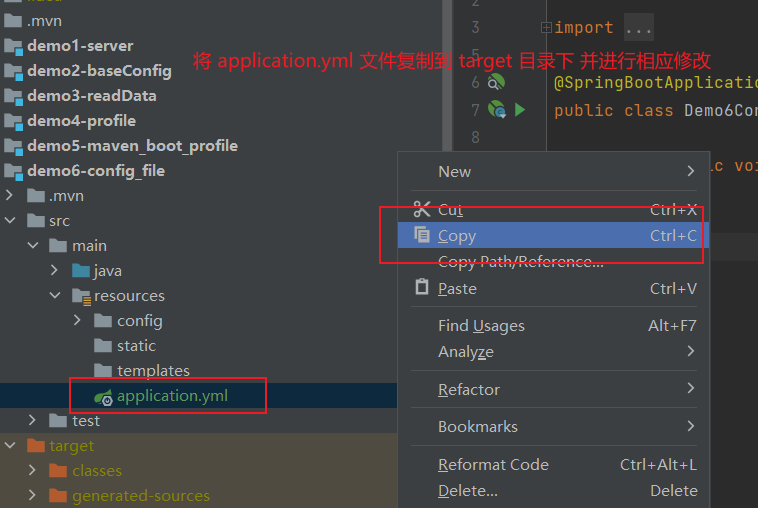
- maven -clean项目
- maven-package项目
- 右键open in exploer
- cmd ```java java -jar xxx.jar —spring.profiles.active=dev
// —spring.profiles.active=dev 此处内容根据application.yml来书写
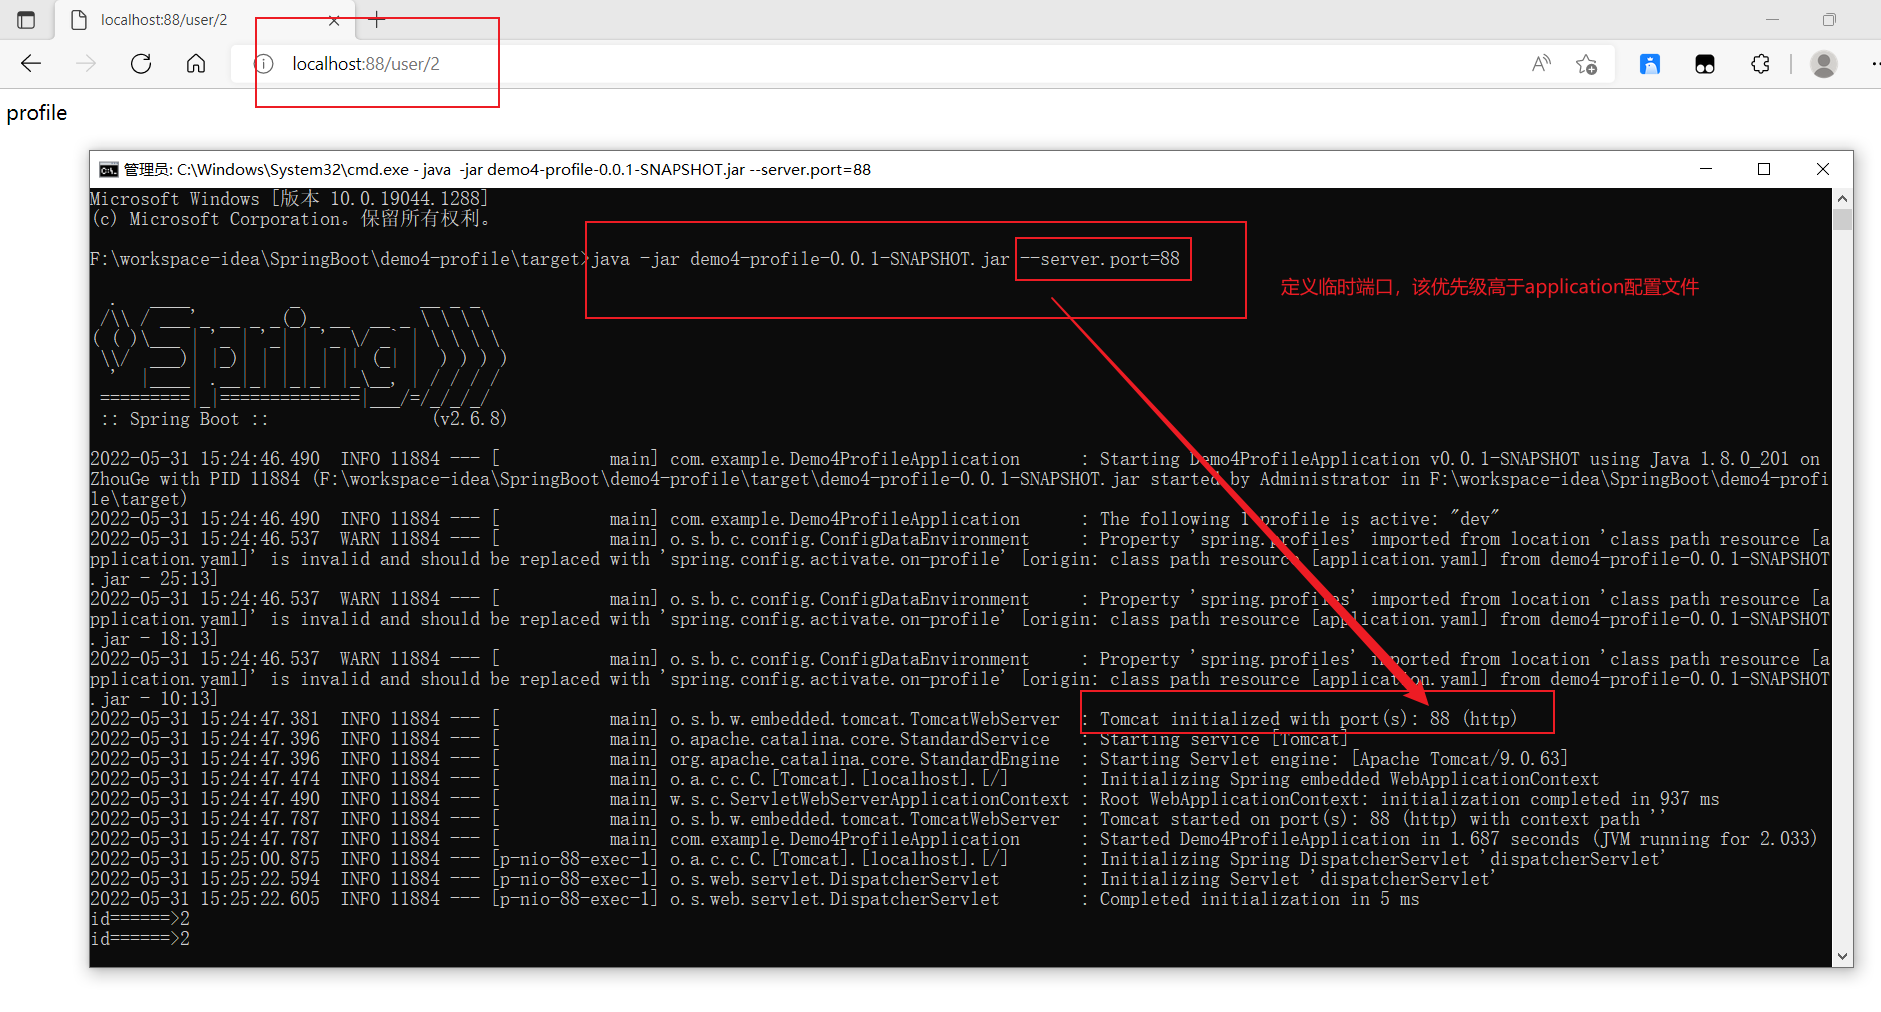
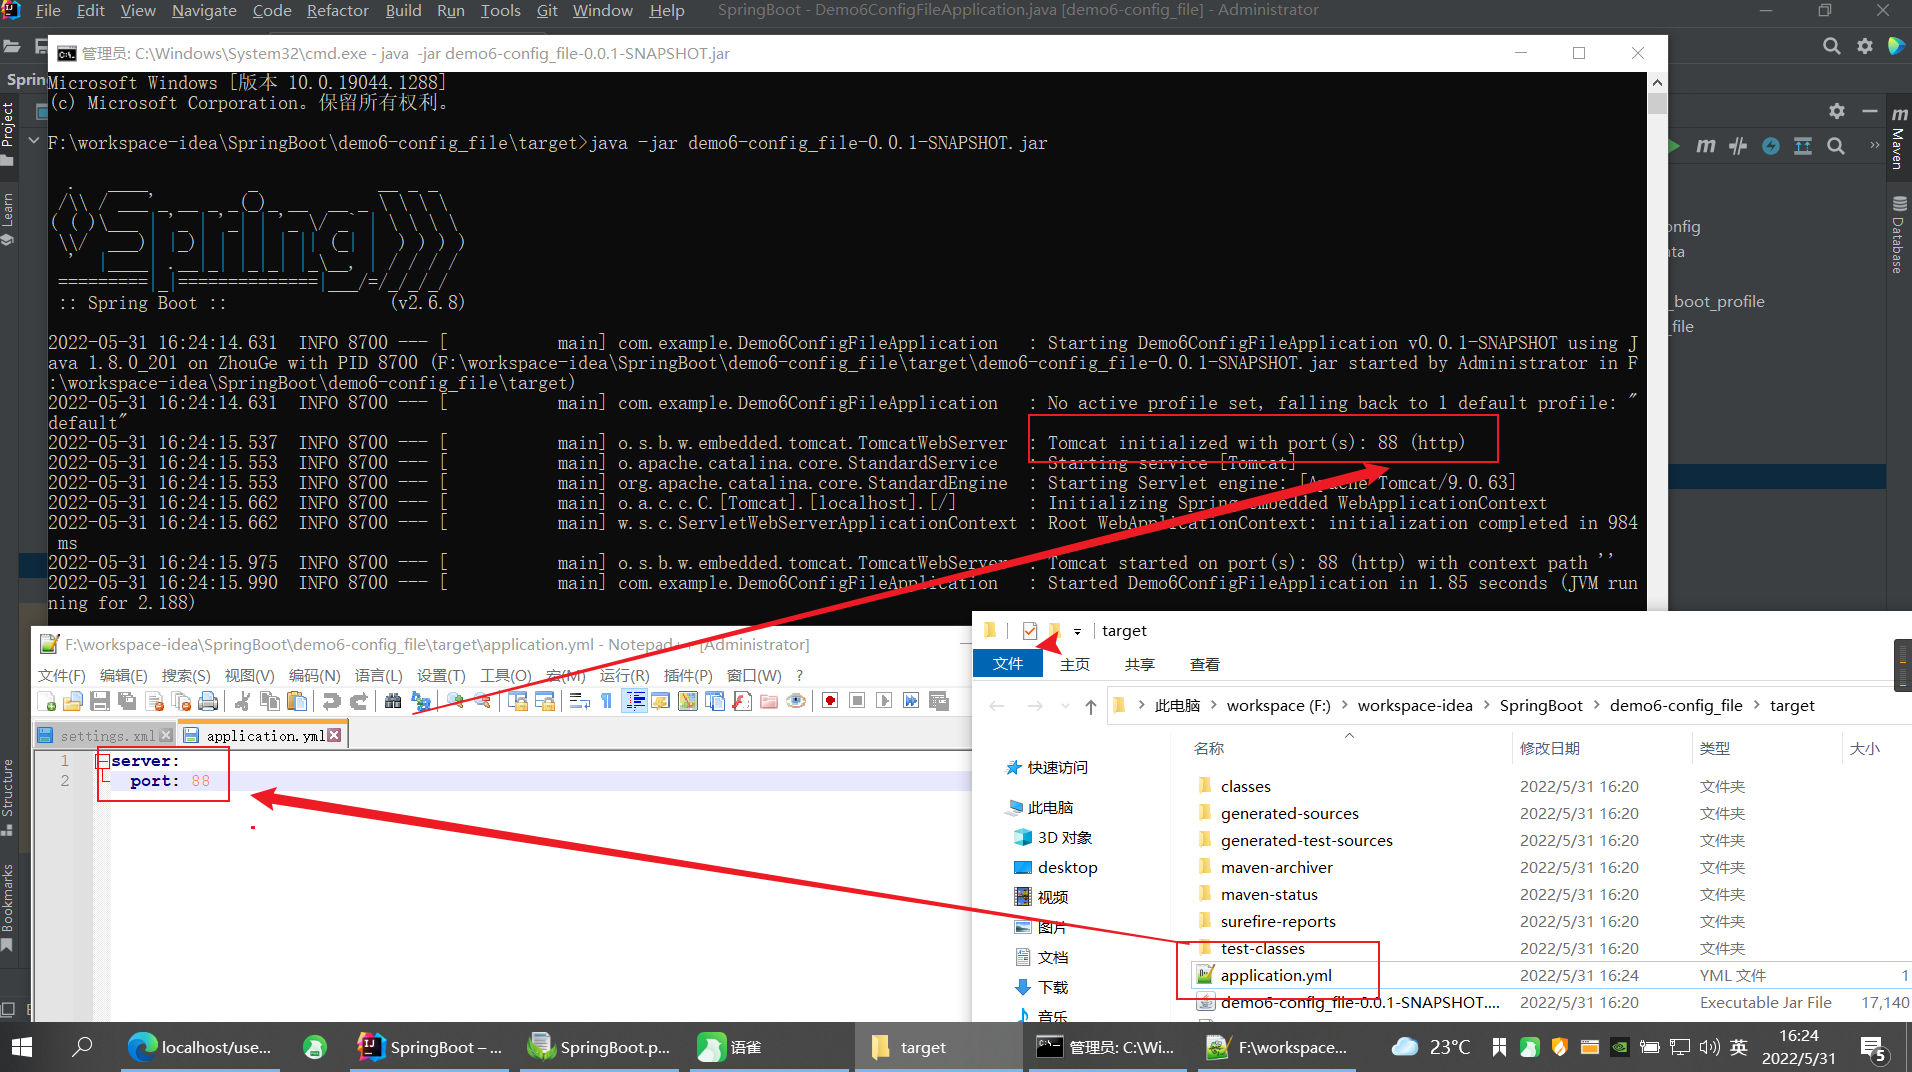
<br />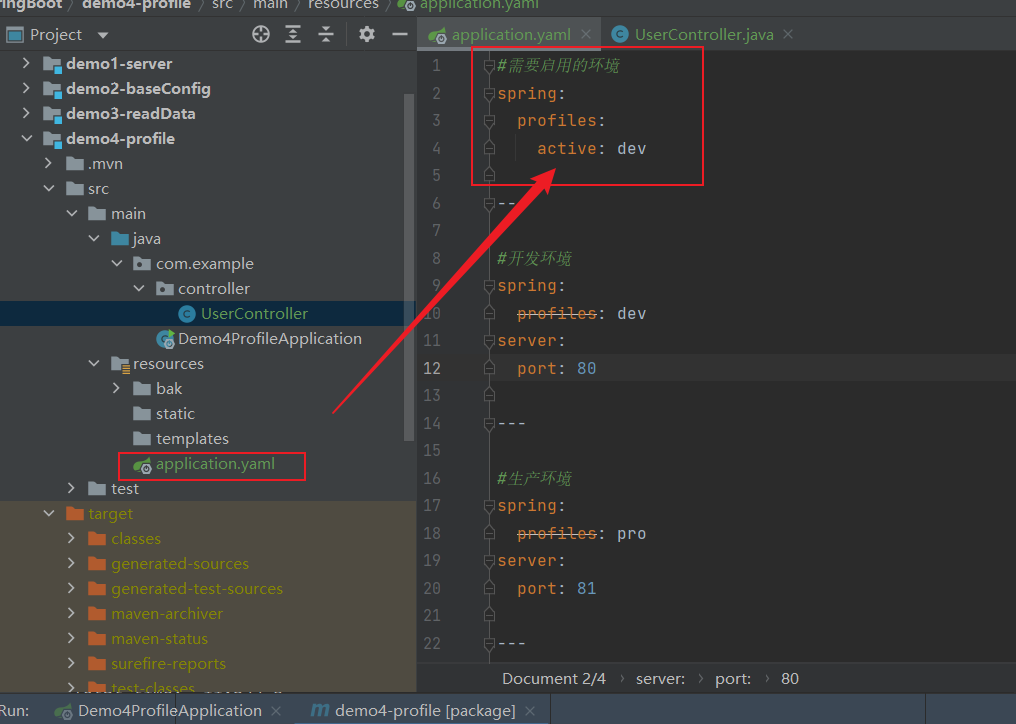<br />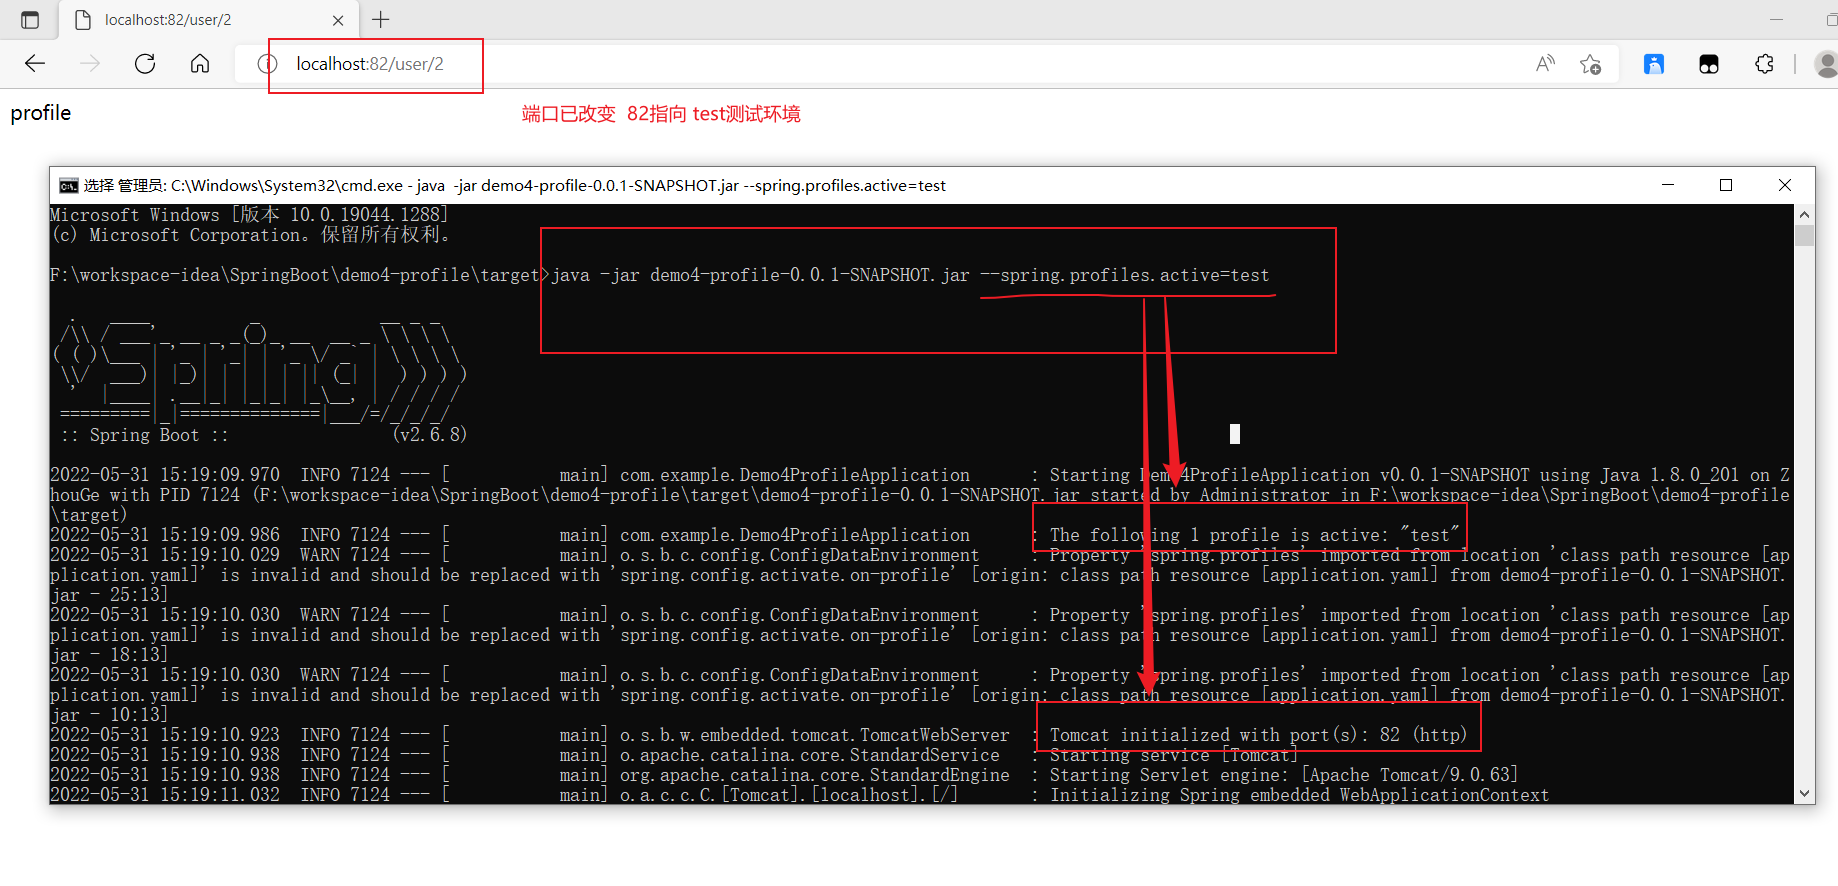<a name="Anmzj"></a>### b、配置端口```javajava -jar xxxx.jar --server.port=88
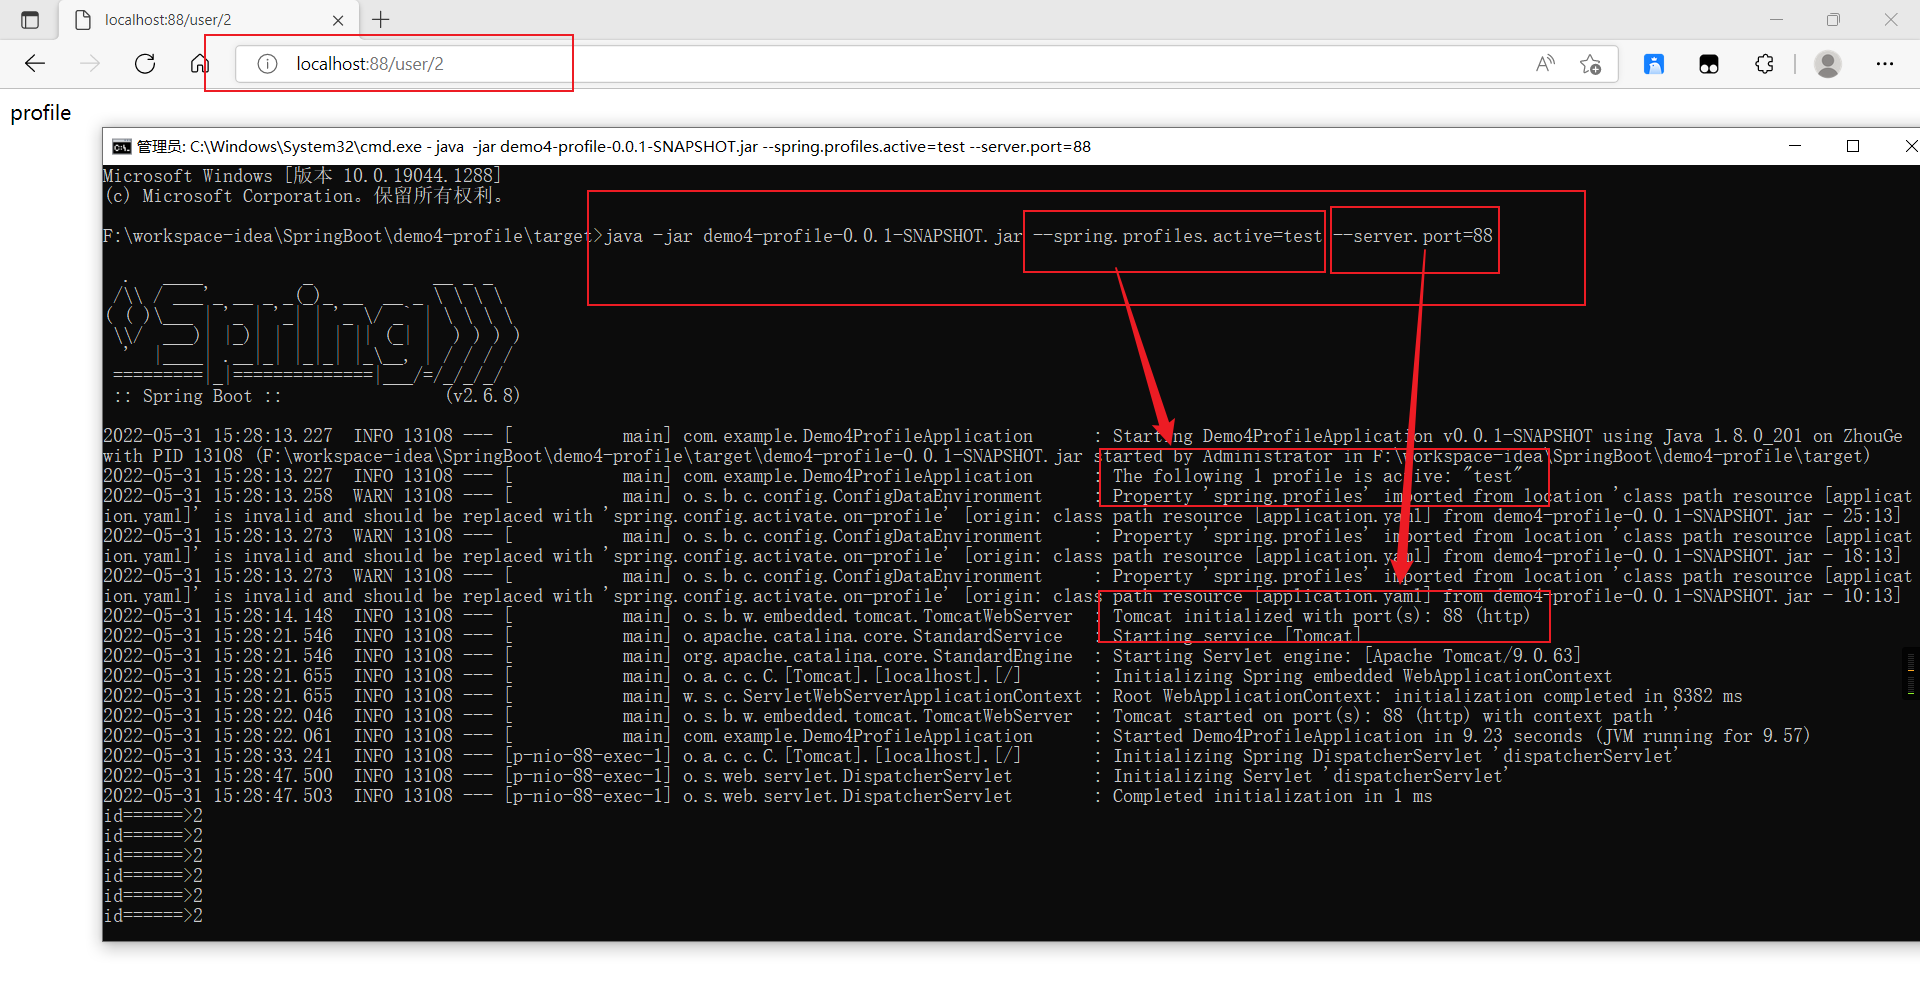
c、混合使用
java -jar xxx.jar --spring.profiles.active=test --server.port=88
4、多环境开发兼容问题(冲突)
含义:maven和springBoot配置环境产生冲突,此时该以谁的配置为主?
#配置需要使用的环境 ${profile.active}读取maven中的环境 但是需要maven插件支持spring:profiles:active: ${profile.active}---#开发环境spring:profiles: devserver:port: 80---#生产环境spring:profiles: proserver:port: 81---#测试环境spring:profiles: testserver:port: 82
<profiles><!--开发环境--><profile><id>dev</id><properties><!--与application.yml 中的相对应--><profile.active>dev</profile.active></properties><!--设置当前环境为默认环境--><activation><activeByDefault>true</activeByDefault></activation></profile><!--生产环境--><profile><id>pro</id><properties><!--与application.yml 中的相对应--><profile.active>pro</profile.active></properties></profile><!--测试环境--><profile><id>test</id><properties><!--与application.yml 中的相对应--><profile.active>test</profile.active></properties></profile></profiles>
<!--maven 读取资源文件插件支持,依靠它 才可以读取application.yml 中的配置,并进行解析--><plugin><groupId>org.apache.maven.plugins</groupId><artifactId>maven-resources-plugin</artifactId><version>3.2.0</version><!--设置--><configuration><!--编码设置--><encoding>UTF-8</encoding><!--maven占位符 ${} 读取里面的内容}--><useDefaultDelimiters>true</useDefaultDelimiters></configuration></plugin>
5、配置文件优先级
a、开发时
server:port: 80
server:port: 81
b、测试时

若有收获,就点个赞吧
0 人点赞
