DefinePlugin
定义全局变量。
const webpack = require('webpack')module.exports = {mode: 'none',entry: './src/main.js',output: {filename: 'bundle.js'},plugins: [new webpack.DefinePlugin({// 值要求的是一个代码片段API_BASE_URL: JSON.stringify('https://api.example.com')})]}
Tree Shaking
production 模式会自动启用。其他模式需要手动开启。
module.exports = {mode: 'none',optimization: {usedExports: true, // 标记未使用对象minimize: true, // 压缩代码并去掉未引用对象}}
Tree Shaking 与 Babel
新版本的 babel-loader 并不会导致 Tree Shaking 失效。Tree Shaking 能使用的前提是使用 ESM ,如果 babel-loader 开启了 ESM 转换到 CommonJS,Tree Shaking 就会失效。
module: {rules: [{test: /\.js$/,use: {loader: 'babel-loader',options: {presets: [['@babel/preset-env', { modules: false }]] // 不转换,Tree Shaking 生效// presets: ['@babel/preset-env'] // 不转换,Tree Shaking 生效// presets: [['@babel/preset-env', { modules: 'commonjs' }]] // 转换,Tree Shaking 失效}}}]},optimization: {usedExports: true,// concatenateModules: true,minimize: true,}
合并模块
concatenateModules 属性会尽量把多个模块合并成一个函数。
module.exports = {mode: 'none',optimization: {usedExports: true, // 标记未使用对象concatenateModules: true,minimize: true, // 压缩代码并去掉未引用对象}}
SideEffects
Webpack 4 开始支持的特性,一般用于标记 npm 包是否有副作用。
optimization: {sideEffects: true, // 开启 sideEffects}
package.json 中 可以标记是否有副作用。sideEffects 设置为 false 表示没有副作用。
"sideEffects": false
或者设置成一个数组,存放有副作用的文件的路径。
"sideEffects": ["./src/extend.js","*.css"]
代码分割
如果是一个大型项目,打包到一个文件,可能导致打包过后的文件体积很大,大多数情况下并不需要把全部模块一并加载,所以可以实现代码的分包/分割。
多入口打包
一般用于多页应用。
示例项目结构: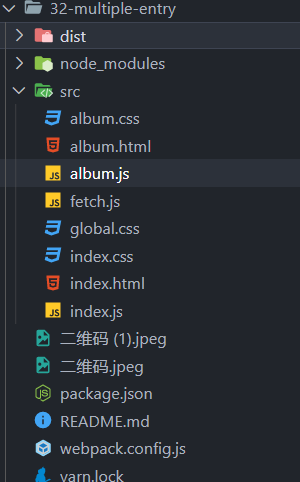
配置文件:
// webpack.config.jsconst { CleanWebpackPlugin } = require('clean-webpack-plugin')const HtmlWebpackPlugin = require('html-webpack-plugin')module.exports = {mode: 'none',entry: {index: './src/index.js',album: './src/album.js'}, // 指定打包的文件output: {filename: '[name].bundle.js' // [name] 可以自动替换成 entry 的名字},module: {rules: [{test: /\.css$/,use: ['style-loader','css-loader']}]},plugins: [new CleanWebpackPlugin(),new HtmlWebpackPlugin({title: 'Multi Entry',template: './src/index.html',filename: 'index.html',chunks: ['index'] // 指定入口文件,如果不配置,那么 html 文件 会把所有打包结果加载进来}),new HtmlWebpackPlugin({title: 'Multi Entry',template: './src/album.html',filename: 'album.html',chunks: ['album']})]}
打包结果: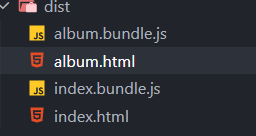
提取公共模块
在多个模块中,可能会导入相同的 CSS 或者 JS 模块,这样打包时就有重复的部分了,应该提取出来,整合到一个打包结果。要实现这个功能,配置 optimization 中的 splitChunks 属性即可。
// webpack.config.jsoptimization: {splitChunks: {// 自动提取所有公共模块到单独 bundlechunks: 'all'}},
动态导入
动态导入可以实现按需加载,动态导入的模块会自动被分包。
示例项目结构: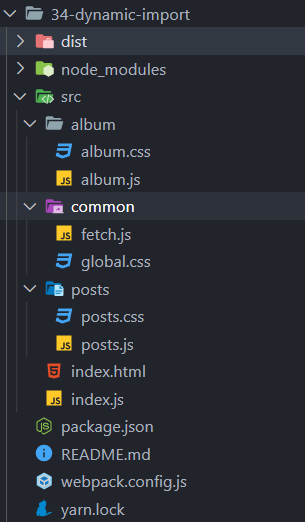
index.js:
// import posts from './posts/posts'// import album from './album/album'const render = () => {const hash = window.location.hash || '#posts'const mainElement = document.querySelector('.main')mainElement.innerHTML = ''// 动态导入核心代码if (hash === '#posts') {// mainElement.appendChild(posts())import('./posts/posts').then(({ default: posts }) => {mainElement.appendChild(posts())})} else if (hash === '#album') {// mainElement.appendChild(album())import('./album/album').then(({ default: album }) => {mainElement.appendChild(album())})}}render()window.addEventListener('hashchange', render)
打包结果: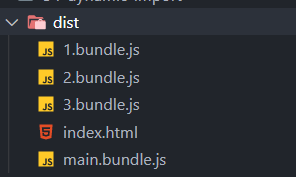
魔法注释
上述动态导入的打包结果,默认名称是序号,如果需要更改,可以使用魔法注释。webpackChunkName 设置成一样,那么会合并到一个文件。
// 动态导入核心代码if (hash === '#posts') {// mainElement.appendChild(posts())import(/* webpackChunkName: 'posts' */'./posts/posts').then(({ default: posts }) => {mainElement.appendChild(posts())})} else if (hash === '#album') {// mainElement.appendChild(album())import(/* webpackChunkName: 'album' */'./album/album').then(({ default: album }) => {mainElement.appendChild(album())})}
打包结果:
CSS 按需加载
mini-css-extract-plugin 可以提取 CSS 部分,从而实现按需加载。
const { CleanWebpackPlugin } = require('clean-webpack-plugin')const HtmlWebpackPlugin = require('html-webpack-plugin')const MiniCssExtractPlugin = require('mini-css-extract-plugin')module.exports = {mode: 'none',entry: {main: './src/index.js'},output: {filename: '[name].bundle.js'},module: {rules: [{test: /\.css$/,use: [MiniCssExtractPlugin.loader,'css-loader']}]},plugins: [new CleanWebpackPlugin(),new HtmlWebpackPlugin({title: 'Dynamic import',template: './src/index.html',filename: 'index.html'}),new MiniCssExtractPlugin()]}
打包结果: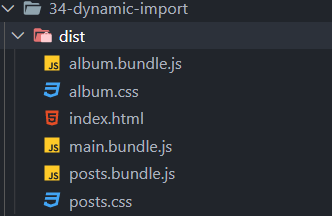
压缩打包后的 CSS 文件
optimize-css-assets-webpack-plugin 插件可以将 mini-css-extract-plugin 提取出来的 CSS 文件进一步压缩。这种压缩类的插件,一般不配置在 plugins 数组中,而是 optimization 中的 minimizer 数组。minimizer 在生产模式下会自动开启。但是如果配置了 minimizer 数组,那么 Webpack 会认为开发者要使用自定义的压缩插件,这个时候需要再手动配置压缩 JS 的插件 terser-webpack-plugin。
const OptimizeCssAssetsWebpackPlugin = require('optimize-css-assets-webpack-plugin')const TerserWebpackPlugin = require('terser-webpack-plugin')optimization: {minimizer: [new OptimizeCssAssetsWebpackPlugin(),new TerserWebpackPlugin(),]},
输出文件名 Hash
如果打包结果文件以特定规则命名,那么部署后会导致缓存的问题,所以把文件名设置为文件的 hash 值不失为一种好办法。Webpack 支持3种哈希: hash、chunkhash、contenthash。
- hash
项目级别的哈希,只要项目中任意文件的内容发生改变,整个项目的哈希都会改变。且所有文件都会使用相同的哈希。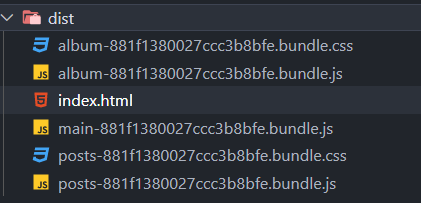
- chunkhash
同一路的打包使用同一个哈希。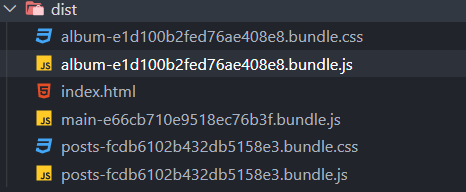
- contenthash
文件级别的哈希,当文件改变,只会改变相关的文件。contenthash 后面可以指定哈希长度。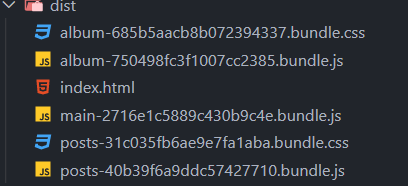
const { CleanWebpackPlugin } = require('clean-webpack-plugin')const HtmlWebpackPlugin = require('html-webpack-plugin')const MiniCssExtractPlugin = require('mini-css-extract-plugin')const OptimizeCssAssetsWebpackPlugin = require('optimize-css-assets-webpack-plugin')const TerserWebpackPlugin = require('terser-webpack-plugin')module.exports = {mode: 'none',entry: {main: './src/index.js'},output: {filename: '[name]-[contenthash:8].bundle.js'},optimization: {minimizer: [new TerserWebpackPlugin(),new OptimizeCssAssetsWebpackPlugin()]},module: {rules: [{test: /\.css$/,use: [// 'style-loader', // 将样式通过 style 标签注入MiniCssExtractPlugin.loader,'css-loader']}]},plugins: [new CleanWebpackPlugin(),new HtmlWebpackPlugin({title: 'Dynamic import',template: './src/index.html',filename: 'index.html'}),new MiniCssExtractPlugin({filename: '[name]-[contenthash:8].bundle.css'})]}

若有收获,就点个赞吧
0 人点赞
