1.简介和安装
文档将介绍Tensorflow目标检测的API(link)。API可以用来检测图片或者视频流中的物体,可是是预先训练好的识别模型来检测物体,也可以是自己定义的需要分类的物体。首先,我们需要安装Tensorflow和相关的依赖。对于CPU的机器,直接安装 pip3 install tensorflow 就可以。对于使用GPU计算的机器,计算会更快,安装如下:
其他,可能需要提前安装的python3.7以及python 依赖库:
pip3 install pillowpip3 install lxmlpip3 install jupyterpip3 install matplotlib
接下来,需要从github上把Tensorflow 目标检测API项目克隆下来,或者直接下载zip包:
git clone https://github.com/tensorflow/models.git
模型文件下载下来以后,到指定目录,运行cmd:
windows机器需要下载 protoc-3.4.0-win32.zip(link),解压以后,bin目录下会有protoc的执行文件。
接下来,我们就可以在model目录下,用protoc来编译模型文件.proto:
"C:/Program Files/protoc/bin/protoc" object_detection/protos/*.proto --python_out=.
注意编译的目录位置
最后,在models/object_detection目录,打开终端terminal/cmd.exe,使用jupyter notebook,选择object_detection_tutorial.ipynb。选择run all,就可以得到如下结果: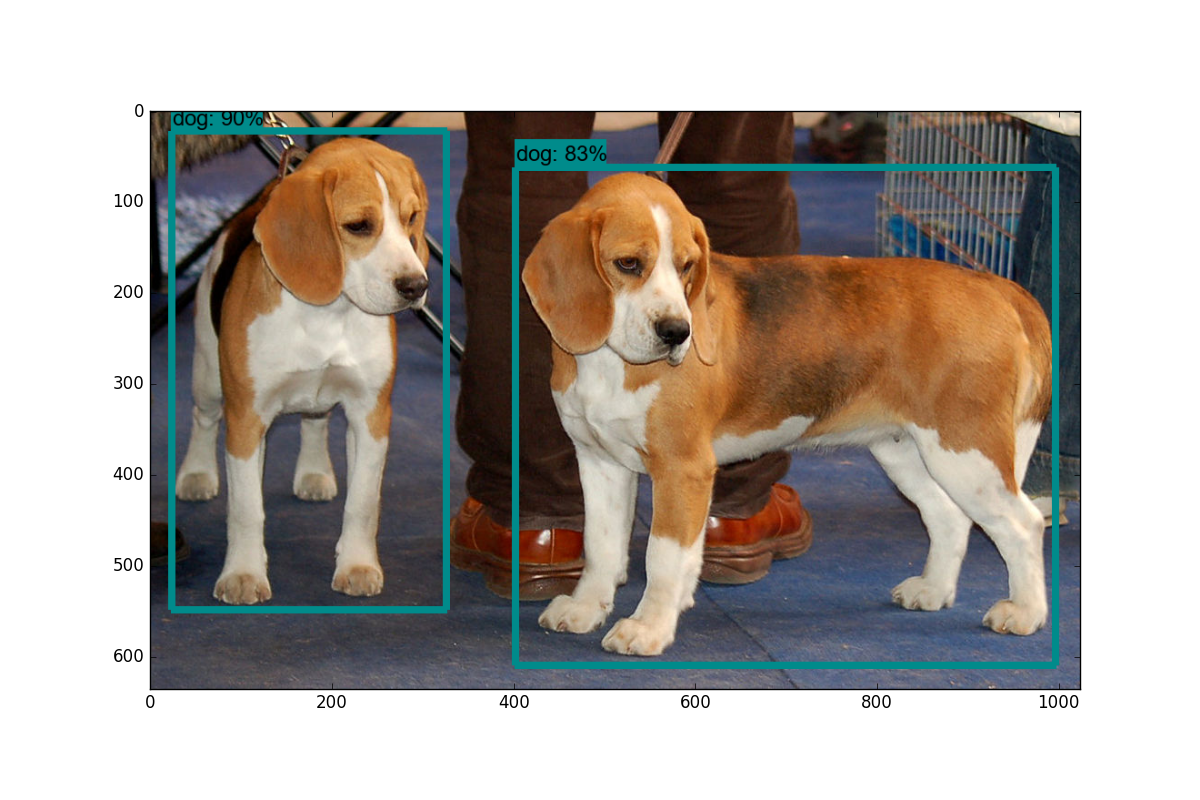
2.视频流目标检测
本部分将包含如何基于示例代码,将其改造成基于摄像头识别的目标检测程序。首先,在object_detection目录下新建detect1.py文件。如果你就想要在notebook里面实现,也没有问题。
检测的机制是我们下载Google的预先训练模型ssd_mobilenet_v1_coco_11_06_2017 link,本模型预训练了大概90个分类,有人,茶杯,手提袋等物体的识别。下面的代码是从opencv来截取视频流,使用tensorflow加载ssd模型进行识别。
接下来,我们将使用opencv包来获取视频信息。如果还没有安装python opencv,可以参考link:
import cv2cap = cv2.VideoCapture(0)
完整代码:
import osimport cv2import numpy as npimport tensorflow as tffrom utils import label_map_utilfrom utils import visualization_utils as vis_utilcap = cv2.VideoCapture(0)# http://download.tensorflow.org/models/object_detection/ssd_mobilenet_v1_coco_11_06_2017.tar.gzMODEL_NAME = 'ssd_mobilenet_v1_coco_11_06_2017'MODEL_FILE = MODEL_NAME + '.tar.gz'# Path to frozen detection graph. This is the actual model that is used for the object detection.PATH_TO_CKPT = MODEL_NAME + '/frozen_inference_graph.pb'# List of the strings that is used to add correct label for each box.PATH_TO_LABELS = os.path.join('data', 'mscoco_label_map.pbtxt')detection_graph = tf.Graph()with detection_graph.as_default():od_graph_def = tf.GraphDef()with tf.gfile.GFile(PATH_TO_CKPT, 'rb') as fid:serialized_graph = fid.read()od_graph_def.ParseFromString(serialized_graph)tf.import_graph_def(od_graph_def, name='')category_index = label_map_util.create_category_index_from_labelmap(PATH_TO_LABELS, use_display_name=True)with detection_graph.as_default():with tf.Session(graph=detection_graph) as sess:while True:ret, image_np = cap.read()# Expand dimensions since the model expects images to have shape: [1, None, None, 3]image_np_expanded = np.expand_dims(image_np, axis=0)image_tensor = detection_graph.get_tensor_by_name('image_tensor:0')# Each box represents a part of the image where a particular object was detected.boxes = detection_graph.get_tensor_by_name('detection_boxes:0')# Each score represent how level of confidence for each of the objects.# Score is shown on the result image, together with the class label.scores = detection_graph.get_tensor_by_name('detection_scores:0')classes = detection_graph.get_tensor_by_name('detection_classes:0')num_detections = detection_graph.get_tensor_by_name('num_detections:0')# Actual detection.(boxes, scores, classes, num_detections) = sess.run([boxes, scores, classes, num_detections],feed_dict={image_tensor: image_np_expanded})# Visualization of the results of a detection.vis_util.visualize_boxes_and_labels_on_image_array(image_np,np.squeeze(boxes),np.squeeze(classes).astype(np.int32),np.squeeze(scores),category_index,use_normalized_coordinates=True,line_thickness=8)cv2.imshow('object detection', cv2.resize(image_np, (800, 600)))# 按q退出程序if cv2.waitKey(25) & 0xFF == ord('q'):cv2.destroyAllWindows()break
3.自定义目标检测
本示例,我们将训练模型来识别吊车(crane)。首先可以先从百度上搜到一些吊车的图片样本。样本越多,模型识别当然越准确,本例只是演示,只下载十几张图片来说明。首先,进入models/research目录,本地安装object_detection的api:
进入models/research目录,执行python setup.py install 本地安装object_detection api库。
新建一个目录object_detection,然后我们将训练相关的内容都暂时放在这里面:
本部分全部完成以后目录结构如下: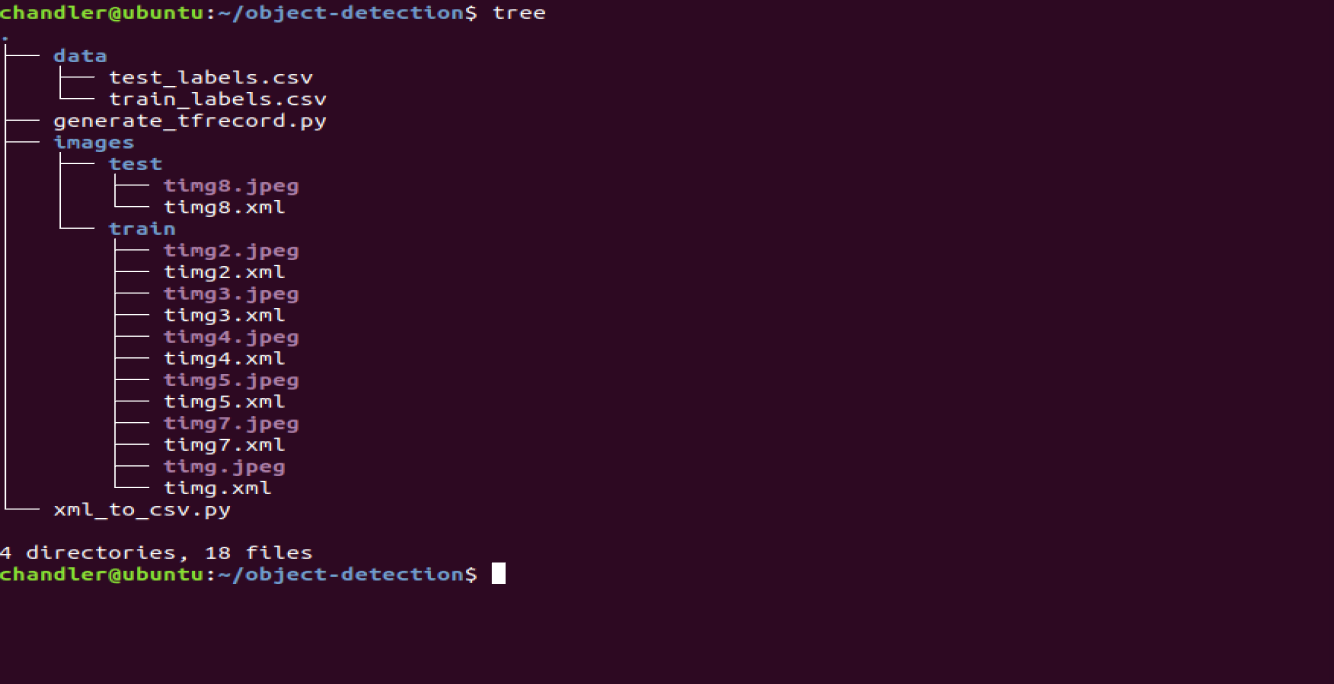
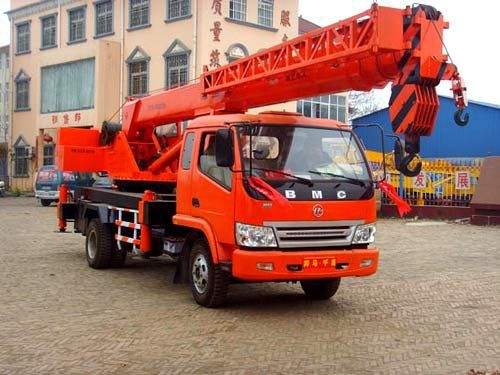
images里面的图片可以选取感兴趣的需要分类的图片,比如吊车:
3.1 标注数据集
本文是基于有监督的分类学习算法,自然要对样本进行分类。图片下载好以后,我们要在图片上来标注哪个是吊车,也就是打上label。打label的工具用的是LabelImagelink。将标注的xml文件和图片保存到images目录。
安装labelimage这个工具的时候,你可能还需要安装一些依赖库:
pip3 install sipapt-get install pyqt5-dev-toolspip3 install -r requirements/requirements-linux-python3.txtmake qt5py3pip3 install pandaspython3 labelImg.pypip3 install pycocotools
打开文件夹为图片打标签: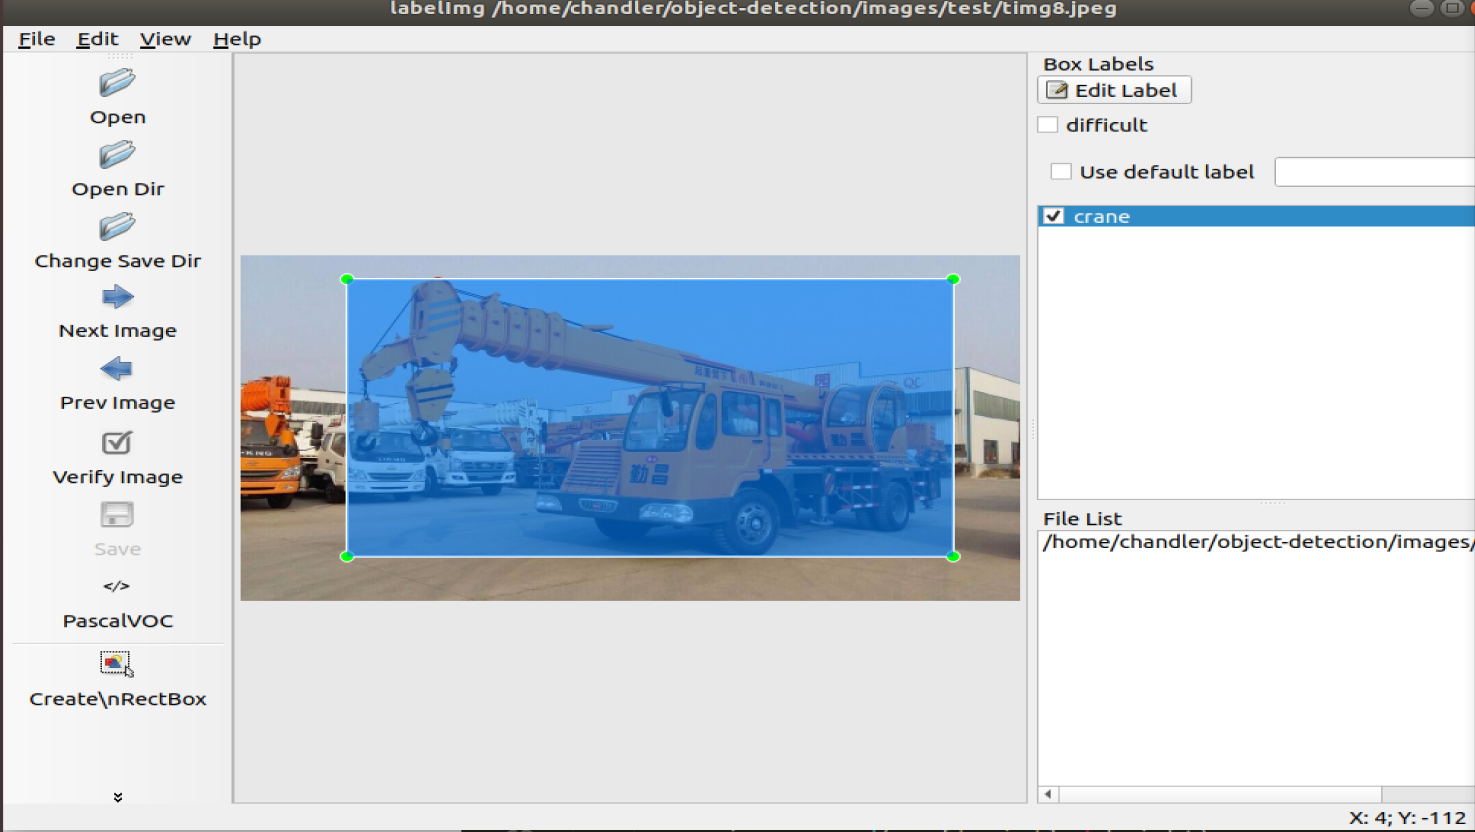
3.2 构建训练的tfrecord文件
3.2.1.下载工具xml_to_csv工具
下载 https://github.com/datitran/raccoon_dataset 里面的xml_to_csv.py文件,即将xml转化为csv文件的工具基础代码
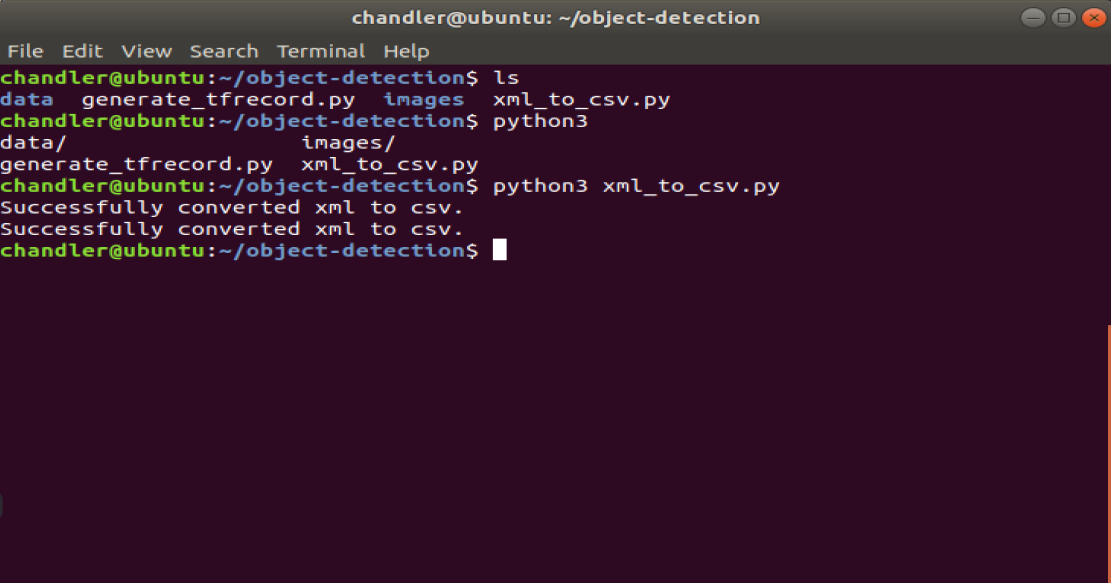
简单改造一下,指定本地的data目录:
import osimport globimport pandas as pdimport xml.etree.ElementTree as ETdef xml_to_csv(path):xml_list = []for xml_file in glob.glob(path + '/*.xml'):tree = ET.parse(xml_file)root = tree.getroot()for member in root.findall('object'):value = (root.find('filename').text,int(root.find('size')[0].text),int(root.find('size')[1].text),member[0].text,int(member[4][0].text),int(member[4][1].text),int(member[4][2].text),int(member[4][3].text))xml_list.append(value)column_name = ['filename', 'width', 'height', 'class', 'xmin', 'ymin', 'xmax', 'ymax']xml_df = pd.DataFrame(xml_list, columns=column_name)return xml_dfdef main():for directory in ['train', 'test']:image_path = os.path.join(os.getcwd(),'images/{}'.format(directory))xml_df = xml_to_csv(image_path)xml_df.to_csv('data/{}_labels.csv'.format(directory), index=None)print('Successfully converted xml to csv.')main()
3.2.2 将csv文件转化为tfrecord文件
python3 generate_tfrecord.py —csv_input=data/test_labels.csv —output_path=data/test.record —image_dir=images/test
结果如下图: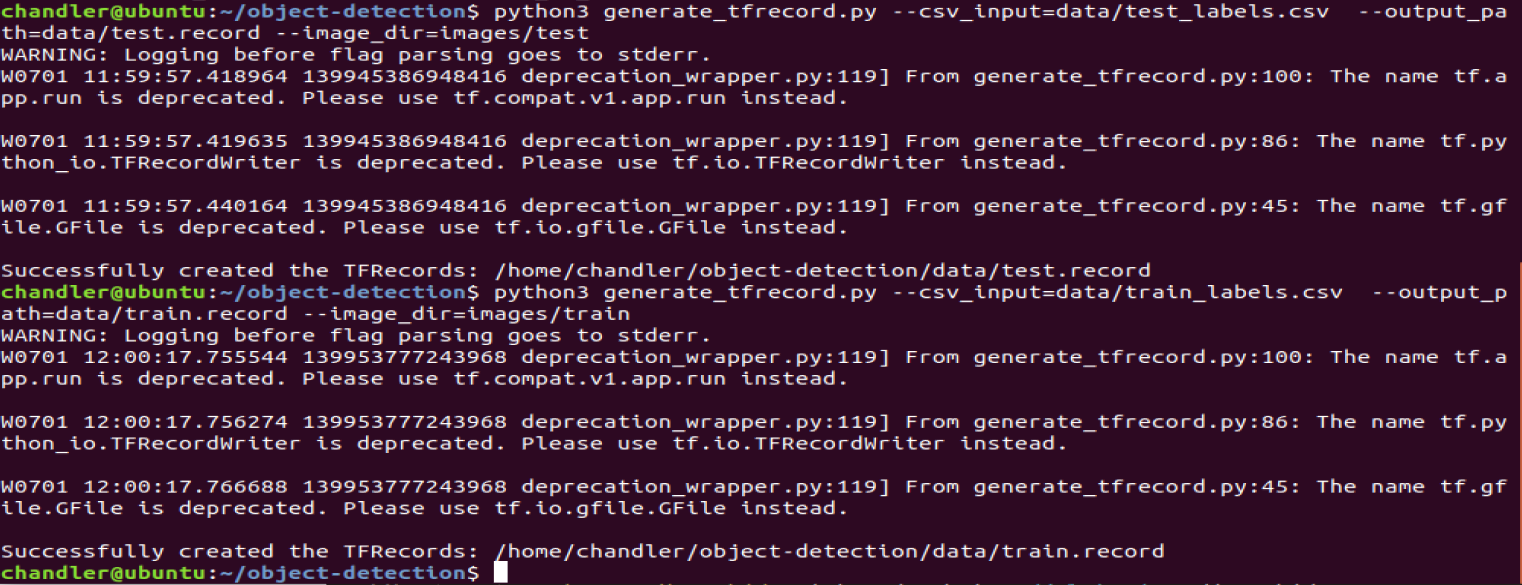
3.3 模型训练
本部分,我们开始来训练自定义的模型算法。为此,我们需要图片训练集TFRecords和测试集TFRecords,其次我们需要模型配置文件和基础模型算法文件。这样,我们就可以利用tensorflow的转移学习基于一些预训练好的模型来继续训练出我们需要的算法(链接link)。转移学习可以快速得到训练算法,所需要的训练数据也相对较少。Tensorflow有不少预训练模型和模型对应的配置文件,本示例就选用了ssd_mobilenet_v1_coco_11_06_2017模型和相应的配置文件ssd_mobilenet_v1_pets.config:
3.3.1 预训练好的model模型文件
模型文件封装了识别用的基础算法,基于基础算法,我们利用object_detection api来训练我们感兴趣的算法模型 。直接下载模型:
wget http://download.tensorflow.org/models/object_detection/ssd_mobilenet_v1_coco_11_06_2017.tar.gz
下载下来,解压到ssd_mobilenet_v1_coco_11_06_2017目录下:
3.3.2 模型配置文件 configuration file
wget https://raw.githubusercontent.com/tensorflow/models/master/object_detection/samples/configs/ssd_mobilenet_v1_pets.config
将模型文件下载下来放到training目录下:
原版的配置文件中,首先要搜索PATH_TO_BE_CONFIGURED,并且修改掉。
还需要修改batch size,这里设为24,其他的模型可能需要不同大小的批处理大小。如果出现内存错误,你可能就需要减小batch size。最后,还需要修改checkpoint的路径,num_classes修改为1,num_examples修改为12,以及一个label_map_path: “training/object-detect.pbtxt”
# SSD with Mobilenet v1, configured for Oxford-IIIT Pets Dataset.# Users should configure the fine_tune_checkpoint field in the train config as# well as the label_map_path and input_path fields in the train_input_reader and# eval_input_reader. Search for "PATH_TO_BE_CONFIGURED" to find the fields that# should be configured.model {ssd {# 将分类的数目设置为1num_classes: 1box_coder {faster_rcnn_box_coder {y_scale: 10.0x_scale: 10.0height_scale: 5.0width_scale: 5.0}}matcher {argmax_matcher {matched_threshold: 0.5unmatched_threshold: 0.5ignore_thresholds: falsenegatives_lower_than_unmatched: trueforce_match_for_each_row: true}}similarity_calculator {iou_similarity {}}anchor_generator {ssd_anchor_generator {num_layers: 6min_scale: 0.2max_scale: 0.95aspect_ratios: 1.0aspect_ratios: 2.0aspect_ratios: 0.5aspect_ratios: 3.0aspect_ratios: 0.3333}}image_resizer {fixed_shape_resizer {height: 300width: 300}}box_predictor {convolutional_box_predictor {min_depth: 0max_depth: 0num_layers_before_predictor: 0use_dropout: falsedropout_keep_probability: 0.8kernel_size: 1box_code_size: 4apply_sigmoid_to_scores: falseconv_hyperparams {activation: RELU_6,regularizer {l2_regularizer {weight: 0.00004}}initializer {truncated_normal_initializer {stddev: 0.03mean: 0.0}}batch_norm {train: true,scale: true,center: true,decay: 0.9997,epsilon: 0.001,}}}}feature_extractor {type: 'ssd_mobilenet_v1'min_depth: 16depth_multiplier: 1.0conv_hyperparams {activation: RELU_6,regularizer {l2_regularizer {weight: 0.00004}}initializer {truncated_normal_initializer {stddev: 0.03mean: 0.0}}batch_norm {train: true,scale: true,center: true,decay: 0.9997,epsilon: 0.001,}}}loss {classification_loss {weighted_sigmoid {}}localization_loss {weighted_smooth_l1 {}}hard_example_miner {num_hard_examples: 3000iou_threshold: 0.99loss_type: CLASSIFICATIONmax_negatives_per_positive: 3min_negatives_per_image: 0}classification_weight: 1.0localization_weight: 1.0}normalize_loss_by_num_matches: truepost_processing {batch_non_max_suppression {score_threshold: 1e-8iou_threshold: 0.6max_detections_per_class: 100max_total_detections: 100}score_converter: SIGMOID}}}train_config: {batch_size: 24optimizer {rms_prop_optimizer: {learning_rate: {exponential_decay_learning_rate {initial_learning_rate: 0.004decay_steps: 800720decay_factor: 0.95}}momentum_optimizer_value: 0.9decay: 0.9epsilon: 1.0}}fine_tune_checkpoint: "ssd_mobilenet_v1_coco_11_06_2017/model.ckpt"from_detection_checkpoint: trueload_all_detection_checkpoint_vars: true# Note: The below line limits the training process to 200K steps, which we# empirically found to be sufficient enough to train the pets dataset. This# effectively bypasses the learning rate schedule (the learning rate will# never decay). Remove the below line to train indefinitely.num_steps: 200000data_augmentation_options {random_horizontal_flip {}}data_augmentation_options {ssd_random_crop {}}}train_input_reader: {tf_record_input_reader {input_path: "data/train.record"}label_map_path: "training/object-detection.pbtxt"}eval_config: {metrics_set: "coco_detection_metrics"num_examples: 12}eval_input_reader: {tf_record_input_reader {input_path: "data/test.record"}label_map_path: "training/object-detection.pbtxt"shuffle: falsenum_readers: 1}
training目录下的object-detect.pbtxt的内容:
item {id: 1name: 'macncheese'}
models/research目录下:
sudo python3 setup.py buildsudo python3 setup.py installexport PYTHONPATH=$PYTHONPATH:`pwd`:`pwd`/slim
3.3.3 训练
接下来,激动人心的时刻到了,开始训练!
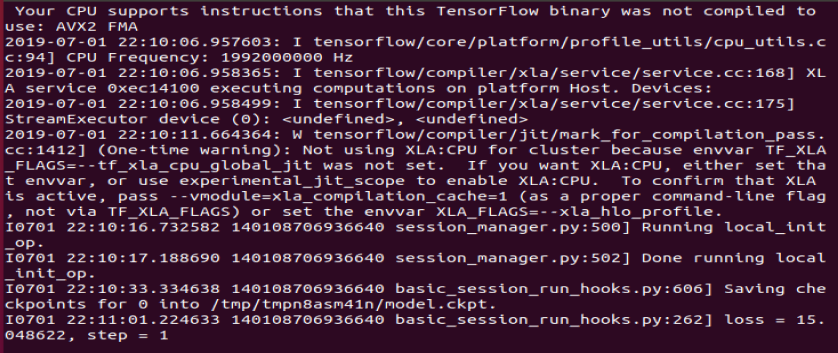
python3 model_main.py --logtostderr --train_dir=training/ --pipeline_config_path=training/ssd_mobilenet_v1_pets.config
见到如下画面说明成功训练中:
训练一段时间,输入如下:
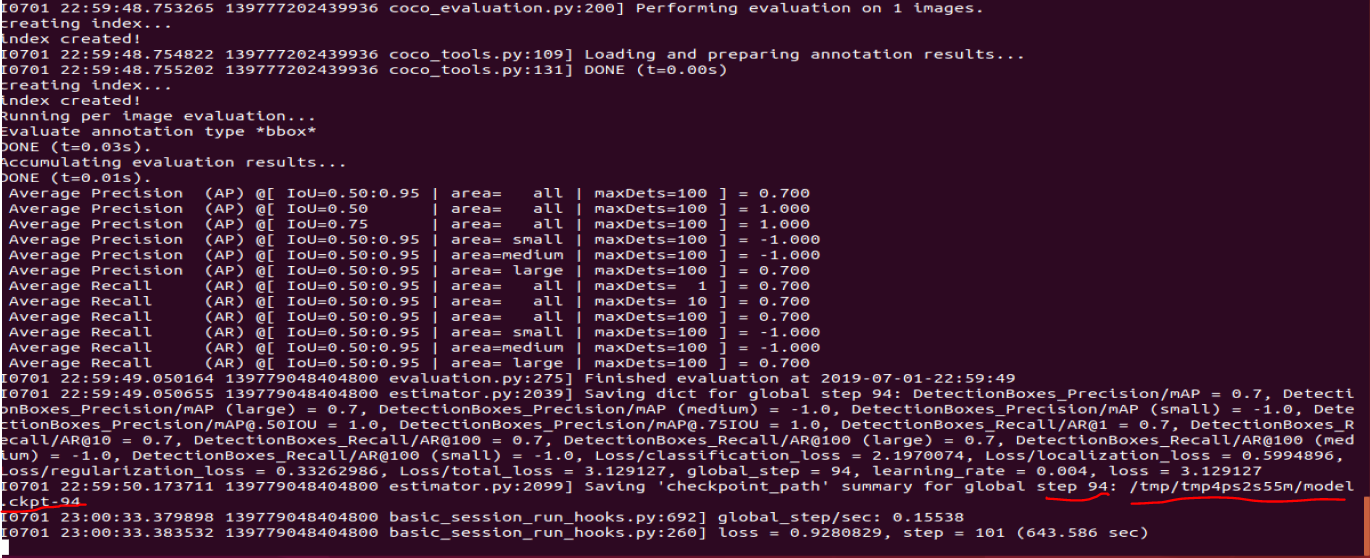
从Tensorboard看一下训练结果的total_loss: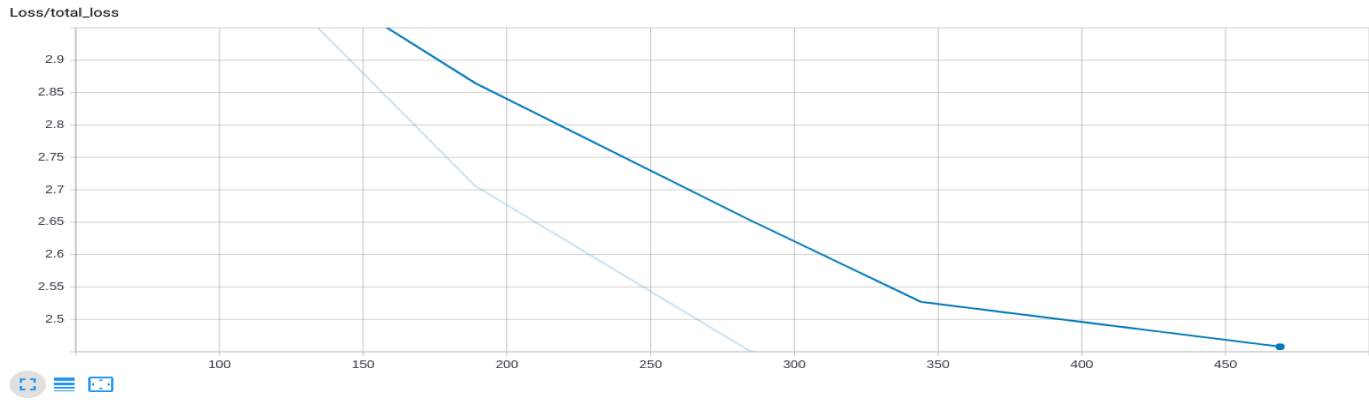
3.4 模型测试
本部分,我们将测试训练好的模型,来看看是否和预期的一致。首先我们要导出模型计算图graph文件,以便测试程序可以直接引入使用。我们可以利用object_detection里面的export_inference_graph.py,只需要传递checkpoint和pipeline config文件就可以导出graph文件了。
python3 export_inference_graph.py \--input_type image_tensor \--pipeline_config_path training/ssd_mobilenet_v1_pets.config \--trained_checkpoint_prefix training/model.ckpt-10856 \--output_directory crane_inference_graph

若有收获,就点个赞吧
0 人点赞
