apk太慢
sed -i 's/dl-cdn.alpinelinux.org/mirrors.ustc.edu.cn/g' /etc/apk/repositories
构建自己的镜像
# --file指定Dockerfile名字# <REPOSITORY>通常在Docker Hub上注册的用户名# <TAG>是描述镜像的唯一值 类似镜像名# . Dockerfile文件所处路径docker image build --file <path_to_Dockerfile> --tag <REPOSITORY>:<TAG> .
# 构建镜像docker image build --tag local:dockerfile-example .# 查看可用镜像docker image ls# 运行容器 -d 后台运行 --name dockerfile-example 运行容器名 local:dockerfile-example镜像名docker container run -d --name dockerfile-example -p 8080:80 local:dockerfile-example# nginx -v 覆盖Dockerfile CMDdocker container run --name nginx-version local:dockerfile-example -v# 查看嵌入的标签docker image inspect -f {{.Config.Labels}} local:dockerfile-example# 停止并删除容器(非镜像 需要先停止再删除docker container stop dockerfile-exampledocker container rm dockerfile-example nginx-version
使用现有容器
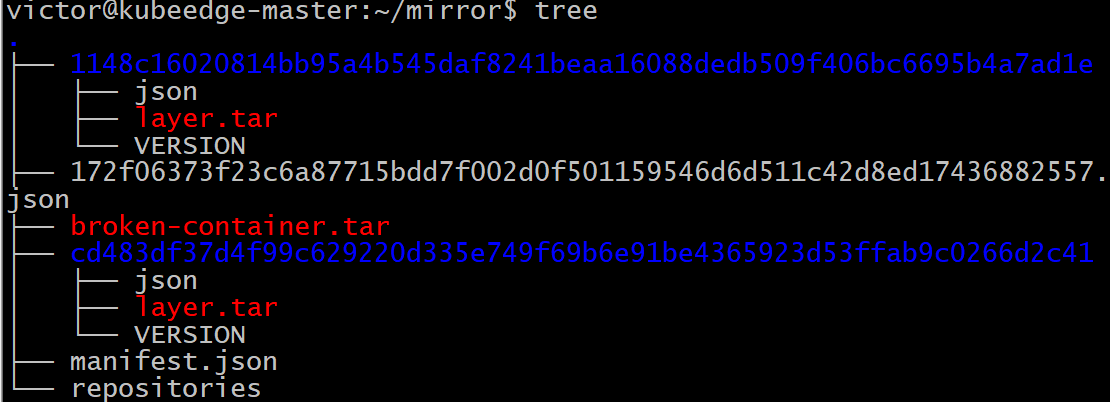
# 下载作为基础的镜像 alpine Linuxdocker image pull alpine:latest# 与容器进行交互docker container run -it --name alpine-test alpine /bin/sh# 以下命令安装 NGINXapk updateapk upgradeapk add --update nginxrm -rf /var/cache/apk/*mkdir -p /tmp/nginx/exit# 将我们停止的容器保存为镜像docker container commit <container_name> <REPOSITORY>:<TAG>docker container commit alpine-test local:broken-container# 保存图像文件docker image save -o <name_of_file.tar> <REPOSITORY>:<TAG>docker image save -o broken-container.tar local:broken-containertar -xvf broken-container.tar
使用 Dockerfile,您可以准确地看到创建映像所执行的操作,但使用该种方法,对该镜像的可见性为零。
另一个原因是你很难建立一套好的默认值。例如,如果您要以这种方式构建图像,那么您将无法真正利用ENTRYPOINT和CMD等功能,甚至无法利用最基本的指令,例如EXPOSE. 相反,用户必须在运行docker container run命令时定义所需的一切。
这是docker早期的一种做法
# 编写Dockerfile scratch为docker hub中默认创建的空文件# https://www.alpinelinux.org/downloads/FROM scratchADD files/alpine-minirootfs-3.11.3-x86_64.tar.gz /CMD [“/bin/sh”]# 建立镜像docker image build --tag local:fromscratch .# 运行镜像docker container run -it --name alpine-test local:fromscratch /bin/sh
使用 ENV
ENV <key> <value>ENV username admin# 也可以在键和值之间放置一个等号ENV <key>=<value>ENV username=admin# 每行只能设置一个ENV 同一行设置多个环境变量ENV username=admin database=wordpress tableprefix=wp# 查看在镜像上设置的ENVdocker image inspect <IMAGE_ID>
使用 Alpine Linux,我们将执行以下操作:
设置一个 ENV 来定义我们想要安装的 PHP 版本。
安装 Apache2 和我们选择的 PHP 版本。
设置镜像以便 Apache2 启动时不会出现问题。
删除默认index.html文件并添加一个index.php显示phpinfo命令结果的文件。
暴露容器上的端口 80。
设置 Apache 使其成为默认进程
ROM alpine:3.8LABEL maintainer=”Russ McKendrick <russ@mckendrick.io>”LABEL description=”This example Dockerfile installs Apache & PHP.”ENV PHPVERSION 7RUN apk add --update apache2 php${PHPVERSION}-apache2 php${PHPVERSION} && \rm -rf /var/cache/apk/* && \mkdir /run/apache2/ && \rm -rf /var/www/localhost/htdocs/index.html && \echo “<?php phpinfo(); ?>” > /var/www/localhost/htdocs/index.php && \chmod 755 /var/www/localhost/htdocs/index.phpEXPOSE 80/tcpENTRYPOINT [“httpd”]CMD [“-D”, “FOREGROUND”]
docker build --tag local/apache-php:7 .docker container run -d -p 8080:80 --name apache-php7 local/apache-php:7# 更改Dockerfile中的ENV PHPVERSION 5docker image build --tag local/apache-php:5 .docker container run -d -p 9090:80 --name apache-php5 local/apache-php:5docker image ls
构建一个更复杂的容器
# installs and configures Consul by HashiCorp# DockerfileFROM alpine:latestLABEL maintainer=”Russ McKendrick <russ@mckendrick.io>”LABEL description=”An image with the latest version on Consul.”ENV CONSUL_VERSION 1.7.1ENV CONSUL_SHA256 09f3583c6cd7b1f748c0c012ce9b3d96de95a6c0d2334327b74f7d72b1fa5054RUN apk add --update ca-certificates wget && \wget -O consul.zip https://releases.hashicorp.com/consul/${CONSUL_VERSION}/consul_${CONSUL_VERSION}_linux_amd64.zip && \echo “$CONSUL_SHA256 *consul.zip” | sha256sum -c - && \unzip consul.zip && \mv consul /bin/ && \rm -rf consul.zip && \rm -rf /tmp/* /var/cache/apk/*EXPOSE 8300 8301 8301/udp 8302 8302/udp 8400 8500 8600 8600/udpVOLUME [ “/data” ]ENTRYPOINT [ “/bin/consul” ]CMD [ “agent”, “-data-dir”, “/data”, “-server”, “-bootstrap-expect”, “1”, “-client=0.0.0.0”]
多阶段(multi-stage)构建容器
下载build环境容器镜像并启动build容器。
将源代码复制到build容器中。
在build容器上编译源代码。
将编译后的二进制文件复制到build容器外。
移除build容器。
使用预先编写的 Dockerfile 构建镜像并将二进制文件复制到其中。
# 之前都是通过包管理器(例如Alpine Linux的APK)直接将二进制文件添加到我们的镜像中# 即下载预编译的二进制文件# 将官方go容器重命名为builderFROM golang:latest as builderWORKDIR /go-http-hello-world/# go代理# RUN go env -w GO111MODULE=on# RUN go env -w GOPROXY=https://goproxy.cn,directRUN go get -d -v golang.org/x/net/html# RUN go env -w GO111MODULE=offADD https://raw.githubusercontent.com/geetarista/go-http-hello-world/master/hello_world/hello_world.go ./hello_world.goRUN CGO_ENABLED=0 GOOS=linux go build -a -installsuffix cgo -o app .FROM scratchCOPY --from=builder /go-http-hello-world/app .CMD [“./app”]docker image build --tag local:go-hello-world .docker container run -d -p 8000:80 --name go-hello-world local:go-hello-world# docker container stop go-hello-world && docker container rm go-hello-world# docker container prune 停止所有容器
nvidia Docker

若有收获,就点个赞吧
0 人点赞
