 ">
">
UIView与CALayer的关系
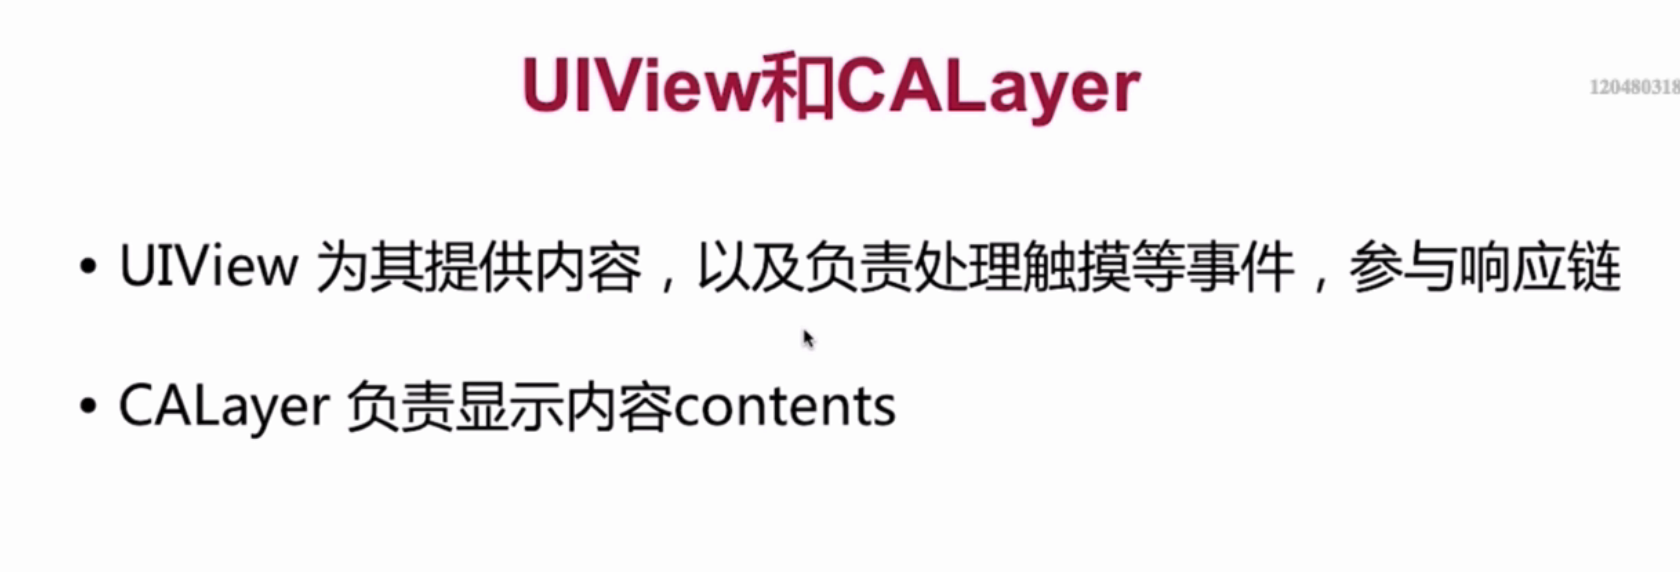
UIView:专门负责提供显示内容和事件传递与视图响应的
UILayer负责UI视图显示,
这样设计就体现了6大设计原则中的单一职责原则。
UITouch
UITouch对象
- 当用户用一根手指触摸屏幕时,会创建一个与手指相关联的UITouch对象
- 一根手指对应一个UITouch对象
UITouch作用
- 保存着跟手指相关的信息,比如触摸的位置、时间、阶段
- 当手指移动时,系统会更新同一个UITouch对象,使之能够一直保存该手指在的触 摸位置
- 当手指离开屏幕时,系统会销毁相应的UITouch对象
- 一个手指一次触摸屏幕,就对应生成一个UITouch对象。多个手指同时触摸,生成多个UITouch对象。
- 多个手指先后触摸,系统会根据触摸的位置判断是否更新同一个UITouch对象。若两个手指一前一后触摸同一个位置(即双击),那么第一次触摸时生成一个UITouch对象,第二次触摸更新这个UITouch对象(UITouch对象的 tap count 属性值从1变成2);若两个手指一前一后触摸的位置不同,将会生成两个UITouch对象,两者之间没有联系。
- 每个UITouch对象记录了触摸的一些信息,包括触摸时间、位置、阶段、所处的视图、窗口等信息。
- 手指离开屏幕一段时间后,确定该UITouch对象不会再被更新将被释放。
_
//触摸的各个阶段状态//例如当手指移动时,会更新phase属性到UITouchPhaseMoved;手指离屏后,更新到UITouchPhaseEndedtypedef NS_ENUM(NSInteger, UITouchPhase) {UITouchPhaseBegan, // whenever a finger touches the surface.UITouchPhaseMoved, // whenever a finger moves on the surface.UITouchPhaseStationary, // whenever a finger is touching the surface but hasn't moved since the previous event.UITouchPhaseEnded, // whenever a finger leaves the surface.UITouchPhaseCancelled, // whenever a touch doesn't end but we need to stop tracking (e.g. putting device to face)};
**
//触摸产生时所处的窗口@property(nonatomic,readonly,retain) UIWindow *window;//触摸产生时所处的视图@property(nonatomic,readonly,retain) UIView *view;//短时间内点按屏幕的次数,可以根据tapCount判断单击、双击或更多的点击@property(nonatomic,readonly) NSUInteger tapCount;//记录了触摸事件产生或变化时的时间,单位是秒@property(nonatomic,readonly) NSTimeInterval timestamp;//当前触摸事件所处的状态@property(nonatomic,readonly) UITouchPhase phase;//获取手指与屏幕的接触半径 IOS8以后可用 只读@property(nonatomic,readonly) CGFloat majorRadius NS_AVAILABLE_IOS(8_0);//获取手指与屏幕的接触半径的误差 IOS8以后可用 只读@property(nonatomic,readonly) CGFloat majorRadiusTolerance NS_AVAILABLE_IOS(8_0);//获取触摸手势@property(nullable,nonatomic,readonly,copy) NSArray <UIGestureRecognizer *> *gestureRecognizers NS_AVAILABLE_IOS(3_2);//获取触摸压力值,一般的压力感应值为1.0 IOS9 只读@property(nonatomic,readonly) CGFloat force NS_AVAILABLE_IOS(9_0);//获取最大触摸压力值@property(nonatomic,readonly) CGFloat maximumPossibleForce NS_AVAILABLE_IOS(9_0);//取得在指定视图的位置// 返回值表示触摸在view上的位置// 这里返回的位置是针对view的坐标系的(以view的左上角为原点(0,0))// 调用时传入的view参数为nil的话,返回的是触摸点在UIWindow的位置- (CGPoint)locationInView:(nullable UIView *)view;//该方法记录了前一个触摸点的位置- (CGPoint)previousLocationInView:(nullable UIView *)view;
什么样的对象才能处理触摸事件呢?只有继承UIResponder的类或者子类才可以响应和处理事件
首先看一下UIView,UIVIewController,UIApplication的继承,都有UIResponder这个类,都有那些事件处理呢?
- (void)touchesBegan:(NSSet<UITouch *> *)touches withEvent:(nullable UIEvent *)event;- (void)touchesMoved:(NSSet<UITouch *> *)touches withEvent:(nullable UIEvent *)event;- (void)touchesEnded:(NSSet<UITouch *> *)touches withEvent:(nullable UIEvent *)event;- (void)touchesCancelled:(NSSet<UITouch *> *)touches withEvent:(nullable UIEvent *)event;- (void)touchesEstimatedPropertiesUpdated:(NSSet<UITouch *> *)touches NS_AVAILABLE_IOS(9_1);- (void)pressesBegan:(NSSet<UIPress *> *)presses withEvent:(nullable UIPressesEvent *)event NS_AVAILABLE_IOS(9_0);- (void)pressesChanged:(NSSet<UIPress *> *)presses withEvent:(nullable UIPressesEvent *)event NS_AVAILABLE_IOS(9_0);- (void)pressesEnded:(NSSet<UIPress *> *)presses withEvent:(nullable UIPressesEvent *)event NS_AVAILABLE_IOS(9_0);- (void)pressesCancelled:(NSSet<UIPress *> *)presses withEvent:(nullable UIPressesEvent *)event NS_AVAILABLE_IOS(9_0);- (void)motionBegan:(UIEventSubtype)motion withEvent:(nullable UIEvent *)event NS_AVAILABLE_IOS(3_0);- (void)motionEnded:(UIEventSubtype)motion withEvent:(nullable UIEvent *)event NS_AVAILABLE_IOS(3_0);- (void)motionCancelled:(UIEventSubtype)motion withEvent:(nullable UIEvent *)event NS_AVAILABLE_IOS(3_0);- (void)remoteControlReceivedWithEvent:(nullable UIEvent *)event NS_AVAILABLE_IOS(4_0);
- touch触摸事件
- presss指压事件 (iOS 9 Deep press的相关方法)
- motion加速计事件 (给陀螺仪和加速传感器使用的方法)
- remote远程控制事件 (比如耳机控制)
- 编辑菜单消息事件(editing menu messages)
UITouch与GestureRecognizer的区别?
系统内置的手势事件是对UIResponder touch事件的监测封装,通过不同的计算得出是否触发了某个手势,而根据不同的手势,触发的时机也不同**。
UIEvent
UIEvent:称为事件对象,记录事件产生的时刻和类型
当指尖触碰屏幕的那一刻,一个触摸事件就在系统中生成了。经过IPC进程间通信,事件最终被传递到了合适的应用。在应用内历经峰回路转的奇幻之旅后,最终被释放。每产生一个事件,就会产生一个UIEvent对象,发生触摸事件后,系统会将该事件加入到一个由UIApplication管理的事件队列中为什么是队列而不是栈?
因为队列的特点是先进先出,先产生的事件先处理才符合常理,所以把事件添加到队列。
//事件类型@property(nonatomic,readonly) UIEventType type;//事件子类型@property(nonatomic,readonly) UIEventSubtype subtype;//事件产生的时间@property(nonatomic,readonly) NSTimeInterval timestamp;//返回值:返回与接收器相关联的所有触摸对象。- (nullable NSSet <UITouch *> *)allTouches;// 返回值:返回属于一个给定视图的触摸对象,用于表示由接收器所表示的事件。- (nullable NSSet <UITouch *> *)touchesForView:(UIView *)view;//返回值:返回属于一个给定窗口的接收器的事件响应的触摸对象。- (nullable NSSet <UITouch *> *)touchesForWindow:(UIWindow *)window;//返回值:返回触摸对象被传递到特殊手势识别- (nullable NSSet <UITouch *> *)touchesForGestureRecognizer:(UIGestureRecognizer *)gesture
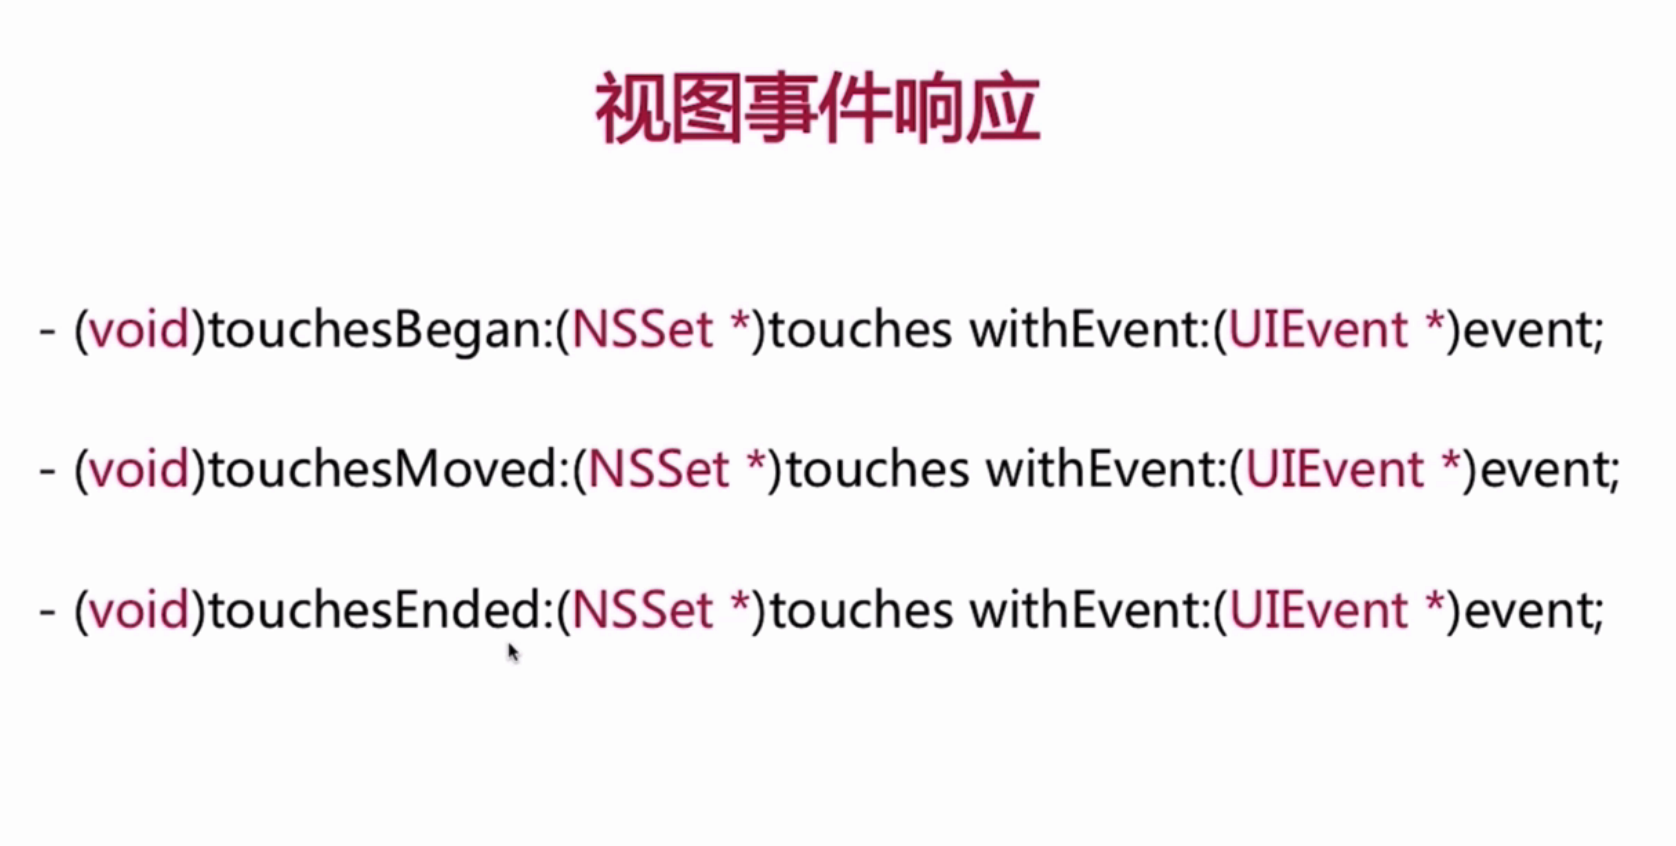
//开始接触屏幕,就会调用一次- (void)touchesBegan:(NSSet *)touches withEvent:(UIEvent *)event;//手指开始移动就会调用(这个方法会频繁的调用,其实一接触屏幕就会多次调用)- (void)touchesMoved:(NSSet *)touches withEvent:(UIEvent *)event;//手指离开屏幕时,调用一次- (void)touchesEnded:(NSSet *)touches withEvent:(UIEvent *)event;//触摸结束前,某个系统事件(例如电话呼入)会打断触摸过程,或者view上面添加手势时,系统会自动调用view的下面方法- (void)touchesCancelled:(NSSet *)touches withEvent:(UIEvent *)event;
- touches 里包含了一个或多UITouch对象,也即一个或多个手指同时触摸view,因此touches.count就是触摸的点数,是1就是单点触摸,大于1就是多点触摸。
- 一次触摸过程中,只会产生一个事件对象,4个触摸方法都是同一个event参数,如果两根手指同时触摸一个view,那就是一个事件,view只会调用一次touchesBegan:withEvent:方法,touches参数中装着2个UITouch对象
- 如果这两根手指一前一后分开触摸同一个view,那就是两个事件,view会分别调用2次touchesBegan:withEvent:方法,并且每次调用时的touches参数中只包含一个UITouch对象
事件的生命周期
当指尖触碰屏幕的那一刻,一个触摸事件就在系统中生成了。经过IPC进程间通信(进程间通信(IPC,Inter-Process Communication)),事件最终被传递到了合适的应用。在应用内历经峰回路转的奇幻之旅后,最终被释放。大致经过如下图: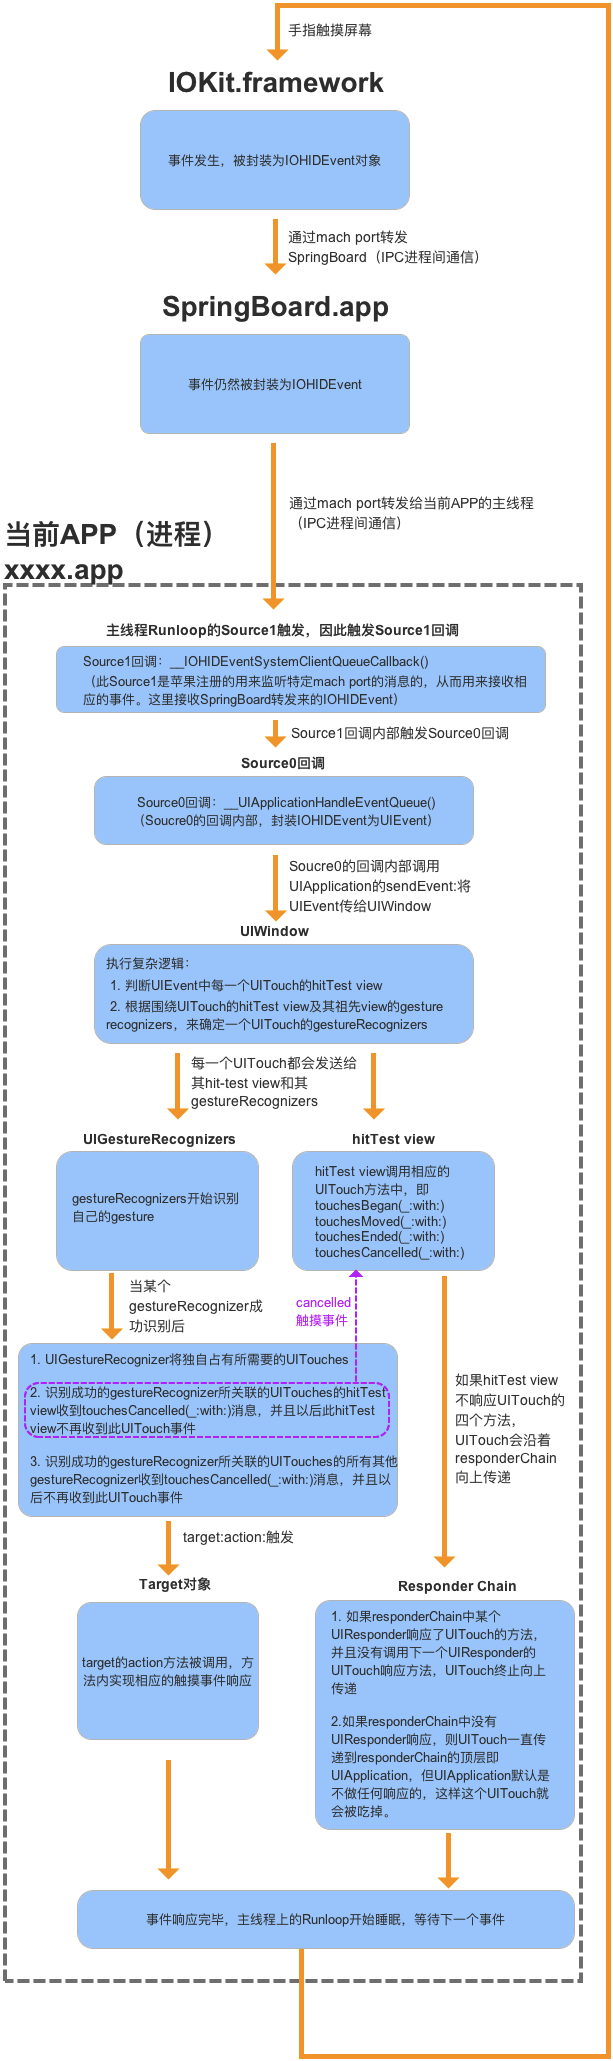
事件传递机制
事件出发后会封装成
UIEvent然后放入UIApplication管理的队列中(先进先出),UIApplication会从最前面取出事件,将它分发下去
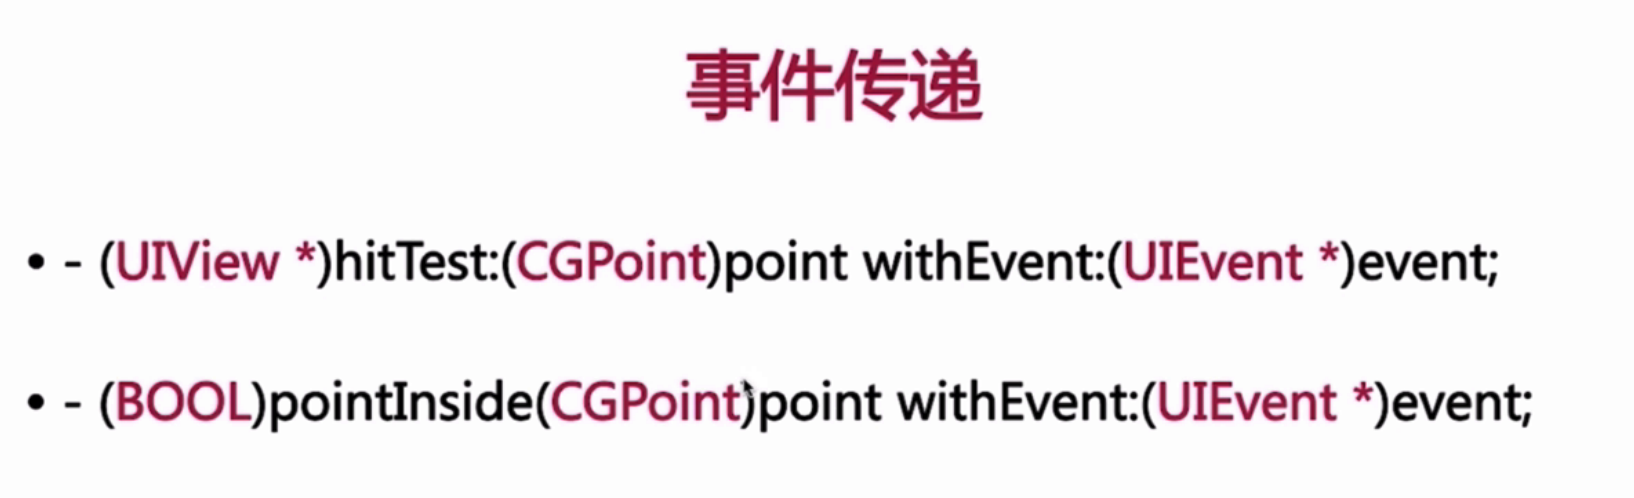
其中,与传递响应相关的,UIView中有两个重要的方法:1、-(UIView *)hitTest:(CGPoint)point withEvent:(UIEvent *)event有事件传递给一个控件,控件就会触发这个方法 ,然后通过下面方法判断是否在范围内,返回NO则忽略整个view,
- 通过重写hitTest:withEvent:,就可以拦截事件的传递过程,想让谁处理事件谁就处理事件。
**2、-(BOOL)pointInside:(CGPoint)point withEvent:(UIEvent *)event**重写方法上面的方法来实现一些功能,要想重写都要自定义View(像扩大点击事件范围,点击超过父VIew范围) 有三个方法判断是否接受事件
userInteractionEnabled(默认view是YES ,表示接受事件)alpha透明度 (< 0.01不接受)hidden隐藏
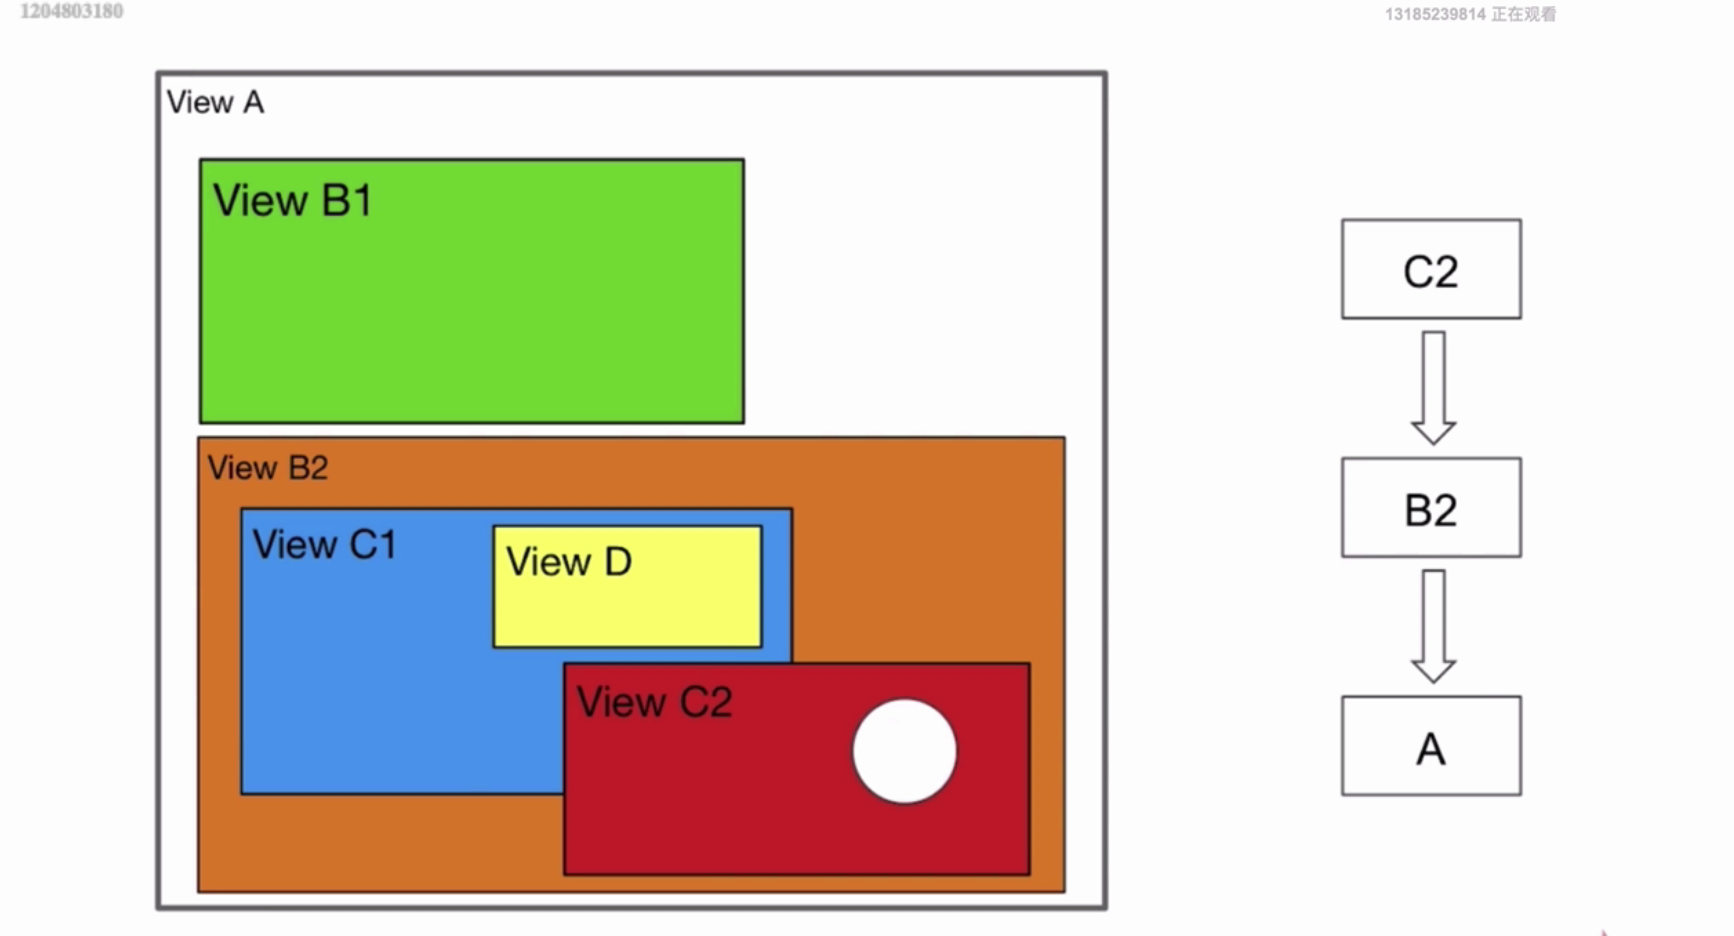
hitTest:withEvent:系统实现原理
首先点击屏幕,事件传递给UIApplication,然后传给UIWindow, 然后UIWindow通过hitTest方法内部进行倒序遍历子视图, 假如子视图可以正常响应手势,就判断触摸点是否在子视图内,假如在的话,判断子视图内是否还有子视图,有的话,就递归查找,直到找到一个合适的视图来处理;假如没找到就让该子视图响应,假如都找不到的话就让window响应 使用场景: 1、扩大视图view的响应热区 2、缩小或指定view区域失去响应. 3、接触到的实际场景:地图撑开视图。扩大撑开视图的响应区。 4、超出父VIew的点击事件
演示代码:扩大按钮的点击响应区**
- (BOOL)pointInside:(CGPoint)point withEvent:(UIEvent *)event {CGRect bounds = self.bounds;bounds = CGRectInset(bounds, -100, -100);return CGRectContainsPoint(bounds, point);}
**演示代码:超出父VIew的点击事件
前提:黄色是父VIew 加了一个红色的子view和UILabel,想要触发红View的点击事件 思路:根据point位置,判断子视图是否包含,有就返回响应的子视图
-(UIView *)hitTest:(CGPoint)point withEvent:(UIEvent *)event{if (!self.userInteractionEnabled || self.isHidden == YES || self.alpha <= 0.01) {return nil;}for (UIView *subview in [self.subviews reverseObjectEnumerator]) { //倒序遍历CGPoint newPoint = [subview convertPoint:point fromView:self]; //self中point转换成subview中坐标点// CGPoint newPoint = [subview convertPoint:point toView:self]; subview中point转换成self中坐标点UIView *testHitView = [subview hitTest:newPoint withEvent:event];if (testHitView) {return testHitView; //红色子View}}return nil;}- (BOOL)pointInside:(CGPoint)point withEvent:(nullable UIEvent *)event {//规则的矩形return CGRectContainsPoint(newBounds, point); // newBounds为想要的触发范围//圆形return pointToCenterDistance < halfRadius; // point到圆心的距离小于半径}
视图响应链机制
假如当前响应者(控件)不处理这个事件,就把这个事件响应交给父视图, 直到Window,UIApplication,UIApplicationDelegate,假如都不响应的话,忽略该事件. 经典使用场景: 根据响应链找到合适的视图进行处理某些事件,比如找到视图控制器viewController 或者 某个指定类型的视图
手势
UiGestureRecognizer是一个父类,而实际操作中我们要使用它的子类,较为常用的有以下几种:
| UITapGestureRecognizer | 轻拍手势 |
| UISwipeGestureRecognizer | 轻扫手势 |
| UILongPressGestureRecognizer | 长按手势 |
| UIPanGestureRecognizer | 平移手势 |
| UIPinchGestureRecognizer | 捏合(缩放)手势 |
| UIRotationGestureRecognizer | 旋转手势 |
| UIScreenEdgePanGestureRecognizer | 屏幕边缘平移 |
UITapGestureRecognizer(点击手势)
//创建手势 使用initWithTarget:action:的方法创建{UITapGestureRecognizer *tap = [[UITapGestureRecognizer alloc]initWithTarget:self action:@selector(tapView:)];//设置属性//tap 手势一共两个属性,一个是设置轻拍次数,一个是设置点击手指个数//设置轻拍次数tap.numberOfTapsRequired = 2;//设置手指字数tap.numberOfTouchesRequired = 2;//别忘了添加到testView上[_testView addGestureRecognizer:tap];}-(void)tapView:(UITapGestureRecognizer *)sender{//设置轻拍事件改变testView的颜色_testView.backgroundColor = [UIColor colorWithRed:arc4random()%256/255.0 green:arc4random()%256/255.0 blue:arc4random()%256/255.0 alpha:1];}
UISwipeGestureRecognizer (滑动手势)
{//创建手势UISwipeGestureRecognizer *swipe = [[UISwipeGestureRecognizer alloc]initWithTarget:self action:@selector(swipeView:)];//设置属性,swipe也是有两种属性设置手指个数及轻扫方向swipe.numberOfTouchesRequired = 2;//设置轻扫方向(默认是从左往右)//direction是一个枚举值有四个选项,我们可以设置从左往右,从右往左,从下往上以及从上往下//设置轻扫方向(默认是从左往右)swipe.direction = UISwipeGestureRecognizerDirectionLeft;// [_redView addGestureRecognizer:swipe];}#pragma mark swipe轻扫手势事件-(void)swipeView:(UISwipeGestureRecognizer *)sender{_testView.backgroundColor = [UIColor colorWithRed:arc4random()%256/255.0 green:arc4random()%256/255.0 blue:arc4random()%256/255.0 alpha:1];}
UILongPressGestureRecognizer(长按手势)
UIPanGestureRecognizer(平移手势)
UIScreenEdgePanGestureRecognizer(屏幕边缘平移手势)
UIPinchGestureRecognizer(捏合手势)
UIRotationGestureRecognizer(旋转手势)

若有收获,就点个赞吧
0 人点赞
